
Guided reading
Not sure where to start?
Answer three quick questions and we will point you to the right guides for your project.
Find your starting pointThree questions. About 30 seconds. No sign-up.
Quick Answer: A typical 12 m² kitchen costs £400-£800 for electric underfloor heating (mat + installation) or £900-£1,800 for a wet system. Electric systems suit most kitchens under 15 m². Wet systems are better for large open-plan kitchens over 20 m². Tile and stone floors provide the best heat output. Avoid placing heating elements under fixed appliances. Plan with the guides at underfloorheating.info and compare local specialists through the Underfloor Heating Directory.
Ready to get quotes for your kitchen? Compare free quotes from trusted installers via the Underfloor Heating Directory.
Is Underfloor Heating Good for Kitchens?
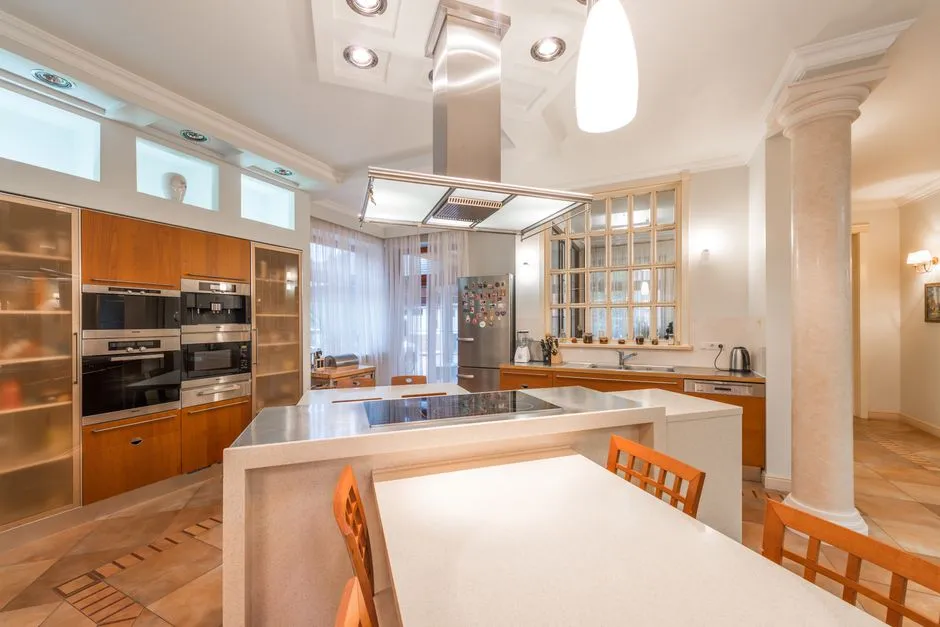
Kitchens are one of the best rooms in the house for underfloor heating (UFH). The combination of hard flooring, high foot traffic, and modern open-plan layouts makes kitchen UFH both practical and comfortable. Unlike carpeted living rooms where heat transfer is restricted, kitchen floors-typically tiled, stone, or vinyl-allow radiant heat to warm the space efficiently.
Why Kitchens Are Ideal for UFH
The modern UK kitchen has evolved significantly over the last twenty years. What was once a small, closed-off room is now frequently the social hub of the home, often connected to a dining area or family room. This shift towards open-plan living means kitchens are larger, more visible, and used for longer periods throughout the day.
Hard flooring is standard. Almost every kitchen uses tile, porcelain, natural stone, or luxury vinyl tile (LVT). These materials have excellent thermal conductivity, transferring heat quickly and evenly into the room. A tiled kitchen floor can deliver up to 71 W/m2 of heat output-significantly better than the 48 W/m2 you'd get from carpet.
High traffic areas benefit from radiant warmth. Standing at a sink or worktop for long periods is far more comfortable when the floor beneath you is gently warm. Unlike radiators that heat the air (which rises to the ceiling), UFH warms your feet first-exactly where you need it when cooking, washing up, or preparing meals.
No wall space is wasted. Kitchens already compete for wall space with cabinets, appliances, and windows. Removing radiators frees up valuable room for extra storage, larger worktops, or better furniture placement in adjoining dining areas.
The Challenges to Be Aware Of
While kitchens are well-suited to UFH, there are practical limitations you need to plan for.
Appliances block heat zones. Fixed units like fridges, dishwashers, cookers, and washing machines should not have heating elements installed beneath them. This is partly for safety (some appliances generate their own heat) and partly to avoid wasting energy heating spaces where it won't be felt. You only heat the open floor area-the zones where people walk and stand.
Kitchen extensions often have high glazing. Many UK kitchen projects involve rear extensions with large bi-fold or sliding doors. While this creates a beautiful, light-filled space, it also increases heat loss. UFH alone may not be sufficient if your extension has poor insulation or a high proportion of glazing. In such cases, UFH should be paired with good insulation and possibly supplementary heating.
Frequent foot traffic during installation. If you're retrofitting UFH into an existing kitchen, the disruption can be significant. The floor must be lifted, the system installed, and a new floor finish applied. Expect the kitchen to be out of action for at least a week, sometimes longer for wet systems that require screed curing time.
Electric vs Wet UFH for Kitchens: Which Should You Choose?
The fundamental choice is between an electric mat system and a wet (water-based) hydronic system. Both can work well in kitchens, but the right choice depends on your kitchen size, existing heating setup, and budget.
Side-by-Side Comparison
| Feature | Electric UFH | Wet UFH |
|---|---|---|
| Best for | Single kitchens, retrofits, rooms under 15 m2 | Large open-plan kitchens, new builds, 20 m2+ |
| Installation Cost (12 m2 kitchen) | £400-£800 | £900-£1,800 |
| Running Cost (4 hrs/day, Oct 2026 rates) | ||
| Heat-Up Time | 20-40 minutes | 60-120 minutes |
| Floor Height Increase | 3-10 mm (mats under tiles) | 65-100 mm (screed + insulation) |
| Installation Speed | 1-2 days | 3-7 days (+ screed drying) |
| Requires Boiler/Heat Pump? | No-works independently | Yes |
| Best Flooring | Tile, porcelain, stone, LVT | Tile, porcelain, stone, LVT |
When Electric UFH Makes Sense
Electric underfloor heating systems work using thin heating cables woven into mats or supplied as loose wire. These are laid directly onto the subfloor (often with a decoupling membrane or insulation board beneath), then tiled over or covered with a self-levelling compound before LVT or engineered wood.
Ideal for standalone kitchens under 15 m2. If you're heating just the kitchen-not an adjoining open-plan dining or family room-electric is usually the better choice. The lower upfront cost, faster installation, and rapid heat-up time make it a practical option.
Perfect for retrofits. Electric mats add minimal height to the floor, typically only 3-6 mm under tiles. This makes them far easier to retrofit into existing properties where raising the floor level would cause issues with doorways, appliances, or step transitions to adjoining rooms.
No boiler connection needed. Electric systems run entirely off your mains electricity supply. They don't require connection to a central heating boiler, making them ideal for properties without wet central heating or for kitchens far from the boiler location.
Higher running costs over time. The trade-off is electricity pricing. At 27p/kWh (October 2026 Ofgem price cap), running an electric mat in a 12 m2 kitchen for 4 hours daily costs approximately £0.76 per day or £23 per month during regular use.
When Wet UFH Makes Sense
Wet underfloor heating systems circulate warm water through plastic pipes embedded in the floor screed. The water is heated by your boiler or, increasingly, by an air source heat pump. A manifold controls the flow to different zones.
Best for large open-plan spaces over 20 m2. If your kitchen opens into a dining area or living space, creating one continuous floor area of 25-40 m2 or more, wet UFH becomes the more economical choice. The higher upfront cost is offset by significantly lower running costs over the system's lifetime.
Ideal for new builds and major renovations. If you're building an extension, converting a garage, or undertaking a full ground-floor renovation where the existing floor is already being removed, wet UFH is easier to integrate. The pipes are laid before the screed is poured, creating a seamless, permanent installation.
Works brilliantly with heat pumps. Wet UFH operates at low flow temperatures of 35-45°C, which is the sweet spot for heat pump efficiency. If you're installing an air source heat pump to meet the Future Homes Standard or to qualify for the Boiler Upgrade Scheme, wet UFH is the natural pairing.
Much lower running costs. A wet system running on mains gas at 6.9p/kWh costs approximately £0.55 per day for the same 12 m2 kitchen used for 4 hours daily, saving around 30% compared to electric. Over a year, that difference compounds. For full worked examples and up-to-date tariff calculations, see our underfloor heating running costs guide.
Slower to heat and more invasive to install. Wet systems have higher thermal mass and take 1-2 hours to warm up fully. Installation is more complex: the floor level increases by 65-100 mm (insulation + pipes + screed), and screed must cure for several weeks before the final floor finish can be applied.
Best Flooring for Kitchen UFH
Your choice of floor finish has a direct impact on how well the UFH system performs. Some materials conduct heat efficiently, while others act as insulators and restrict heat flow into the room.
Tile and Porcelain (Ideal)
Why it's best: Ceramic and porcelain tiles have the highest thermal conductivity of any common flooring material. They transfer heat rapidly from the UFH system into the room, providing the best heat output and efficiency. Thermal resistance for tiles is typically 0.5-1.0 m2K/W, well within the recommended range for UFH.
Performance: A tiled floor over electric or wet UFH can deliver up to 71 W/m2 of heat output, the maximum you can expect from any floor covering. Tiles also retain heat well, so even after the system turns off, the floor stays warm for a period.
Cost: Tile installation over UFH is straightforward. Use a flexible tile adhesive suitable for heated floors, and consider a decoupling membrane beneath the tiles to prevent cracking from thermal expansion.
Natural Stone (Ideal)
Why it's great: Limestone, slate, travertine, and granite all have excellent thermal properties similar to tiles. Stone floors provide a luxurious finish and pair beautifully with the even warmth of UFH.
Performance: Heat output is comparable to porcelain, typically around 68-71 W/m2. Stone is dense and has high thermal mass, meaning it takes slightly longer to warm up but holds heat for longer once it does.
Cost: Stone is more expensive than ceramic tiles, both for the material itself and for installation (requires skilled tilers). The thermal performance, however, is outstanding.
LVT and Vinyl (Compatible)
Why it works: Luxury vinyl tile (LVT) and sheet vinyl are popular in modern kitchens for their durability, water resistance, and ease of cleaning. Most LVT products are compatible with UFH, but you must check the manufacturer's maximum temperature rating.
Performance: Vinyl has a higher thermal resistance than tiles-typically around 0.10-0.15 m2K/W for the vinyl itself-but still allows good heat transfer when installed correctly. Heat output is slightly lower than tiles, closer to 60-65 W/m2.
Temperature limits: Most LVT manufacturers specify a maximum floor surface temperature of 27°C. This is critical. Your UFH thermostat must include a floor temperature probe, and the limit should be set to 27°C to prevent damage to the vinyl. For detailed guidance on thermostat setup and temperature limiting, see our smart thermostats guide.
Installation tip: Use a smooth, self-levelling screed or overlay board beneath LVT. Any imperfections in the subfloor will telegraph through the vinyl.
Engineered Wood (Compatible, With Caution)
Why it's less common: Engineered wood can work with UFH, but it's less popular in kitchens due to water exposure risks. Solid wood is not recommended for kitchens at all-it's prone to warping and has poor dimensional stability when exposed to heat and moisture.
Performance: Engineered wood has a thermal resistance of around 0.10-0.15 m2K/W per layer, depending on thickness. A 14 mm engineered oak floor will deliver approximately 55-60 W/m2 of heat output.
Temperature limits: Like LVT, engineered wood must not exceed 27°C floor surface temperature. Excessive heat will cause the wood to dry out, leading to gaps, cupping, or cracking. Always use a floor probe thermostat.
Installation tip: Allow the wood to acclimatise in the room for at least 48 hours before installation. Use a flexible adhesive or click-lock floating system designed for UFH.
Why Carpet Is Not Suitable in Kitchens
Thermal resistance is too high. Carpet and underlay combined typically have a thermal resistance (tog rating) well above 2.5 m2K/W-far too high for efficient UFH operation. Heat output drops to around 48 W/m2 or lower, wasting energy and reducing comfort.
Hygiene and practicality. Kitchens are high-spill, high-traffic areas. Carpet is impractical for kitchen use regardless of the heating system. Stick to hard, washable surfaces.
For a comprehensive breakdown of all flooring types, thermal resistance values, and compatibility charts, see our best flooring for underfloor heating guide.
Layout Considerations for Kitchen UFH
Unlike heating a simple rectangular bedroom, kitchens have unique layout challenges. Fixed appliances, cabinetry, and islands all affect where you can-and should-place heating elements.
Avoid Placing Heating Under Fixed Appliances
Do not install UFH beneath:
- Fridges and freezers (insulated bases block heat; wasted energy)
- Dishwashers (generate their own heat; potential for overheating)
- Washing machines (same as dishwashers)
- Ovens and cookers (obvious fire safety and efficiency concern)
- Fixed kitchen units and cabinets (no benefit; heat cannot escape)
Why? Heating beneath these appliances wastes energy. The heat cannot reach the room-it's trapped beneath an insulated box. Worse, some appliances may overheat or become less efficient if their base is warmed.
How to plan around appliances: During the design stage, mark out the exact footprint of all fixed units and appliances on a floor plan. Heating elements (whether electric mats or wet UFH pipes) should only be installed in the open, walkable floor areas.
Measure Only the Heated Floor Area
When calculating system size and costs, measure only the actual heated area-not the total floor area of the kitchen.
Example: A 15 m2 kitchen might only have 10-12 m2 of heated floor once you subtract the footprint of all fixed units, appliances, and islands.
Why this matters: If you order a 15 m2 electric mat for a kitchen with only 10 m2 of open floor, you'll either waste money or have to cut the mat to fit (and cutting electric heating wire destroys the mat). Always measure carefully and order the correct size.
Perimeter Insulation Is Critical
Heat loss occurs around the edges of a room, particularly where the floor slab meets external walls. Without proper insulation, a significant proportion of the heat from your UFH will escape through the edges rather than radiating upwards into the room.
What to use: Install perimeter insulation strips around the edge of the floor before laying the heating system. These are typically 10-20 mm thick strips of closed-cell foam that sit between the floor screed and the wall, preventing thermal bridging.
Where it's most important: External walls, particularly in rear extensions or kitchens on external corners of the property. Internal walls are less critical, but perimeter insulation is still good practice.
Kitchen UFH Installation Process
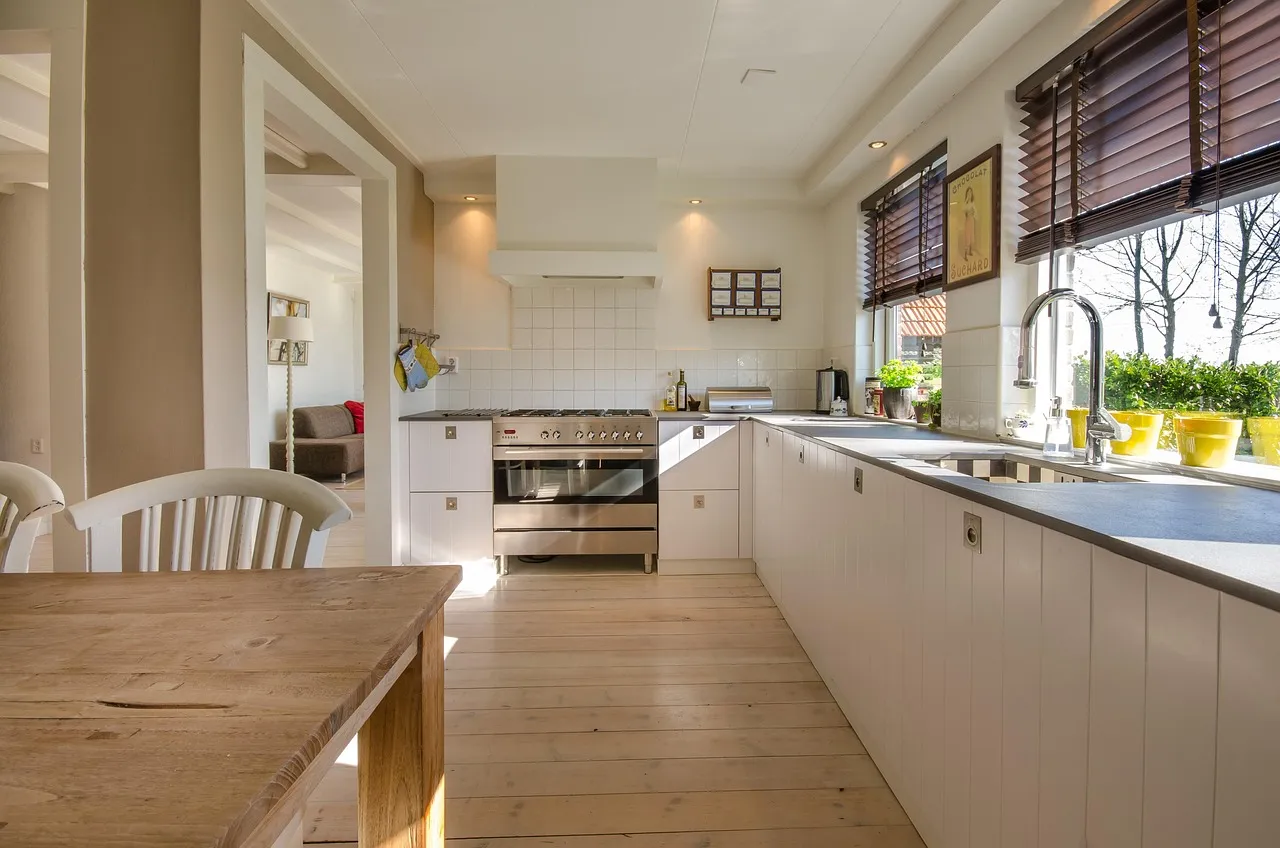
The installation sequence depends on whether you're using electric or wet UFH. Both require careful preparation, but the timescales and complexity differ significantly.
Electric UFH Installation (Step-by-Step)
1. Subfloor preparation. The existing subfloor must be clean, dry, and level. If you're working on a concrete slab, use a self-levelling compound to smooth any irregularities. For timber subfloors, install a layer of tile backer board to provide a stable, flat surface.
2. Install insulation boards. Lay insulation boards (typically 6-10 mm XPS or PIR foam) across the entire floor area to prevent heat loss downwards. Tape the joints between boards to prevent the tile adhesive or screed from seeping through.
3. Lay the electric heating mat. Unroll the mat across the open floor areas, avoiding the footprints of fixed appliances and units. The mat can be cut (the mesh backing, not the wire) to navigate around obstacles. Never cut the heating wire itself-this will destroy the entire mat.
4. Install the floor temperature sensor. The sensor probe is a small thermistor on a wire that sits within the floor, measuring surface temperature. Run the probe wire in a conduit between two runs of heating cable, approximately 15-20 cm from the wall. This prevents the floor from overheating and is essential for LVT or engineered wood installations.
5. Connect to the thermostat. The mat's power supply cable and sensor wire are run up the wall to the thermostat location (usually 1.5 m above floor level). This final electrical connection must be completed by a Part P qualified electrician to comply with UK building regulations. For detailed guidance on thermostat types and installation, see our smart thermostats guide.
6. Test the system. Before covering the mat, measure the electrical resistance of the heating circuit with a multimeter. Compare the reading to the manufacturer's specification (printed on the mat label). This confirms the mat is undamaged.
7. Apply tile adhesive or screed. For tiled floors, use a flexible tile adhesive to cover the mat, then lay tiles directly on top. For LVT or engineered wood, pour a thin self-levelling compound (10-15 mm) over the mat to create a smooth surface.
8. Commission and test. Once the adhesive or screed has cured (24-48 hours for adhesive; 7 days minimum for screed), turn on the system gradually. Start at a low temperature (20°C) and increase by 2-3°C per day until you reach the desired operating temperature. This prevents thermal shock.
Total installation time: 1-2 days for the mat installation and tiling. Add another 1-2 days for the electrician to complete wiring and final connection.
Wet UFH Installation (Step-by-Step)
1. Subfloor preparation. As with electric, the subfloor must be clean, level, and structurally sound. For new builds, the insulation is often integrated into the floor slab design. For retrofits, a layer of rigid insulation board (typically 50-100 mm PIR or EPS) is laid first.
2. Install the manifold. The manifold is the control centre for the wet UFH system, distributing warm water to different zones. It's usually installed in a utility room, hallway cupboard, or under the kitchen sink. Position it centrally to minimise pipe run lengths. For complete guidance on manifold selection and installation, see our manifold guide.
3. Lay the pipe. UFH pipes (typically 16 mm diameter PEX or PE-RT) are laid in loops across the floor, spaced at 150-250 mm intervals depending on the heat output required. The pipes are clipped to the insulation board or held in place with staples. A typical kitchen might use a snail (spiral) pattern, which provides even heat distribution.
4. Connect pipes to the manifold. Each loop of pipe is connected to the flow and return ports on the manifold. This is plumbing work and should be completed by a qualified heating engineer or plumber.
5. Pressure test the system. Before any screed is poured, the entire pipe network must be pressure tested. The system is filled with water and pressurised to 6 bar, then left for 24 hours. If the pressure holds, the system is leak-free and ready for screed. Never skip this step.
6. Pour the screed. A sand and cement screed (typically 65-75 mm thick) or liquid anhydrite screed (45-65 mm thick) is poured over the pipes, fully encasing them. The screed provides thermal mass and protects the pipes. For detailed guidance on screed types, curing times, and common problems, see our underfloor heating screed guide.
7. Cure the screed. Sand and cement screed requires at least 6-8 weeks to cure fully before the UFH system can be turned on. Liquid anhydrite screed can be force-dried after 7 days using the UFH system itself, but this must be done gradually. Do not turn on UFH too early-it will crack the screed.
8. Commission the system. Once cured, the system is gradually warmed up, starting at 25°C and increasing by 5°C per day until the design flow temperature (typically 40-45°C) is reached. This hardens the screed and ensures even heat distribution.
9. Lay the final floor finish. Tiles, stone, LVT, or engineered wood can now be installed over the cured screed.
Total installation time: 3-7 days for pipe laying and screed pouring. Add 6-8 weeks for screed curing (sand/cement) or 2-3 weeks for liquid anhydrite with force drying.
Running Costs for Kitchen UFH
How much it costs to run your kitchen UFH depends on the system type, how often you use it, and the current energy tariff. Here's a realistic worked example for a typical UK kitchen.
Electric UFH Running Costs
Scenario: 12 m2 kitchen, electric mat rated at 150 W/m2, used for 4 hours per day.
Power consumption: 12 m2 × 150 W/m2 = 1,800 W = 1.8 kW
Daily usage: 1.8 kW × 4 hours = 7.2 kWh per day
Not sure this is the right page?
Get a reading list built for your project
Three quick questions and we will point you to the guides that match what you are actually trying to do.
Find your starting pointThree questions. About 30 seconds. No sign-up.
Daily cost (at 27p/kWh): 7.2 kWh × £0.27 = £1.94 per day
Monthly cost (30 days): £1.94 × 30 = £58.32 per month
However, this assumes continuous use for 4 hours. In practice, a smart thermostat will cycle the heating on and off to maintain the target temperature, reducing actual consumption by around 40-60%. Realistic monthly cost: £23-£35.
For a detailed breakdown of how thermostats reduce running costs and comparisons across different room sizes, see our running costs guide.
Wet UFH Running Costs (Gas Boiler)
Scenario: Same 12 m2 kitchen, wet UFH system, gas boiler at 90% efficiency, gas price 6.9p/kWh.
Heat output required: Approximately 1.5 kW (slightly lower than electric due to better heat distribution from screed thermal mass).
Daily usage: 1.5 kW × 4 hours = 6.0 kWh per day (heat delivered to the room)
Gas consumption (accounting for 90% boiler efficiency): 6.0 kWh ÷ 0.90 = 6.67 kWh of gas
Daily cost (at 6.9p/kWh): 6.67 kWh × £0.069 = £0.46 per day
Monthly cost (30 days): £0.46 × 30 = £13.80 per month
Again, thermostat cycling reduces this further. Realistic monthly cost: £8-£14.
Annual Cost Comparison
Over a full heating season (October-April, approximately 7 months), the cost difference compounds:
- Electric UFH: £161-£245 per season
- Wet UFH (gas): £56-£98 per season
Saving with wet UFH: £105-£147 per year for a typical 12 m2 kitchen.
For a larger open-plan kitchen-diner (25-30 m2), this annual saving could reach £250-£350, which helps offset the higher installation cost of a wet system over 5-10 years.
Kitchen UFH and Kitchen Extensions
Kitchen extensions are one of the most common home improvement projects in the UK. Extending rearwards into the garden to create a larger, open-plan kitchen-dining space is a popular way to add value and living space.
Why Extensions Are Ideal for UFH
Floor is already being constructed. Whether you're building on a new concrete slab or using a suspended beam-and-block floor, the opportunity to integrate UFH is already there. There's no need to lift existing flooring or disrupt the rest of the house.
Open-plan layouts suit zoned heating. A large kitchen-diner extension (20-40 m2) benefits from UFH's even heat distribution. Unlike radiators, which create hot spots near the units, UFH warms the entire floor area uniformly-perfect for open-plan spaces where people move around freely.
Glazing is often extensive. Many extensions feature bi-fold or sliding doors along the rear wall, creating a bright, airy space. However, this glazing increases heat loss. UFH, combined with good insulation and double or triple glazing, can compensate for this. For guidance on insulation requirements and heat loss calculations, see our design and planning guide.
Heat Loss Considerations for Glazed Extensions
The challenge: A glazed extension can lose 3-4 times more heat per square metre than a well-insulated solid wall. If your extension has 6-8 m2 of glazing (a typical bi-fold door), you must account for this in your heat loss calculation.
The solution:
- Maximise insulation. Use 100-150 mm of rigid PIR or EPS insulation beneath the floor slab. Insulate the walls to current Building Regulations standards (Part L requires a U-value of 0.18 W/m2K or better for walls).
- Specify low-emissivity (Low-E) double or triple glazing. Modern glazing with argon or krypton gas fills significantly reduces heat loss. A triple-glazed door has a U-value around 0.8 W/m2K compared to 1.4 W/m2K for standard double glazing-nearly 50% better.
- Increase UFH pipe density or mat wattage. In high-heat-loss areas, reduce pipe spacing to 150 mm (instead of 200 mm) or use a higher-wattage electric mat (200 W/m2 instead of 150 W/m2). This compensates for the additional heat loss.
- Consider supplementary heating. If the glazing ratio is very high (more than 50% of the external wall area), UFH alone may struggle to maintain comfort on the coldest days. A wall-mounted panel heater or contemporary vertical radiator can provide backup heat when needed.
Open-Plan Kitchen-Diner Sizing
Typical sizes for UK extensions:
- Small extension: 12-18 m2 (single-storey rear extension, 3-4 m deep)
- Medium extension: 20-30 m2 (full-width rear extension, 4-5 m deep)
- Large extension: 35-50 m2 (full-width, 6+ m deep, often incorporating side return)
Which system to choose:
- Under 18 m2: Electric UFH is viable if the extension is well-insulated and glazing is limited. Cost: £720-£2,160 installed.
- 20-30 m2: Wet UFH becomes more economical. Cost: £1,800-£5,700 installed. Annual running cost saving over electric: £200-£350.
- Over 35 m2: Wet UFH is the clear choice, especially if you're installing a new boiler or heat pump for the whole house. Cost: £3,150-£9,500 installed.
Do You Need Planning Permission for Kitchen UFH?
The short answer: No, you do not need planning permission to install underfloor heating alone. UFH is an internal alteration and does not affect the external appearance of the property. However, there are some building regulations and permissions you must comply with, particularly if the UFH is part of a larger kitchen renovation or extension.
Building Regulations Part P (Electrical Work)
What it covers: Part P of the UK Building Regulations governs electrical safety in dwellings. Any new electrical circuit or connection must comply.
How it applies to UFH: If you're installing electric UFH, a qualified electrician registered with a competent person scheme (e.g., NICEIC, NAPIT, or ELECSA) must complete the final electrical connection: wiring the mat to the consumer unit and connecting the thermostat.
Do you need to notify Building Control? If your electrician is registered, they will self-certify the work and issue a certificate of compliance. You do not need to notify Building Control separately. If the electrician is not registered, you must notify Building Control in advance and pay a fee for inspection. For full details on electrical compliance, see our UK building regulations guide.
Building Regulations for Kitchen Extensions
When it applies: If your kitchen UFH is part of a new extension, the entire extension must comply with Building Regulations, including:
- Part A (Structure): Foundations, walls, and roof must be structurally sound.
- Part L (Energy Efficiency): The extension must meet minimum insulation standards and energy performance targets. UFH can actually help you meet Part L requirements, as it operates at lower flow temperatures than radiators.
- Part F (Ventilation): Adequate ventilation must be provided.
- Part M (Access): Level thresholds and step-free access may be required.
Do you need Building Control approval? Yes, for any extension or structural alteration. You must submit plans and pay Building Control fees. Inspections will be carried out at key stages (foundation, drainage, floor slab, completion).
Do you need planning permission for the extension? Most single-storey rear extensions up to 4 m deep (or 8 m for detached houses) are permitted development and do not require planning permission. However, if your property is listed, in a conservation area, or the extension exceeds permitted development limits, planning permission is required.
No Planning Permission for UFH Alone
Internal alterations are exempt. Installing UFH in an existing kitchen, bathroom, or any other room is an internal alteration. It does not require planning permission, even if you're lifting the floor, increasing the floor height, or making significant changes to the heating system.
Exception: If you live in a listed building or a flat, you may need listed building consent or freeholder approval respectively. Check with your local authority or freeholder before starting work.
Frequently Asked Questions
How much does underfloor heating cost for a kitchen?
A typical 12 m2 kitchen costs £400-£800 for electric UFH (supply and installation) or £900-£1,800 for a wet system. Larger open-plan kitchens (20-30 m2) cost £1,200-£3,600 for electric or £1,800-£5,700 for wet UFH. Use our underfloor heating cost guide for benchmark prices or the cost calculator for a personalised estimate.
Can you put underfloor heating under kitchen units?
No, you should not install UFH beneath fixed kitchen units, appliances, or islands. The heat cannot escape and is wasted. Only heat the open, walkable floor areas where people stand and move around. This also applies to any area under cabinets (sometimes searched as "under cabinet" heating).
What is the best flooring for kitchen underfloor heating?
Tile and porcelain are the best choices, delivering up to 71 W/m2 of heat output. Natural stone is equally good. LVT and engineered wood are compatible but require a floor temperature limit of 27°C. Avoid carpet in kitchens-it's impractical and has poor thermal performance. See our flooring guide for full details.
How long does it take to install underfloor heating in a kitchen?
Electric UFH takes 1-2 days to install and can be used within 24-48 hours once the tile adhesive or screed has cured. Wet UFH takes 3-7 days to install but requires 6-8 weeks for screed curing before it can be turned on. Factor in this timeline if you're planning a kitchen renovation.
Is underfloor heating expensive to run in a kitchen?
Electric UFH costs approximately £23-£35 per month for a 12 m2 kitchen used 4 hours daily (October 2026 tariffs). Wet UFH costs £8-£14 per month on gas for the same usage. Wet systems are more economical for larger kitchens and continuous use. If you are asking whether underfloor heating is expensive to run, our full running cost guide compares electric and wet systems in detail.
Can I install kitchen UFH myself?
You can lay electric mats yourself if you're a competent DIYer, but the final electrical connection must be completed by a Part P registered electrician. Wet UFH pipe laying is more complex and usually requires a professional heating engineer, particularly for manifold connection and pressure testing. Labour savings from DIY are typically 30-40% of the total cost.
Does underfloor heating work with kitchen islands?
Yes, but do not install heating elements beneath the island itself. Heat the open, walkable floor around the island. If your island houses appliances (dishwasher, wine fridge), these areas should also be excluded from the heated zone.
Ready to plan your kitchen UFH project? Use our cost calculator for a personalised quote, or explore our complete installation guide for step-by-step guidance.
Ready to get your kitchen quotes? Compare prices from professional UFH installers via the Underfloor Heating Directory. Already have a quote? Check if it's competitive →
One useful email,
once a month.
New guides as they go live. Real cost data, not press releases. The occasional rumour from the industry that's actually worth knowing.
No sales pitches. No jargon. Unsubscribe in one click.