DIY Underfloor Heating Installation: Step-by-Step Guide for 2026
Installing underfloor heating can be a rewarding DIY project that adds significant comfort and value to your home. While electric systems are generally more DIY-friendly, both types can be successfully installed by a competent enthusiast with the right preparation and knowledge.
This guide will walk you through the process for both electric and water-based systems.

New to underfloor heating? Start with our beginner’s guide → to understand the basics first.
📄 Get this whole guide as a free PDF → — handy to keep on site or print out.
Before You Start: DIY or Professional?
- Consider DIY if: You have experience with flooring or plumbing, you’re working on a small area (e.g., a single bathroom), and you’re installing an electric system.
- Use a Professional if: It’s a large or whole-house installation, a complex layout, a water-based system, or if you’re at all unsure. Electrical connections must be certified by a qualified electrician.
Tools and Materials Needed
Having the right tools is crucial for a smooth installation.
For Electric UFH:
- Multimeter & Insulation Resistance Tester
- Tiling tools (trowel, spacers)
- Sharp knife, measuring tape
- Heating mats/cables, thermostat, insulation boards
For Wet UFH:
- Pipe cutters & bending tool
- Manifold and mounting brackets
- Pressure testing equipment
- Pipe staples or clips
- UFH pipes, insulation boards, screed

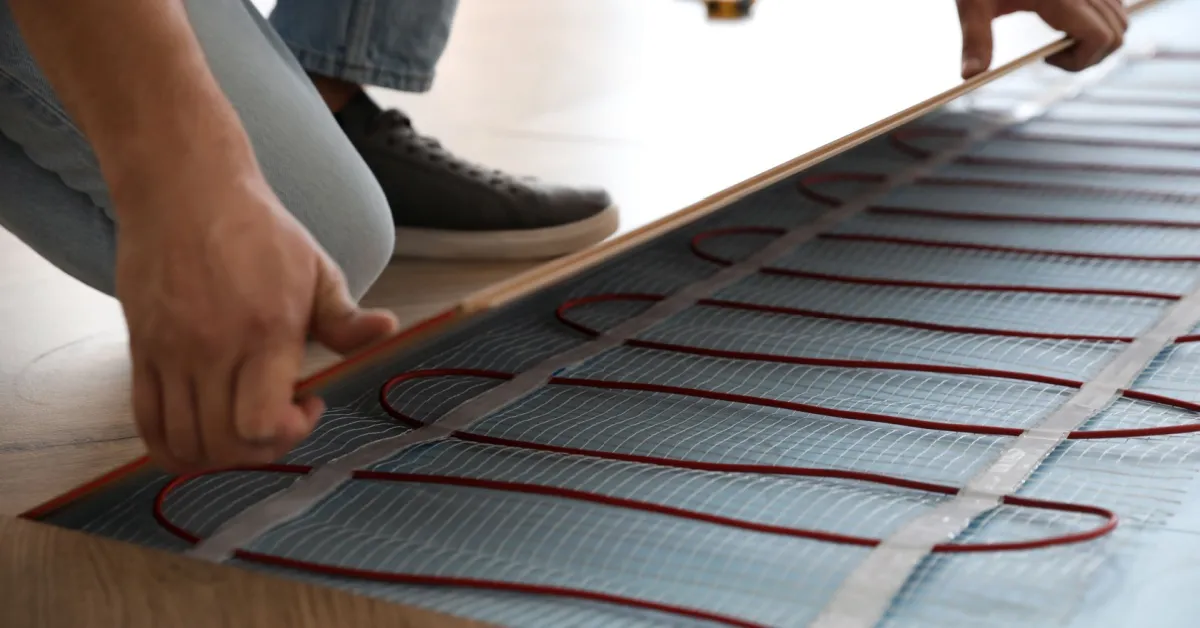
Electric UFH Installation: Step-by-Step
Electric systems are the most common choice for DIY projects.
Step 1: Plan Your Layout
Measure the floor area accurately, excluding fixed furniture like baths or kitchen cabinets. Plan the route for the heating mat and the location for the thermostat (typically 1.5m high, near the door). If you’re designing a wet system, use our pipe-per-m² guide to estimate loop lengths before ordering materials.
Step 2: Prepare the Subfloor & Insulate
Ensure the subfloor is clean, level, and free of debris. For concrete floors, laying insulation boards is essential to prevent heat loss downwards and ensure the system runs efficiently. This is the most critical step for performance.

Step 3: Install the Thermostat & Sensor
Install the thermostat back box. Run the floor sensor probe from the thermostat location onto the floor. It should be placed centrally between two runs of the heating cable to get an accurate reading.

Step 4: Lay the Heating Mat/Cables
Roll out the heating mat according to your plan. The mesh can be cut (avoiding the wire!) to fit around corners. Ensure the cables never cross or overlap. Use the mat’s self-adhesive backing or tape to fix it securely to the floor.
Step 5: Test the System
This is a critical step. Before covering the system, use a multimeter to test the resistance and continuity of the mat. The reading should match the value provided in the manufacturer’s instructions. Record this reading for your warranty.
Step 6: Cover with Screed & Install Flooring
Cover the heating mat with a thin layer of flexible self-levelling compound. This protects the wires and creates a flat surface. Once cured, you can lay your final floor covering (e.g., tiles).
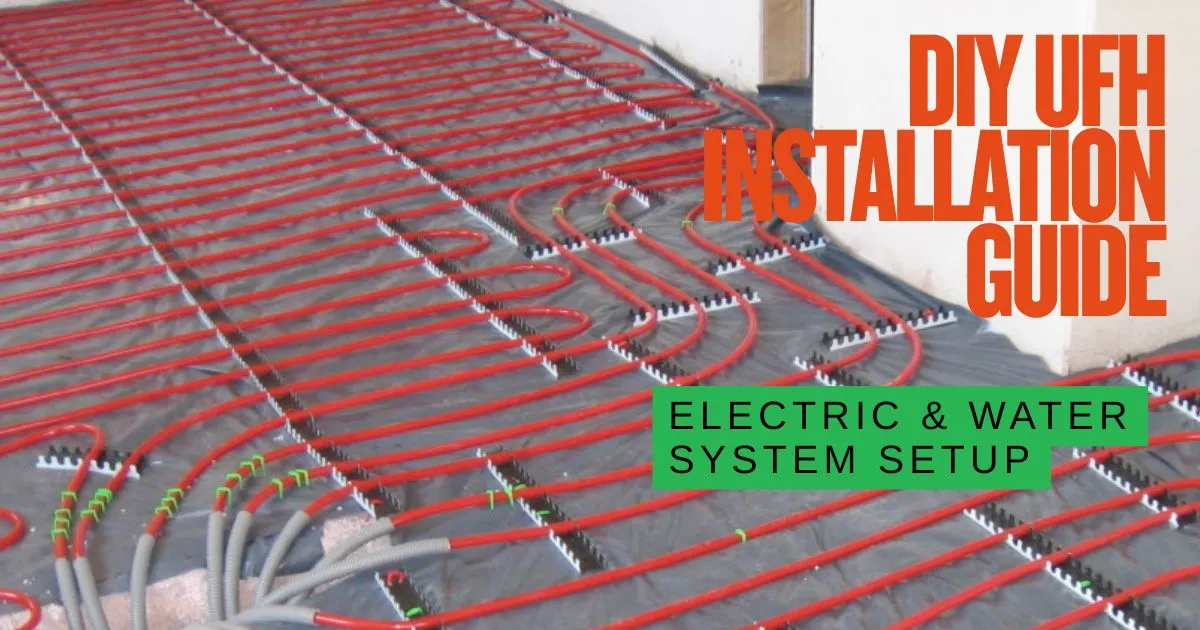
Wet UFH Installation: Step-by-Step
Wet systems are more complex and often best left to professionals, but here is an overview of the process.
Step 1: Design and Heat Loss Calculation
A professional should perform a heat loss calculation to determine the required pipe spacing and flow temperatures for each room.
Want to calculate your pipe spacing yourself? Our free pipe spacing calculator provides instant recommendations based on your room specifications, insulation level, and heat source type.
Step 2: Install the Manifold
The manifold is the central hub of the system. Mount it in an accessible location, like a utility cupboard. Connect it to the main heat source (boiler or heat pump).
Check out our Underfloor Heating Manifold Guide
Step 3: Lay Insulation and Pipes
After laying the insulation boards, begin laying the pipes. Start at the manifold, uncoiling the pipe and fixing it to the insulation boards in the planned pattern (e.g., snail or serpentine) using staples or clips. Return the end of the pipe to the manifold to complete the loop.

Pro Tip: Use our pipe spacing calculator to determine exactly how much pipe you’ll need and what spacing is optimal for your room’s heat requirements.
Step 4: Pressure Test the System
Once all pipe loops are connected to the manifold, the system must be filled with water and pressure tested (typically to 6 bar for 24 hours) to ensure there are absolutely no leaks before it is covered.
Step 5: Pour the Screed
A layer of floor screed (typically 65-75mm deep) is poured over the pipes — see our UFH screed guide for types, drying times, and the commissioning protocol. This must be left to dry and cure completely, which can take several weeks.
Common Mistakes to Avoid
- Forgetting Insulation: The #1 mistake. Without it, a large portion of your heat will be lost downwards.
- Damaging Cables/Pipes: Be extremely careful not to cut or pierce the heating elements during installation.
- Incorrect Spacing: Leads to hot and cold spots on the floor.
- Skipping the Tests: Failure to test the system before covering it can lead to a catastrophic failure with no warranty.
Conclusion
Installing underfloor heating is a meticulous but achievable DIY project, especially with electric systems. The key to success is careful planning, following instructions precisely, and testing at every stage. By taking your time, you can add a touch of luxury and efficiency to your home that you’ll appreciate for years to come.
If you encounter issues during installation or after commissioning your system, our complete troubleshooting guide covers installation-related problems including testing failures, incorrect wiring, sensor issues, and post-installation faults for both electric and wet systems.
Before purchasing materials, compare system kits and components from leading UK manufacturers in our Best Underfloor Heating Brands UK Guide.
One useful email,
once a month.
New guides as they go live. Real cost data, not press releases. The occasional rumour from the industry that's actually worth knowing.
No sales pitches. No jargon. Unsubscribe in one click.