
Quick Answer: Yes, you can retrofit underfloor heating in an existing home. Electric systems start from just 1.8mm thin, no floor raise needed. Low-profile wet systems add 15–25mm. Whole-house retrofit costs £3,000–£13,000 depending on scope. Single-room electric mat: £240–£480 including installation. Key challenge: floor height, heat source compatibility, and insulation. Read on for a room-by-room difficulty guide and DIY vs professional breakdown. Explore retrofit guidance at underfloorheating.info and compare suitable installers through the Underfloor Heating Directory.
🧮 Get an instant cost estimate for your retrofit with our free calculator →
Guided reading
Not sure where to start?
Answer three quick questions and we will point you to the right guides for your project.
Find your starting pointThree questions. About 30 seconds. No sign-up.
Is retrofitting underfloor heating in an existing home realistic?
Yes, retrofitting underfloor heating is realistic. You don't need to rip an existing house apart to get warm floors, but you do need to choose the system around your subfloor, available floor height and heat source.
UFH warms a room evenly from the floor up and runs at lower water temperatures than traditional radiators. That makes it a strong partner for modern heat pumps, and you get your wall space back because there are no bulky radiators.
The disruption is what worries most homeowners. I've seen plenty of retrofit ideas stall because people assume the job means a full-scale, messy renovation. Modern low-profile systems have changed that.
Ultra-thin electric systems can be as slim as 1.8mm and fit directly within a layer of tile adhesive. Low-profile wet underfloor heating uses slim panels designed for renovations. So whether you've got a modern build or a period home, there's likely to be a workable route.
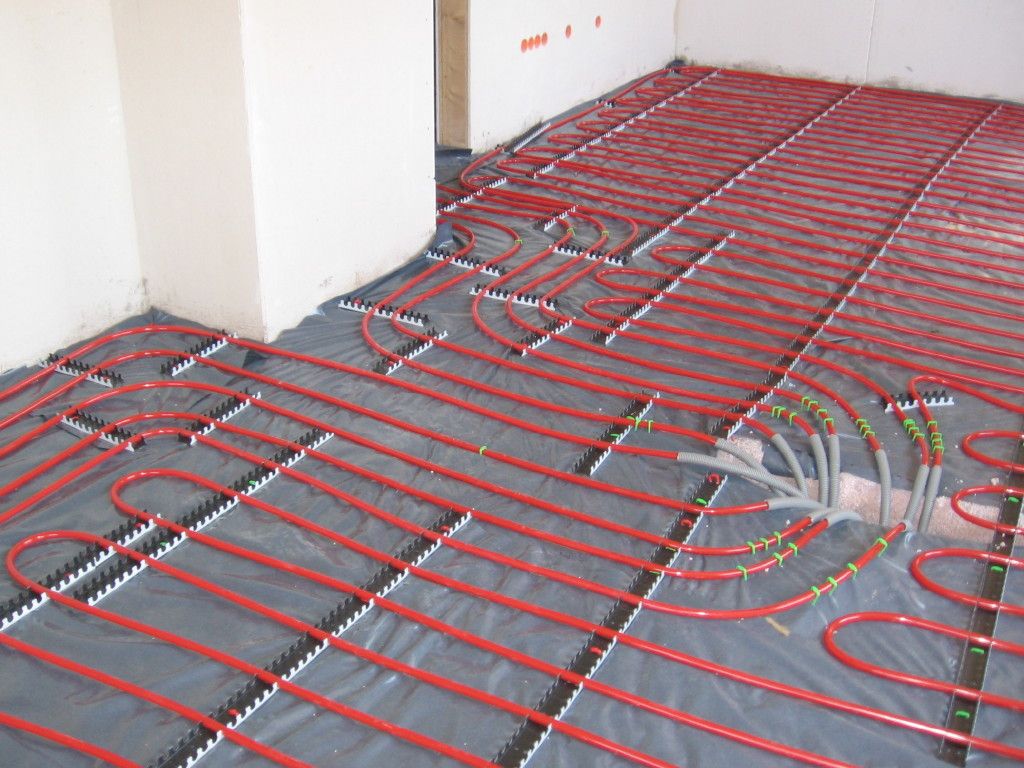
Key benefits of upgrading to underfloor heating
Ready to start your retrofit? Compare quotes from professional UFH installers via the Underfloor Heating Directory.
Warm floors are only part of the appeal. A well-designed UFH system can improve comfort, efficiency and the way you use the room. Here's what you'll notice.
Comfort
Underfloor heating uses radiant heat. It warms the floor, which then sends gentle warmth upwards to the people and objects in the room. Unlike radiators, it doesn't rely on convection currents of hot and cold air.
The result is a more even temperature from wall to wall, without the usual cold spots and draughts. It's a different sort of warmth, and most people notice it straight away.

Energy efficiency
UFH runs at much lower temperatures than conventional radiators. That can reduce energy use and heating bills when the system is designed and controlled properly.
- Lower Operating Temperatures: Wet underfloor heating systems typically run at 35°C–45°C. This is a stark contrast to radiators, which require water temperatures of 60°C–80°C to heat a room effectively.
- Reduced Energy Use: Because the heat source, whether a boiler or a heat pump, does not need to work as hard, energy consumption can be reduced in many homes compared to a radiator system.
- Optimal for Modern Heat Sources: The low-temperature operation makes UFH an ideal partner for renewable technologies. It works particularly well with air and ground source heat pumps, which are most efficient when producing lower-temperature water.
The installation costs money upfront, of course. The payback comes through lower energy use over time. Use our underfloor heating costs guide to plan the budget properly.
Design freedom
No radiators means free walls. You can put a sofa, bookshelf or sideboard where it suits the room instead of working around a heat source. It's a simple benefit, but it can completely change a small room's layout.
Air quality
Underfloor heating can contribute to a healthier indoor environment. Radiator systems rely on convection, where hot air rises and circulates around a room. This movement of air can disturb and spread dust, pollen, and other allergens. Radiant heat, on the other hand, does not create these air currents. By warming the room gently from the floor up, it keeps the circulation of dust particles to a minimum. This makes it an excellent choice for individuals with allergies, asthma, or other respiratory sensitivities.
Property value
Installing underfloor heating is a smart investment that can increase the long-term value of your home. It is often seen as a premium, high-end feature that is highly attractive to prospective buyers. A home equipped with an efficient and luxurious heating system stands out in the property market; Find out about current European Underfloor Heating Market. It signals that the house has been modernised and well-maintained, justifying a higher valuation and making it more appealing to discerning buyers.
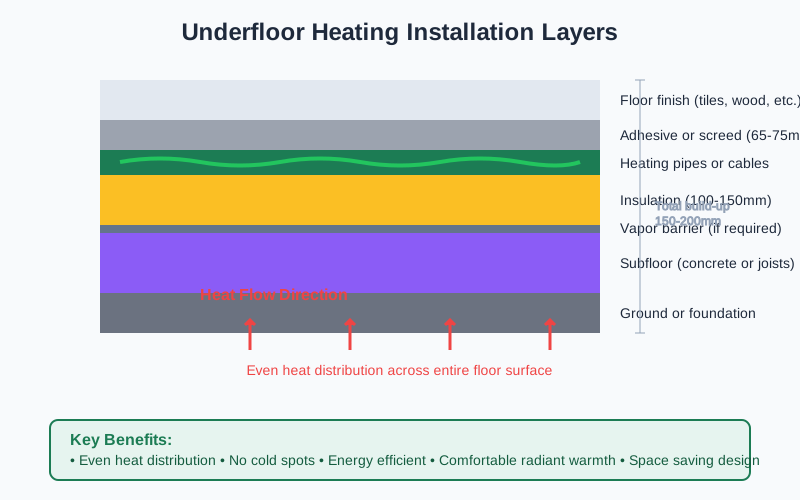
Pre‑installation assessment: is your home ready for retrofit UFH?
Before you buy anything, assess the property properly. The subfloor, insulation, floor finish and available height will decide which retrofit system makes sense. Getting this right now avoids expensive problems later.
Analysing your existing subfloor
The type and condition of your subfloor will largely determine the most suitable retrofit UFH system. Each subfloor presents unique opportunities and challenges that must be addressed.
Underfloor heating on a solid concrete floor
Most concrete subfloors are well-suited for retrofit UFH, and there are several valid routes to choose from: a thin screeded system, a rigid overlay board system, or a milled screed (in-cut) system that cuts the pipe directly into the existing slab for zero floor build-up. Whichever route you take, the primary task is to prepare the surface, it must be clean, dry, and level before installing a low-profile system, with any large cracks or unevenness repaired with a self-levelling compound to create a stable base. See our dedicated guide to UFH on existing concrete floors for the full comparison of routes, costs and prep work.
Suspended timber floors
For homes with suspended timber floors, the goal is to add heating without a large increase in floor height. There are two primary solutions:
- Between joists: Heating pipes are fitted into the void between the floor joists, often supported by aluminium heat spreader plates. This method has a minimal impact on floor height as the system sits within the existing structure. Insulation is fitted below the plates to direct heat upwards.
- Over joists: Slim, pre-grooved panels are laid directly on top of the joists or existing floorboards. The heating pipes are then pressed into the channels within these boards. This provides excellent heat distribution but adds more to the floor height than between-joist methods.
See our dedicated guide to UFH on suspended timber floors for period-property considerations, ventilation requirements and costs.
Addressing challenges in older properties
Retrofitting UFH in period properties requires special attention. Uneven floors, a common feature in older homes, often need to be levelled before installation. A structural engineer should assess any quirks to ensure the floor can support the chosen system. When working with original floorboards or features, careful planning is needed to preserve the building's historical character. It is also vital to maintain subfloor ventilation to prevent moisture build-up and timber decay.
The role of insulation
Don't treat insulation as an optional extra. Without it, a large share of the heat travels down into the subfloor or void, wasting energy and pushing up your bills. You want that heat moving into the room.
For retrofits, high-density insulation boards made from materials such as extruded polystyrene (XPS) give you high thermal resistance without taking up much height. They're strong enough to support the UFH system and final floor covering. Between joists, installers often use flexible quilt insulation instead.
Managing floor height build‑up
Typical retrofit build‑up ranges (excl. floor finish):
| Retrofit system | Typical build‑up | Notes |
|---|---|---|
| Electric mat | 3–6mm | Best for tiled floors |
| Electric loose wire | 2–4mm | Most flexible layouts |
| Wet low‑profile overlay | 15–25mm | Good for ground floors |
| Between‑joist wet | 0mm above deck | Works in timber floors |
| Milled screed / in‑cut wet | 0mm | Milled into concrete/screed floors only |
The single biggest challenge in any retrofit project is the increase in floor height. Even a small addition can affect doors, skirting boards, staircases, and thresholds, creating trip hazards and requiring costly adjustments. To combat this, manufacturers have developed a range of slim, low-profile systems. These are engineered for existing homes.
- Electric systems can be incredibly thin. Some loose-wire options are only 1.8mm thick, while mat-based systems add as little as 3mm before the adhesive and floor finish. These offer a quick installation with minimal disruption.
- Wet (hydronic) systems are also available in low-profile designs. These typically consist of pre-grooved boards or panels that can be as slim as 15-22mm, offering the running cost benefits of a wet system without a major floor build-up.
Compatibility with floor coverings
Your choice of floor covering has a direct impact on the performance of your UFH system. The best materials are those that conduct heat well, allowing for an efficient transfer of warmth into the room.
- Ideal Materials: Stone, ceramic tiles, and polished concrete have excellent thermal conductivity. They heat up quickly and retain warmth effectively, making them a perfect partner for UFH.
- Excellent Options: Engineered wood is highly recommended as it is more stable than solid wood when exposed to temperature changes. Luxury vinyl tile (LVT) and specific UFH-compatible carpets (with a low Tog rating, typically below 2.5) are also great choices.
- Important Considerations: Solid wood flooring can be used, but it must be properly acclimatised, and the UFH system must be operated carefully to prevent the wood from warping or shrinking. Similarly, always check the manufacturer's specifications for laminate flooring to ensure it is rated for use with underfloor heating.
For detailed flooring selection advice including heat output comparisons, temperature limits, and room-specific recommendations, see our complete flooring guide.
Choosing your system: electric vs wet UFH
So which should you choose, electric or wet UFH? It comes down to the size of the project, your upfront budget and how much the system will run. Here's the practical difference.
Electric underfloor heating systems
Electric UFH systems use a network of wires or heating mats to warm the floor. They are often favoured for their simplicity and speed of installation, making them an excellent choice for smaller projects.
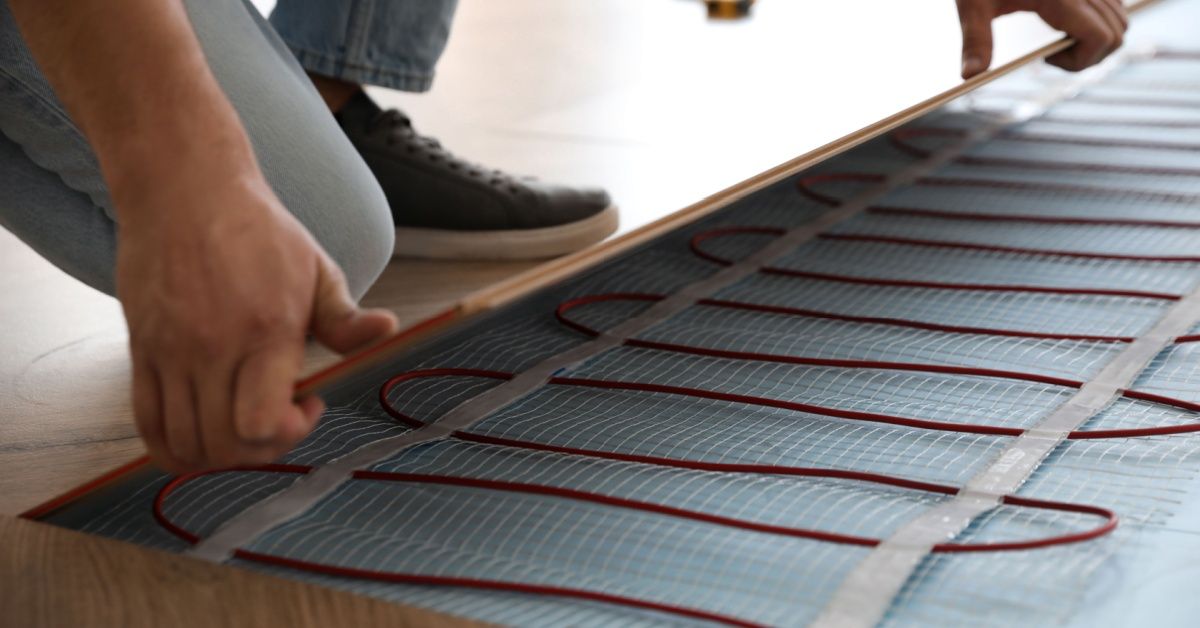
- Best suited for: Bathrooms, kitchens, single rooms, or areas where minimal disruption is key. They are ideal for projects where you cannot raise the floor height largely. See our bathroom underfloor heating guide for room-specific advice.
- Advantages:
- Lower upfront installation cost: The initial materials and labour for electric systems are typically less expensive. Retrofit installation costs average around £60-£85 per square metre.
- Rapid heat-up times: Electric systems can heat a room quickly, providing warmth on demand in as little as 20-30 minutes.
- Minimal floor build-up: Modern systems are incredibly thin, preserving existing floor levels and ceiling heights.
- Disadvantages:
- Higher long-term running costs: The primary drawback is the reliance on electricity, which is more expensive per unit than gas. As one industry report notes, electric UFH is quick to fit but more costly long-term, whereas wet systems are more expensive to install but cheaper to run. (Source: amberufh.co.uk)
Common Retrofit Types
- Heating Mats (e.g., StickyMat): These consist of a thin heating wire pre-spaced on a self-adhesive mesh mat. They are simple to roll out, making installation fast and straightforward. They add as little as 3mm to the existing floor height.
- Loose Wire Systems: These systems offer maximum flexibility. The loose wire can be laid to fit around fixtures and in irregular-shaped rooms. With profiles as thin as 1.8mm, they offer the lowest possible floor build-up.
- Foil Systems: These are designed for installation under floating floors like laminate or engineered wood. The heating cable is encased between layers of reinforced aluminium foil, which helps distribute heat evenly.
Wet (hydronic) underfloor heating systems
Wet UFH systems circulate warm water through pipes laid beneath the floor. They are connected to a central heat source, such as a boiler or heat pump. These systems are the benchmark for efficiency and are ideal for larger-scale projects.
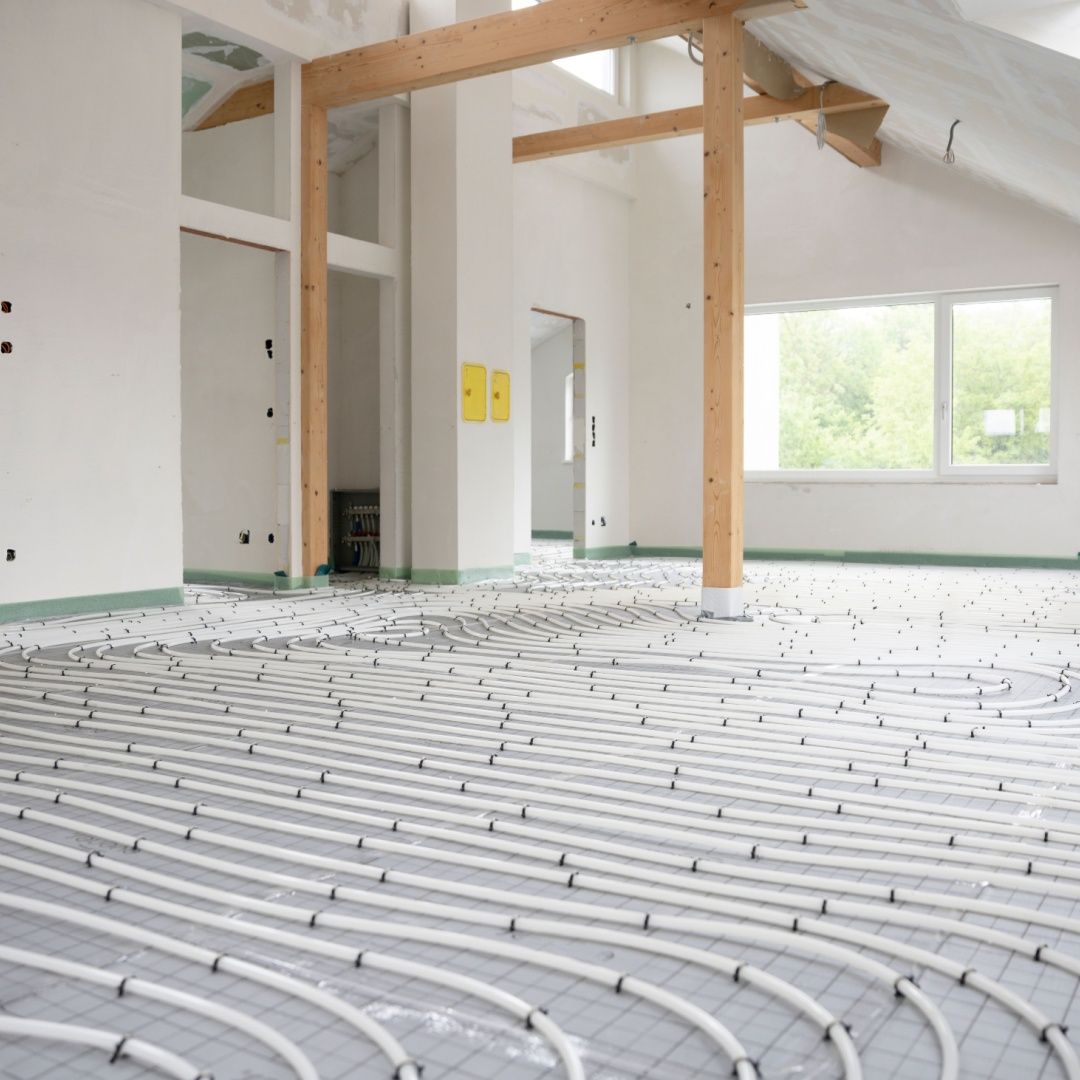
- Best suited for: Whole-house renovations, new extensions, and for homeowners who prioritise long-term running costs and energy efficiency.
- Advantages:
- Lower running costs: Water-based systems are efficient, operating at much lower temperatures than radiators. This can make them up to four times cheaper to run than electric alternatives.
- Optimal for renewables: They are the most efficient choice when paired with renewable heat sources like air or ground source heat pumps, which produce hot water at the low temperatures that UFH requires.
- Disadvantages:
- Higher upfront installation cost: The materials and labour are more substantial, with installation averaging £135-£185 per square metre for retrofit projects.
- Slower to heat up and cool down: Due to the thermal mass of the floor and water, these systems take longer to respond to temperature changes.
Common Retrofit Types
- Low-Profile Overlay Systems (e.g., Nu-Heat LoPro or Wunda): These consist of slim, pre-grooved panels that are laid directly over the existing subfloor. The pipes are fitted into the grooves, and the system typically adds around 15-22mm to the floor height, making it a popular retrofit choice.
- Slim Screed Systems: In this method, pipes are clipped onto insulation boards laid over the existing floor. A thin layer of self-levelling compound is then poured over the pipes, creating a slim and strong new floor base.
- Between-Joist Systems (e.g., Warmup Econna): For properties with suspended timber floors, this is the ideal solution. Aluminium spreader plates or pre-grooved insulation panels are fitted between the joists, and the heating pipes are slotted into place. This results in zero floor build-up, as the system sits entirely within the existing floor structure.
Zero-build-up option for concrete floors: milled screed systems
There's a fourth option worth knowing about if you have a solid concrete or screed floor: milled screed (also called in-cut or chase-cut) underfloor heating. Rather than laying pipe on top of the existing floor, a specialist milling machine cuts shallow channels directly into the slab, and a continuous 16mm pipe is pressed flush into them, giving a full wet system zero floor build-up, with no screed curing wait before the flooring goes back down. It's only suitable for concrete or screed floors with enough depth to mill safely, not suspended timber, and every provider quotes on a project basis after a site survey rather than a standard rate. See our full guide to milled screed underfloor heating for how it works, where it does and doesn't apply, and who installs it in the UK.

The retrofit installation process
A good retrofit starts with preparation. Rush the subfloor and you'll risk uneven heat, wasted energy and problems with the finished floor.
Preparation
Before any heating elements are installed, the subfloor requires careful attention. This is the most critical phase for guaranteeing system efficiency and longevity. First, you must remove all existing floor coverings. This includes any carpet, tiles, laminate, or vinyl. The goal is to expose the original subfloor, whether it is concrete or timber, completely. Next, the subfloor needs thorough cleaning, repairing, and levelling.
- Cleaning: Remove all dust, grease, and construction debris from the surface. A clean base ensures proper adhesion for insulation and levelling compounds.
- Repairing: Inspect the subfloor for damage. For concrete, you must fill any large cracks. For suspended timber floors, secure or replace any loose or warped boards to create a stable base.
- Levelling: The surface must be flat to ensure even heat distribution. Use a self-levelling compound to correct any unevenness, as this prevents strain on the heating elements.
The final preparation step is laying a layer of high-performance insulation board. This is an essential step. Insulation directs heat upwards into the room, preventing it from escaping downwards into the subfloor. This improves the system's efficiency and reduces running costs.
Laying the system
With the subfloor prepared, you can begin installing the heating system. Always follow the bespoke design plan provided by the manufacturer for optimal layout and performance. For wet systems, this involves laying the heating pipes across the insulated floor. Installers secure them into pre-grooved insulation panels or clip them directly onto the boards. Once the layout is complete, the pipes are connected to the manifold. The manifold is the system's control centre, distributing warm water through the individual pipe circuits.
For electric systems, the process involves rolling out heating mats or spacing loose wires. Electric systems often have a very low profile, which minimises the increase in floor height. Some loose wire systems are only 1.8mm thick, making them ideal for retrofitting. The wires are then connected to the thermostat and the mains power supply. A qualified electrician must complete this final electrical connection.
Commissioning and finishing
Before laying the final floor, the system must be tested and commissioned. This step verifies that everything is working correctly and safely. For wet systems, the pipework is filled with water and pressure-tested. This test confirms the system is watertight and free from leaks. It is essential to perform this check before covering the pipes with screed. Discovering leaks after the floor is finished would require costly and disruptive work.
Not sure this is the right page?
Get a reading list built for your project
Three quick questions and we will point you to the guides that match what you are actually trying to do.
Find your starting pointThree questions. About 30 seconds. No sign-up.
Next, a thin layer of screed or self-levelling compound is often applied over the system. This layer encases the pipes or wires, protecting them and helping to conduct heat evenly across the floor surface. The type and thickness of the screed depend on the specific system and final floor covering.
Finally, you can lay your chosen floor covering. It is important to allow the screed or levelling compound to cure completely first. The curing time varies, so always follow the manufacturer's guidance. Laying the floor too early can trap moisture and cause damage to both the heating system and the floor finish.
Budgeting for your project: understanding the costs
Your budget needs to cover more than the heating kit. System type, property size, labour and project complexity all affect the final figure. For the full breakdown, see our underfloor heating costs guide.
Installation cost breakdown
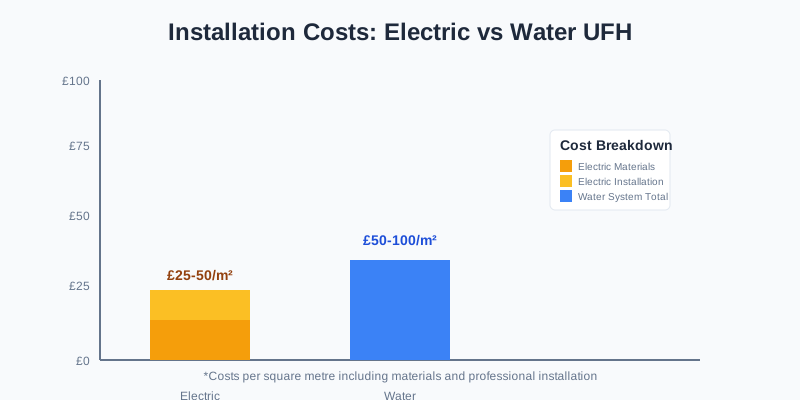
The primary cost difference lies between electric and hydronic (wet) systems. Installation quotes are typically provided on a per-square-metre basis, which includes the core materials and labour for fitting the system.
- Electric UFH: Installation costs for electric systems average between £60-£85 per m². These systems are generally faster and less disruptive to install, resulting in lower labour expenses.
- Wet UFH: Wet systems require a larger initial investment, averaging between £135-£185 per m². The higher price reflects more complex components like manifolds and pipework, plus the intensive labour needed to connect the system to a boiler or heat pump. (Retrofit underfloor heating: installation and running costs for both systems).
Total project investment
When budgeting for a whole-house installation, these per-metre costs scale up. Several factors influence the final project price. The system type, the total floor area, and regional labour rates all play a large role. For a full UK home retrofit, the total investment can range from £3,000 to £13,000. (Top Underfloor Heating Trends in the UK for 2026). This broad range covers everything from a small electric system in a single zone to a detailed wet system throughout a larger property.
Additional costs to consider
The per-square-metre installation quote rarely covers the entire project cost. To create an accurate budget, you must also factor in several other essential expenses.
- Professional Labour: Your project will require a qualified electrician to connect the system and its controls. A wet system also needs a certified plumber for connecting pipework to the manifold and central heating source.
- Subfloor Preparation: The existing subfloor must be clean, level, and stable. This may involve costs for self-levelling compounds or installing insulation boards, which are critical for preventing heat loss downwards.
- New Thermostats and Controls: Every heating zone requires a thermostat. Costs vary from basic dial models to advanced smart thermostats that offer remote control, learning algorithms, and energy monitoring to optimise UFH performance and reduce running costs.
- Final Floor Covering: The cost of the underfloor heating system does not include the price of your new flooring. Whether you choose tile, engineered wood, or vinyl, this must be budgeted separately.
Integrating UFH with your home's heat source
UFH only works efficiently when it matches the home's heat source. Whether you've got a boiler or a heat pump, the temperatures and controls need to work together.
Connecting to an existing boiler
Most modern boilers are compatible with wet underfloor heating systems. This includes combi, system, and conventional boilers. However, they cannot connect directly. Boilers produce water at high temperatures (typically 60-80°C) for radiators, which is too hot for UFH. A UFH system requires much lower water temperatures, usually between 35°C and 50°C. To achieve this, a thermostatic mixing valve (also called a blending valve) is essential. The valve blends hot water from the boiler with cooler water returning from the UFH pipe loops. This mix creates the precise, lower temperature needed to heat the floor safely and efficiently. The mixing valve performs several critical roles:
- Protects the Floor: It prevents excessively hot water from damaging the floor finish or cracking the screed.
- Ensures Comfort: It delivers a consistent and gentle warmth, avoiding hot spots.
- Improves Efficiency: By only using the necessary heat, it prevents the boiler from working harder than required.
In most setups, the mixing valve is part of the UFH manifold. The manifold also includes a dedicated circulation pump to ensure water flows correctly through the long UFH pipe circuits. Check out our Underfloor Heating Manifold Guide
UFH and heat pumps
Underfloor heating is the ideal partner for air source and ground source heat pumps. Heat pumps operate most efficiently when producing water at low temperatures. They consume much less energy to produce water at 40°C than at 60°C. This perfectly matches the requirements of a UFH system.
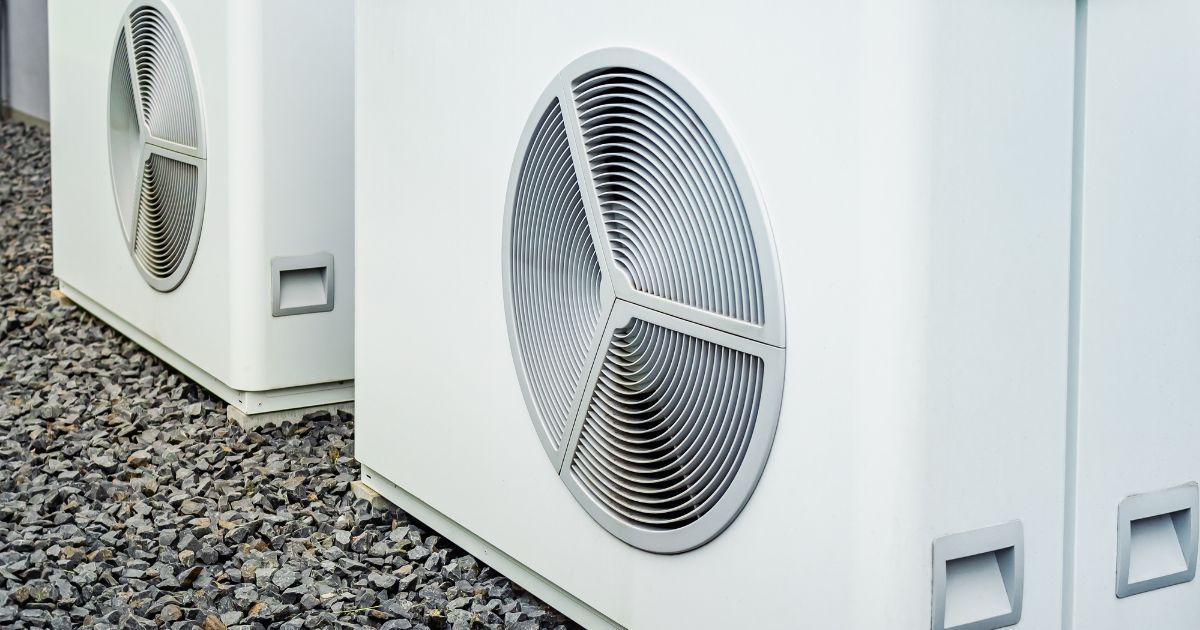
Pairing the two creates an efficient heating system. Wet UFH suits the low-temperature water output from heat pumps, helping you maximise the Coefficient of Performance (CoP) and reduce energy bills. Source: homebuilding.co.uk. Our heat pump and UFH integration guide explains the setup in more detail.
This combination is an excellent way to future-proof your home. As the UK moves towards more sustainable heating solutions, a heat pump and UFH system will ensure your property remains efficient, comfortable, and environmentally friendly for years to come.
Smart controls and zoning
To maximise the benefits of your UFH system, advanced controls are vital. Smart thermostats allow you to manage your heating with precision, often from a smartphone app. You can set detailed schedules and adjust temperatures remotely. You only use energy when needed.

Underfloor heating is also perfectly suited for zoning. A UFH manifold distributes water to multiple pipe loops, and each loop can be controlled as an independent zone. This means you can set different temperatures and schedules for different rooms. For detailed guidance on planning your zones, including pipe layouts and manifold configuration, see our complete zoning guide. For example, you could heat the living areas during the day and the bedrooms only in the evening and morning. This level of control prevents energy wastage in unoccupied rooms and improves comfort and running costs. For hybrid systems that use both UFH and radiators, separate zone controls are important due to their different response times.
Retrofitting UFH is realistic in most UK homes, but the system has to suit the building. Get the subfloor, insulation and floor height right, and you'll get even radiant warmth without major structural changes.
My advice is simple: start with a professional heat loss calculation. That tells you what each room actually needs and stops you buying a system based on guesswork. Then get detailed quotes from certified installers so you can compare the full cost and disruption, not just the kit price.
If you encounter retrofit-specific issues such as cold zones, uneven heating, floor height problems, or integration challenges with existing heating systems, see our complete troubleshooting guide for step-by-step diagnostics and solutions tailored to retrofit installations.
Planning UFH for a specific project type? See our dedicated guides for loft conversions, basements, and garage conversions and garden rooms, each has its own floor-height, insulation or waterproofing considerations beyond this general guide. If you're new to underfloor heating, start with our beginner's guide to underfloor heating to understand the fundamentals before planning your retrofit project. For an overview of the leading UK suppliers and retrofit-specific systems, see our Best Underfloor Heating Brands UK Guide.
Ready to transform your home? Find experienced UFH retrofit specialists via the Underfloor Heating Directory.
One useful email,
once a month.
New guides as they go live. Real cost data, not press releases. The occasional rumour from the industry that's actually worth knowing.
No sales pitches. No jargon. Unsubscribe in one click.