Start Here: Why Your Underfloor Heating Isn’t Working
Cold spots, strange noises or no heat at all? Underfloor heating faults are frustrating, but the symptom usually gives you somewhere sensible to start. I’ll take you through the checks in order so you can find the likely cause without guessing. You’ll find more practical guidance at underfloorheating.info and qualified help through the Underfloor Heating Directory.
With the right maintenance, the core pipework of a UFH system can last for more than 50 years. Underfloor Heating & Heat Pumps: Complete 2026 Guide. First, work out which type of system you have and what each component does. Many faults, including actuators not responding, thermostat errors and RCD trips, trace back to the wiring. Our wiring diagrams guide shows how the electrics should connect.
Differentiating Wet vs. Electric Systems
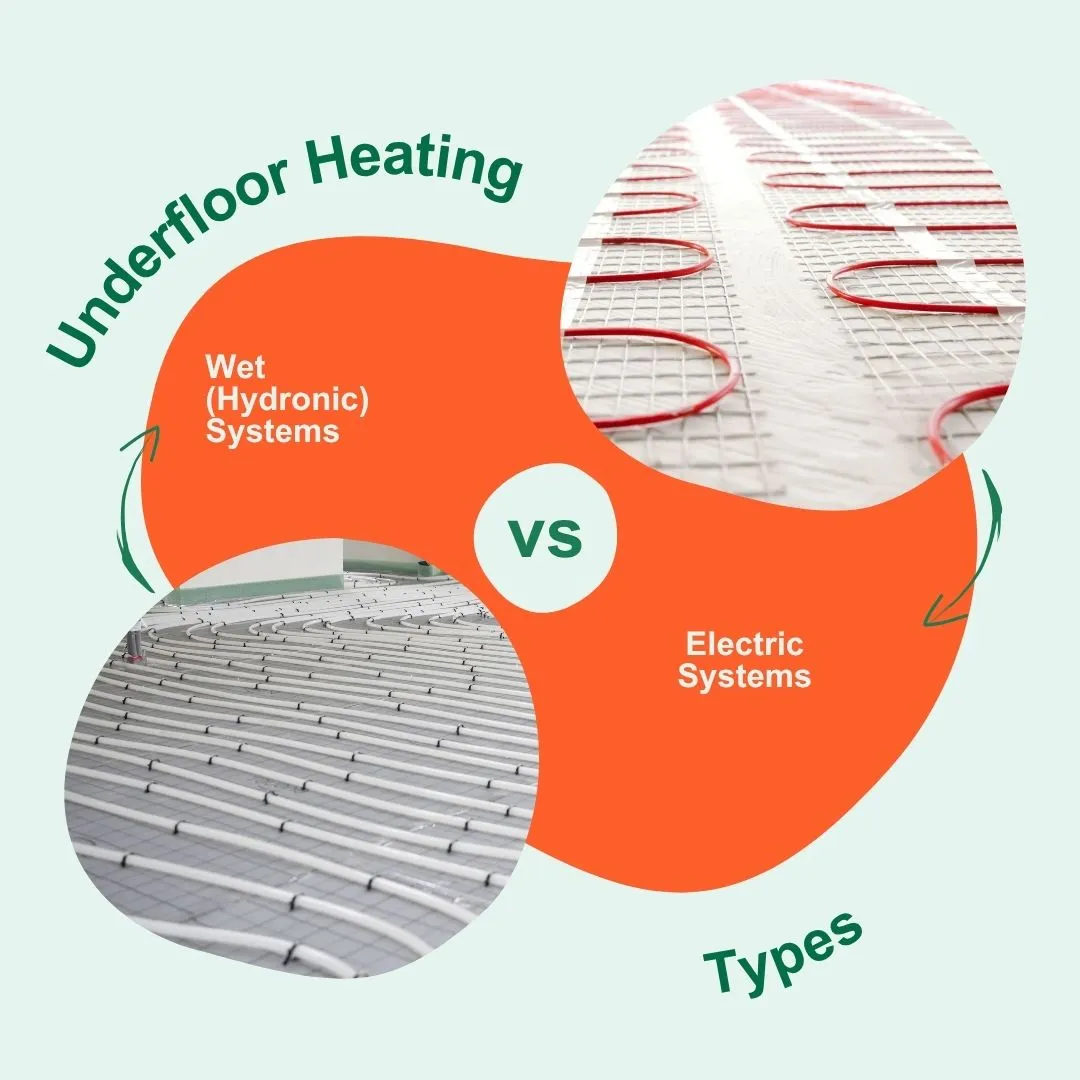
Most faults belong to one of the two main system types. Identify yours before you start testing anything.
-
Wet (Hydronic) Systems: These systems circulate warm water through a continuous network of pipes installed beneath the floor. A boiler or heat pump heats the water, which is then distributed via a manifold that controls the flow to different “zones” or rooms. Key components include the heat source, circulation pump, and manifold. The spacing between pipes affects heat distribution and efficiency. For a comprehensive guide to wet systems, see our Ultimate Guide to Wet Underfloor Heating.
-
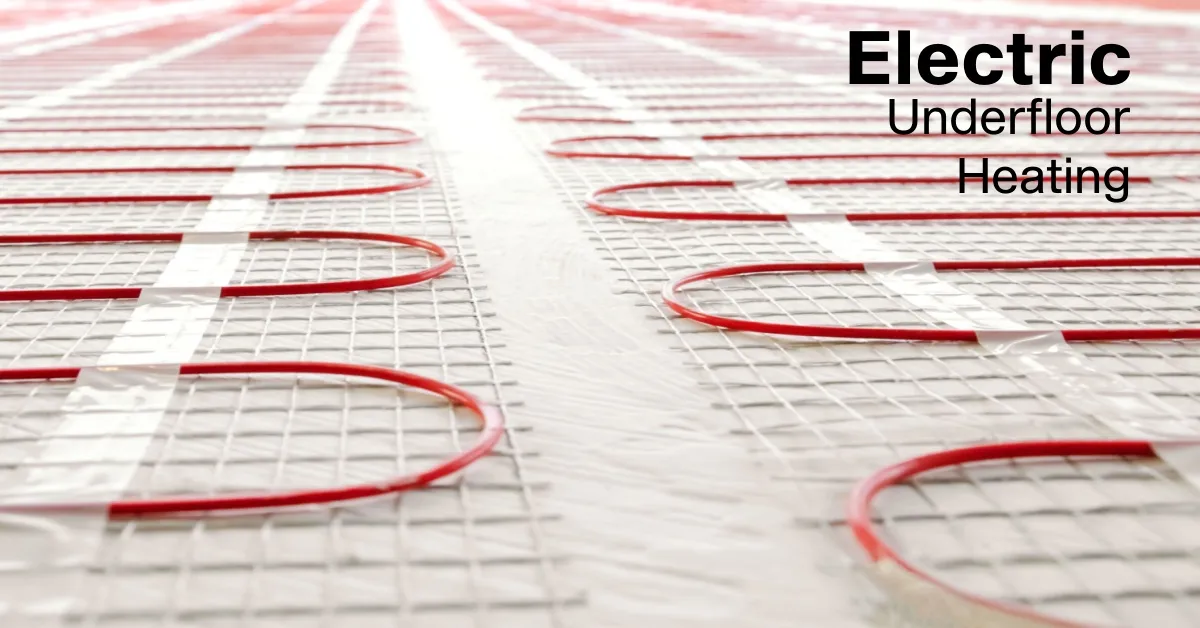
Electric Systems: These systems use electrical resistance to generate heat. They consist of heating cables or pre-formed mats of wires installed directly under the floor finish. A dedicated thermostat, often with a floor sensor, controls each zone. They are simpler in design but operate differently from wet systems. Learn more in our Complete Electric Underfloor Heating Guide.
Safety First: When to DIY and When to Call
You can handle some checks yourself. Others need a qualified professional, and it’s important to know where that line sits.
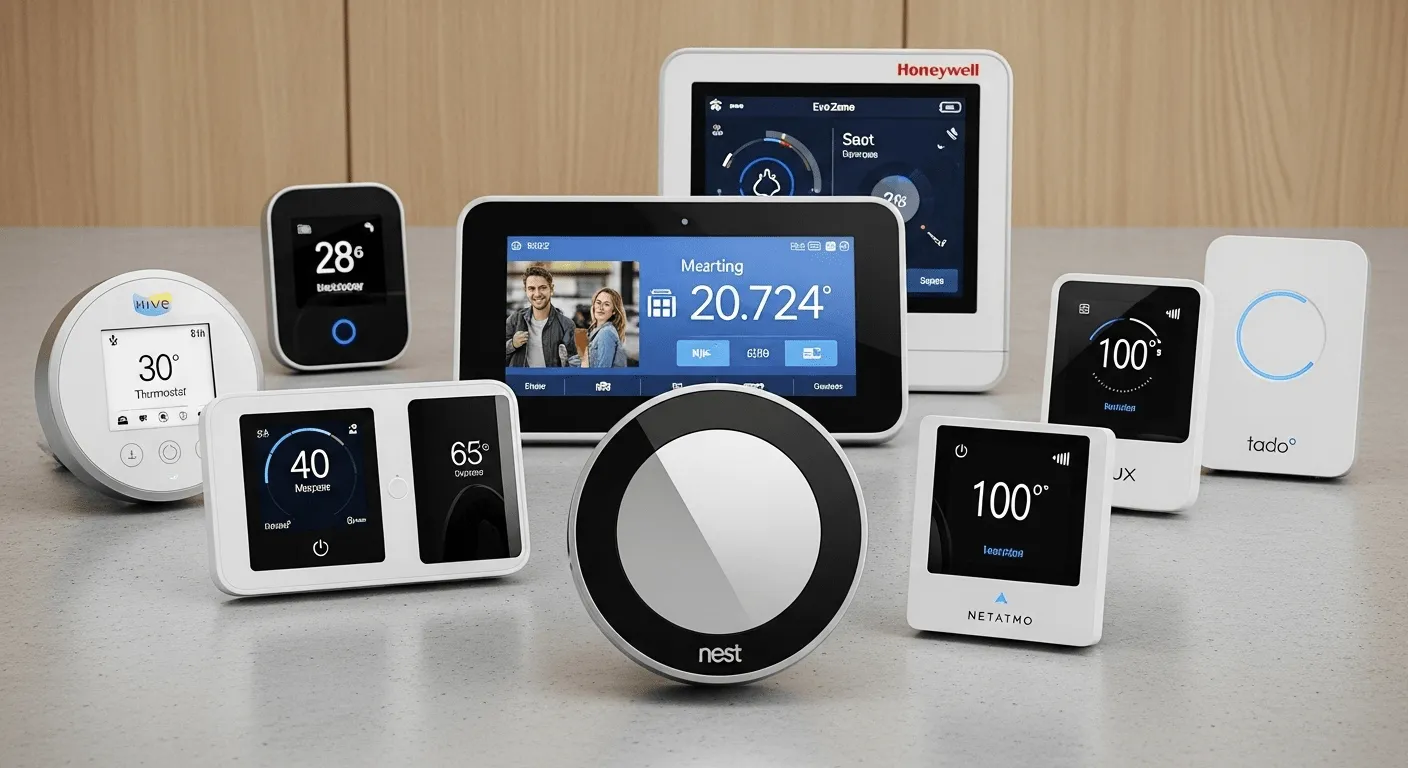 You may be able to handle simple diagnostic tasks yourself. This includes checking thermostat settings, ensuring the system has power, and resetting the controls. For wet systems, bleeding a single zone to remove trapped air can sometimes resolve isolated cold spots.
Call a certified professional for anything more involved.
- For electric systems, any work involving wiring, testing circuits, or replacing components must be done by a qualified electrician.
- For wet systems, contact a heating engineer for issues related to the boiler, circulation pump, or manifold valves. Persistent pressure drops or damp patches on the floor are signs of a leak that require immediate professional attention. Underfloor Heating Leaks - What Happens and What to Do
Quick Reference: Diagnosing Your Problem
Use this decision tree to match the symptom to the most likely cause.
Step 1: What Type of System Do You Have?
- Wet (Hydronic) → Go to Step 2A
- Electric → Go to Step 2B
Not sure which system type you have? See our Electric vs Water UFH Comparison to identify your system.
Step 2A: Wet System - What’s the Symptom?
- No heat at all (entire system) → Check: Power supply, boiler firing, circulation pump running, system pressure. See: All Zones Not Heating
- One room/zone not heating → Check: Zone thermostat, actuator function, airlock in that loop. See: Single Zone Not Working
- Multiple zones not heating → Check: Manifold components, multiple thermostats, common airlock. See: Multiple Zones Not Heating
- System losing pressure → Check: For leaks at manifold, pipework, pressure relief valve. See: Pressure Drop
- System pressure too high → Check: Filling loop, expansion vessel integrity. See: High Pressure Issues
- Pump won’t stop running → Check: Stuck relay, faulty actuator, thermostat fault. See: Continuous Pump Operation
- Uneven heating/cold spots → Check: Airlocks, flow gauge settings, manifold valves. See: Uneven Heating
- Strange noises (gurgling) → Check: Airlock, pump speed, circulation issues. See: No Circulation
Step 2B: Electric System - What’s the Symptom?
- No heat at all → Check: Fused spur, consumer unit, thermostat power, wiring. See: Not Heating
- System trips electrics → Check: RCD (cable damage) vs MCB (overcurrent) trip type. See: Power Trips
- Floor too hot or too cold → Check: Floor sensor position, temperature limits, thermostat mode. See: Temperature Issues
- Error codes on thermostat → Check: Error code meaning (E1, E2, E4), battery, sensor connection. See: Error Codes
- High running costs → Check: Thermostat programming, insulation, system sizing. See: Running Costs
Step 3: Quick Wins to Try First
Before detailed diagnostics, try these simple fixes:
⚠️ Common Mistake: Turning the thermostat higher than needed does not make the room heat faster - it just makes the system run longer.
- Check the power supply - Consumer unit (fuse box), fused spur switched on
- Check thermostat settings - Calling for heat, correct mode, batteries fresh
- Check system pressure (wet systems) - Should read 1.0-1.5 bar when cold
- Reset the system - Turn thermostat off/on or perform factory reset
- Remove thermal blocks - Check for rugs, dog beds, or furniture over floor sensor
Still no luck? Move on to the detailed checks below.
Part 1: Initial Diagnostics - The 5-Minute Triage
Do these quick checks before you dig into anything complex. They solve plenty of common UFH problems and don’t need specialist tools.
Check the Power Source
A loss of power is a frequent cause of a non-working system. Take a moment to verify the basics.
- For all systems: Go to your consumer unit (fuse box) and check that the circuit breaker for your underfloor heating hasn’t tripped. If it has, reset it. If it trips again, there may be an electrical fault that requires a qualified electrician.
- For wet systems: Ensure your boiler is switched on and displaying power. Also, check that the circulation pump, which is often located near the boiler or manifold, is powered and running.
Review Your Thermostat Settings
Incorrect thermostat settings can easily make it seem like your heating has failed. Confirm that it is correctly configured to call for heat.
- Is it calling for heat? The set temperature on your thermostat must be higher than the current room temperature for the heating to activate.
- Check for dead batteries. Many digital thermostats are battery-powered. If the screen is blank or showing a low battery icon, replace the batteries.
- Ensure it’s in the right mode. Check that the thermostat is not in a “standby,” “holiday,” or “off” mode which would override your normal schedule.
A common mistake is turning the thermostat far higher than required, believing it will heat the room faster. It will not; the system simply stays on for a longer period to reach that higher temperature.
Check Boiler and System Pressure (Wet Systems)
For hydronic (wet) systems, the water pressure within the closed central heating circuit is critical for correct operation.
You can inspect the system pressure on a gauge, which is usually found on the front of your boiler or on the underfloor heating manifold.
Check out our Underfloor Heating Manifold Guide
Optimal Pressure Range
When the heating system is cold, the pressure gauge should ideally read between 1.0 and 1.5 bar. This range ensures there is enough pressure to circulate water effectively through the pipework. When the system heats up, the water expands, and the pressure will naturally rise slightly.
Low-Pressure Issues
If the gauge reads below 1.0 bar, the pressure is too low. This can lead to poor circulation, causing cold spots or preventing the system from heating up at all. Many modern boilers have a safety feature that will lock out and prevent the boiler from firing if the pressure drops too low, protecting the pump from damage. A pressure that drops frequently may indicate a leak somewhere in the system. Underfloor Heating Leaks - What Happens and What to Do.
How to Re-pressurise Your System
You can usually re-pressurise the system yourself using the filling loop. This is a braided hose that connects your mains water supply to the central heating circuit.
- Locate the filling loop, typically underneath your boiler.
- Ensure the heating is switched off and the system is cold.
- Open the valve on the filling loop slowly, allowing mains water to enter the heating circuit. You should hear the water flowing.
- Watch the pressure gauge closely. As the pressure rises, close the valve once it reaches the 1.5 bar mark.
- If your filling loop is detachable, you must disconnect it after use to comply with water regulations.
⚠️ Common Mistake: Always disconnect your filling loop after re-pressurising. A filling loop left connected or slowly leaking can cause continuous pressure increases.
Part 2: Diagnostic Procedures for Professionals
This is how qualified professionals test the more complex faults. You shouldn’t copy electrical tests you’re not trained to do, but knowing the process will help you explain the fault and understand the work involved.
Three-Tier Troubleshooting Approach
A good diagnosis works through three levels. Each one needs more technical knowledge and specialist equipment than the last.
Level 1: Basic User Checks (No Specialist Tools Required)
These are diagnostic steps you can perform safely without technical training:
For All Systems:
- Check the fused spur is switched on (usually located on the wall below the thermostat)
- Verify the circuit breaker in your consumer unit hasn’t tripped
- Ensure the thermostat is powered on and displays no error codes
- Confirm thermostat batteries are not flat (wireless models)
- Check that the thermostat is calling for heat (set temperature > current temperature)
- Verify system is not in holiday/standby mode
For Wet Systems:
- Check boiler pressure gauge reading (should be 1.0-1.5 bar when cold)
- Listen for circulation pump operation (low hum or slight vibration)
- Visually inspect manifold for leaks or weeping joints
- Check isolation valve positions (lever in line with pipe = open, 90° = closed)
For Electric Systems:
- Check the dedicated fused spur beneath the thermostat is switched on
- Remove any thermal blocks (rugs, dog beds, furniture) from over the floor sensor
- Verify floor temperature limit isn’t set too low (set to 35°C for testing)
Level 2: Qualified Electrician/Plumber Checks
These tests require a qualified professional with appropriate testing equipment:
Wet System Checks (Heating Engineer):
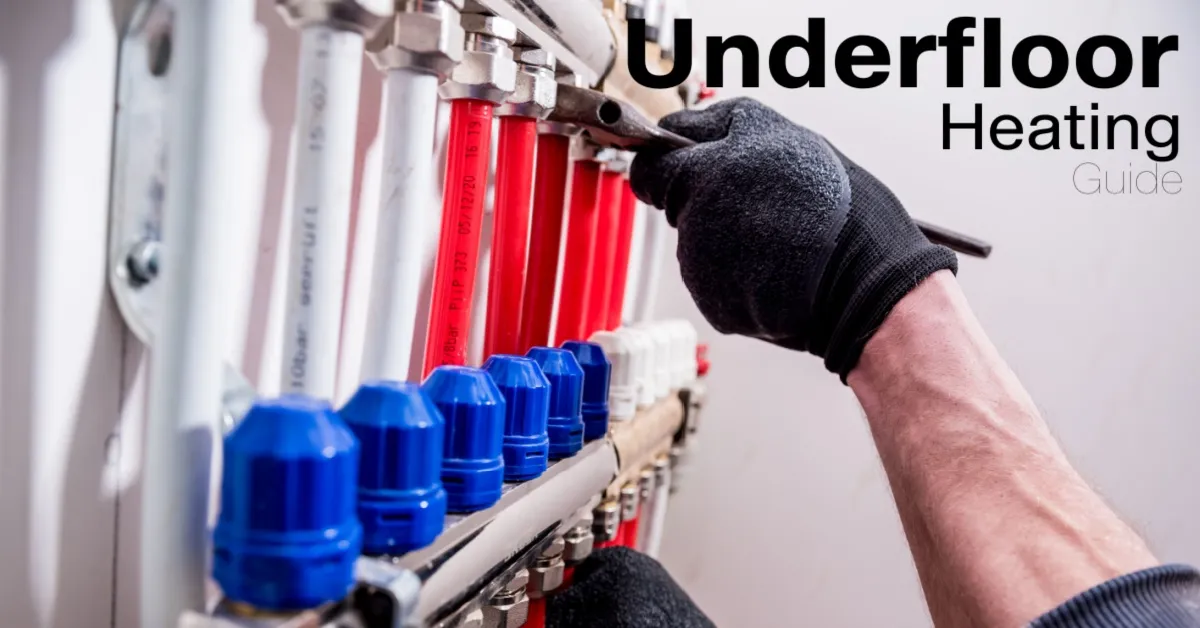
- Actuator Pin Valve Testing
- Remove actuator head from suspected faulty zone
- Check the pin valve underneath moves freely
- Use long-nose pliers to gently free stuck pins
- Apply silicone spray if pin is seized
- Look for visual indicator showing valve position (up = open, down = closed)
-
Blending Valve Inspection
- Remove thermostatic valve head from blending valve
- Check pin valve isn’t stuck down
- Free with silicone spray or long-nose pliers if required
-
Flow Gauge Adjustment
- Verify flow rates are correctly set for each zone
- Adjust according to manifold manufacturer’s specifications
- Ensure adequate flow reaches each loop
-
Expansion Vessel Integrity Test
- Locate the Schrader valve on the expansion vessel (similar to car tyre valve)
- Depress the needle with a small screwdriver
- If water escapes, the internal diaphragm has ruptured and vessel needs replacement
- If no water (just air), check pressure is around 2 bar
-
Leak Location Using Isolation
- Re-pressurise the system to normal operating pressure
- Close isolation valves to separate boiler side from manifold side
- Monitor pressure gauge on both sides
- Pressure drop on boiler side = leak in boiler circuit
- Pressure drop on manifold side = leak in underfloor pipe network
Electric System Checks (Qualified Electrician):
- Thermostat Wiring Verification
- Remove thermostat from wall mounting plate
- Check all connections are secure (no dry joints)
- Verify correct wiring to manufacturer’s diagram
- Test for 230V input to thermostat
- Test for 230V output when thermostat calls for heat
- Floor Sensor Probe Testing
- Disconnect sensor from thermostat
- Use multimeter to measure resistance
- Compare reading to manufacturer’s specification (common values: 10kΩ, 12kΩ, 50kΩ, 100kΩ at 25°C)
- Incorrect reading indicates faulty or incompatible sensor
Level 3: Specialist Circuit Testing (Qualified Electrician Only)
These advanced tests diagnose faults within the heating cables or system components:
For Electric Underfloor Heating:
-
Resistance Testing
- Power must be isolated before testing
- Measure resistance between live and neutral cores of each heating mat/cable
- Compare reading to manufacturer’s specification label on the cold tail
- Readings should match within ±5%
- Combined resistance of multiple circuits confirms total system loading
- Example: A 200W/m² mat covering 5m² should read approximately 264 ohms at 230V
-
Insulation Resistance Testing
- Performed using a 500V megohmmeter (megger)
- Tests for current leaking to earth through damaged insulation
- Test between live conductor and earth, then neutral conductor and earth
- Healthy reading: Greater than 200 MΩ (megohms)
- Failed reading: Less than 2 MΩ indicates damaged cable insulation
- Zero reading confirms serious cable damage causing RCD trips
-
Continuity Testing
- Tests for breaks in the heating element
- Multimeter measures resistance between live and neutral
- Normal: Matches manufacturer’s resistance specification
- Fault: Infinite (OL) reading indicates broken heating element
-
Direct Power Testing (Last Resort)
- Only performed if all other tests show no fault
- Heating mat/cable powered directly with 30mA RCD protection
- System should warm within 2 hours
- Use thermal block (towel/cushion) on cold floor to concentrate heat for testing
- If no heat develops, heating element has failed despite passing resistance test
For Wet Systems:

-
Pump Speed Setting Verification
- Many circulation pumps have adjustable speeds (I, II, III)
- Setting too low = inadequate circulation
- Setting too high = excess noise and energy consumption
- Match pump speed to system size per manufacturer’s guidance
-
Zone Isolation Diagnostic Method
- Isolate system to run on single zone only
- If heat source runs = actuator or airlock issue in that zone
- If heat source doesn’t run = thermostat or wiring issue
- Repeat for each zone systematically to map all faults
When to Escalate to a Professional
Immediate professional callout required for:
- Persistent pressure drops suggesting active leak
- Damp patches appearing on floors or walls
- Repeated RCD/MCB trips after reset
- Burning smell from any components
- Error codes that persist after battery replacement and reset
- Total system failure after basic checks
Can wait for scheduled service:
- Single zone not heating (after confirming thermostat/batteries OK)
- Minor pressure loss requiring top-up every few months
- Intermittent heating in some zones
- Slightly uneven heating across large floor areas
For complete guidance on when to call professionals, finding qualified experts, cost expectations, and what to expect from professional visits, see our When to Call a Professional for UFH Repairs Guide.
Troubleshooting Wet (Hydronic) Underfloor Heating Systems
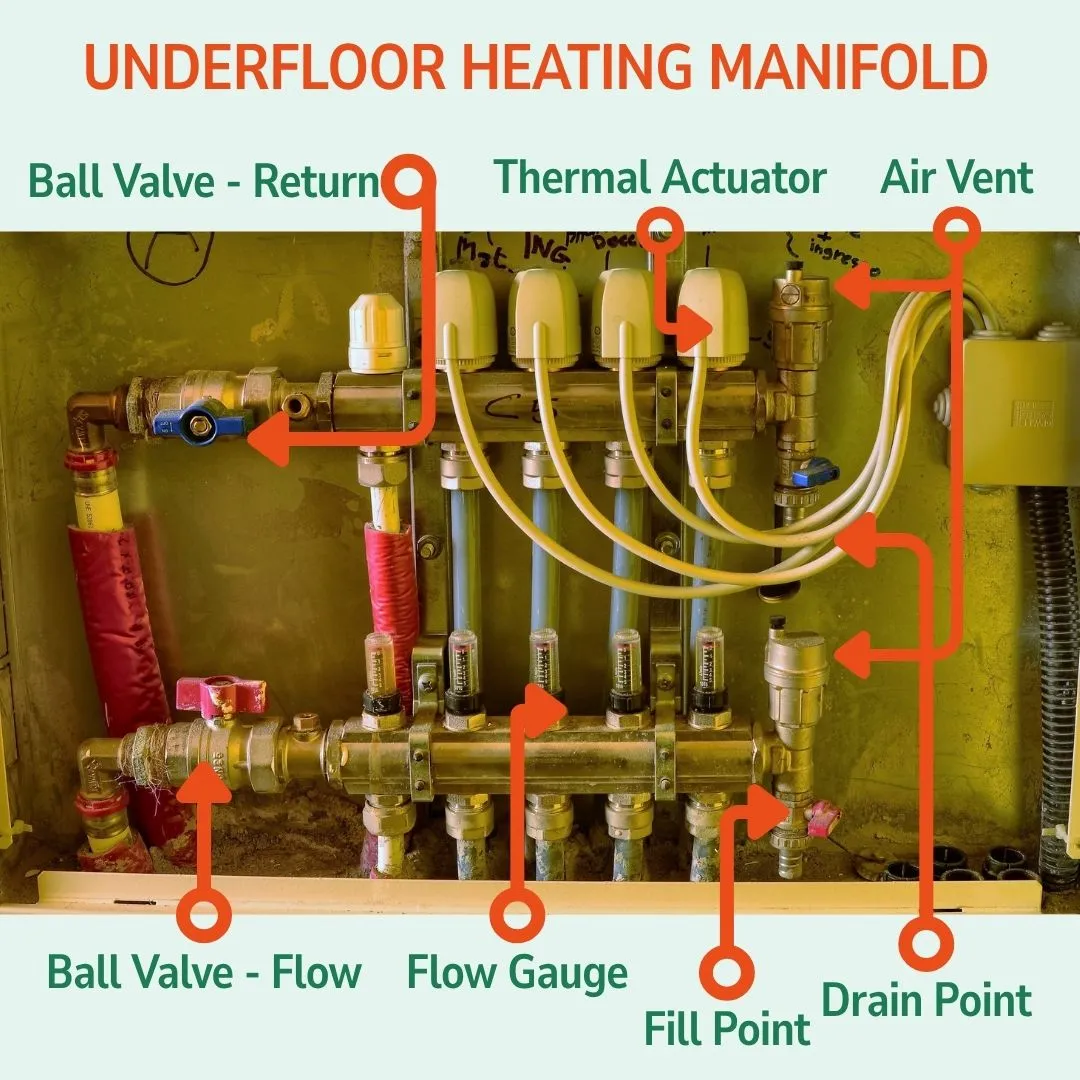
A wet underfloor heating system circulates warm water through pipes beneath the floor. The main parts are the boiler (the heat source), the manifold (which distributes water to different zones), actuators (which open and close individual pipe loops), the pump (which circulates the water) and the pipework itself. Find which part has stopped doing its job and you’ll usually find the fault.
Problem: Uneven Heating and Cold Spots
- Symptom: Some rooms or floor areas are warm while others remain stubbornly cold.
- Likely Cause: The most common cause is trapped air within the system’s pipe loops. Air prevents the free circulation of hot water, leading to cold patches.
- Solution: Bleeding the System
- Bleeding removes trapped air, allowing water to flow correctly through every loop. For cold spots in a wet system, bleeding the system to remove trapped air might resolve the issue.
- Step-by-Step Bleeding Guide:
- First, gather your tools. You will need a bucket or container, old towels, and a bleed key or a suitable screwdriver.
- Isolate the heating zones. On the manifold, turn off the water flow to all zones except for the single one you intend to bleed.
- Locate the bleed valve for that specific loop on the manifold. Place your bucket underneath it and slowly open the valve. You will hear a hissing sound as air escapes.
- Keep the valve open until water begins to flow out in a steady stream with no air bubbles. Promptly close the valve.
- Repeat this process for every zone in your system, one at a time.
- After bleeding all loops, check your boiler’s pressure gauge. It is likely to have dropped. You must re-pressurise the system according to your boiler manufacturer’s instructions.
Problem: System Losing Pressure or Total Heat Loss
- Symptom: The pressure gauge on your boiler consistently drops, forcing you to top it up frequently. In some cases, you may discover unexplained damp patches on or around the floor.
- Likely Cause: These symptoms strongly suggest a leak, either in the sub-floor pipework or at the manifold connections.
- Diagnosis:
- Frequent drops in system pressure or damp floor patches are key signs of a potentially damaging underfloor heating leak. Source
- Start with a careful visual inspection of the manifold. Look for any drips, signs of corrosion, or water stains on the surrounding pipes and floor.
- If no leak is visible at the manifold, the issue is likely within the pipework under the floor. Professionals use tools like thermal imaging cameras to locate the exact source of the leak without needing to lift the entire floor.
- Action: A leak requires immediate professional attention. Contact a qualified heating engineer to locate and repair the fault to prevent further damage to your property.
Problem: A Single Zone Not Working
- Symptom: One specific room or zone fails to heat up, while the rest of the system works perfectly.
- Likely Causes & How to Check:
- Faulty Actuator: The actuator is a small motor that opens and closes the valve for a specific zone. When the thermostat for that zone calls for heat, the actuator should open. Check for a visible pin or indicator on the actuator head that moves up or down to show it is operating.
- Stuck Manifold Valve: Beneath each actuator is a pin that is part of the manifold valve. Sometimes these pins can seize, especially after a long period of inactivity. You can test this by removing the actuator head and gently trying to press the pin down. It should move freely and spring back up.
- Airlock in a Single Loop: The cold zone may have an isolated airlock. Bleed just that specific loop using the step-by-step guide detailed earlier.
- Wiring Issue: There could be a faulty connection between the room thermostat, the wiring centre, and the actuator for that zone. Check that all wires are securely connected.
Diagnostic Tip: Use the zone isolation method (see Diagnostic Procedures section above). Isolate your system to run only the faulty zone. If the boiler still fires and the pump runs, the issue is with the actuator or an airlock. If the boiler doesn’t fire, the problem lies with the thermostat or wiring.
Problem: Multiple Zones Not Heating Up
-
Symptom: Two or more zones fail to heat, but not the entire system. Some zones may still work correctly.
-
Likely Causes:
- Common Airlock: Multiple zones can share a section of pipework before the manifold. An airlock in this common section will affect all zones downstream. Bleeding the system, starting with the affected zones, should resolve this.
- Multiple Thermostat Issues: If the affected zones are all controlled by battery-powered thermostats, check and replace batteries. Cold weather can cause batteries to drain faster.
- Manifold Component Failure: A stuck blending valve or closed isolation valve affecting a section of the manifold can prevent water reaching multiple zones.
- Wiring Board Issues: If multiple zones share a wiring board or relay, a fault here can affect all connected zones. This requires an electrician to diagnose.
-
Action: Check each affected zone’s thermostat first. Then inspect the manifold for any isolation valves that may have been accidentally closed. If thermostats and valves appear correct, call a heating engineer to inspect the manifold components and wiring.
Problem: All Zones Not Heating Up
- Symptom: Complete system failure. No zones are producing any heat, despite the thermostats calling for heat.
- Likely Causes: This indicates a fault affecting the entire system’s operation, not individual zones.
Diagnostic Steps:
-
Check the Boiler
- Verify the boiler has power and is attempting to fire
- Check the boiler pressure gauge reads 1.0-1.5 bar (low pressure will prevent firing)
- Look for error codes on the boiler’s display panel
-
Check the Power Supply to Wiring Boards
- Locate the main isolating switch for the underfloor heating system
- Ensure it is in the “on” position
- If switched off, no power reaches the wiring centre and no zones can operate
- Check for tripped breakers in the consumer unit
-
Listen for the Circulation Pump
- A working pump produces a low whirring sound or slight vibration
- If silent, the pump may have failed mechanically or lost electrical power
- Check the pump’s power connection and any dedicated isolation valve
-
Check for Boiler Signal Issues
- The boiler requires a signal from the wiring board to fire for underfloor heating
- A failed relay on the wiring board or loose connection can prevent this signal
- An electrician can test the relay and wiring board connections
-
Bleed the System for Major Airlock
- If the boiler fires and pump runs but pipes remain cold, suspect a major airlock
- Bleed each zone systematically as described in the earlier section
- Run an air purge cycle on your boiler/heat source if you know how
Action: If boiler pressure is correct and power is confirmed, but the system still doesn’t work, contact a heating engineer immediately. The fault likely requires specialist diagnosis of the boiler, pump, or wiring board.
Problem: High System Pressure
- Symptom: The pressure gauge reads significantly above 1.5 bar when the system is cold, or climbs to 2.5-3 bar when heating. The pressure relief valve may discharge water.
- Likely Causes:
-
Filling Loop Left Open or Leaking
- The most common cause of rising pressure
- Check both ends of the flexible filling loop hose are fully closed
- Even a slowly dripping filling loop can continuously add water
- Solution: Close both valves and disconnect the filling loop entirely (if detachable)
-
Failed Expansion Vessel
- The expansion vessel contains a flexible diaphragm that allows water to expand as it heats
- If the diaphragm ruptures, water fills the air side and pressure rises excessively
- Test: Depress the Schrader valve (like a car tyre valve) on the underside of the expansion vessel. If water escapes instead of air, the diaphragm has failed and the vessel needs replacing.
- Solution: A plumber must replace the expansion vessel
-
Empty Expansion Vessel (No Air Pressure)
- If the air side of the vessel has lost pressure, there’s no room for water to expand
- Test: If pressing the Schrader valve releases only a tiny puff of air (or none), the vessel is empty
- Solution: A plumber can repressurise the vessel. First, drain some water from the system to reduce pressure. Then use a foot pump to inflate the vessel to 2 bar through the Schrader valve. Finally, refill the water side to normal operating pressure.
-
Restriction or Blockage in Pipework
- Less common, but a partial blockage can cause pressure spikes when the pump runs
- Test: If pressure varies significantly when changing pump speed, suspect a restriction
- Note: Pumps installed close to valves may cause temporary pressure fluctuations on start-up (this is normal)
⚠️ Warning: High pressure (above 3 bar) can damage your boiler and system components. If pressure climbs dangerously high, carefully release water via the pressure relief valve or a drain point until it returns to the safe zone (1.0-1.5 bar).
Problem: Circulation Pump Won’t Turn Off
- Symptom: The pump runs continuously, even when all thermostats are satisfied and not calling for heat. This wastes electricity and can cause premature pump wear.
- Likely Causes:
-
Stuck Pump Relay on Wiring Board
- The relay that switches the pump on/off has jammed in the “on” position
- The relay may be faulty or dirty contacts may be welded together
- Action: An electrician should inspect and replace the wiring board or relay
-
Faulty Actuator Keeping System “On”
- If an actuator fails in the open position, the system thinks that zone still needs heat
- Even if the thermostat is satisfied, the actuator doesn’t close
- Action: Inspect each actuator. Look for visual indicators showing which valves are open. Manually test each thermostat by turning it to its lowest setting - the corresponding actuator should close. Replace any actuator that stays open.
-
Thermostat Stuck “Calling for Heat”
- A faulty thermostat may continuously send a “demand” signal
- Action: Turn off each thermostat one by one to identify which zone is causing the issue. Replace the faulty thermostat or check for low batteries.
Problem: Manifold Component Issues
Beyond actuator and pressure problems, several manifold components can fail and prevent proper operation:
Blending Valve Stuck
- Purpose: Blending valves mix hot water from the boiler with cooler return water to achieve the correct flow temperature for underfloor heating (typically 35-50°C)
- Symptom: Water too hot or too cold, or no flow at all
- Diagnosis: Remove the white thermostatic head from the blending valve. Check if the pin underneath is stuck down.
- Solution: Use silicone spray or long-nose pliers to free the pin. Replace the thermostatic head. If this doesn’t work, the entire valve may need replacing.
Flow Gauges Not Opened Correctly
- Purpose: Flow gauges (flow meters) on the manifold show and control the flow rate to each zone
- Symptom: Weak or no heat in zones despite actuators opening
- Diagnosis: Check each flow gauge’s indicator. It should show water flowing when the zone is calling for heat
- Solution: Adjust flow rates according to your manifold manufacturer’s specification. Each loop requires a specific flow rate based on pipe length and spacing. Refer to your system’s commissioning sheet or manual for the correct flow rates for your pipe spacing configuration.
⚠️ Note: Incorrect flow rates can cause uneven heating. Too little flow = cold spots. Too much flow = reduced efficiency and potential noise.
Isolation Valves Accidentally Closed
- Purpose: Isolation valves allow you to shut off water to the manifold for maintenance
- Symptom: Entire manifold or specific sections have no heat
- Diagnosis: Visual inspection of valve lever position
- Open position: Lever in line with the direction of the pipe
- Closed position: Lever at 90 degrees to the pipe
- Solution: Simply turn the lever to align with the pipe. The valve is now open.
Problem: Boiler Not Firing for Underfloor Heating
- Symptom: The boiler works fine for hot water or radiators, but won’t fire when the underfloor heating calls for heat.
- Likely Causes:
-
No Signal from Wiring Board to Boiler
- The wiring centre should send a signal to the boiler when any zone calls for heat
- A wiring fault or failed relay prevents this signal
- Test: An electrician can test for voltage at the boiler’s UFH input terminals when a stat calls for heat
- Solution: Repair faulty wiring or replace wiring board relay
-
Pump Relay Failure
- If the pump relay has failed, the pump won’t run
- Without water circulation, the boiler won’t fire (or will fire then lock out on high temperature)
- Solution: Electrician to replace relay or wiring board
-
Boiler Interlock System
- Modern boilers use interlock systems that require signals from all zones before firing
- A fault in the control logic can prevent the boiler responding
- Solution: Heating engineer to diagnose boiler control board
Problem: No Circulation or Gurgling Noises
- Symptom: The system is switched on and the boiler is running, but the manifold pipes feel cool. You may also hear distinct gurgling or bubbling sounds coming from the pipes.
- Likely Cause: This points to either a circulation pump failure or a significant airlock affecting the entire system.
- Diagnosis:
- Place your hand on the circulation pump. You should feel a slight vibration or hear a low hum, which indicates that the motor is running. If it is silent and cold, it may have failed.
- Check the speed settings on the pump. Some pumps have adjustable speeds; ensure it is set to an appropriate level (often II or III) for your system size.
- Widespread gurgling is a clear sign of a major airlock. This requires a full system bleed, addressing each loop individually to purge all the trapped air.
Troubleshooting Electric Underfloor Heating Systems
An electric underfloor heating system has three main parts. The heating mats or cables generate the warmth. The thermostat acts as the control unit. The floor sensor measures the floor’s temperature and reports it to the thermostat. When a problem occurs, it usually involves one of these components.
Problem: System Not Heating at All
Symptom: The floor remains completely cold. The system shows no signs of life across the entire heated area.
This is one of the most common electric underfloor heating faults. Before calling a professional, you can perform a few simple checks.
Step 1: Check the Fused Spur The fused spur is typically located on the wall beneath the thermostat. It looks like a standard switch with a removable fuse.
- Ensure the switch is in the “on” position
- If it has a neon indicator light, check if it’s illuminated (showing power)
- Check the fuse inside hasn’t blown (replace with correct rating if needed - typically 13A)
Step 2: Check the Consumer Unit Go to your consumer unit (fuse box) and look for the circuit labelled for underfloor heating:
- Look for a tripped circuit breaker or RCD - the switch will be in the “off” or middle position
- Try resetting it by switching it fully off, then back on
- If it trips again immediately: There is a serious electrical fault (likely damaged cable). Do not keep resetting it. Call an electrician.
- If it stays on: The temporary trip may have been a power surge. Proceed to the next check.
Step 3: Check the Thermostat Look at the thermostat’s display:
- Is it powered on and showing the current temperature?
- Is it set to a temperature higher than the current floor temperature?
- Does it display any error codes (see Error Codes section below)?
- For wireless thermostats, check the battery level
- A blank screen suggests no power reaching the thermostat
Step 4: Check for Heating Indicator Most thermostats have an indicator showing when they’re actively heating:
- Look for a flame symbol, wavy lines, or the display turning red
- If the indicator is on for 2+ hours but the floor remains cold, the issue is with the heating cable or wiring
- If the indicator never comes on, the thermostat may be faulty or incorrectly configured
Step 5: Remove Thermal Blocks Check if anything is blocking heat or affecting the floor sensor:
- Remove rugs, dog beds, or furniture from the heated area
- These can trap heat at the sensor, causing the thermostat to shut off heating prematurely
⚠️ Common Mistake: Setting the floor temperature limit too low. Many thermostats have a maximum floor temperature setting (separate from target room temperature). If this is set to 20°C, for example, the system will never heat properly. Set it to 35°C for testing purposes.
Step 6: Factory Reset If the thermostat powers on but doesn’t function correctly, try a factory reset:
- Locate the reset procedure in your thermostat’s manual
- Common method: Press and hold Mode + i buttons for 10 seconds
- After reset, reconfigure your heating schedule
If none of these steps restore heating, the fault requires electrical testing by a qualified electrician.
Electric System Error Codes
Modern thermostats display error codes to help diagnose problems. Here are the most common codes and their meanings:
E1 Error - Floor Sensor Problem
- Meaning: Floor sensor is disconnected, damaged, or reading outside expected range
- Quick Fix: Check sensor connection at back of thermostat. Ensure wire is firmly seated.
- If persists: Sensor may be damaged. An electrician can test its resistance value to confirm.
E2 Error - Floor Sensor Short Circuit
- Meaning: Sensor wires are touching (short circuit) or sensor has internal damage
- Quick Fix: Check sensor wires aren’t pinched or damaged where they exit the floor
- If persists: Sensor needs replacement
E4 Error - Internal Thermostat Fault
- Meaning: Thermostat’s internal components have failed
- Quick Fix: Try factory reset procedure
- If persists: Thermostat needs replacement
Other Error Codes Different manufacturers use different codes. Always check your specific thermostat manual. If an error code persists after:
- Replacing batteries (wireless models)
- Checking all connections
- Performing a factory reset
Then the component displaying the error likely needs replacing.
Problem: System Trips the Power
Symptom: The system causes the RCD or circuit breaker at your consumer unit to trip. This may happen immediately when switched on, after running for a few minutes, or intermittently.
A trip indicates a serious electrical fault that acts as a safety measure. Understanding which type of device has tripped helps identify the problem.
Understanding RCD vs MCB Trips
RCD (Residual Current Device) Trip:
- What it protects against: Current leaking to earth
- What caused it: This nearly always means damaged heating cable insulation
- How damage occurs:
- Screw or nail piercing the cable during installation or renovations
- Trowel or tile cutter damaging the cable during flooring work
- Compression damage from heavy furniture or dropped tools
- Moisture ingress into damaged cable insulation
- Identifying RCD trip: The RCD will be labelled “RCD” or show a “T” test button
- What to do: Do not keep resetting. Cable damage requires professional diagnosis and repair.
MCB (Miniature Circuit Breaker) Trip:
- What it protects against: Overcurrent or short circuit
- What caused it:
- Short circuit: Live and neutral wires touching inside the heating cable (severe damage)
- Overcurrent: Total system load exceeds circuit breaker rating
- Incorrectly sized circuit breaker for the heating load
- Identifying MCB trip: The MCB will be labelled with an amperage rating (e.g., 16A, 20A)
- What to do: Check total system wattage doesn’t exceed circuit capacity. If load is correct, suspect cable damage.
Calculating System Load
To check if your system overloads the circuit:
- Add up total wattage of all heating mats/cables (check specification labels)
- Divide by voltage (230V in UK) to get amperage
- Example: 3,000W ÷ 230V = 13.0 Amps
- Circuit breaker must be rated higher than this (e.g., 16A minimum for this example)
Diagnosis by a Qualified Electrician:
-
Insulation Resistance Test (for RCD trips)
- Uses a megohmmeter (megger) set to 500V
- Tests for current leaking to earth
- Healthy reading: Greater than 200 MΩ (megohms)
- Failed reading: Less than 2 MΩ indicates damaged insulation
- Zero reading: Serious cable damage
-
Continuity Test (for MCB trips)
- Multimeter measures resistance between live and neutral
- Normal: Reading matches manufacturer’s specification on cable label
- Fault: Infinite (OL) reading indicates broken heating element
- Short circuit: Near-zero reading indicates live and neutral touching
-
Finding the Exact Damage Location
- Specialist companies use thermal imaging or TDR (Time Domain Reflectometry)
- Pinpoints damage to within a few centimetres
- Allows targeted floor lifting instead of replacing entire system
Cable Repair Options:
Modern heating cable repairs are often possible without complete replacement:
- Repair kits available: Specialist kits can fix small sections of damaged cable
- Cost consideration: Cable repair typically costs 60-80% less than full system replacement
- Limitations: Repairs must be carried out by a qualified electrician and may affect warranty
- When full replacement needed: Extensive damage, multiple fault points, or very old systems
⚠️ Safety Warning: Never attempt DIY repairs on damaged heating cables. Always use a qualified electrician. Improper repairs can cause electric shock, fire, or further system damage.
Problem: System Overload / Maximum Power Exceeded
Symptom: Thermostat feels hot to touch, displays overheat warnings, or cuts out intermittently during heating.
Cause: The total wattage of connected heating mats/cables exceeds the thermostat’s maximum rating.
Modern thermostats have maximum power ratings, typically:
- Standard thermostats: 3,000W - 3,600W (13-16A)
- High-power thermostats: 3,680W - 3,840W (16A)
How It Happens:
- Multiple heating mats connected to a single thermostat
- Larger area heated than thermostat designed for
- Incorrect thermostat specified during installation
Solution:
- Calculate total system wattage (add up all mat/cable ratings)
- Check thermostat’s maximum rating (in manual or on back of unit)
- If total exceeds maximum:
- Split system across multiple thermostats with separate circuits
- Replace with higher-rated thermostat (if available)
- Install a contactor to switch high loads
⚠️ Safety Concern: Operating a thermostat above its rated capacity creates a fire risk. Address this immediately.
Problem: Unexpectedly High Running Costs
Symptom: Electricity bills are much higher than expected, or higher than comparable heating methods.
Electric underfloor heating is more expensive to run than water-based systems. However, if costs seem excessive, several factors might be responsible:
1. Poor Insulation Underneath System
- Heat escaping downwards instead of rising into the room
- Especially common in ground floor rooms without insulation boards
- Impact: Can increase running costs by 30-50%
- Solution: Cannot be added retrospectively. Factor into future installations.
2. Thermostat Programming Issues
- System running when property is unoccupied
- Temperature set higher than necessary
- Floor sensor mode vs air sensor mode confusion
- Solution: Review and optimise programming. Use schedules and setback temperatures.
3. System Not Suited to Room
- Electric UFH used as primary heating in large, poorly insulated rooms
- System oversized for the space
- Solution: Electric UFH works best as supplementary heating in small rooms (bathrooms, en-suites). For whole-house heating, wet systems are more economical.
4. Unrealistic Expectations
- Comparing to gas central heating costs (electric is typically 3-4x more expensive per kWh)
- Expecting instant heat-up like radiators (UFH takes 1-2 hours to reach temperature)
- Solution: Understand typical running costs: 5m² bathroom = £0.15-0.30 per hour at current electric rates
Reducing Running Costs:
- Lower target temperature by 1-2°C
- Use timers to heat only when needed
- Ensure floor covering has low thermal resistance (TOG rating <1.5)
- Close doors to retain heat
- Consider switching to Economy 7 tariff and heating overnight
For detailed running cost analysis and ROI calculations, see our Complete UFH Costs Guide.
Problem: Installation Mistakes
Symptom: System never worked properly from installation, or problems appeared shortly after commissioning.
Common installation errors that cause problems:
1. Wrong Sensor for Controller
- Controllers require specific sensor resistance values (10kΩ, 12kΩ, 50kΩ, or 100kΩ at 25°C)
- Using incompatible sensor gives false temperature readings
- Solution: Electrician verifies sensor matches controller specification or adjusts controller settings if sensor type is selectable
2. Incorrect Sensor Placement
- Too close to heating cable (reads too hot)
- Under furniture or in cold spot (reads incorrectly)
- In direct sunlight or near radiator
- Solution: Sensor should be between two heating runs, in a neutral location. Difficult to fix without lifting floor.
3. Damaged Cable During Installation
- Trowel cuts during levelling compound application
- Tile cutter nicks cable
- Furniture dropped on cable before floor protection
- Solution: Always perform insulation resistance test before covering cable. Test again before energising system.
4. Incorrect Cable Spacing
- Cables too close together (overheating risk)
- Cables too far apart (cold spots, inadequate heat output)
- Solution: Follow manufacturer’s installation plan exactly. Typical spacing 100-150mm for 150W/m² systems. Proper spacing is critical for even heat distribution and system efficiency.
5. Thermostat Misconfiguration
- Floor sensor mode vs air sensor mode incorrect
- Maximum floor temperature set too low
- Wrong floor type selected (carpet vs tile settings)
- Solution: Check all advanced settings match your installation. Perform factory reset and reconfigure.
⚠️ Prevention: Always use qualified installers who test systems before covering. Many problems are easily fixed during installation but very costly afterwards.
Problem: Floor Overheats or Doesn’t Reach Temperature
Symptom: The floor either gets much hotter than the temperature set on the thermostat or never feels warm enough.
This issue is almost always caused by a problem with the floor sensor probe. The thermostat relies on this sensor for accurate readings to control the heat.
Diagnosis The location and condition of the sensor are critical for correct system function.
- Incorrect Sensor Placement: The sensor must be placed in a neutral area, midway between two heating runs. If it is placed in direct sunlight, near another heat source like a radiator, or under a thick rug, it will sense a higher temperature than the rest of the floor. This gives a false reading, causing the thermostat to turn the heating off too soon.
- Faulty Sensor Probe: The sensor itself can fail over time. An electrician can disconnect the sensor from the thermostat and measure its resistance with a multimeter. This reading can be checked against the manufacturer’s data sheet to confirm if it is working correctly.
- Incorrect Thermostat Settings: Many thermostats can operate in different modes. It might be set to “air sensor” mode, using its internal sensor to measure the room’s air temperature instead of the floor temperature. Ensure the thermostat is set to “floor sensor” mode for correct operation. Using the wrong setting is a common mistake that prevents the system from working efficiently. Common mistakes made with underfloor heating thermostats.
Advanced Thermostat Troubleshooting for All Systems
Modern thermostats offer precise control but can introduce new challenges. Connectivity and configuration issues are common but often have straightforward solutions. This guide addresses advanced troubleshooting for smart and zoned systems.
Smart Thermostat Connectivity Issues
For guidance on choosing the right smart thermostat for your system, see our Ultimate Guide to Smart Thermostats.
A smart thermostat that cannot connect to the internet loses its key features. Remote control and scheduling will fail, though it may still function as a basic manual thermostat.
Wi-Fi Connection Loss
When your thermostat disconnects from your home network, follow a structured approach. Start with the simplest fixes before moving to more complex steps.
- Check Network Status: First, confirm your home Wi-Fi is working. Use a phone or laptop to see if you can access the internet. If other devices are offline, the problem is with your router or internet service.
- Reboot Devices: The most common fix is a simple power cycle. Turn off the thermostat, your Wi-Fi router, and any smart home hubs. Wait one minute before turning them back on, starting with the router.
- Verify Password: Ensure the correct Wi-Fi password has been entered in the thermostat’s settings. A router reset or password change can cause this issue.
If these steps fail, investigate your network’s configuration.
- Check Signal Strength: A weak signal at the thermostat’s location can cause intermittent drops. Obstacles like thick walls or metal appliances can interfere with the signal.
- Confirm Network Band: Many smart thermostats only work on a 2.4GHz Wi-Fi network. They are often not compatible with 5GHz-only networks. Check your router settings to ensure a 2.4GHz band is active.
App or Hub Unresponsiveness
Sometimes the Wi-Fi connection is stable, but the control app or hub fails to respond. This points to a software or communication glitch.
- Update the App: Check your phone’s app store for any updates to the thermostat manufacturer’s application.
- Clear App Cache: On your phone, go to the application settings and clear the cache for the thermostat app. This can resolve performance issues.
- Reinstall the App: If problems persist, uninstalling and then reinstalling the app can re-establish a clean connection with the system.
Zonal Control Errors
Systems like Honeywell Evohome or Tado use multiple components to manage different heating zones. An error in one part can affect the entire system.
If a specific zone is not responding, check the communication link between the main controller, the thermostat for that zone, and the manifold actuator. Rebooting the central hub or bridge often resolves these communication errors. You should also check the battery levels in any wireless thermostats or sensors.
Optimizing Zonal Control
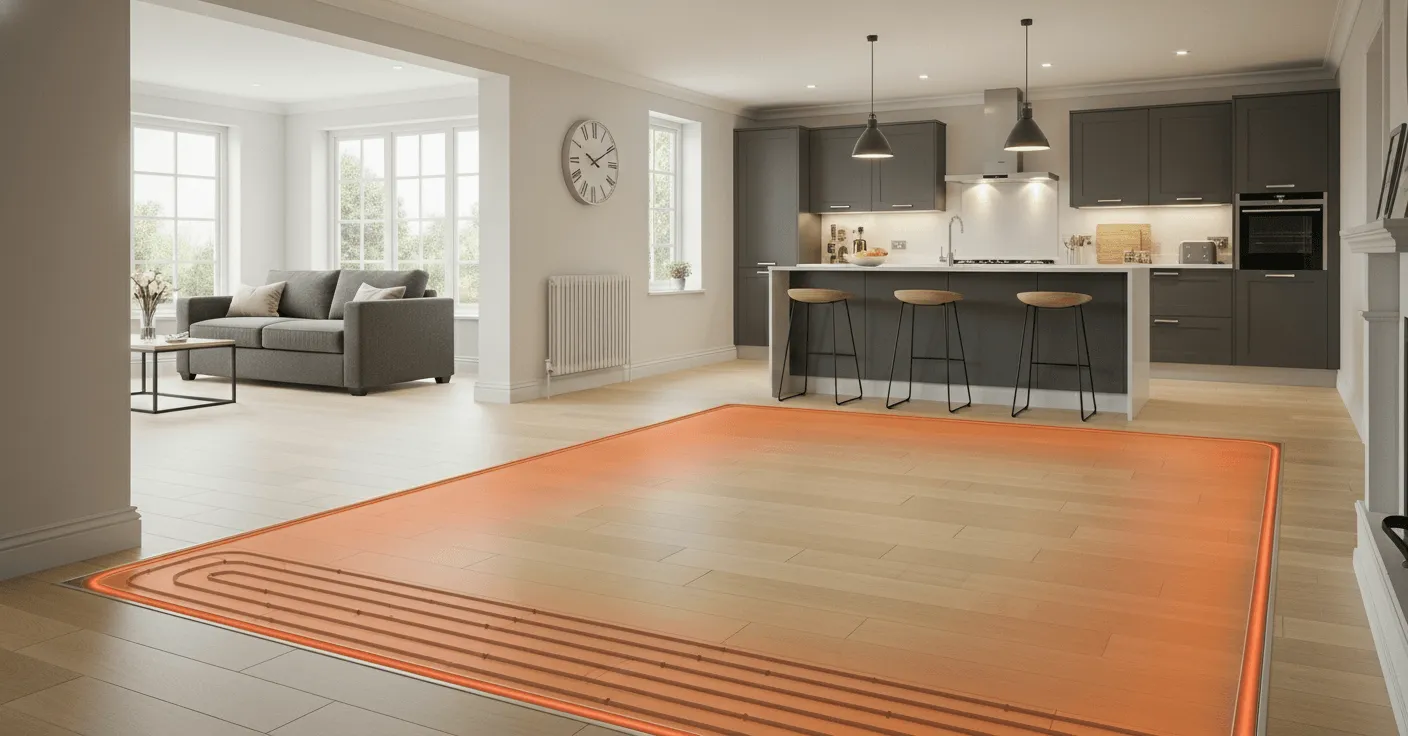
A well-configured zonal system ensures comfort and efficiency. Smart thermostats can both cause issues and help diagnose them.
How Smart Thermostats Can Help Diagnose Problems
Smart systems provide real-time data that helps pinpoint underfloor heating problems. If a room feels cold, the system’s app can offer clues.
For example, if the app shows a zone is actively calling for heat but the floor remains cold, the issue is not the thermostat. The fault likely lies with the manifold actuator for that zone, an air lock in the pipe loop, or a wiring fault. This insight saves time by directing your focus to the physical components of the system. In this situation, bleeding the specific loop may resolve the cold spot.
Ensuring Correct Actuator Pairing
Each thermostat in a zoned system controls a specific actuator on the underfloor heating manifold. If the wiring is incorrect, one thermostat will operate the wrong room.
To check this:
- Turn all zones off at their respective thermostats.
- Turn one zone on and set it to a high temperature.
- Go to the manifold and observe which actuator opens. Most actuators have a visual indicator that pops up when the valve is open.
- Confirm that the actuator that opened corresponds to the correct room.
- Repeat this process for every zone to ensure each thermostat controls the correct loop.
If you find a mismatch, the wiring between the thermostat and the wiring centre needs to be corrected.
Calibrating Thermostats for Accurate Temperature Readings
A thermostat’s reading can be skewed by its location. Direct sunlight, draughts, or proximity to other heat sources can cause it to read the temperature inaccurately.
Most quality smart thermostats have a calibration or temperature offset feature in their advanced settings menu.
- Place a reliable, calibrated thermometer in the centre of the room, away from draughts or heat sources.
- Leave it for at least 30 minutes to get an accurate reading of the ambient room temperature.
- Compare this reading to the temperature displayed on the underfloor heating thermostat.
- If there is a difference, use the thermostat’s offset feature to adjust it. For example, if the room is 20°C but the thermostat reads 21.5°C, you would apply a -1.5°C offset.
Accurate calibration ensures the system runs efficiently and maintains the desired comfort level. It prevents the system from running unnecessarily or shutting off too soon. Remember, setting a thermostat higher than needed does not make the room heat up faster; it simply forces the system to run for longer.
Proactive Maintenance for Long-Term System Health
Regular checks keep your underfloor heating running efficiently for decades. Catch a small pressure drop, sticky valve or weak actuator early and you can avoid a much more expensive failure.
Creating a Maintenance Schedule
Combine a professional service with a few simple checks of your own. That covers the critical components without turning maintenance into a constant job.
Annual Professional Service (Wet Systems)
Wet UFH systems benefit from a professional service once a year. This inspection should include checking the manifold valves and bleeding any trapped air from the system. How to Maintain Your Underfloor Heating for Long-Term Performance A technician can spot early signs of wear on pumps and actuators, preventing unexpected breakdowns.
For a complete maintenance checklist and service schedule, see our UFH Maintenance Guide.
DIY Annual Checks
You can perform several quick checks annually to monitor your system’s health:
- Inspect the manifold: Visually check the manifold and its connections for any signs of weeping or leaks. Address small drips before they become serious.
- Check system pressure: Note the pressure reading on the gauge when the system is cold. A consistent drop may indicate a leak.
- Test the thermostat: Ensure the thermostat is communicating correctly with the system. Check and replace the batteries if it is battery-operated.
The Foundation of Efficiency: Insulation and System Longevity
Don’t overlook the insulation. If heat escapes downwards, the system works harder and a perfectly sound UFH installation can look faulty, with high bills and uneven heating.
Get the insulation right from the start and the UFH pipework can last for over 50 years. The pipes last well, but pumps, valves and actuators will still need maintenance or replacement during the system’s life. Underfloor Heating & Heat Pumps: 2026 UK Guide
The best way to troubleshoot UFH is to work in a fixed order. Start with the simple checks and only move on when you’ve ruled them out.
Focus on these core areas:
- Power and Thermostat: First, confirm your system has power by checking the circuit breaker. Then, examine the thermostat to ensure it has power and is correctly set to call for heat. Remember that turning the thermostat higher than needed does not speed up heating.
- System-Specific Faults: For wet systems, issues often involve air or pressure. Trapped air can create cold spots and may require bleeding the system to fix. Electric systems, by contrast, are more likely to suffer from electrical faults like a damaged heating cable.
Many faults have simple fixes. If you feel confident, adjust the thermostat settings, check for tripped breakers or bleed an individual loop. You may solve the problem without spending anything.
Know when to stop. Damp patches or constantly falling pressure can signal a water leak, so get expert help straight away to limit property damage. (Underfloor Heating Leaks - What Happens and What to Do Any electrical fault needs a certified electrician too. Keep up with regular maintenance, including an annual professional service for wet systems, and you’ll prevent many of these faults before they start. (How to Maintain Your Underfloor Heating for Long-Term Performance
Frequently Asked Questions
How do I reset my underfloor heating system?
The reset procedure depends on your system type:
For Electric Systems: Most thermostats can be factory reset by pressing and holding the Mode + i buttons simultaneously for approximately 10 seconds. The display should show “reset” or return to factory defaults. Check your specific thermostat manual, as the procedure varies by manufacturer.
For Wet Systems: There’s no single “reset” button for hydronic systems. To reset the system:
- Turn off all zone thermostats
- Switch off the boiler and circulation pump at the isolator switch
- Wait 2-3 minutes for all components to power down completely
- Turn the boiler and pump back on
- Gradually turn on each zone thermostat
This power cycle often resolves temporary communication errors or sensor glitches.
Does underfloor heating often break down?
No, underfloor heating is generally very reliable when properly installed and maintained. The core components have excellent longevity:
- Wet system pipework: Can last 50+ years with minimal maintenance
- Electric heating cables: Typically last the lifetime of the floor (20-30+ years)
- Thermostats and controls: 10-15 years average lifespan
- Actuators and pumps: 10-20 years, but may require occasional replacement
Most “breakdowns” are actually:
- Simple thermostat battery failures
- Tripped circuit breakers
- Airlocks that develop over time in wet systems
- Configuration errors rather than component failures
Annual servicing for wet systems and basic checks for electric systems prevent most serious issues.
How often does underfloor heating need servicing?
Wet (Hydronic) Systems:
- Professional service: Once per year, ideally before the heating season
- Service includes: Manifold inspection, bleeding airlocks, checking actuators, testing pump operation, pressure check
- DIY checks: Every 3-6 months (visual manifold inspection, pressure gauge reading)
Electric Systems:
- Professional service: Not typically required unless problems develop
- DIY checks: Annually check thermostat batteries, test system operation, verify no error codes
- When to call professional: If error codes appear, heating becomes uneven, or system doesn’t respond to controls
Both Systems:
- Check and replace thermostat batteries annually (wireless models)
- Test system operation before heating season starts
- Keep area around manifold/controls clear and dust-free
Can I repair damaged heating cables myself?
No, you should never attempt DIY repairs on electric heating cables. This work must always be carried out by a qualified electrician for several critical reasons:
Safety Risks:
- Electric shock hazard when working with mains voltage cables
- Fire risk from improper connections or insulation
- Risk of further damage to adjacent cable sections
Technical Requirements:
- Requires specialist repair kits designed for specific cable types
- Needs proper insulation resistance testing before and after repair
- Must maintain earth bonding and cable shielding integrity
- Requires knowledge of correct heat-shrink application and sealing
Warranty and Insurance:
- DIY repairs will void manufacturer warranties
- May invalidate home insurance if fault causes fire or damage
- Professional repairs maintain certification trail for insurance claims
When Repair is Possible: A qualified electrician can often repair localised cable damage using specialist kits, typically costing 60-80% less than full system replacement. However, extensive damage, multiple fault points, or very old systems may require complete replacement.
Which type of flooring works best with underfloor heating?
Different floor coverings have varying heat conductivity and compatibility with underfloor heating:
Best (Most Efficient):
- Ceramic and porcelain tiles - Excellent heat conductivity, retains warmth well, ideal for UFH
- Natural stone (marble, slate, travertine) - Superior heat transfer, creates thermal mass
- Polished concrete - Modern aesthetic with excellent thermal properties
Good (Suitable with Precautions): 4. Engineered wood - Must be UFH-rated, keep moisture content 6-9%, max temperature 27°C 5. Luxury vinyl tiles (LVT) - Check manufacturer’s UFH compatibility, ensure TOG <1.5 6. Laminate flooring - Must be specified for UFH use, requires underlay TOG <1.0
Acceptable (Reduced Efficiency): 7. Carpet - Combined carpet + underlay TOG must be <1.5 (preferably <2.5 for heat pump systems)
- Hessian-backed carpets work better than foam-backed
- Avoid thick underlay
Not Recommended:
- Solid wood flooring (prone to movement, cracking, and cupping from heat)
- Very thick carpets or underlay (excessive insulation prevents heat transfer)
- Rubber flooring (can degrade from constant heat exposure)
Key Consideration - TOG Rating: TOG measures thermal resistance. Lower TOG = better heat transfer:
- TOG 0.0-1.0: Excellent (tiles, stone, vinyl)
- TOG 1.0-1.5: Good (thin laminate, engineered wood)
- TOG 1.5-2.5: Acceptable but reduced efficiency (carpet)
- TOG >2.5: Poor heat transfer, not recommended
Always verify your chosen flooring is rated for underfloor heating before installation to avoid damage and ensure efficient operation.
For room-specific recommendations and heat output comparisons, see our Best Flooring for Underfloor Heating Guide.
Why is my electric underfloor heating expensive to run?
Electric underfloor heating costs more to operate than wet systems for fundamental reasons:
1. Energy Source Cost Difference:
- Electricity: Approximately 24-34p per kWh (depending on tariff and supplier)
- Gas: Approximately 6-10p per kWh
- This makes electric heating 3-4x more expensive per unit of heat generated
2. Best-Use Scenarios for Electric UFH: Electric systems are most cost-effective when used appropriately:
- Ideal: Small rooms (bathrooms, en-suites, cloakrooms) as supplementary heating
- Acceptable: Kitchens, utility rooms with good insulation
- Not ideal: Primary heating for whole house or large open-plan areas
3. Factors Increasing Costs:
- Poor insulation underneath: Heat escapes downwards (30-50% cost increase)
- Inefficient programming: Running when property empty
- Thick floor coverings: High TOG carpet/underlay reduces efficiency
- Oversized system: Heating larger area than needed
- No use of timers: Continuous operation instead of scheduled heating
4. Reducing Running Costs:
- Use timers to heat only occupied hours
- Lower target temperature by 1-2°C
- Consider Economy 7 tariff (cheaper night-time electricity)
- Ensure good insulation under system and in room
- Use floor sensor mode (more efficient than air sensor mode)
- Zone heating - only heat rooms in use
5. Realistic Cost Expectations:
- 5m² bathroom: £0.15-0.30 per hour to run
- 10m² bathroom: £0.30-0.60 per hour to run
- Typical usage: 2-3 hours daily = £15-25 per month per room
Alternative: For whole-house heating or large areas, water-based underfloor heating powered by a gas boiler or heat pump is significantly more economical to run.
What’s the difference between an RCD trip and an MCB trip?
Understanding which protective device has tripped helps identify the type of electrical fault:
RCD (Residual Current Device) Trip:
- What it detects: Current leaking to earth (ground)
- Typical cause in UFH: Damaged cable insulation allowing current to leak
- How to identify:
- Labelled “RCD” on the consumer unit
- Has a “T” test button
- Often protects multiple circuits
- May say “30mA” or similar
- What it means: This nearly always indicates damaged heating cable
- Action required: Do not reset repeatedly - call qualified electrician
MCB (Miniature Circuit Breaker) Trip:
- What it detects: Overcurrent or short circuit
- Typical causes in UFH:
- Short circuit: Live and neutral wires touching (severe cable damage)
- Overcurrent: System load exceeds circuit rating
- Incorrectly sized circuit breaker
- How to identify:
- Labelled with amperage rating (e.g., “16A”, “20A”, “32A”)
- Usually protects single circuit
- No test button
- What it means: Either serious cable damage or system overload
- Action required: Check system wattage doesn’t exceed circuit capacity. If correct, indicates cable fault.
Visual Identification in Consumer Unit:
RCD: [T] ← Has test button
     30mA
     Several circuits protected

MCB: 16A ← Amperage rating only
     Single circuit
     No test button
Why It Matters:
- RCD trip = Insulation damage → Needs insulation resistance testing
- MCB trip = Overcurrent or short → Needs load calculation or continuity testing
Both require investigation by a qualified electrician if they trip repeatedly when the UFH system operates. Never bypass safety devices or fit higher-rated breakers without professional assessment.
How long should underfloor heating take to warm up?
The warm-up time for underfloor heating varies significantly based on several factors:
Typical Warm-Up Times:
Electric Systems:
- Tiled floors: 30-60 minutes to feel warm
- Laminate/wood floors: 45-90 minutes
- Carpeted floors: 60-120 minutes (due to insulation effect)
Wet (Hydronic) Systems:
- Tiled floors with screed: 2-3 hours to reach comfortable warmth
- Tiled floors with liquid screed: 1.5-2.5 hours (slightly faster)
- Timber suspended floors: 1-2 hours (less thermal mass)
- Thick concrete slab: 3-4 hours (significant thermal mass)
Factors Affecting Warm-Up Speed:
-
Floor Construction:
- Thin coverings heat faster (tiles directly on mat)
- Thick screed takes longer (stores more heat, then releases slowly)
- Insulation underneath improves response time
-
Starting Temperature:
- Room at 15°C warms faster than room at 10°C
- First use of the season takes longest
-
Target Temperature:
- Reaching 20°C is faster than reaching 24°C
- Each additional degree takes progressively longer
-
System Power Output:
- 150W/m² systems heat faster than 100W/m² systems
- Correctly sized system reaches temperature quicker
-
Room Insulation:
- Well-insulated rooms retain heat and require less recovery time
- Draughty rooms lose heat as fast as it’s generated
Common Mistake: Turning the thermostat higher does NOT make the system heat faster - it just makes it run longer to reach a higher final temperature. UFH provides constant, gentle heat rather than rapid temperature changes.
Optimisation Tips:
- Use programmable thermostats with advance start function
- Set heating to come on 1-2 hours before you wake up or arrive home
- Maintain constant lower temperature (18-19°C) rather than turning on/off completely
- For wet systems, keep flow temperature consistent rather than frequently adjusting
Related guides
- DIY or Professional Underfloor Heating Installation: What to Choose
- Underfloor Heating in Extensions: A UK Planning Guide
- Underfloor Heating for Garages & Garden Rooms: UK Guide 2026
- Boiler Upgrade Scheme Changes on 21 July: £9,000 Grants Explained
- Underfloor Heating Grants UK: Warm Homes Local Grant Explained
- Renting with Underfloor Heating: What to Expect (UK Guide 2026)
One useful email,
once a month.
New guides as they go live. Real cost data, not press releases. The occasional rumour from the industry that's actually worth knowing.
No sales pitches. No jargon. Unsubscribe in one click.