Guided reading
Not sure where to start?
Answer three quick questions and we will point you to the right guides for your project.
Find your starting pointThree questions. About 30 seconds. No sign-up.
Quick Answer: A new build is the cheapest and easiest time to install underfloor heating. Wet systems cost £40–£80/m² in a new build versus £90–£190/m² for retrofit, nearly 50% less. Electric costs £60–£120/m² either way. Heat pump + wet UFH is now the go-to combination for Future Homes Standard compliance (2025). Specify it at foundation stage so it fits properly into the build. Use underfloorheating.info for further planning guidance and the Underfloor Heating Directory when you're ready to compare project options.
Ready to get quotes? Compare free estimates from trusted installers via the Underfloor Heating Directory.
Why UFH Makes Sense in a New Build
Building a new house or commissioning a development? Put underfloor heating near the top of your specification list. The construction process already gives you the right conditions, and you'll save a lot compared with retrofitting it later.
No Existing Flooring to Lift
The retrofit problem: Adding UFH to an existing property means lifting floors, removing tiles or carpet and often raising floor levels. Every part adds cost, disruption and complexity.
The new build advantage: You design the floor slab around the UFH system. The installer lays pipes or electric mats on the insulation before the screed goes down. There's nothing to lift, no floor height mismatch to solve and nobody living through the disruption.
Cost impact: Labour costs for wet UFH installation in a new build are 40–50% lower than retrofit because there is no demolition, disposal, or floor-level matching required.
Concrete Slab Poured Around Pipes
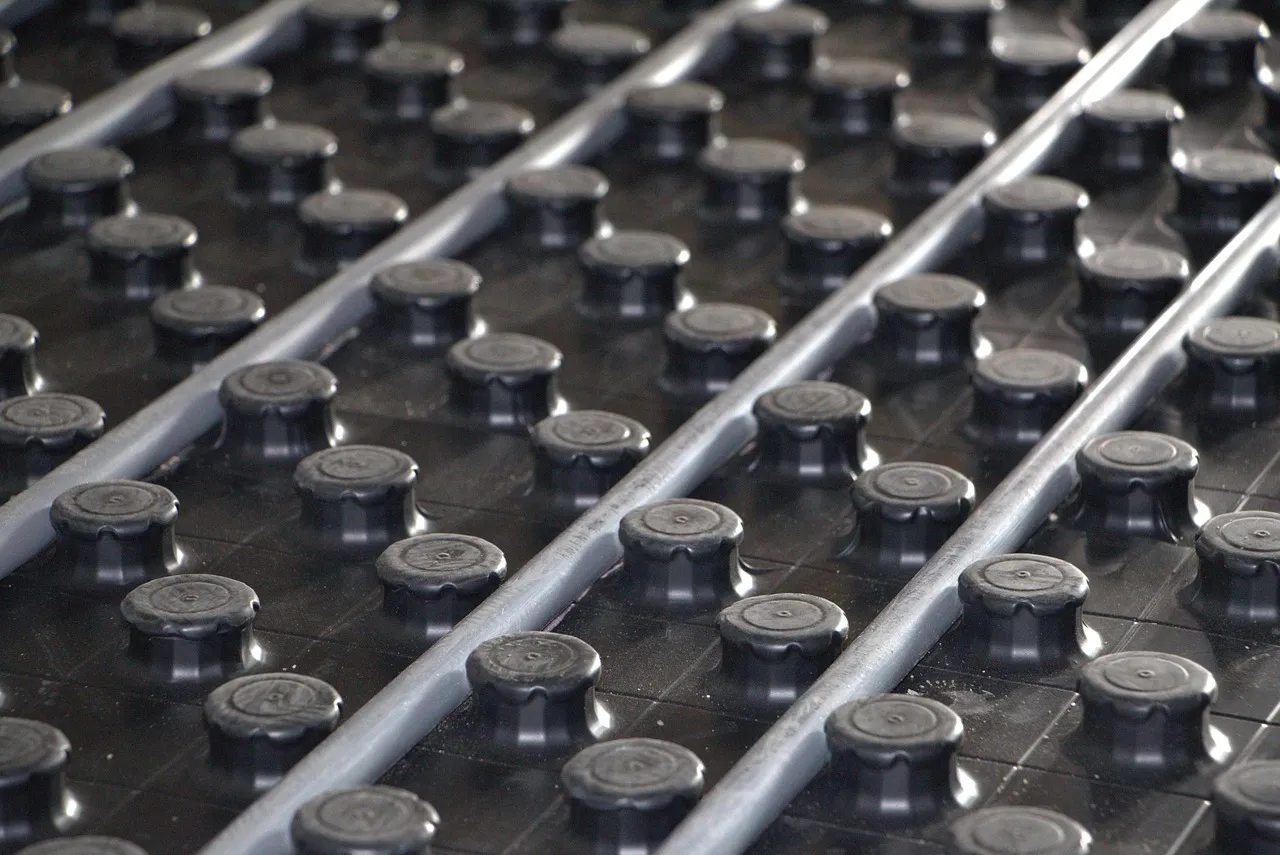
How it works: In a new build, the wet UFH pipes are laid directly on the insulation layer that sits on top of the ground-bearing concrete slab or suspended floor structure. The screed is then poured over the pipes, fully encasing them and creating perfect thermal contact.
Thermal mass benefits: The screed absorbs heat and releases it slowly, giving you steady, even warmth. In effect, the whole floor becomes a large thermal store, reducing temperature swings and improving comfort.
Structural integrity: Because the pipes are integrated into the floor structure from the start, there is no risk of damaging existing floors, cracking tiles, or creating weak points. The floor is built to accommodate the system.
Insulation Easy to Integrate
Building Regulations requirement: New builds must meet strict insulation standards under Part L (Conservation of Fuel and Power). For ground floors, this typically means 100–150 mm of rigid insulation (PIR or EPS) beneath the slab or screed.
Why it helps UFH: This insulation is essential for efficiency. A new build already includes it in the floor build-up, so you avoid extra cost and complexity. In a retrofit, you'd have to add it separately and often raise the floor, which creates problems at doorways and steps.
Perimeter insulation: Edge insulation strips around the perimeter of the floor (to prevent thermal bridging at the walls) are also easily integrated during construction. In a retrofit, adding perimeter insulation often means cutting into finished plaster or skirting boards.
Manifolds Planned Into the Design
The manifold challenge in retrofits: Finding a sensible manifold location in an existing house can be difficult. You need a central spot with room for the cabinet and access to the pipework. That often means losing a cupboard or fitting an unsightly external box.
New build advantage: The manifold location is designed into the floor plan from the start. Common locations:
- Utility room (ideal, centrally located, plenty of space, existing pipework)
- Under-stairs cupboard (compact, central)
- Hallway cupboard (purpose-built)
- Plant room (if the property has one)
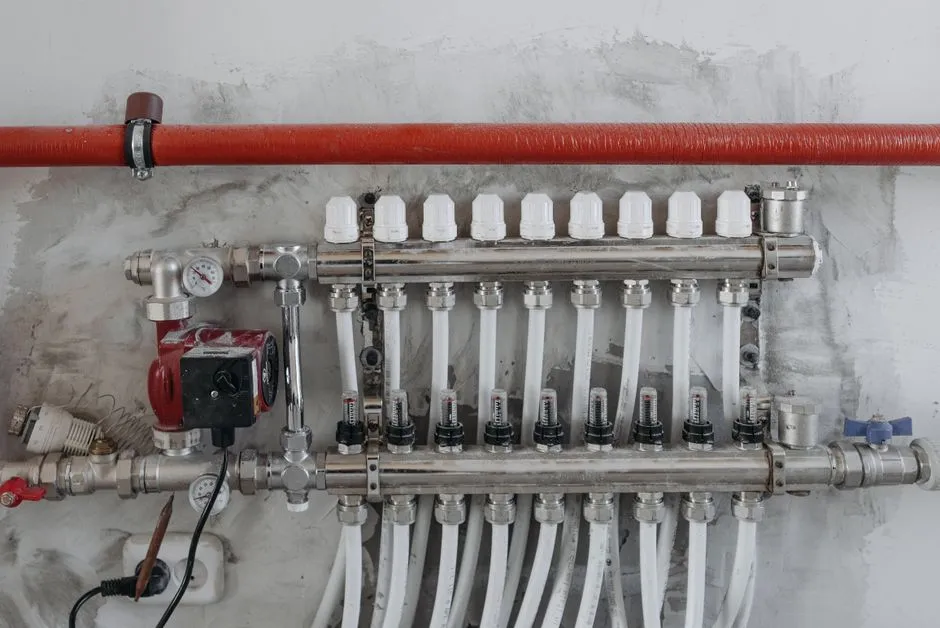
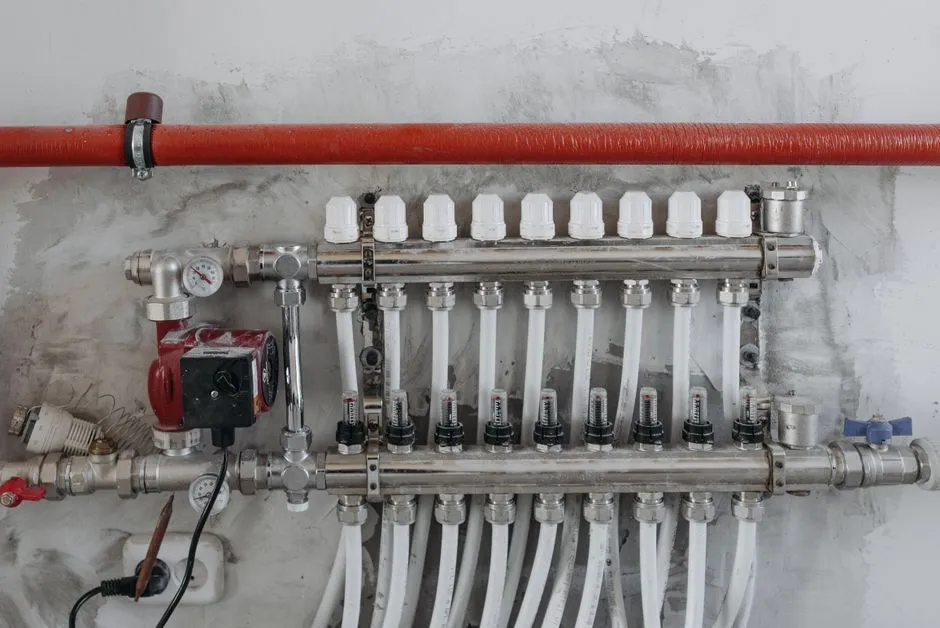
The manifold is installed before the screed is poured, with pipes running to each zone beneath the floor. Everything is hidden, tidy, and accessible for servicing. For detailed guidance on manifold selection and positioning, see our manifold guide.
Electricians On-Site for Thermostats
Electric final connections: Even if you are installing electric UFH, the final electrical connections (thermostat wiring, connection to the consumer unit) must be completed by a Part P qualified electrician.
New build advantage: Electricians are already on-site throughout the build, first-fixing and second-fixing electrics. Adding UFH thermostat wiring to their scope of work is straightforward and adds minimal cost. In a retrofit, you would need to book an electrician specifically for the UFH work, adding call-out fees and scheduling delays.
New Build vs Retrofit Costs
New build UFH often costs 40–50% less than a retrofit because you cut the labour and avoid demolition work.
Side-by-Side Cost Comparison
| System Type | New Build Cost (per m²) | Retrofit Cost (per m²) | Saving in New Build |
|---|---|---|---|
| Wet (Hydronic) UFH | £40–£80 | £90–£190 | £50–£110/m² (44–58% cheaper) |
| Electric UFH | £60–£120 | £60–£120 | Minimal saving (electric is similar cost either way) |
Why Wet UFH Is So Much Cheaper in New Builds
No floor lifting: Labour to remove existing flooring, dispose of waste, and prepare the subfloor can cost £15–£30/m². This is eliminated in a new build.
Integrated screed pour: The screed is poured once, over the UFH pipes, as part of the floor construction. In a retrofit, you might need two screed pours (one to level the floor, another over the UFH) or use more expensive low-profile systems to avoid raising floor levels.
No floor height matching: Retrofitting often requires raising the new floor to match adjacent rooms, which means building up the subfloor, adjusting door frames, and dealing with thresholds. In a new build, all floors are at the same level from the start.
Efficient pipe routing: In a new build, pipes can run directly beneath the floor to the manifold. In a retrofit, pipes often need to be routed around existing structures, increasing pipe length and complexity.
Example (60 m² ground floor):
- New build wet UFH: £2,400–£4,800 (at £40–£80/m²)
- Retrofit wet UFH: £5,400–£11,400 (at £90–£190/m²)
- Saving: £3,000–£6,600 (50–58% cheaper in new build)
Why Electric UFH Doesn't Save Much in New Builds
Electric mats are thin (3–10 mm) and quick to install, whether in a new build or retrofit. The main cost is the mat itself, which does not change. Labour to lay the mat is minimal (1–2 hours per room), so the new build advantage is small.
When electric still makes sense in new builds:
- Small or single-room installations (bathrooms, utility rooms)
- Supplementary heating (e.g., bedroom over a garage conversion)
- Where running wet UFH pipework would be impractical
When wet UFH is better in new builds:
- Whole-house or ground-floor installations
- Where a heat pump is being installed
- For compliance with Future Homes Standard (see below)
For full cost breakdowns and comparisons, see our underfloor heating costs guide.
UFH and the Future Homes Standard
From June 2025, the Future Homes Standard (FHS) comes into effect in England, fundamentally changing how new homes are heated. UFH, particularly wet systems paired with heat pumps, is at the heart of this new standard.
What the Future Homes Standard Means
Key requirements:
- No new gas boilers in new builds. From 2025, new homes cannot be connected to the gas grid. All heating must be low-carbon.
- 75–80% reduction in carbon emissions compared to current Building Regulations (Part L 2021).
- All-electric heating systems are the default, typically using air source heat pumps (ASHPs) or ground source heat pumps (GSHPs).
- Fabric-first approach: New homes must have excellent insulation, airtightness, and thermal performance to minimise heating demand.
Why this matters: Heat pumps operate most efficiently when delivering heat at low temperatures (35–45°C). Wet underfloor heating is designed for exactly this temperature range, making it the ideal emitter for heat pump systems. Radiators, by contrast, typically require 60–75°C flow temperatures, forcing the heat pump to work harder and consume more electricity.
Why UFH + Heat Pump Is the Compliant Combination
Heat pump efficiency (COP): A heat pump's coefficient of performance (COP) measures how much heat it delivers for each unit of electricity consumed. At low flow temperatures (35–40°C), a modern ASHP can achieve a COP of 3.0–3.5, meaning it delivers 3–3.5 kW of heat for every 1 kW of electricity. At higher temperatures (60°C for radiators), the COP drops to 2.0–2.5, a 30–40% efficiency loss.
UFH enables low flow temperatures: Wet UFH can comfortably heat a well-insulated new build at flow temperatures of 35–40°C. This keeps the heat pump operating in its most efficient zone, reducing electricity consumption and running costs.
Part L compliance: Building Regulations Part L 2021 (and the upcoming Future Homes Standard) set a maximum flow temperature of 55°C for wet central heating systems. UFH easily meets this requirement; radiators struggle unless they are significantly oversized.
Carbon emissions: By pairing UFH with a heat pump, a new build can achieve the 75–80% carbon reduction required by FHS without needing to rely on expensive technologies like solar thermal or battery storage (though these can help further reduce emissions).
For detailed guidance on pairing UFH with heat pumps, including flow temperature optimisation and system sizing, see our heat pumps guide.
Flow Temperature Requirements (Max 55°C Part L)
Part L 2021 requirement: The maximum flow temperature for wet heating systems in new builds is 55°C. This is a carbon-reduction measure designed to encourage the use of heat pumps and low-temperature emitters.
UFH compliance: Wet UFH typically operates at 35–45°C flow temperature, well within the limit. Even in the coldest weather, UFH rarely needs to exceed 45°C.
Radiator challenge: Traditional radiators sized for 70–75°C flow temperatures are undersized for 55°C operation. To meet Part L, radiators must be significantly oversized (sometimes 2–3× larger), which is expensive, impractical, and aesthetically unappealing.
Why UFH is the logical choice: UFH naturally complies with Part L flow temperature limits without any oversizing or compromise. It is the simplest, most cost-effective way to meet the regulations.
What Developers Need to Spec
If you are a developer building to the Future Homes Standard, here is what to specify for compliant UFH:
- Air source heat pump (3–8 kW for typical new build, depending on floor area and heat loss)
- Wet UFH across all heated floors (ground floor minimum; consider first floor for best performance)
- High-efficiency insulation (U-values: walls ≤ 0.18 W/m²K, floors ≤ 0.13 W/m²K, roof ≤ 0.11 W/m²K)
- Airtightness target ≤ 3 m³/hr/m² at 50 Pa (preferably ≤ 1.5 m³/hr/m²)
- Smart thermostats and zoning for each room or zone (required for compliance)
- Mechanical ventilation with heat recovery (MVHR) (not UFH-specific, but required for FHS)
Cost impact: A heat pump + UFH installation for a typical 80 m² new build costs £8,000–£14,000, including the heat pump, UFH pipework, manifolds, thermostats, and installation. This is comparable to a high-efficiency gas boiler + radiator system, but with far lower running costs and full FHS compliance.
Planning Your UFH in a New Build
Timing matters. Specify UFH early so the architect and installer can build it into the floor structure and heating design.
At What Stage to Specify UFH (Foundation Stage Is Ideal)
Optimal timing: Foundation/subfloor design stage (before slab is poured)
Why this stage matters: The floor build-up must be designed to accommodate the UFH system. This includes:
- Insulation thickness (typically 100–150 mm PIR or EPS)
- Screed depth (65–75 mm for wet UFH)
- Floor level (must match door thresholds and adjacent rooms)
- Perimeter insulation (edge strips around the slab perimeter)
If you specify UFH after the slab is poured, you will need to use low-profile overlay systems or raise the floor level, both of which are more expensive and compromise the design.
What to confirm with your architect/builder at this stage:
- Floor build-up specification (insulation type and thickness, screed type and depth)
- Manifold location (mark on floor plans)
- Thermostat locations (mark on electrical layout)
- Pipe entry points (where pipes will penetrate walls to reach manifold)
Working with Architect and M&E Engineer
Architect's role:
- Design the floor plan to accommodate manifold location
- Ensure floor levels work with UFH screed depth
- Coordinate with structural engineer on floor loading (screed adds weight, typically 130–150 kg/m² for 65–75 mm screed)
M&E (Mechanical & Electrical) Engineer's role:
- Calculate heat loss for each room (essential for pipe spacing and heat pump sizing)
- Design the UFH layout (pipe spacing, loop lengths, zoning)
- Specify the heat pump (size, location, connection to UFH manifold)
- Design the electrical system (thermostat wiring, power supply for heat pump and pumps)
Self-builders: If you are self-building without a full design team, you can hire a specialist UFH designer or heating engineer to produce the heat loss calculations and UFH layout. Cost: £300–£800 for a typical house.
Heat Loss Calculations Before Slab Pour
Why they are essential: Heat loss calculations determine how much heat each room needs to maintain a comfortable temperature (typically 20–21°C). This drives:
- Pipe spacing (150 mm for high heat loss, 200–250 mm for low heat loss)
- Heat pump size (undersized = cold house; oversized = inefficient, expensive)
- Screed depth (must provide sufficient thermal mass for even heat distribution)
When to do them: Before the floor slab is poured, so the UFH design can be finalised and integrated into the floor structure. Use our free heat loss calculator for a room-by-room figure, this matters especially for extensions, which typically lose more heat per m² than the rest of the house.
What is involved: The calculation considers:
- External wall U-values and area
- Window/door U-values and area
- Roof and floor U-values and area
- Air infiltration (based on airtightness target)
- Internal heat gains (occupants, appliances, lighting)
- Design external temperature (typically -3°C for UK)
Output: A room-by-room heat loss report specifying the heat output required (in watts) for each room. This feeds directly into the UFH design.
Who can do it: A qualified heating engineer, M&E consultant, or specialist UFH designer. Many UFH suppliers offer free heat loss calculations if you are purchasing their system.
For detailed guidance on heat loss calculations and UFH design, see our design and planning guide.
Manifold Room Planning (Utility Room Is Ideal)
Why manifold location matters: The manifold is the distribution hub for the UFH system. Pipe runs from the manifold to each zone beneath the floor. Longer pipe runs increase resistance, reduce flow rate, and waste energy. A central manifold location minimises pipe lengths and improves system efficiency.
Best locations:
- Utility room (ideal: central, spacious, existing plumbing and electrics, hidden from living areas)
- Under-stairs cupboard (compact, usually central, accessible)
- Hallway cupboard (purpose-built, central)
- Plant room (if the house has one, common in larger self-builds)
Worst locations:
- External walls (long pipe runs to internal rooms, heat loss through external wall)
- Upstairs (if heating ground floor only, long vertical pipe runs)
- Garage or outbuilding (too far from heated areas)
Space required: Allow at least 600 mm (width) × 400 mm (depth) × 800 mm (height) for the manifold cabinet. Larger houses with multiple zones need more space.
Access: The manifold needs to be accessible for servicing, balancing, and troubleshooting. Do not bury it behind built-in furniture or in a location that requires dismantling other fixtures to reach.
Whole-House Wet UFH Design for New Builds
Designing a whole-house wet UFH system requires careful planning to ensure even heat distribution, efficient operation, and compliance with Building Regulations.
Zoning Across Floors
What is zoning? Zoning divides the house into separate heating areas, each with its own thermostat and control valve. Different zones can be heated to different temperatures or turned off independently, improving comfort and reducing energy waste.
Typical zoning for a new build:
- Ground floor: 2–4 zones (living room, kitchen/diner, hallway, WC/utility)
- First floor: 2–4 zones (master bedroom, other bedrooms, bathroom, landing)
Why zone? Different rooms have different heating needs:
- Bedrooms are typically heated to 18–19°C
- Living areas to 20–21°C
- Bathrooms to 22–23°C
Zoning allows you to set different temperatures for each area, avoiding overheating bedrooms or underheating living rooms.
Zone size: Each zone should ideally be 10–40 m². Zones smaller than 10 m² can be difficult to balance; zones larger than 40 m² may need multiple pipe loops.
For detailed guidance on zoning strategies and control options, see our zoning guide.
Manifold Locations (Utility Room, Hallway Cupboard)
Single manifold or multiple?
- Small to medium houses (up to 100 m²): One manifold can serve the entire house if centrally located.
- Large houses (100–200 m²): Two manifolds (one per floor) reduce pipe run lengths and improve efficiency.
- Very large houses (200+ m²): Multiple manifolds (e.g., one per wing) may be needed.
Manifold per floor (ideal for two-storey new builds):
- Ground floor manifold: Located in utility room or under-stairs cupboard, serving ground floor zones.
- First floor manifold: Located in airing cupboard or landing cupboard, serving first floor zones.
Why this works well: Shorter pipe runs, easier balancing, and each floor can be controlled independently (e.g., turn off first floor heating during the day when bedrooms are unoccupied).
Pipe Spacing for New Build Insulation Levels (200–250 mm Typical)
Why pipe spacing matters: The closer the pipes are spaced, the higher the heat output per square metre. However, closer spacing requires more pipe (higher cost) and creates higher resistance (lower flow rate).
Typical spacing for well-insulated new builds:
- High heat loss areas (external walls, large glazing): 150 mm spacing
- Standard areas (internal rooms, normal glazing): 200 mm spacing
- Low heat loss areas (internal bathrooms, small rooms): 250 mm spacing
Why wider spacing works in new builds: Modern new builds have excellent insulation (U-values ≤ 0.18 W/m²K for walls, ≤ 0.13 W/m²K for floors). Heat loss per square metre is low, typically 40–60 W/m² compared to 80–120 W/m² in older properties. This means you can use wider pipe spacing and still deliver sufficient heat.
Example heat output (wet UFH at 40°C flow, 30°C return):
- 150 mm spacing: ~80 W/m²
- 200 mm spacing: ~60 W/m²
- 250 mm spacing: ~45 W/m²
For a well-insulated new build requiring 50 W/m², 200 mm spacing is perfect.
Flow Temperature Targets (35–40°C)
Why low flow temperatures? Heat pumps achieve maximum efficiency at low flow temperatures. The lower the temperature, the less electricity the heat pump consumes.
Recommended flow temperatures for new build UFH:
- Mild weather (10–15°C outside): 30–35°C flow
- Cold weather (0–5°C outside): 35–40°C flow
- Very cold weather (below 0°C): 40–45°C flow (rarely needed in well-insulated new builds)
How to achieve this: Good insulation + adequate pipe spacing + sufficient screed depth (65–75 mm). The screed provides thermal mass, allowing the UFH to deliver steady heat at low temperatures.
Compare to radiators: Radiators typically require 60–75°C flow temperatures to deliver the same heat output. At these temperatures, heat pump COP drops from 3.5 to 2.0–2.5, increasing running costs by 30–40%.
Heat Pump Selection for New Build UFH
Pairing your wet UFH with the right heat pump is critical for efficiency, comfort, and compliance with the Future Homes Standard.
ASHP Sizing for New Build (Smaller Unit Needed Due to Low Heat Loss)
Why new builds need smaller heat pumps: Modern new builds have such low heat loss (thanks to insulation, airtightness, and high-performance glazing) that the required heat pump is much smaller than for older properties.
Typical heat pump sizes for new builds:
- Small house (60–80 m²): 3–5 kW ASHP
- Medium house (80–120 m²): 5–7 kW ASHP
- Large house (120–180 m²): 7–10 kW ASHP
Compare to retrofit: A poorly insulated 1930s semi (100 m²) might need a 10–12 kW heat pump due to higher heat loss. A modern new build of the same size needs only 5–7 kW.
Why sizing matters: An oversized heat pump cycles on and off frequently (short-cycling), which reduces efficiency, increases wear, and creates temperature fluctuations. An undersized heat pump runs continuously but cannot maintain the target temperature on the coldest days. Correct sizing (based on accurate heat loss calculations) is essential.
Rule of thumb for new builds: ~50–60 W/m² heat loss is typical for a well-insulated new build. For a 100 m² house, this equates to 5–6 kW heat pump.
Boiler Upgrade Scheme Grant
What it is: The UK government's Boiler Upgrade Scheme (BUS) provides grants of up to £7,500 towards the cost of installing an air source heat pump or ground source heat pump in England and Wales (as of 2026).
Who qualifies: Homeowners, landlords, and self-builders installing a heat pump in an existing property or new build (subject to eligibility criteria).
How it works:
- Find an MCS-certified installer (see below).
- Get a quote for the heat pump + UFH installation.
- The installer applies for the BUS grant on your behalf.
- The grant is deducted from your final invoice (you do not pay upfront and claim back).
Cost impact: A 6 kW ASHP + wet UFH installation for an 80 m² new build might cost £10,000–£14,000. With the £7,500 BUS grant, your net cost is £2,500–£6,500, comparable to a gas boiler + radiator system.
Important: The grant is only available for MCS-certified installations (see below). Check current eligibility at gov.uk/boiler-upgrade-scheme.
MCS Certification Requirement
What is MCS? The Microgeneration Certification Scheme (MCS) is the UK's quality assurance standard for renewable energy installations, including heat pumps. MCS certification is required to:
- Qualify for the Boiler Upgrade Scheme grant
- Comply with Building Regulations Part L (for new builds)
- Access certain green energy tariffs and incentives
What it involves: The installer must:
Not sure this is the right page?
Get a reading list built for your project
Three quick questions and we will point you to the guides that match what you are actually trying to do.
Find your starting pointThree questions. About 30 seconds. No sign-up.
- Be MCS-certified (registered with MCS and trained on heat pump installation)
- Conduct a heat loss calculation (MCS standard)
- Design the system to meet MCS performance standards
- Commission the system and provide a performance certificate
- Provide a warranty (typically 2–5 years for the heat pump, 1–2 years for installation)
Cost: MCS-certified installations are not significantly more expensive than non-certified work, the MCS process is standard practice for professional heat pump installers.
Finding an MCS installer: Search the MCS database at mcscertified.com.
Self-builders: If you are self-building and want to DIY the UFH installation, you will still need an MCS-certified installer for the heat pump connection and commissioning to qualify for BUS grant.
Building Regulations for New Builds
New build properties must comply with Building Regulations, which cover structural integrity, energy efficiency, electrical safety, and more. UFH affects several parts of the regulations.
Part L (Energy Efficiency)
What it covers: Conservation of fuel and power. Part L sets minimum standards for insulation, airtightness, heating system efficiency, and carbon emissions.
UFH compliance:
- Flow temperature: Must not exceed 55°C. Wet UFH at 35–45°C easily complies.
- Heating system efficiency: Heat pump + UFH systems achieve high efficiency (COP 3.0–3.5), helping meet Part L carbon reduction targets.
- Thermal bridging: Edge insulation around the floor perimeter reduces thermal bridging, improving Part L compliance.
SAP calculations: Part L compliance is demonstrated using Standard Assessment Procedure (SAP) calculations, which model the property's energy performance. UFH + heat pump scores highly in SAP due to low flow temperatures and high efficiency.
Part L 2021 vs Future Homes Standard 2025: Part L 2021 requires a 30% carbon reduction vs 2013 regulations. Future Homes Standard (from June 2025) requires a 75–80% reduction, effectively mandating heat pumps and UFH for most new builds.
For full details on Part L compliance and how UFH contributes to energy performance, see our building regulations guide.
Part P (Electrical)
What it covers: Electrical safety in dwellings. All electrical work must be completed by a qualified electrician and comply with BS 7671 (the IEC Wiring Regulations).
UFH electrical work:
- Electric UFH mats: Final connection to consumer unit must be completed by a Part P registered electrician.
- Wet UFH thermostats: Wiring from thermostats to zone valves and manifold pump.
- Heat pump power supply: Dedicated circuit (typically 16–32A) must be installed by a qualified electrician.
Compliance: The electrician will self-certify the work and issue an Electrical Installation Certificate. This is required for Building Control sign-off.
SAP Calculations and How UFH Affects Them
What is SAP? The Standard Assessment Procedure is a government-approved methodology for calculating a dwelling's energy performance. SAP produces an Energy Performance Certificate (EPC) rating (A–G scale) and demonstrates compliance with Part L.
How UFH improves SAP scores:
- Low flow temperature heating: UFH at 35–45°C scores higher than radiators at 60–75°C.
- Heat pump compatibility: Heat pumps achieve higher COP with UFH, reducing primary energy consumption.
- Even heat distribution: Reduced heat loss through better thermal comfort (lower thermostat settings).
- Zoning and controls: Smart thermostats and room-by-room zoning improve SAP scores by reducing wasted heat.
Typical EPC improvement: A new build with heat pump + UFH might achieve an EPC rating of A (92–100), compared to B (81–91) for a gas boiler + radiator system.
SAP assessor: You will need a qualified SAP assessor to run the calculations and produce the EPC. Cost: £300–£600 for a new build.
Air Pressure Testing Requirements
What it is: Building Regulations require new builds to achieve a minimum airtightness standard, measured by a blower door test (also called air pressure testing). The result is expressed as air changes per hour at 50 pascals pressure (m³/hr/m² @ 50 Pa).
Current requirement (Part L 2021): Maximum 8 m³/hr/m² (in practice, aim for ≤ 3 m³/hr/m² for good energy performance).
Future Homes Standard (2025): Target ≤ 1.5 m³/hr/m² for best practice.
Why it matters for UFH: Poor airtightness = high heat loss = UFH struggles to maintain temperature = higher running costs. A leaky new build might need a larger heat pump and more aggressive UFH (closer pipe spacing), both of which increase cost.
When tested: Twice, once at completion of the build (before final sign-off), and often once during construction (after plastering, before final finishes) to identify issues early.
Cost: £300–£500 per test.
Common Mistakes Developers Make
Even experienced developers can make mistakes that compromise UFH performance, increase costs, or create problems post-completion.
1. Under-Speccing Insulation (Saves Money Now, Costs Later)
The mistake: Specifying the minimum insulation required by Building Regulations, rather than going beyond compliance.
Why it is tempting: Insulation is expensive. Reducing floor insulation from 150 mm to 100 mm saves £5–£10/m² on materials.
The consequence:
- Higher heat loss = larger heat pump required = higher capital cost
- Higher running costs for homeowners (poor EPC rating, higher bills)
- UFH struggles to maintain temperature on coldest days
- Poor SAP score = lower property value
The fix: Specify 150 mm PIR or EPS insulation beneath ground floors, even if regulations only require 100 mm. The additional cost is £300–£600 for a typical 80 m² ground floor, but it future-proofs the property and improves marketability.
2. Forgetting Perimeter Insulation at Slab Edge
The mistake: Not installing edge insulation strips around the perimeter of the floor slab.
The consequence: Thermal bridging at the slab edge, heat escapes through the junction between the floor and external wall. This creates cold spots around the room perimeter and wastes 10–15% of heat output.
The fix: Install 10–20 mm closed-cell foam edge strips around the entire perimeter of the slab before the screed is poured. Cost: £50–£150 per house (trivial compared to the energy loss).
3. Wrong Manifold Location (Too Far from Zones)
The mistake: Installing the manifold in a convenient location for the plumber (e.g., external wall, garage) rather than a central location that minimises pipe runs.
The consequence:
- Long pipe runs = higher resistance = lower flow rate = reduced heat output
- Wasted energy pumping water through long pipes
- Higher installation cost (more pipe required)
The fix: Plan the manifold location at the design stage. Aim for a central location within 10–15 metres of all zones. If the house has two floors, use two manifolds (one per floor).
4. No Commissioning Handover Pack
The mistake: Completing the UFH installation without providing the homeowner with:
- Heat loss calculations
- UFH layout drawings (showing pipe routes)
- Manifold balancing settings
- Thermostat programming instructions
- Warranty and maintenance guidance
The consequence: Homeowners do not know how to operate the system efficiently. Service engineers called to fix "faults" have no documentation to work from. Warranty claims are delayed or rejected due to missing paperwork.
The fix: Provide a comprehensive handover pack in a folder or digitally. Include:
- As-built drawings (showing exact pipe routes and sensor locations)
- Commissioning report (flow temperatures, flow rates, balancing settings)
- Thermostat user manuals and quick-start guides
- Warranty certificates (heat pump, UFH system, installation)
- Maintenance schedule (when to service, what to check)
Cost: Minimal (documentation should be produced as part of the installation anyway).
Questions to Ask Your Builder
If you are a self-builder or commissioning a developer, use this checklist to ensure UFH is specified and installed correctly.
UFH System Design
- Have heat loss calculations been completed for every room? (Essential for correct pipe spacing and heat pump sizing.)
- What pipe spacing will be used, and why? (Should vary by room based on heat loss, not a one-size-fits-all approach.)
- Where will the manifold(s) be located, and how far are the longest pipe runs? (Aim for ≤ 80–100 m per loop.)
- What flow temperature is the system designed for? (Should be 35–45°C for heat pump systems.)
- How many zones will there be, and which rooms are in each zone? (Minimum 2–4 zones for a house; more for larger properties.)
Insulation and Floor Build-Up
- What thickness of floor insulation is specified? (Minimum 100 mm; 150 mm is better.)
- Is perimeter edge insulation included? (Must be yes, this is essential for efficiency.)
- What screed depth will be used? (Should be 65–75 mm over pipes for wet UFH.)
- What screed type? (Sand/cement or liquid anhydrite? Anhydrite is faster but more expensive.)
Heat Pump and Controls
- What size heat pump has been specified, and how was it sized? (Should be based on heat loss calculations, not guesswork.)
- Is the heat pump MCS-certified, and will installation be MCS-compliant? (Essential for Boiler Upgrade Scheme grant.)
- What thermostats and controls will be used? (Smart thermostats recommended; ensure each zone has independent control.)
- Will the system be commissioned and balanced before handover? (Essential and non-negotiable.)
Documentation and Warranty
- Will I receive as-built drawings showing pipe routes? (Yes, you will need these for future servicing or renovations.)
- What warranty is provided for the UFH system and heat pump? (Minimum 2 years installation warranty; 5–10 years for heat pump.)
- Will a commissioning report be provided showing flow rates and temperatures? (Yes, this proves the system has been installed correctly.)
If the builder or installer cannot answer these questions clearly, find someone who can.
Frequently Asked Questions
How much does underfloor heating cost in a new build?
Wet UFH costs £40–£80/m² in a new build (supply and installation), compared to £90–£190/m² for retrofit, nearly 50% cheaper. Electric UFH costs £60–£120/m² (similar to retrofit). A typical 60 m² ground floor costs £2,400–£4,800 for wet UFH or £3,600–£7,200 for electric. See our costs guide for full breakdowns.
Is underfloor heating worth it in a new build?
Yes. A new build is the cheapest and easiest time to install UFH. Wet UFH costs 40–50% less than retrofit, fits neatly into the floor structure and works best with heat pump systems (required by the Future Homes Standard from 2025). Running costs are 15–40% lower than radiators.
Do new builds have to have underfloor heating?
No, but from June 2025, the Future Homes Standard requires all new builds to have low-carbon heating (typically heat pumps). Heat pumps work best with low-temperature emitters like UFH. While radiators can be used, they must be significantly oversized to work at the 55°C maximum flow temperature, making UFH the more practical choice.
When should UFH be installed in a new build?
Specify UFH at the foundation/subfloor design stage before the slab is poured. Wet UFH pipes are laid on the insulation layer before screed is poured, creating seamless integration. Specifying UFH later means costly retrofitting or raised floor levels.
Can you have underfloor heating upstairs in a new build?
Yes. Wet UFH can be installed on suspended floors (timber joists or beam-and-block) using low-profile overlay systems or by integrating pipes into a screed on top of the floor deck. Electric UFH is also suitable for upstairs rooms. Cost is similar to ground floor installation.
How long does underfloor heating last in a new build?
A well-installed wet UFH system lasts 25–30 years (pipes are encased in screed and have no moving parts). Electric UFH lasts 20–25 years. Heat pumps typically last 15–20 years before requiring replacement. All should outlast the first mortgage term.
What heating system is best for a new build house?
Air source heat pump + wet UFH is the best combination for new builds from 2025 onwards. It meets Future Homes Standard requirements, achieves the lowest running costs, qualifies for the £7,500 Boiler Upgrade Scheme grant, and provides superior comfort. Total cost: £8,000–£14,000 for an 80 m² house (net £500–£6,500 after grant).
Planning a new build with UFH? Use our cost calculator for a personalised quote, or explore our design and planning guide for step-by-step guidance on system design and specification.
Take the next step? Compare free quotes from professional UFH installers via the Underfloor Heating Directory.
Related guides
- Smart Life App for Underfloor Heating: Setup and Limits
- Electricity VAT Cut: Impact on Underfloor Heating Bills
- Is Underfloor Heating Being Banned? The New Efficiency Rules Explained
- Underfloor Heating Repair or Replacement: A UK Guide
One useful email,
once a month.
New guides as they go live. Real cost data, not press releases. The occasional rumour from the industry that's actually worth knowing.
No sales pitches. No jargon. Unsubscribe in one click.