# Underfloor Heating Hub — full text
> Complete text of all 65 published guides. For a curated index of the site, see https://underfloorheating.info/llms.txt
--- title: Best Electric Underfloor Heating Systems UK 2026 description: Compare the best electric underfloor heating systems in the UK for 2026, including real outputs, costs, floor finishes, warranties and leading brands. url: https://underfloorheating.info/best-electric-underfloor-heating-systems-uk-2026/ published: 2026-08-21 tags: ['best electric underfloor heating', 'best electric underfloor heating UK', 'electric underfloor heating systems', 'electric heating mats', 'electric UFH kits'] ---
# Best Electric Underfloor Heating Systems UK 2026
If you're comparing the best electric underfloor heating in the UK, [underfloorheating.info](https://underfloorheating.info/) will help you get the specification right, while [underfloorheating.directory](https://underfloorheating.directory/) helps you find installers when you'd rather hand the job to somebody who does it every week.
> **Quick Answer**: A **150W/m² self-adhesive heating mat** is the best electric UFH system for most insulated, regularly shaped bathrooms and kitchens. Choose **foil at 140 to 150W/m²** beneath floating laminate or engineered wood, **loose cable at 100 to 200W/m²** for awkward shapes, and **in-screed cable at roughly 100 to 160W/m²** for a new screeded floor. Allow about **£55 to £110/m² installed**, plus £100 to £250 for a thermostat and £150 to £300 for final electrical connection and testing.
## The short list
My best all-round pick is a properly sized 150W/m² mat from Warmup, ProWarm, Fastwarm or Heat Mat. The cable comes pre-spaced, so you get predictable output without spending half a day measuring every run.
That doesn't make mats best for every floor. Warmup's 140W/m² Foil Heater or Heat Mat's 150W/m² foil mat makes much more sense beneath a floating engineered wood floor. In a small ensuite full of awkward corners, loose cable wins because you can vary the spacing without putting heat beneath the toilet or shower tray.
Wunda deserves a mention because UK buyers see the name everywhere. Its core strength is water-based retrofit UFH, not a broad electric mat range. If your project is one bathroom, buy a dedicated electric system. If you're heating a whole ground floor, compare electric running costs with Wunda's wet overlay products before ordering anything.
## Electric UFH system comparison
Prices below are realistic 2026 UK project allowances, including the heater, normal preparation, laying and basic covering materials. They exclude the final floor finish and can rise sharply in a tiny room because the electrician's fixed charge gets divided across fewer square metres.
| System type | Typical output | Installed cost | Install difficulty | Best floor finish | Typical heater warranty |
|---|---:|---:|---|---|---|
| Self-adhesive mat | 100, 150 or 200W/m² | £55 to £95/m² | Easy to moderate | Tile or stone | 15 years to lifetime |
| Foil heating mat | 140 to 150W/m² | £60 to £100/m² | Easy, but layout must stay flat | Floating laminate or engineered wood | 15 years to lifetime |
| Loose heating cable | 100 to 200W/m², set by spacing | £60 to £105/m² | Moderate | Tile, stone or levelled resilient floor | 15 years to lifetime |
| In-screed cable | About 100 to 160W/m² | £70 to £110/m² | Hard | Tile, stone or polished screed | Usually 10 to 20 years |
The system output is its maximum electrical load, not its constant consumption. Once the floor reaches temperature, a correctly positioned floor sensor cycles the heater on and off. Our [electric UFH systems guide](/electric-underfloor-heating-systems/) explains the running-cost calculation with worked room examples.

## Best mat system: 150W/m² self-adhesive mats
This is the sensible default for tiled bathrooms, kitchens and utility rooms. The cable is fixed to a mesh, normally 500mm wide, at a known spacing. You cut and turn the mesh to change direction, but never cut, shorten or cross the heating cable.
Warmup StickyMat comes in 150 and 200W/m² versions, uses a cable under 1.8mm thick and carries a lifetime warranty when its conditions are met. ProWarm and Fastwarm sell 100, 150 and 200W/m² mats, also with lifetime cover on registered qualifying products. Heat Mat offers a wider professional range, including 110, 160, 200 and 240W/m² formats, although 160W/m² is its mainstream undertile choice.
For most UK rooms, I'd pick 150 or 160W/m². A 100W/m² mat is mainly floor warming in a low-loss room. A 200W/m² product gives faster response and more peak output, but it can't rescue a badly insulated conservatory. Get the heat loss calculated first.
### Best brand choices for mat systems
**Warmup StickyMat** is the polished premium option. Product documentation, installer support, smart controls and the SafetyNet installation guarantee are strong. You pay more, but it suits homeowners who want one supplier responsible for the heater and controls.
**ProWarm mat kits** are the value pick. The 150W/m² system covers the mainstream bathroom and kitchen market, and the range of kit sizes makes online buying straightforward. Check exactly what's included because insulation boards and the thermostat can change the apparent price substantially.
**Fastwarm sticky mats** offer 100, 150 and 200W/m² options in sizes from 0.5m². The 200W/m² range goes up to 18m² and the brand states a 25 per cent faster warm-up than its 150W/m² version. Our [Fastwarm review](/fastwarm-underfloor-heating-review/) looks at the range in more detail.
**Heat Mat** is my trade-led choice where the room needs something less standard. Its cable construction, broad output range and technical support are useful on more demanding jobs.
## Best for laminate and engineered wood: foil systems
Foil heaters sit dry beneath a floating floor. The aluminium layer spreads warmth across the surface and provides a continuous earth layer. You avoid tile adhesive and levelling compound, which makes this a neat retrofit.
Warmup's Foil Heater is 140W/m² and carries a 15-year limited warranty. Heat Mat's foil system is 150W/m² and is sold with 6mm insulation in relevant packs, with lifetime heater cover subject to its conditions.
The snag is furniture. You mustn't trap a foil mat under fitted wardrobes, flat-bottomed furniture or any area where heat can't escape. The floor manufacturer must also approve UFH, normally with a surface limit around 27°C. Read our [laminate and engineered wood guide](/laminate-engineered-wood-underfloor-heating/) before choosing the floor and heater separately.

## Best for awkward rooms: loose cable
Loose cable earns its keep around curved baths, islands and irregular walls. Fastwarm's system gives a useful example of how spacing changes output: roughly 50mm for 200W/m², 65mm for 150W/m² and 100mm for 100W/m². Heat Mat's 3mm cable can also be adjusted by spacing, while Warmup offers loose-wire systems for rooms where a fixed-width mat wastes too much coverage.
It takes longer to fit and uneven spacing creates hot and cold bands. Draw the layout, keep the cable clear of permanent fittings, photograph every run and record resistance readings before, during and after covering it. That evidence matters if you ever make a warranty claim.
## Best for new screed: in-screed cable
An in-screed cable sits deeper in the floor than an undertile mat. It suits a new extension, polished screed finish or commercial area where the floor build-up already includes screed.
The extra thermal mass gives stable heat but slows the response. It also turns a simple electric installation into a coordinated screeding job. For a bathroom refurbishment, it's normally needless complication. For a large screeded room, pause and compare a wet system because direct electric heating can become expensive over long daily run times.

## Brand comparison, what you actually get
| Brand | Electric products worth considering | Published outputs | Warranty headline | Best fit |
|---|---|---|---|---|
| Warmup | StickyMat, Foil Heater, loose wire | 150 and 200W/m² mats, 140W/m² foil | Lifetime on StickyMat, 15 years on foil, conditions apply | Premium controls and support |
| ProWarm | Sticky mats and loose cable | 100, 150 and 200W/m² | Lifetime on qualifying registered electric products | Good-value online kits |
| Fastwarm | Sticky mats, underwood mat, loose cable | 100, 150 and 200W/m² | Lifetime on listed mats, conditions apply | Wide kit sizes and keen pricing |
| Heat Mat | Undertile mats, foil, loose and in-screed cable | 110 to 240W/m² across the range | 15 years to lifetime by product | Technical or non-standard jobs |
| Wunda | Primarily wet overlay systems | Not a mainstream electric range | Product-specific | Whole-floor wet retrofit comparison |
Don't choose from the warranty number alone. Read whether it covers removal and reinstatement of the floor, whether registration has a deadline, and whether an approved electrician must complete the certificate.
## What should a complete kit include?
A useful kit includes the correctly sized heater, thermostat, floor sensor, installation monitor or tester, fixing materials and clear resistance values. Insulation is often separate. So are levelling compound, flexible adhesive and the electrician's work.
Measure only the free floor area. Don't include kitchen units, baths, shower trays, fitted wardrobes or appliances without permanent clearance beneath them. Buy a heater slightly smaller than the usable area because you cannot shorten the cable to make it fit.
For tile, add a compatible insulation or tile backer board where the build-up permits. Even a thin thermal break can improve response on a cold concrete slab. The [underfloor heating mats guide](/underfloor-heating-mats-guide/) covers preparation and floor build-up in more detail.
## Installed cost, a realistic example
Take a 5m² bathroom with 3.5m² of heatable floor:
| Item | Typical cost |
|---|---:|
| 3.5m² branded 150W/m² mat | £170 to £280 |
| Insulation boards and fixing | £70 to £130 |
| Programmable thermostat | £90 to £180 |
| Flexible adhesive or levelling materials | £60 to £120 |
| Electrician, testing and connection | £180 to £300 |
| **UFH total before tiles and tiling labour** | **£570 to £1,010** |
That total looks higher per square metre than the comparison table because small rooms carry fixed thermostat and electrician costs. Be wary of adverts quoting only the bare mat price. Our [full UK cost guide](/underfloor-heating-costs/) separates materials, labour and running costs.

## My verdict
Buy the system for the floor, not the logo. For a normal tiled bathroom, choose a 150 or 160W/m² self-adhesive mat from a supplier with proper UK technical support. For floating wood or laminate, use a purpose-made foil product. Pick loose cable only when the shape genuinely demands it.
For anything above about 15 to 20m² that will heat for hours every day, compare [electric and water UFH](/electric-vs-water-underfloor-heating-2026/) before committing. Electric wins on simplicity. Wet UFH usually wins on whole-house running cost, particularly with a heat pump.
---
--- title: Best Wet Underfloor Heating Systems UK 2026: Six Brands Compared description: Compare the best wet underfloor heating systems in the UK, including Wunda, Polypipe, Uponor, John Guest, Emmeti and Warmup pipe, manifolds and costs. url: https://underfloorheating.info/best-wet-underfloor-heating-systems-uk-2026/ published: 2026-08-21 tags: ['best wet underfloor heating systems UK', 'best water underfloor heating system', 'wet underfloor heating brands', 'water underfloor heating', 'UFH manifolds'] ---
# Best Wet Underfloor Heating Systems UK 2026: Six Brands Compared
For straight UK guidance on water systems, start at [underfloorheating.info](https://underfloorheating.info/), then use [underfloorheating.directory](https://underfloorheating.directory/) when you're ready to compare local installers and project quotes.
> **Quick Answer**: There isn't one best wet underfloor heating brand for every house. **Wunda** is particularly strong for low-profile retrofit floors, **Polypipe** and **John Guest** have excellent UK merchant and installer familiarity, **Uponor** is a premium designed-system choice, and **Emmeti** and **Warmup** offer broad manifolds, controls and floor formats. Budget **£25 to £55/m² supplied** for a basic screed system or **£45 to £85/m²** for low-profile materials, before controls, heat-source connection and labour.
## The six systems at a glance
The numbers below are budgeting ranges, not fixed retail prices. A small two-zone pack costs more per square metre than a 100m² ground floor because the manifold, controls and design fee don't shrink with the floor area.
| Brand | Typical pipe | Manifold options | Published warranty headline | Typical supplied cost | Best for |
|---|---|---|---|---:|---|
| Wunda | 16mm PE-RT/AL/PE-RT for low-temperature UFH | Premium multi-port bars, pump sets, single and double-loop sets | 50 years pipe, 10 years manifold bars, 5 years moving parts | £45 to £80/m² overlay | Low-profile retrofit |
| Polypipe | 12, 15 or 18mm PB barrier pipe, plus multi-layer options | Brass or stainless steel, 2 to 12 ports | 50 years pipe, components subject to separate terms | £30 to £65/m² | Merchant-supported whole-house work |
| Uponor | PE-Xa and PE-RT ranges, including small-bore retrofit pipe | Vario stainless steel or reinforced polymer, Magna for larger duties | 25 years on UFH systems, 2 years electrical goods | £45 to £85/m² | Premium design and heat-pump projects |
| John Guest | 15mm PEX or PB barrier pipe, 12mm LowFit | Stainless steel Speedfit manifold, 2 to 12 ports | 50 years pipe and fittings, 2 years manifold and controls | £30 to £65/m² | Fast trade installation and push-fit familiarity |
| Emmeti | 16mm PE-Xa, PE-RT or multilayer pipe by system | Brass and stainless steel manifolds, mixing and control sets | Product-specific, commonly 10 years on qualifying pipe systems | £30 to £70/m² | Component choice and mixed systems |
| Warmup | 16mm PE-RT pipe and low-profile pipe by system | Stainless steel manifold, pump and control packs | Product-specific, long pipe cover when registered | £40 to £80/m² | One-brand design, controls and support |
Prices include the core floor-heating materials but not the final floor finish, screed, heat pump or boiler, electrical wiring or full installation. Always compare like with like.

## Best overall system or best brand?
Here's the bit sales pages tend to skip. The best water underfloor heating system is the one that meets the room heat loss at the lowest practical flow temperature without creating a silly floor build-up.
A well-designed mid-price system beats premium pipe laid at the wrong spacing. Ask for a room-by-room heat-loss calculation, proposed flow temperature, pipe centres, loop lengths and flow rates. If a quote gives you only total square metres and a kit price, it isn't a finished design.
Our [wet UFH buyer's guide](/wet-underfloor-heating-ultimate-guide/) explains screed, overlay and suspended-floor formats. This article focuses on what differentiates the six leading suppliers.
## Wunda: best for a low-profile retrofit
Wunda's Rapid Response boards put the pipe close to the finished floor, avoiding the slow thermal mass of a thick screed. That's useful in renovations where you can't excavate the slab or wait hours for the floor to warm.
The published guarantee is unusually clear: 50 years for its low-temperature PE-RT/AL/PE-RT pipe, 10 years for manifold bars, five years for manifold moving parts and pump sets, and cover for the branded controls. The aluminium layer in the pipe helps it hold its shape as installers press it into routed boards.
Allow roughly £45 to £80/m² for a supplied overlay package once boards, pipe and a share of the manifold are counted. Complex floor preparation, levelling and coverings sit on top. Read our full [Wunda underfloor heating review](/wunda-underfloor-heating-review/) if minimal floor height is your main constraint.
**Best for:** occupied renovations, timber or solid-floor retrofits and quick-response zones.
**Watch for:** the board and floor covering must form an approved build-up. Don't mix a cheap levelling compound or adhesive into a tested system and hope for the best.
## Polypipe: best UK merchant network
Polypipe supplies systems for solid, floating and suspended floors. Its BBA-certified UFH range includes 12, 15 and 18mm polybutylene barrier pipe, with brass or stainless steel manifolds in two to 12-port configurations.
PB pipe is flexible and installer-friendly. Polypipe's range also gives builders a familiar route through UK merchants, which matters when a fitting goes missing at 3pm on screed day.
The current warranty wording gives 50 years on qualifying UFH pipe, while components have shorter initial cover that may extend subject to the stated conditions. Don't write “50-year system warranty” on your comparison sheet without checking those conditions.
**Best for:** new builds, extensions and trade-led jobs needing local stock and established technical literature.
**Typical supplied allowance:** £30 to £50/m² for a screed system, rising towards £65/m² for panel-led or smaller projects.
## Uponor: best premium designed system
Uponor offers traditional tacker systems, Minitec wet installation at about 15mm, Siccus Mini dry construction and larger heating and cooling systems. Its Vario S manifolds use stainless steel, while Magna uses glass-fibre-reinforced polyamide for larger applications. Depending on the model, Vario serves up to 12 or 16 circuits.
Uponor states a 25-year warranty as standard on its UFH systems and manifolds, with electrical goods covered for two years. Its PE-Xa pipe and Q&E connection ecosystem appeal to installers who already use Uponor plumbing products.
You normally pay for the depth of range, design input and coordinated components. That's worthwhile on a heat-pump project where shaving a few degrees from the flow temperature can improve seasonal performance.
**Best for:** high-spec new builds, difficult refurbishments and projects where designed heat output matters more than the cheapest kit.
**Typical supplied allowance:** £35 to £55/m² for conventional construction and £55 to £85/m² for proprietary low-profile formats.

## John Guest: best for fast, familiar connections
JG Underfloor combines 15mm PEX or polybutylene barrier pipe with Speedfit connections. The stainless steel manifold comes with adjustable flow indicators, fill and drain points, air venting and 15mm push-fit loop connections. It is available with two to 12 ports.
The 12mm LowFit range handles shallow retrofit floors. For conventional work, plenty of UK plumbers already know the fittings and pipe preparation rules, reducing the learning curve on site.
John Guest states 50-year cover for qualifying pipe and fittings, but two years for UFH manifolds, control packs and controls. Again, the shortest warranty on the critical component may matter more than the headline pipe warranty.
**Best for:** installer-led extensions, standard screed floors and LowFit retrofit work where Speedfit familiarity saves time.
**Typical supplied allowance:** £30 to £50/m² conventional, or up to about £65/m² for LowFit and small areas.
## Emmeti: best for manifold and control choice
Emmeti has long been strong in distribution hardware. Its UK range spans brass and stainless steel manifolds, mixing sets, actuators, wiring centres and pipe options including PE-Xa, PE-RT and multilayer construction depending on the package.
That flexibility suits a plumber specifying individual components, or a mixed home with radiators upstairs and UFH downstairs. It also means you need to compare the exact bill of materials. “Emmeti system” can describe several very different specifications.
Warranty periods vary by range and installation conditions. Ask the supplier to put the pipe, manifold, pump and controls cover in writing rather than relying on a single headline.
**Best for:** bespoke multi-zone systems and installers who want to select the manifold, blending set and controls separately.
**Typical supplied allowance:** £30 to £55/m² for screed, rising to about £70/m² with specialist panels or upgraded controls.
## Warmup: best one-brand homeowner package
Warmup is better known for electric mats, but it also supplies hydronic pipe systems, low-profile formats, stainless steel manifolds and connected controls. The appeal is a coordinated design and a recognisable homeowner-facing brand.
That makes sense if you want the floor system, thermostat and technical support through one route. As with every supplier, confirm which party designed the system and who owns performance if the calculated room output isn't achieved.
Warmup's pipe and component warranties differ by product and depend on registration and correct installation. Use the current project quotation as the authority, not a warranty figure copied from an old brochure.
**Best for:** homeowners wanting design support and matched controls rather than loose trade components.
**Typical supplied allowance:** £35 to £55/m² conventional and £50 to £80/m² low profile.
## Pipe type, what actually matters

PE-Xa, PE-RT, PB and multilayer composite pipe can all work well. Focus on five things:
1. It has an oxygen barrier suitable for a sealed heating system.
2. The diameter matches the system design and manifold connection.
3. Loop lengths stay within the manufacturer's hydraulic limits.
4. There are no hidden joints beneath the floor.
5. The pipe, fittings and manifold retain traceable warranty support.
Small-bore pipe allows thin retrofit panels but creates more resistance. That can mean shorter loops, more manifold ports or higher pump duty. Standard 16mm pipe generally suits larger screeded zones. Our guide to [how much UFH pipe you need](/how-much-underfloor-heating-pipe-per-m2/) explains the relationship between spacing, area and loop length.
## Manifolds and controls, don't buy the cheapest box
A good manifold gives every loop an adjustable flow meter, isolation, filling and draining points, automatic or manual air removal and correctly sized actuators. Stainless steel and DZR brass are both credible. Reinforced polymer can also be appropriate when designed for the duty.
For a gas boiler plus UFH, a pump and thermostatic blending arrangement may be needed to protect the floor from high primary temperatures. A heat pump designed to supply UFH directly may not need local blending. Unnecessary mixing can raise the required heat-pump temperature and waste efficiency.
The [manifold guide](/underfloor-heating-manifold-guide/) shows what each component does, while the [zoning guide](/underfloor-heating-zoning-complete-guide/) explains thermostats, actuators and wiring centres.
## What a proper quote should include

Ask every supplier for the same scope:
- Room-by-room heat loss and design output
- Pipe type, diameter, spacing and maximum loop length
- Design flow temperature and temperature drop
- Manifold material, port count, flow meters and isolation
- Pump or blending controls, if required
- Number and type of thermostats and actuators
- Floor panels, fixings, edge strip and pressure-test equipment
- CAD loop drawing and commissioning flow rates
- Separate warranties for pipe, manifold, controls and labour
Then compare total project cost. A £28/m² pipe-and-clip offer can become more expensive than a £45/m² designed package once somebody adds the manifold, controls and missing zones.
## Which one would I choose?

For a conventional new-build screed floor, I'd shortlist Polypipe, John Guest and Uponor, then choose on design quality, local installer experience and the complete price. For a shallow retrofit, I'd compare Wunda Rapid Response, Uponor Minitec or Siccus Mini, JG LowFit and the relevant Warmup overlay system.
If you're installing a heat pump, don't accept “heat-pump compatible” as the whole answer. Ask what flow temperature the design needs on the coldest day. The [heat pump and UFH guide](/underfloor-heating-heat-pumps-guide-2026/) explains why 35°C design water and 45°C design water can produce noticeably different efficiency.
The brand matters, but the heat-loss calculation, floor build-up and commissioning decide whether the house is warm. Spend your attention there.
---
--- title: Is Underfloor Heating Banned in the UK? The 2026 Rules Explained description: Underfloor heating is not banned in the UK. Here is what the Future Homes Standard, Part L, electric heater rules and gas boiler plans actually mean. url: https://underfloorheating.info/news/is-underfloor-heating-banned-uk-2026/ published: 2026-08-21 tags: ['underfloor heating ban', 'UK ban underfloor heating', 'Future Homes Standard', 'Part L', 'gas boiler ban', 'underfloor heating 2026'] ---
# Is Underfloor Heating Banned in the UK? The 2026 Rules Explained
No, underfloor heating isn't banned. [underfloorheating.info](https://underfloorheating.info/) explains what the rules mean for your system, and [underfloorheating.directory](https://underfloorheating.directory/) helps you find installers who can design a compliant low-temperature heating setup.
> **Quick Answer**: The UK has **not banned underfloor heating**, and nobody has to remove an existing electric or wet system. England's final Future Homes and Buildings Standards were published on 24 March 2026 and take effect on **24 March 2027**, subject to transitional rules. They push new homes towards low-carbon heat, where wet UFH and heat pumps work particularly well. The separate 2035 gas boiler policy is an ambition to phase out new and replacement natural gas boilers, not an order to rip out working boilers.
## Why people think UFH is being banned
Three different stories have been bundled into one alarming headline:
1. The Future Homes Standard was expected in 2025 and changes how new homes meet Part L.
2. The government has stated an ambition to phase out new and replacement natural gas boilers by 2035.
3. Proposed ecodesign rules would raise standards for newly sold electric local space heaters, a category that includes electric UFH.
None of those is a blanket underfloor heating ban. They deal with new buildings, future heating appliances or products entering the market. Your warm bathroom floor hasn't suddenly become illegal.

## The “Future Homes Standard 2025” did not start in 2025
You'll still see “Future Homes Standard 2025” in searches, planning documents and older articles. That was the intended timetable, not the final commencement date.
The government published England's final Future Homes and Buildings Standards package on 24 March 2026. The Building Regulations amendments come into force on **24 March 2027** for most work. Higher-risk building provisions have a later 24 September 2027 date.
For ordinary non-higher-risk work, transitional arrangements can protect projects where a valid building notice, initial notice or full-plans application is submitted before 24 March 2027 and the relevant building work starts before 24 March 2028. Building control should confirm how the provisions apply to a specific project.
The change updates Part L and associated guidance in England. It requires new homes to combine high energy efficiency with low-carbon heating and on-site renewable electricity generation. The government's published summary says gas boilers will not meet the required performance standard for new homes.
That is not the same as banning UFH. Underfloor heating is a heat emitter, like a radiator. The regulation is concerned with the whole building's energy and emissions performance, plus minimum standards for its services.
## What does Part L 2023 mean?

“Part L 2023” usually refers to the 2023 consultation process for the Future Homes and Buildings Standards, not a single UK-wide regulation called Part L 2023.
Before the 2027 standards take effect, new English homes generally work to the Part L 2021 uplift, which came into force in June 2022, subject to its transition arrangements. The 2023 consultation proposed the next step, and the government published the final response and regulations in 2026.
This matters because four UK nations set their own building standards:
- **England** uses Approved Document L and the 2026 Future Homes and Buildings package.
- **Wales** has separate Welsh Building Regulations and Approved Documents.
- **Scotland** uses its Technical Handbooks and building standards system.
- **Northern Ireland** uses its own Building Regulations and technical booklets.
So a national headline can be directionally useful but legally sloppy. Check the rules for the nation where the property sits. Our [UK Building Regulations guide](/uk-building-regulations-underfloor-heating/) explains Part L, electrical safety and system standards in practical terms.
## Is gas underfloor heating banned?

There isn't really a “gas underfloor heating system”. Wet UFH carries warm water. That water might come from a gas boiler today, then from a heat pump after a future upgrade. The pipe and floor construction can often stay in place if both systems were designed sensibly.
For new homes in England built to the Future Homes Standard, the government's position is that gas boilers won't meet the required performance standard. That pushes developers towards heat pumps, heat networks and other low-carbon heat.
Existing homes are different. You do not have to remove a working gas boiler in 2026. The government's 2035 language has been an **ambition to phase out installations of new and replacement natural gas boilers**, with the transition depending on workable and affordable low-carbon alternatives. It isn't a retrospective confiscation date.
If your boiler fails after a future rule change, the options available then will depend on final legislation, the building and any exemptions. Don't spend thousands now because somebody told you every boiler becomes illegal on 1 January 2035. That isn't what current policy says.
## Why wet UFH plus a heat pump fits the new direction
A heat pump's efficiency depends heavily on the temperature it must produce. Wet underfloor heating spreads heat across most of the room, so it can often meet demand with water around 30 to 45°C. A small radiator system may need much hotter water.
Lower flow temperature usually improves a heat pump's coefficient of performance. In plain English, you get more useful heat from each unit of electricity.

That makes UFH a strong compliance route, but not an automatic one. The design still needs:
- A room-by-room heat-loss calculation
- Enough insulation beneath the floor and around the building fabric
- Pipe spacing and floor output that meet the design load
- Low-resistance floor finishes
- Weather compensation and sensible zoning
- Hydraulic design that lets the heat pump maintain adequate flow
A badly insulated room with sparse pipework may still demand high water temperatures. Read our [heat pumps and UFH guide](/underfloor-heating-heat-pumps-guide-2026/) for worked flow-temperature and efficiency examples.
## Is electric underfloor heating being banned?

No. A separate ecodesign proposal targets newly sold electric local space heaters, including electric UFH, towel rails, panel heaters and storage heaters. The proposed approach focuses on minimum product performance, temperature controls and low-power standby or off modes.
Existing installed heaters are unaffected. The proposal does not send inspectors into homes to pull up floors. It means some products may need better controls or redesign before manufacturers can continue selling them after the future rules take effect.
There is a real Part L issue, though. Direct electric resistance heating turns one unit of electricity into roughly one unit of heat at the point of use. A heat pump can deliver several units of heat from one unit of electricity under suitable conditions. That makes large areas of direct electric heating harder to justify in some new-build energy models, even though the product itself remains legal.
For a 4m² bathroom used for short warm-up periods, electric UFH can still be practical. For a 100m² new home, wet UFH with a heat pump normally gives a much stronger whole-building energy case. Our [electric versus water comparison](/electric-vs-water-underfloor-heating-2026/) sets out the capital and running-cost trade-off.
## What changes for different homeowners?
| Your situation | Is UFH banned? | What to do |
|---|---|---|
| Existing wet UFH with a gas boiler | No | Service it normally and plan future heat-source replacement sensibly |
| Existing electric bathroom mat | No | Keep using the thermostat and floor sensor |
| New home in England under current transition | No | Confirm the applicable Part L route with building control |
| New English home under the 2027 standard | No | Model the whole building with low-carbon heat, fabric and renewables |
| Heat-pump retrofit | No | Check heat loss, emitter output and required flow temperature |
| Buying a new electric UFH product after ecodesign changes | No | Choose a compliant heater and matched control |
## Can you keep UFH when changing the boiler?
Usually, yes. Existing wet UFH is one of the better emitters to keep when moving from a boiler to an air source or ground source heat pump.
But don't assume that “UFH equals heat-pump ready”. An older system might have 200mm pipe spacing, weak floor insulation, thick carpet or a mixing set designed around 70°C boiler water. An installer should calculate each room's output at the proposed lower flow temperature.
You may need to improve insulation, change controls, remove an unnecessary blending valve or add emitters in high-loss rooms. The buried pipe doesn't normally need replacing just because the heat source changes.
## What about radiators?
Radiators aren't banned either. New-build compliance is performance-based, and appropriately sized low-temperature radiators or fan-assisted emitters can work with a heat pump.
UFH simply has a useful physical advantage: much more emitting surface. It also frees wall space and produces even temperatures. The trade-off is disruption and cost in an existing home, which is why a mixed system, UFH downstairs and oversized radiators upstairs, often makes sense.
Our [UFH versus radiators guide](/underfloor-heating-vs-radiators/) compares response time, installation and comfort without pretending one answer fits every house.
## The practical answer for a 2026 project
If you already have UFH, carry on. Maintain the manifold, use sensible controls and don't replace working equipment because of a misleading ban headline.
If you're building a new home in England, ask the designer which regulatory route and transition applies, then get the heating and fabric modelled together. Wet UFH plus a heat pump is a strong path, not a legal requirement in every building.
If you're renovating, future-proof the parts that are hard to change later. Good insulation, close pipe spacing and low-temperature design cost less to get right while the floor is open. You can change the heat source and controls later. Digging up undersized pipework is another story.
The rule to remember is simple: **underfloor heating isn't being banned**. Building standards are moving away from high-carbon heat and towards efficient, controllable systems. Properly designed wet UFH sits comfortably on that side of the line.
---
--- title: Electricity VAT Cut: Impact on Underfloor Heating Bills description: Electricity VAT falls from 5% to 0% in October 2026. See how the cut affects electric and heat pump underfloor heating bills and estimate your saving. url: https://underfloorheating.info/news/electricity-vat-cut-underfloor-heating/ published: 2026-08-03 updated: 2026-08-21 tags: ['underfloor heating news', 'energy prices', 'VAT', 'running costs', 'heat pumps', 'electric underfloor heating'] ---
# Electricity VAT Cut: Impact on Underfloor Heating Bills
On 21 July, in his first week as Prime Minister, Andy Burnham announced that VAT on domestic electricity bills will fall from 5% to 0% from 1 October 2026, initially for six months. Miatta Fahnbulleh was appointed Energy Secretary at the same reshuffle, with Ed Miliband moving to the Foreign Office. Follow the wider implications at [underfloorheating.info](https://underfloorheating.info/) and compare suitable professionals through the [Underfloor Heating Directory](https://underfloorheating.directory/).
The headline figure being quoted is around £45 a year for a typical household. Some coverage has treated this as a meaningful cut to heating bills; other coverage has dismissed it as too small to notice. Both readings miss the point that matters most to anyone running underfloor heating: the cut applies to electricity only, and gas keeps its 5%. That narrows the gap between the two fuels, which is the number that decides whether electric heating makes financial sense.
Here is what the change does and doesn't do.
## The arithmetic
Under the July-September 2026 price cap, the average electricity unit rate is about 26.11p per kWh and gas is about 7.33p per kWh, both including 5% VAT. Strip VAT out of electricity and the rate falls to roughly **24.87p per kWh** - a reduction of about 4.8%.
That figure is the honest one to work from. It is not a dramatic cut, but it applies to every kWh you use.
**For electric underfloor heating**, a household spending £250 a year on its floor heating would save around £12; one spending £400 would save around £19. If your whole home runs on electric heating, the saving scales up accordingly. This is a straightforward percentage off what you already pay - nothing about how the system runs changes. Our [electric underfloor heating guide](/electric-underfloor-heating-systems/) and the [running costs breakdown](/underfloor-heating-running-costs-2026/) both work from unit rates, so you can apply the 4.8% yourself to whatever figure fits your home.
**For heat pumps feeding underfloor heating**, the change is more interesting, because it shifts the comparison with gas.
A condensing gas boiler running at roughly 90% seasonal efficiency delivers useful heat at about **8.1p per kWh** at current gas rates. A heat pump on a well-designed underfloor system, achieving a seasonal performance factor (SCOP) of 3.5, delivers heat at about **7.1p per kWh** once VAT comes off electricity - down from around 7.5p today. At a SCOP of 4.0, which good underfloor design at low flow temperatures can reach, that falls to roughly **6.2p per kWh**.
The break-even point - the SCOP a heat pump needs to match a gas boiler on running cost - drops from about 3.2 to about 3.05.

## The part that gets lost in the headlines
Heat pumps on underfloor heating were already ahead of gas on running cost before this announcement. That happened on 1 July, when the price cap rose 13% overall but gas jumped around 24% while electricity rose only about 5%. We covered that shift in [our piece on the July price cap](/news/july-2026-price-cap-underfloor-heating/). The VAT cut widens an advantage that already existed; it does not create one.
Equally, it does not rescue the case for direct electric heating against gas. Electric underfloor heating converts electricity to heat at close to 100%, so it still costs roughly three times as much per unit of heat as a gas boiler - the ratio moves from about 3.6:1 to about 3.4:1. That is why electric systems remain best suited to bathrooms, small extensions and rooms without a practical wet connection, as set out in our [electric versus water comparison](/electric-vs-water-underfloor-heating-2026/).
## Four caveats worth knowing
**It is six months, not forever.** The cut is funded for the remainder of the 2026-27 financial year. Anything beyond March 2027 is a matter for a future Budget. Do not build a ten-year investment case on it.
**Your October bill may still be higher than today's.** Cornwall Insight has cut its forecast for the October-December cap to about £1,699.59 a year for a typical dual-fuel household, down from £1,906.27 before the announcement. But that is still around 2% above the current £1,663 level, because wholesale gas prices have risen. Ofgem confirms the actual October cap by 26 August, so the unit rates above will change.
**The "typical household" figure moved too.** Ofgem revised its typical consumption assumptions on 1 July, cutting the assumed gas figure by 17% and electricity by 7%. That makes headline annual bills look lower without anyone using less energy. Compare unit rates, not annual averages.
**VAT was never the main distortion.** Jan Rosenow, professor of energy and climate policy at Oxford, made the point plainly: VAT was only 5%, and the bigger imbalances sit in the policy levies loaded onto electricity rather than gas. Whether this is a first step towards proper rebalancing or a one-off is the open question, and it is the one that will actually determine long-term running costs for electrically heated homes.

## What to do about it
Practically speaking: nothing urgent. Suppliers including British Gas have confirmed they will apply the reduction automatically from 1 October, including to customers on fixed tariffs, so there is no action to take and no reason to switch tariff for it.
If you are weighing up a heat pump with underfloor heating, the more useful lever is still system design rather than tariff timing. Getting flow temperatures down - through correct pipe spacing, adequate floor coverage and sensible [controls](/smart-thermostats-underfloor-heating/) - moves your SCOP by far more than 4.8%. Our [heat pump and underfloor heating guide](/underfloor-heating-heat-pumps-guide-2026/) covers what good design looks like, and if you are at the quoting stage, the sister directory lists [MCS-approved installers](https://underfloorheating.directory/mcs-approved-installers) certified for the heat pump work that Boiler Upgrade Scheme funding requires.
The VAT cut is a modest, welcome nudge in a direction that helps electrically heated homes. It is not a reason to rush a decision either way.
---
**Sources:** [ECIU: VAT to be removed from electricity bills / reshuffle comment (21 July 2026)](https://eciu.net/media/press-releases/vat-to-be-removed-from-electricity-bills-reshuffle-comment) · [British Gas: UK Government VAT cut on electricity bills explained (22 July 2026)](https://www.britishgas.co.uk/the-source/news/uk-vat-cut-on-electricity-bills.html) · [Solar Power Portal: Burnham's electricity VAT cut could 'rebalance' prices, Cornwall Insight lowers October forecast (22 July 2026)](https://www.solarpowerportal.co.uk/energy-policy/burnham-s-electricity-vat-cut-could-rebalance-prices-cornwall-insight-lowers-october-forecast) · [Ofgem: Energy price cap will rise by 13% from July](https://www.ofgem.gov.uk/press-release/energy-price-cap-will-rise-13-july) · [Ofgem: Review of typical domestic consumption values - decision](https://www.ofgem.gov.uk/sites/default/files/2026-05/Review%20of%20typical%20domestic%20consumption%20values%20decision.pdf) · [Cornwall Insight: Default tariff cap predictions](https://www.cornwall-insight.com/predictions-and-insights-into-the-default-tariff-cap/)
---
--- title: Heat Pump Load Control Explained: What UK Owners Need to Know description: Heat pump load control explained: learn why the DESNZ proposal is opt-in, what suppliers could control and what it means for underfloor heating owners. url: https://underfloorheating.info/news/heat-pump-load-control-explained/ published: 2026-07-28 updated: 2026-08-21 tags: ['underfloor heating news', 'heat pumps', 'load control', 'smart heating', 'energy policy'] ---
# Heat Pump Load Control Explained: What UK Owners Need to Know
> **Quick Answer:** A wave of headlines this week claimed heat pump owners face "winter warmth rationing" because suppliers will soon be able to turn their heating down remotely. The policy behind the story, the Smart Secure Electricity Systems (SSES) programme, is real, but the framing is misleading. Load control is proposed as opt-in: only households that choose to join a scheme, in exchange for a cheaper tariff, would be affected, and the current consultation is about licensing the companies involved, not mandating anything for homeowners. For underfloor heating owners, the fuller story is arguably good news. Read more independent guidance at [underfloorheating.info](https://underfloorheating.info/) or find heating professionals through the [Underfloor Heating Directory](https://underfloorheating.directory/).
## Where the headlines came from
On 20 July, The Telegraph reported that "heat pump households face winter warmth rationing", saying electricity suppliers will be able to remotely turn down heat pump central heating by the end of next year. The story was picked up widely, with some outlets escalating the language to government-controlled thermostats and comparisons to totalitarianism.
The underlying policy is the Department for Energy Security and Net Zero's Smart Secure Electricity Systems programme. It covers what officials call energy smart appliances, heat pumps, home batteries and EV charge points, and something called load control: the ability for a licensed company to adjust when those appliances draw power, shifting demand away from evening peaks to keep the grid stable and make better use of cheap off-peak electricity.
DESNZ ran a consultation on a draft load control licensing framework from 10 December 2025 to 18 February 2026, alongside a parallel Ofgem consultation on how licences would be monitored and enforced. As of late July, the government is still analysing responses; no final regulations have been made.

## What the proposals actually say
Three points from the consultation documents sit awkwardly with the "rationing" framing.
First, participation is voluntary. The proposal is that only households that agree to join a load control scheme would be included, with discounted tariffs offered in return. That is the same bargain behind existing time-of-use tariffs and the National Grid's demand flexibility events, which hundreds of thousands of households already join happily each winter. Anyone who does not sign up keeps full control of their own heating.
Second, the consultation is about licensing the controllers, not controlling consumers. The draft Electricity Act 1989 (Load Control Licence) Regulations 2026 would require companies that remotely manage appliances to hold a licence, with standard conditions covering fairness, transparency and cybersecurity. In other words, the regime being consulted on exists to constrain what companies can do with connected devices, activity that today happens with far less oversight.
Third, none of this is unique to heat pumps. EV charge points have operated under smart-charging regulations since 2021, and smart tariffs already shift millions of appliances' demand daily. Heat pumps are simply the next large flexible load to be brought inside a proper regulatory framework.
There is fair ground for scrutiny: how consent is obtained, how easily households can leave a scheme, and how override functions work in a cold snap all matter, and the final regulations deserve a close read when they appear. But a proposal to license and regulate voluntary flexibility schemes is a long way from rationing.

## Why underfloor heating owners are well placed
If you heat your home with a [heat pump feeding wet underfloor heating](/underfloor-heating-heat-pumps-guide-2026/), the flexibility being described is something your system is unusually good at. A heated screed floor stores a large amount of warmth, so briefly reducing heat input during a peak period barely registers as a temperature change in the room; the floor keeps radiating while the heat pump eases off. Radiator systems, with far less thermal mass, cool much faster.
That makes underfloor heating households ideal candidates for the discounted flexibility tariffs these schemes would offer: you shift load with minimal comfort penalty and are paid for doing so. Many owners already do a manual version of this, using [smart thermostats](/smart-thermostats-underfloor-heating/) to pre-warm floors on cheap overnight rates. With July's price cap having widened the gap between gas and electricity standing costs, covered in our [price cap analysis](/news/july-2026-price-cap-underfloor-heating/), anything that trims peak-rate electricity use helps the arithmetic in our guide to [underfloor heating running costs](/underfloor-heating-running-costs-2026/).
The story is different for [electric underfloor heating](/electric-underfloor-heating-systems/), which is not an "energy smart appliance" under these proposals and is unaffected, though owners on time-of-use tariffs benefit from the same off-peak logic.

## The bottom line
Nothing has been decided, nothing is mandatory, and the consultation now being reported as "warmth rationing" is chiefly about putting licence conditions on companies that operate voluntary flexibility schemes. If you are considering a heat pump, perhaps prompted by the £9,000 off-gas-grid grant that went live on 21 July, this week's headlines are not a reason to hesitate. Choose an installer from the directory of [MCS-approved installers](https://underfloorheating.directory/mcs-approved-installers), and treat any flexibility tariff you are later offered as what it is: an optional discount, not an obligation.
We will report on the final load control regulations when DESNZ publishes its consultation response.
**Sources:** [DESNZ. SSES Programme: draft load control licence regulations and conditions](https://www.gov.uk/government/consultations/smart-secure-electricity-systems-sses-programme-draft-load-control-licence-regulations-and-conditions) · [Ofgem. Implementing the load control licensing regime](https://www.ofgem.gov.uk/consultation/smart-secure-electricity-systems-implementing-load-control-licensing-regime) · [The Telegraph. Heat pump households face winter warmth rationing (via AOL)](https://www.aol.com/articles/heat-pump-households-face-winter-160056000.html)
---
--- title: Carpet with Underfloor Heating: TOG Rating & UK Compatibility Guide 2026 description: Carpet works with underfloor heating when carpet and underlay stay within safe TOG limits. Compare suitable carpets, underlays and heat pump guidance. url: https://underfloorheating.info/carpet-underfloor-heating/ published: 2026-07-24 updated: 2026-08-21 tags: ['carpet', 'underfloor heating', 'TOG rating', 'underlay', 'heat pump', 'VOC'] ---
# Carpet with Underfloor Heating: TOG Rating & UK Compatibility Guide 2026
> **Quick answer:** Yes, carpet is compatible with underfloor heating, provided the **combined TOG rating of the carpet and underlay stays at or below 2.5** for a standard system, or **1.5 or below if you have a heat pump**. Choose a low-pile carpet (max 1.0–1.5 TOG) with a hessian or woven backing, paired with a specialist low-TOG underlay explicitly labelled for underfloor heating, never felt, standard foam or rubber-backed underlay. Carpet delivers the lowest heat output of any common flooring (48 W/m² vs 71 W/m² for tile), so it suits comfort-first rooms like bedrooms better than high-output areas like bathrooms. Explore more planning advice at [underfloorheating.info](https://underfloorheating.info/) and compare local professionals through the [Underfloor Heating Directory](https://underfloorheating.directory/).
**Planning carpet over UFH?** Find installers experienced with underfloor heating and carpet specification via the [Underfloor Heating Directory](https://underfloorheating.directory/installers).
## Can you have carpet with underfloor heating?
Yes, carpet is one of the most common flooring choices for UK homes and works over underfloor heating, but it's the flooring type where getting the specification wrong has the biggest impact on system performance. This guide covers what you need to know; for how carpet compares with every other flooring type, see our [complete flooring compatibility guide](/best-flooring-underfloor-heating/).
## The golden rule: combined TOG rating
The single most important number is the **combined TOG rating of the carpet and its underlay together**:
| System type | Maximum combined TOG |
|---|---|
| Standard wet or electric UFH | 2.5 TOG |
| Heat pump-driven UFH | 1.5 TOG |
| Best real-world performance (any system) | 1.5 TOG or lower |
A high combined TOG acts like insulation, trapping heat below the surface instead of letting it radiate into the room, exactly what you don't want sitting on top of a heating system. If you're on a heat pump, the stricter 1.5 TOG limit exists because heat pumps are most efficient at low flow temperatures (35–45°C), and a heavily insulating floor forces the system to raise the flow temperature to compensate, directly cutting the heat pump's coefficient of performance (CoP).
### The "subtract 1 TOG" rule
Lab-rated TOG values are measured under static conditions that don't fully reflect how carpet behaves on an actively heated floor. The Carpet Foundation notes real-world heat transmission under active UFH is typically better than the lab figure suggests, and recommends **subtracting around 1.0 TOG from the standard rating** when calculating suitability specifically for underfloor heating. In practice, some carpets that look borderline on paper perform acceptably once installed, but always check the manufacturer's UFH-rated figure rather than relying on this alone.

## Choosing the right carpet and underlay
- **Carpet type:** low-pile carpets with a maximum TOG of 1.0–1.5, ideally with a hessian or woven backing rather than thick felt or rubber, which trap heat.
- **Underlay:** use a specialised low-TOG underlay (typically 0.5–1.0 TOG) explicitly labelled "suitable for underfloor heating." Avoid felt, polyurethane foam, and standard rubber-backed underlays, all have far too much thermal resistance for UFH use.
- **Always verify** the combined figure (carpet + underlay) against the 2.5 TOG ceiling, or 1.5 for heat pumps, before buying, using the manufacturer's published UFH-specific rating where available.
## Health and air quality considerations
Carpets and their backings can release volatile organic compounds (VOCs) when heated, compounds that evaporate more readily as temperature rises. The most recognisable is 4-phenylcyclohexene (4-PC), a byproduct of styrene-butadiene rubber latex backing responsible for the "new carpet smell." Laboratory studies heating carpet samples to typical UFH surface temperatures (25–27°C, against 18–20°C for an unheated floor) detected meaningfully higher concentrations of these compounds than at room temperature.
In poorly ventilated rooms, this can contribute to symptoms associated with sick building syndrome, headaches, respiratory and eye irritation, and fatigue, particularly with newly installed carpet (first 6–12 months), synthetic fibres and backings, foam or rubber underlays, and limited fresh air circulation.
**Healthier carpet choices for UFH:**
- 100% wool carpet with a hessian or jute backing, which emits substantially less VOC than synthetic equivalents.
- Products with recognised low-VOC certification.
- Natural felt, wool or natural rubber underlays instead of synthetic foam.
- Good ventilation, especially in the first few weeks after installation.
- Running the heating for 48–72 hours with windows open before occupying the room, to let initial off-gassing occur.
For anyone with respiratory sensitivities or allergies, a hard finish, tile, engineered wood or LVT, will usually be the more comfortable long-term choice. See our [vinyl & LVT guide](/vinyl-lvt-underfloor-heating/) for an alternative that keeps more of a soft-underfoot feel with much lower thermal resistance.

## Heat output: what you're trading for comfort
Carpet delivers roughly 32% less usable heat than tile, a fair trade in a bedroom prioritising softness, but a weaker choice for a bathroom or kitchen where fast, high warmth matters most. See our [room-by-room selection guide](/best-flooring-underfloor-heating/#room-by-room-selection-guide) for where carpet fits best across a typical home.

## Frequently Asked Questions
### What TOG rating carpet is best for underfloor heating?
As low as possible. Aim for a combined carpet-and-underlay TOG of 2.5 or below for a standard system, or 1.5 or below for a heat pump. Tile, polished screed and thin LVT sit at the low end of thermal resistance; carpet and underlay combinations need the most careful checking.
### Can carpet be used with a heat pump and underfloor heating?
Yes, but the combined TOG limit is stricter. 1.5 TOG or below, rather than the 2.5 TOG ceiling for a standard boiler-fed system. This protects the heat pump's efficiency, since a heavily insulating floor forces higher flow temperatures and reduces the coefficient of performance (CoP).
### Does carpet reduce underfloor heating efficiency?
Yes, more than any other common flooring, carpet delivers around 48 W/m² of heat output compared with 71 W/m² for tile, a roughly 32% reduction. Choosing a low-TOG carpet and underlay combination minimises this efficiency loss.
### Is underfloor heating safe under carpet?
Yes, provided the combined TOG rating of carpet and underlay is checked and kept within limits. The main practical consideration isn't safety but efficiency and VOC off-gassing, both of which are addressed by choosing a UFH-rated low-TOG underlay and a low-VOC carpet where possible.
## Related reading
- [Best Flooring for Underfloor Heating: Complete Guide](/best-flooring-underfloor-heating/)
- [Vinyl & LVT for Underfloor Heating](/vinyl-lvt-underfloor-heating/)
- [Laminate & Engineered Wood for Underfloor Heating](/laminate-engineered-wood-underfloor-heating/)
- [Underfloor Heating with Heat Pumps](/underfloor-heating-heat-pumps-guide-2026/)
**Ready to plan your project?** Find installers experienced with carpet specification over UFH via the [Underfloor Heating Directory](https://underfloorheating.directory/installers).
---
--- title: Laminate & Engineered Wood for Underfloor Heating: UK Guide 2026 description: Laminate and engineered wood suit underfloor heating within key temperature and thickness limits. Compare flooring, fitting and acclimatisation advice. url: https://underfloorheating.info/laminate-engineered-wood-underfloor-heating/ published: 2026-07-24 updated: 2026-08-21 tags: ['laminate flooring', 'engineered wood', 'underfloor heating', 'TOG rating', 'acclimatisation', 'floor sensor'] ---
# Laminate & Engineered Wood for Underfloor Heating: UK Guide 2026
> **Quick answer:** Yes, both laminate and engineered wood work well with underfloor heating, delivering solid heat output (60 W/m² and 56 W/m² respectively) within a 27°C surface temperature limit. Engineered wood is the far safer choice than solid wood, thanks to its cross-laminated construction resisting the expansion and contraction a heated floor puts every timber product through. Boards should be no thicker than 18mm with a 4–6mm wear layer, and must acclimatise to the room, running the UFH system, for 48–72 hours before fitting. Find more flooring guidance at [underfloorheating.info](https://underfloorheating.info/) and compare experienced installers through the [Underfloor Heating Directory](https://underfloorheating.directory/).
**Planning wood or laminate flooring over UFH?** Find installers experienced with timber and laminate specification via the [Underfloor Heating Directory](https://underfloorheating.directory/installers).
## Does laminate work with underfloor heating?
Yes. Laminate rated for UFH use is compatible with both wet and electric systems, delivers solid heat output (around 60 W/m²), and is one of the more budget-friendly flooring options. It carries the same 27°C surface temperature limit as LVT and engineered wood, so a floor sensor thermostat is essential. See our [complete flooring compatibility guide](/best-flooring-underfloor-heating/) for how laminate compares against every other material.
## Is engineered wood suitable for underfloor heating?
Yes, and it's the preferred wood option for UFH, by a clear margin over solid wood. Its cross-laminated construction (thin layers of timber bonded with the grain running in alternating directions) resists the expansion and contraction that a heated floor puts every timber product through. Solid wood, being a single uniform block, has no such defence and is simply more likely to gap, cup or warp once the heating is switched on.
## The 27°C ceiling
Laminate and engineered wood both carry a **27°C maximum surface temperature** (up to 29.4°C for some laminate products), noticeably stricter than tile's 29–30°C. A **floor sensor thermostat**, wired to a probe beneath the flooring, is essential to enforce this limit directly at the surface rather than relying on air temperature, which is what actually protects both the flooring and its manufacturer's warranty.

## Engineered wood: thickness and construction
- **Board thickness:** ideally no more than **18mm**, with a **4–6mm wear layer**, thick enough to sand and refinish once or twice over its life, thin enough not to insulate the room from its own heating system.
- **Moisture content:** should sit at 6–9% before installation.
- **Construction:** cross-laminated layers running in alternating grain directions, which is what gives engineered wood its dimensional stability over solid wood.
### Acclimatisation is non-negotiable
Timber, engineered or solid, must be allowed to acclimatise to the property before fitting:
1. Store the flooring in the installation room for a minimum of 48–72 hours.
2. Run the UFH system at its normal operating temperature during this period.
3. Allow the boards to fully adjust to the room's temperature and humidity.
4. Only begin installation once the boards have stabilised.
Skipping acclimatisation is the single most common cause of gapping and warping in wood floors laid over underfloor heating, far more common than choosing the wrong wood species.
## Laminate: installation essentials
- **Underlay:** a dense, low-resistance, radiant-rated underlay, never a standard acoustic underlay, which blocks the heat you're paying for.
- **Expansion gap (10–15mm):** around the full room perimeter, covered by skirting or beading, to absorb thermal movement without buckling.
- **Moisture barrier:** required over concrete subfloors to protect the laminate core from moisture migrating up through the slab.
- **Floor sensor control:** as with engineered wood, a probe wired to the thermostat enforces the surface temperature cap.
## Heat output comparison
Both laminate and engineered wood sit in the middle of the pack, noticeably better than carpet, slightly behind tile and vinyl. For most living rooms and bedrooms, the difference is small enough that aesthetics and budget usually decide the choice rather than raw thermal performance. See our [room-by-room selection guide](/best-flooring-underfloor-heating/#room-by-room-selection-guide) for where each fits best.

## Solid wood: proceed with caution
If solid wood is non-negotiable for a project, minimise the risk with narrow, kiln-dried boards from a dimensionally stable species, a specialist moisture barrier, rigorous acclimatisation, and a floor temperature sensor to enforce the 27°C limit. Even then, solid wood is not recommended for most retrofit projects or for systems designed to deliver high output, and it pairs poorly with the fast response times of electric UFH. Engineered wood delivers a near-identical look with far less risk.
## Frequently Asked Questions
### Does laminate flooring work with underfloor heating?
Yes. UFH-rated laminate is compatible with both wet and electric systems, delivering around 60 W/m² of heat output. It carries the same 27°C surface temperature limit as LVT and engineered wood, so a floor sensor thermostat is required to protect the flooring and its warranty.
### Is engineered wood better than solid wood for underfloor heating?
Yes, considerably. Engineered wood's cross-laminated construction resists the expansion and contraction that heated floors cause, making it far less prone to gapping, cupping or warping than solid wood. Solid wood can work with careful specification, but engineered wood is the lower-risk choice in almost every case.
### How thick can engineered wood be over underfloor heating?
Ideally no more than 18mm total, with a 4–6mm wear layer. Thicker boards insulate the room from its own heating system, reducing heat output and slowing response time.
### Do I need to acclimatise wood flooring before fitting over UFH?
Yes, this is one of the most important steps. Store the flooring in the installation room for 48–72 hours with the UFH system running at normal operating temperature, allowing the boards to fully adjust before fitting. Skipping this is the most common cause of gapping and warping.
## Related reading
- [Best Flooring for Underfloor Heating: Complete Guide](/best-flooring-underfloor-heating/)
- [Vinyl & LVT for Underfloor Heating](/vinyl-lvt-underfloor-heating/)
- [Carpet for Underfloor Heating](/carpet-underfloor-heating/)
- [Underfloor Heating Screed Guide](/underfloor-heating-screed/)
**Ready to plan your flooring?** Find installers experienced with timber and laminate over UFH via the [Underfloor Heating Directory](https://underfloorheating.directory/installers).
---
--- title: Underfloor Heating in a Basement: UK Guide 2026 description: Underfloor heating for basements and cellars: compare damp-proofing, insulation, floor height, heat loss and suitable flooring for a warmer space today. url: https://underfloorheating.info/underfloor-heating-basement/ published: 2026-07-24 updated: 2026-08-21 tags: ['basement underfloor heating', 'cellar heating', 'heated basement floor', 'tanking', 'wet UFH', 'electric UFH'] ---
# Underfloor Heating in a Basement: UK Guide 2026
> **Quick answer:** Underfloor heating works well in a basement or cellar conversion, and it's arguably a better fit than radiators. Plan your project with the [Underfloor Heating Directory](https://underfloorheating.directory/) and read more UK guidance at [underfloorheating.info](https://underfloorheating.info/). Basements often have limited wall space for furniture and fittings, and UFH's even, gentle heat suits a room that can otherwise feel cold and damp underfoot. The two things that matter more here than anywhere else: **waterproofing (tanking) must be resolved before the UFH goes in**, and insulation is essential given a basement floor sits directly against the ground, with no benefit from the building's own heat above it.
**Planning a basement conversion?** Compare quotes from UFH installers experienced with basement projects via the [Underfloor Heating Directory](https://underfloorheating.directory/installers).
## Why basements need extra care before UFH goes in
A basement or cellar floor sits below ground level, in direct contact with earth that stays cold year-round. That is very different from an upstairs room, where the floor below is another heated part of the house. This has two consequences that need resolving before UFH is even discussed:
- **Waterproofing (tanking):** a basement conversion needs a proper damp-proofing or tanking system, a cavity drain membrane system, external tanking, or an internal waterproof render, installed and signed off before any heating system goes on top. UFH does not replace or substitute for proper tanking; it goes in afterwards, as part of the finished floor build-up.
- **Insulation:** because a basement floor has cold, damp earth beneath it rather than a heated room, insulation is doing more work than in a normal ground-floor room. Skipping or under-specifying it here means UFH ends up warming the surrounding ground as much as the room above it.

## Floor build-up in a basement
A typical basement UFH build-up, working up from the structural slab, looks like this: structural floor → tanking/waterproofing system → insulation → UFH (pipe or mat) → screed or overlay → floor covering. Getting the order right, insulation above the tanking, not below it, is what protects both the waterproofing and the heating system's efficiency.
### Wet vs electric in a basement
- **Wet UFH** suits a full basement conversion (home cinema, gym, additional living space) where the room is used for extended periods and lower running costs matter over time. It requires the same manifold connection back to the main heat source as any other wet zone, see our [manifold guide](/underfloor-heating-manifold-guide/) for placement, and factor in the extra pipe run distance if the manifold is on a floor above.
- **Electric UFH** suits a smaller basement room (a home office, utility room, or shower room) where a full wet zone isn't worth the additional plumbing, or where the basement is a later addition to an already-zoned wet system.

## Heat loss in a basement
Basements have an unusual heat loss profile compared with a normal room: the below-ground walls lose heat differently to above-ground external walls (ground temperature is more stable but still much cooler than room temperature), and there's often little to no natural heat gain from sunlight given small or absent windows. A generic heat loss assumption from an upstairs room won't transfer accurately.
**[Use our free heat loss calculator →](/heat-loss-calculator/)** to get a figure specific to the basement's actual construction and below-ground wall area, before specifying pipe spacing or mat wattage.
## Flooring choice for a heated basement floor
Tile, stone or polished concrete/screed are the strongest choices for a basement UFH floor. They deliver the highest heat output and, just as importantly, tolerate the slightly higher risk of residual moisture in a below-ground space better than timber does. If you want a warmer-underfoot finish, engineered wood or LVT both work, provided the tanking and moisture control are properly specified first. See our [complete flooring compatibility guide](/best-flooring-underfloor-heating/) for TOG ratings, surface temperature limits and room-by-room detail. Solid wood is best avoided in a basement given the elevated moisture risk versus other rooms in the house.

## Costs
| Basement use | Typical size | System | Installed cost (excl. tanking) |
|---|---|---|---|
| Utility/shower room | 6–10m² | Electric | £360–£1,200 |
| Home office/gym | 15–25m² | Electric or wet | £900–£4,750 |
| Full basement conversion | 30–60m² | Wet | £2,700–£11,400 |
These figures cover the UFH system only. Tanking and waterproofing is a separate, often substantial cost that should be budgeted and specified before the heating system, not alongside it. See our [full costs guide](/underfloor-heating-costs/) for the complete UK breakdown.
## Building regulations
A basement conversion is notifiable building work and typically involves structural waterproofing sign-off in addition to the usual Part L (energy efficiency) and Part P (electrical safety) requirements that apply to any UFH installation. See our [UK building regulations guide](/uk-building-regulations-underfloor-heating/). Ventilation and damp control are also a bigger consideration in a basement than elsewhere in the house and should be resolved as part of the same project.
## Frequently Asked Questions
### Can you put underfloor heating in a basement?
Yes, and it's often a better fit than radiators given limited wall space in many basement layouts. The key sequencing point: proper waterproofing (tanking) must be installed and signed off first, with the UFH system going in as part of the floor build-up above it. UFH does not replace or substitute for tanking.
### Do you need extra insulation for basement underfloor heating?
Yes, more than for an upstairs room. A basement floor sits directly against cold, damp earth rather than another heated room, so insulation is doing more work to keep heat directed upward rather than into the surrounding ground.
### What flooring is best for a heated basement floor?
Tile, stone or polished concrete/screed are the strongest choices, highest heat output and the best tolerance for the slightly elevated moisture risk of a below-ground space. Solid wood is best avoided; engineered wood and LVT are reasonable alternatives provided tanking and moisture control are properly specified.
## Related reading
- [Underfloor Heating on Existing Concrete Floors](/underfloor-heating-existing-concrete-floor/)
- [Best Flooring for Underfloor Heating](/best-flooring-underfloor-heating/)
- [Underfloor Heating Design & Planning](/underfloor-heating-design-planning/)
- [UK Building Regulations for Underfloor Heating](/uk-building-regulations-underfloor-heating/)
**Ready to plan your basement's heating?** Find installers experienced with basement conversions via the [Underfloor Heating Directory](https://underfloorheating.directory/installers).
---
--- title: Underfloor Heating on Existing Concrete Floors: UK Retrofit Guide description: Add underfloor heating to an existing concrete floor using overlay, milled screed or full-screed systems. Compare floor height, costs and preparation. url: https://underfloorheating.info/underfloor-heating-existing-concrete-floor/ published: 2026-07-24 updated: 2026-08-21 tags: ['concrete floor', 'existing concrete floor', 'retrofit', 'milled screed', 'low-profile overlay', 'wet UFH', 'electric UFH'] ---
# Underfloor Heating on Existing Concrete Floors: UK Retrofit Guide
> **Quick answer:** Yes, most solid concrete floors in UK homes can take underfloor heating without being dug up. Review practical advice at [underfloorheating.info](https://underfloorheating.info/) and plan your installation through the [Underfloor Heating Directory](https://underfloorheating.directory/). There are three realistic routes: a **low-profile overlay** system (15–25mm build-up, works for wet or electric), **milled screed / in-cut** (pipe milled directly into the slab, zero build-up, wet only, needs 75–100mm of slab depth), or a **thin electric mat** (3–6mm, under tile or stone). Which one suits your project depends mainly on how much floor height you can afford to lose and whether you want a wet or electric system. Read on for the full comparison, prep work, and costs.
**Planning a concrete floor retrofit?** Compare quotes from UFH installers experienced with concrete subfloors via the [Underfloor Heating Directory](https://underfloorheating.directory/installers).
## Can you put underfloor heating on an existing concrete floor?
Yes. It's the single most common retrofit scenario in the UK. Most homes built from the 1930s onwards have a solid concrete ground-floor slab. Concrete is the easier of the two subfloor types to retrofit onto (the other being [suspended timber floors](/underfloor-heating-suspended-timber-floor/)), because it's a stable, flat, high-mass base that both wet and electric systems can be fixed to directly.
The question isn't really *can* you; it's *which method*. Three genuinely different installation routes all work on concrete, each with a different floor-height cost.
## The three retrofit routes for concrete floors

| Method | Floor build-up | System type | Best for |
|---|---|---|---|
| **Low-profile overlay** | 15–25mm | Wet | Rooms with some height to spare |
| **Milled screed (in-cut)** | 0mm | Wet only | Height-critical rooms, doorways, thresholds |
| **Electric mat/loose wire** | 1.8–6mm | Electric | Single rooms, tiled floors, smaller budgets |
### Low-profile overlay systems
Pre-grooved insulation panels are laid directly on top of the existing slab, with pipes pressed into the grooves and a thin self-levelling compound over the top. This is the most widely available wet retrofit option and works on essentially any sound concrete floor. Typical build-up is 15–25mm, enough to notice at doorway thresholds, but rarely enough to require raising doors. See our [full retrofitting guide](/retrofitting-underfloor-heating/) for how overlay systems compare with the other retrofit types across both concrete and timber floors.
### Milled screed (in-cut), the zero-build-up option
Rather than adding a layer on top, a specialist milling machine cuts shallow channels directly into the slab, and continuous 16mm pipe is pressed flush into the channels, giving a full wet system with **zero increase in floor height**. This is specifically a concrete/screed technique; it needs roughly 75–100mm of combined slab and screed depth to mill into safely, and doesn't work on suspended timber floors at all. It's the best option where floor height, door clearances or step-free thresholds rule out an overlay. See our [complete milled screed guide](/milled-screed-underfloor-heating/) for the full installation process, costs and where it does and doesn't apply.
### Electric mats and loose wire
For a single room, a bathroom or kitchen extension, for example, a thin electric mat or loose-wire system can go straight onto a prepared concrete slab under tile or stone, adding as little as 1.8–6mm. This is the cheapest and fastest route, though running costs are higher than a wet system for anything beyond one or two rooms. See our [electric underfloor heating guide](/electric-underfloor-heating-systems/) for costs and system types.

## Preparing an existing concrete floor for UFH
Whichever method you choose, the slab needs the same basic preparation:
1. **Strip the existing floor covering**, carpet, tiles, laminate or vinyl removed back to bare concrete.
2. **Inspect and repair**, fill any significant cracks; a structural engineer should assess anything beyond hairline cracking in older properties.
3. **Level the surface**, a self-levelling compound corrects any unevenness before insulation or milling begins, since dips and bumps create air gaps that cause uneven heating.
4. **Check moisture levels**, a damp-proof membrane may be needed if the slab doesn't already have one, particularly in older solid-floor properties without a modern DPM.
5. **Confirm slab depth**, only relevant if you're considering milled screed; providers survey for 75–100mm of usable depth before quoting.
## Insulation on a concrete retrofit
Insulation matters more on a retrofit than a new build because you're adding it after the fact rather than designing it in from the start. High-density rigid insulation boards (commonly XPS) are laid over the prepared slab before the heating element goes down, directing heat upward into the room rather than into the concrete's thermal mass below. Skipping this step is one of the most common causes of disappointing running costs on a concrete retrofit. The system ends up heating the slab as much as the room.

## Costs
| Route | Typical cost (supply + install) | Notes |
|---|---|---|
| Electric mat (single room) | £60–£120/m² | Cheapest route, highest running cost |
| Low-profile overlay (wet) | £135–£185/m² | Standard retrofit wet system |
| Milled screed (in-cut) | Quoted per project | No standard rate, always survey-based |
For the full cost breakdown across room sizes and system types, see our [underfloor heating costs guide](/underfloor-heating-costs/) or run your own numbers with the [cost calculator](/underfloor-heating-cost-calculator/).
## Floor covering choice on a concrete retrofit
A concrete or milled-screed base pairs naturally with tile, stone or polished concrete finishes, all deliver virtually zero thermal resistance and the highest heat output of any covering. Engineered wood, LVT and carpet all work too, provided TOG and surface-temperature limits are respected. See our [complete flooring compatibility guide](/best-flooring-underfloor-heating/) for the full breakdown by material.
## Frequently Asked Questions
### Can you retrofit underfloor heating on a concrete floor without raising it?
Yes, milled screed (in-cut) UFH cuts pipe channels directly into the existing slab, giving a full wet system with zero floor build-up, provided the slab has 75–100mm of usable depth. This is currently the only zero-build-up option for a wet system on concrete; a thin electric mat (1.8–6mm) is the equivalent zero-height-impact route if you're open to an electric system instead.
### How thick does a concrete floor need to be for underfloor heating?
For a standard overlay retrofit, any sound structural slab is suitable. The overlay sits on top rather than requiring specific slab depth. For milled screed specifically, providers look for roughly 75–100mm of combined concrete and screed depth to mill channels safely.
### Is it cheaper to retrofit UFH on concrete or timber floors?
Concrete is generally the more straightforward and often cheaper retrofit, since overlay and milled systems are widely available and don't require the joist-void access that [suspended timber floor](/underfloor-heating-suspended-timber-floor/) retrofits need. Exact costs still depend heavily on room size, system type and site access.
### Do I need to remove my existing concrete floor to add underfloor heating?
No. All three retrofit routes, overlay, milled screed, and electric mat, work directly on top of or into the existing slab. You only need to remove the current floor covering (carpet, tiles, etc.), not the concrete itself.
## Related reading
- [Retrofitting Underfloor Heating: Full UK Guide](/retrofitting-underfloor-heating/)
- [Milled Screed Underfloor Heating](/milled-screed-underfloor-heating/)
- [Underfloor Heating on Suspended Timber Floors](/underfloor-heating-suspended-timber-floor/)
- [Best Flooring for Underfloor Heating](/best-flooring-underfloor-heating/)
- [Underfloor Heating Screed Guide](/underfloor-heating-screed/)
- [Underfloor Heating Costs UK](/underfloor-heating-costs/)
**Ready to get quotes?** Find installers experienced with concrete floor retrofits via the [Underfloor Heating Directory](https://underfloorheating.directory/installers).
---
--- title: Underfloor Heating in Extensions: UK Guide & Heat Loss Calculator 2026 description: Plan underfloor heating for an extension with UK heat loss guidance, system choices and realistic costs, so you avoid undersizing and stay comfortable. url: https://underfloorheating.info/underfloor-heating-extensions/ published: 2026-07-24 updated: 2026-08-21 tags: ['extension underfloor heating', 'extension heat loss calculator', 'extension heat loss calculation', 'new build', 'wet UFH', 'electric UFH'] ---
# Underfloor Heating in Extensions: UK Guide & Heat Loss Calculator 2026
> **Quick answer:** Underfloor heating is one of the best heating choices for a home extension. You're already opening up the floor, so there's no retrofit penalty, and UFH pairs well with the large glazing and open-plan layouts extensions often have. The step that matters most, and that most self-builders skip, is a proper **heat loss calculation** for the new space before ordering pipe or mats. Extensions typically have more external wall and glazing per m² than the rest of the house, so using a rule of thumb from an existing room will usually undersize the system. Explore more planning guidance at [underfloorheating.info](https://underfloorheating.info/) and find suitable installers through the [Underfloor Heating Directory](https://underfloorheating.directory/).
**Planning an extension?** Compare quotes from UFH installers experienced with new-build extensions via the [Underfloor Heating Directory](https://underfloorheating.directory/installers).
## Why underfloor heating suits extensions so well
An extension is the easiest possible scenario for wet UFH. The floor build-up is being decided from scratch, so there's none of the floor-height compromise that retrofits into an existing house involve (see our [retrofitting guide](/retrofitting-underfloor-heating/) for how much harder that problem is elsewhere in the house). You get to specify the full insulation, pipe spacing and screed depth exactly as designed, with no existing floor level to work around.

Extensions also tend to suit UFH's strengths particularly well: open-plan kitchen-diners and garden rooms benefit from the lack of radiators taking up wall space against large glazed doors, and the even, gentle heat works well in rooms with a lot of glass.
## Calculate heat loss before you specify anything
This is the single most important step, and the one GSC data on this site shows people actively searching for and not finding good answers to. An extension's heat loss profile is usually **worse per m² than the rest of the house**:
- More external wall relative to floor area (a single-storey extension typically has three or four external walls plus a roof, versus one or two external walls for an equivalent room within the main house).
- Often more glazing, bifold or sliding doors are common in modern extensions and lose heat much faster than solid wall.
- A new, often flat or low-pitched roof, which can have a different (sometimes worse) U-value than the original house roof if not carefully specified.
Using a generic "W/m²" figure borrowed from a normal room will typically undersize the system for an extension, leading to a floor that never quite gets warm enough on the coldest days.
**[Use our free heat loss calculator →](/heat-loss-calculator/)**, enter the extension's actual dimensions, glazing area, wall and roof construction, and get a proper room-specific heat loss figure and flow temperature requirement, rather than guessing.
## Designing the system once you know the heat loss

With an accurate heat loss figure, the rest of the design follows the same logic as any wet UFH system:
- **Pipe spacing:** higher heat-loss extensions (lots of glazing, flat roofs) typically need tighter spacing. 100–150mm rather than 200mm, to deliver enough output per m². Use our [pipe spacing calculator](/underfloor-heating-pipe-spacing-calculator/) once you have the heat loss figure.
- **Flow temperature:** a well-insulated modern extension can run at 35–40°C (ideal for a heat pump); a glazing-heavy extension with weaker insulation may need 45–50°C to hit its heat loss requirement, see our [heat pump guide](/underfloor-heating-heat-pumps-guide-2026/) for how this affects efficiency.
- **Zoning:** most single extensions are one zone on the manifold, but an open-plan kitchen-diner-living extension is sometimes worth splitting into two zones if part of it (e.g. a snug or reading corner) is used at different times, see our [zoning guide](/underfloor-heating-zoning-complete-guide/).
- **Manifold placement:** if the extension is some distance from the existing manifold or boiler, factor in the extra pipe run distance and consider whether a second manifold makes sense, see our [manifold guide](/underfloor-heating-manifold-guide/) for placement and sizing.
## Electric vs wet for an extension
Because an extension's floor is being built from scratch, wet UFH is usually the stronger choice for anything beyond a small single room. You get the lower running costs without the retrofit floor-height penalty that makes wet systems harder to justify elsewhere in an existing house. Electric UFH still makes sense for a small single-room extension (a home office or boot room) where running a full wet zone isn't worth the manifold and pipework. See our [electric vs wet comparison](/electric-vs-water-underfloor-heating-2026/) for the full decision framework.

## Costs
| Extension type | Typical size | System | Installed cost |
|---|---|---|---|
| Small home office/boot room | 8–12m² | Electric | £600–£1,400 |
| Kitchen-diner extension | 20–35m² | Wet | £2,700–£6,650 |
| Large open-plan extension | 35–50m² | Wet | £4,700–£9,500 |
These are new-build (not retrofit) rates. See our [full costs guide](/underfloor-heating-costs/) for the complete UK breakdown, or run your own numbers with the [cost calculator](/underfloor-heating-cost-calculator/).
## Building regulations
An extension is notifiable building work regardless of the heating system, and UFH in a new extension falls under the same Part L (energy efficiency) and Part P (electrical safety) rules as anywhere else in the house. See our [UK building regulations guide](/uk-building-regulations-underfloor-heating/) for the full compliance picture, including what your Building Control application needs to show for the heating system.
## Frequently Asked Questions
### Do I need a heat loss calculation for an extension?
Yes, more so than for most rooms. Extensions typically have more external wall and glazing per m² than the rest of the house, so a heat loss calculation specific to the new space (not a rule of thumb borrowed from elsewhere) is what prevents an undersized system. Use our [free heat loss calculator](/heat-loss-calculator/) to get a proper figure before specifying pipe spacing or flow temperature.
### Is underfloor heating worth it in an extension?
Usually, yes. An extension is close to the ideal scenario for wet UFH, since the floor build-up is designed from scratch with no retrofit floor-height penalty, and UFH suits the open-plan layouts and large glazing common in modern extensions.
### What pipe spacing do I need for an extension?
It depends on the heat loss figure for that specific space. Glazing-heavy or flat-roofed extensions often need 100–150mm spacing, while a well-insulated extension can use 200mm. Run the [heat loss calculator](/heat-loss-calculator/) first, then the [pipe spacing calculator](/underfloor-heating-pipe-spacing-calculator/) to size the loops correctly.
### Should I use electric or wet underfloor heating in an extension?
Wet UFH is usually the stronger choice for anything beyond a small single room, since the extension's floor is being built from scratch and there's no retrofit penalty to offset the wet system's higher installation cost. Electric suits a small single-room extension where a full wet zone isn't worthwhile.
## Related reading
- [Underfloor Heating in New Builds](/underfloor-heating-new-builds/)
- [Underfloor Heating Design & Planning](/underfloor-heating-design-planning/)
- [Underfloor Heating with Heat Pumps](/underfloor-heating-heat-pumps-guide-2026/)
- [Underfloor Heating Zoning Guide](/underfloor-heating-zoning-complete-guide/)
- [Underfloor Heating Costs UK](/underfloor-heating-costs/)
**Ready to plan your extension's heating?** Find installers experienced with new-build extensions via the [Underfloor Heating Directory](https://underfloorheating.directory/installers).
---
--- title: Underfloor Heating for Garages & Garden Rooms: UK Guide 2026 description: Underfloor heating for garages and garden rooms: compare wet and electric systems, insulation, slab preparation and heat loss to plan a warm, usable space. url: https://underfloorheating.info/underfloor-heating-garage-garden-room/ published: 2026-07-24 updated: 2026-08-21 tags: ['garage conversion', 'garden room', 'garden office', 'underfloor heating', 'insulation', 'detached'] ---
# Underfloor Heating for Garages & Garden Rooms: UK Guide 2026
> **Quick answer:** Garage conversions and garden rooms are both good candidates for underfloor heating, but they share a challenge most other rooms don't: they're often detached or semi-detached from the main house's heating system, with a concrete slab and insulation levels originally designed for storage, not comfort. Electric UFH is the more common choice for a garden room or home office (simple, self-contained, no need to extend pipework from the house), while a garage conversion joined to the main house can go either way depending on distance from the manifold. Explore more project guidance at [underfloorheating.info](https://underfloorheating.info/) and find suitable installers through the [Underfloor Heating Directory](https://underfloorheating.directory/).
**Planning a garage conversion or garden room?** Compare quotes from UFH installers experienced with these projects via the [Underfloor Heating Directory](https://underfloorheating.directory/installers).
## Why these spaces need extra thought
Garages and garden rooms share a structural starting point that's different from a normal room in the house: the existing slab (if any) was built to a storage or vehicle-standing specification, not a habitable-room one. That usually means:
- **Little or no floor insulation**, garage slabs in particular are rarely insulated, since the original design brief never needed to keep heat in.
- **A concrete slab, often uninsulated underneath**, the same [existing concrete floor](/underfloor-heating-existing-concrete-floor/) considerations apply, but with the added step of confirming there's adequate insulation before the heating goes in, since it likely wasn't specified originally.
- **Detachment from the main house's heat source**, a garden room, in particular, is often standalone, meaning either a separate small heat source (electric is simplest) or a pipe run back to the house's manifold, which adds cost and complexity for a wet system.
## Garage conversions
A garage conversion into a habitable room needs a full re-think of the floor build-up, since the original slab is single-purpose and was never designed with a finished, insulated floor in mind.
- **If the garage is attached to the house:** extending the wet UFH system from the main house is often practical, provided the manifold has spare capacity (or a second small manifold is added) and the pipe run distance is reasonable. See our [manifold guide](/underfloor-heating-manifold-guide/) for placement and distance considerations.
- **If the slab needs raising for insulation:** this is close to a [new-build floor build-up](/underfloor-heating-new-builds/) rather than a retrofit, since the existing garage floor typically needs digging out or building up to accommodate proper insulation before the heating goes in, check door thresholds and any connecting steps into the house carefully.
- **Milled screed** is not usually an option here, since the slab typically lacks the insulation a habitable room needs beneath it, see our [milled screed guide](/milled-screed-underfloor-heating/) for where that technique does and doesn't apply.

## Garden rooms and garden offices
A garden room or garden office is almost always a standalone structure, which changes the calculation:
- **Electric UFH is the default choice** for most garden rooms, no pipework needs to run from the house, installation is simpler, and a garden office used for work hours during the day doesn't run up the same cumulative running costs a whole-house room would. See our [electric underfloor heating guide](/electric-underfloor-heating-systems/) for system types and costs.
- **Wet UFH is possible** but only really makes sense where the garden room already has a plumbed connection back to the house (for example, alongside a bathroom or kitchenette in a larger garden building), since running a dedicated pipe run purely for heating rarely pays back against a simple electric system.
- **Insulation is critical and often underspecified**, modern insulated garden room kits handle this reasonably well, but a cheaper, converted shed or summer house often won't have adequate floor, wall or roof insulation for year-round comfort, and no heating system compensates for that gap.
## Heat loss: don't guess for a detached structure
Both garages and garden rooms have a heat loss profile that's meaningfully different from a room within the main house, they typically have external walls (and sometimes a roof) on every side, with no adjoining heated rooms to reduce heat loss the way an internal room benefits from.
**[Use our free heat loss calculator →](/heat-loss-calculator/)** to get a figure specific to the structure's actual insulation levels and exposed wall area, rather than assuming it behaves like a normal room in the house.

## Costs
| Project | Typical size | System | Installed cost |
|---|---|---|---|
| Garden room/office | 10–20m² | Electric | £600–£2,400 |
| Garage conversion (attached, extending house system) | 15–25m² | Wet | £2,025–£4,750 |
| Garage conversion (full re-build with insulation) | 15–25m² | Wet or electric | £2,700–£6,650 |
See our [full costs guide](/underfloor-heating-costs/) for the complete UK breakdown, or the [cost calculator](/underfloor-heating-cost-calculator/) for a personalised estimate.
## Building regulations
A garage conversion into habitable space is notifiable building work and must meet Part L (energy efficiency) requirements, including adequate floor insulation, which a converted garage slab rarely has without intervention. A garden room used purely as a garden room (not a habitable extension) has different, lighter-touch requirements, but any fixed electrical work for UFH still falls under Part P regardless of the structure's planning status. See our [UK building regulations guide](/uk-building-regulations-underfloor-heating/) for the details.
## Frequently Asked Questions
### Can you put underfloor heating in a garage conversion?
Yes, but the existing garage slab usually needs attention first, most garage floors have little or no insulation, since they were built for storage or parking rather than comfort. Expect the floor build-up to need digging out or raising to add adequate insulation before the heating system goes in.
### Is electric or wet underfloor heating better for a garden room?
Electric is the more common choice for a standalone garden room or garden office, since it avoids running pipework from the house and suits the shorter, more intermittent usage pattern of a home office. Wet UFH only tends to make sense where the garden room already has a plumbed connection to the house for another reason.
### Do garages need extra insulation before adding underfloor heating?
Yes, almost always. Garage slabs are typically uninsulated, since the original design never needed to retain heat. Skipping this step before installing UFH means the system ends up heating the ground beneath the slab as much as the room above it.
## Related reading
- [Underfloor Heating on Existing Concrete Floors](/underfloor-heating-existing-concrete-floor/)
- [Underfloor Heating in New Builds](/underfloor-heating-new-builds/)
- [Electric Underfloor Heating Systems](/electric-underfloor-heating-systems/)
- [UK Building Regulations for Underfloor Heating](/uk-building-regulations-underfloor-heating/)
**Ready to plan your garage conversion or garden room?** Find installers experienced with these projects via the [Underfloor Heating Directory](https://underfloorheating.directory/installers).
---
--- title: Underfloor Heating for Living Rooms: UK Guide 2026 description: Underfloor heating in the living room: best flooring, wet vs electric, zoning with the rest of the house, and typical costs for the UK's most-used room. url: https://underfloorheating.info/underfloor-heating-living-room/ published: 2026-07-24 updated: 2026-08-21 tags: ['living room underfloor heating', 'lounge heating', 'wet UFH', 'electric UFH', 'zoning', 'engineered wood'] ---
# Underfloor Heating for Living Rooms: UK Guide 2026
> **Quick answer:** The living room is one of the best rooms for underfloor heating. It's usually the largest single heated area, benefits most from losing radiator wall space, and typically runs for the longest hours, which is exactly where wet UFH's lower running costs pay off. Engineered wood or LVT are the most popular flooring choices for comfort and heat output, and the living room is usually worth its own zone so it can run on a different schedule to bedrooms. Explore more room-planning guidance at [underfloorheating.info](https://underfloorheating.info/) and find suitable installers through the [Underfloor Heating Directory](https://underfloorheating.directory/).
**Planning UFH for your living room?** Compare quotes from qualified installers via the [Underfloor Heating Directory](https://underfloorheating.directory/installers).
## Why the Living Room Suits Underfloor Heating
The living room is typically where people spend the most waking hours, which changes the electric-vs-wet economics compared with a bathroom or box room. Electric UFH's higher running cost per hour matters much more over 6–10 hours of daily use than over a 20–30 minute morning warm-up in a bathroom. This is where wet UFH's lower running costs have time to earn back the higher installation cost. See our [electric vs wet comparison](/electric-vs-water-underfloor-heating-2026/) for the full numbers.
Removing radiators also matters more here than in smaller rooms: living rooms have the most furniture, the widest range of layouts (sofas against walls, TV units, bookshelves), and the largest windows or glazed doors, all things that benefit from not having a radiator dictating furniture placement.

## Best Flooring for a Living Room
**Engineered wood** and **LVT (wood-effect)** are the two most popular choices for living rooms over UFH, and both perform strongly:
- **Engineered wood:** delivers a natural aesthetic with solid heat output (56 W/m²) and much better dimensional stability than solid wood, which is most at risk of gapping or warping over a heated floor.
- **LVT with wood effect:** a cost-effective alternative with stronger heat output (68 W/m²) than engineered wood and easier long-term upkeep.
- **Low-TOG carpet:** a reasonable choice in seating areas if softness underfoot matters more than maximum output, provided the combined TOG of carpet and underlay stays at or below 2.5 (1.5 for a heat pump).
See our [best flooring guide](/best-flooring-underfloor-heating/), or the dedicated [engineered wood & laminate guide](/laminate-engineered-wood-underfloor-heating/) and [vinyl & LVT guide](/vinyl-lvt-underfloor-heating/) for full installation detail on each.

## Zoning the Living Room Separately
Because the living room runs on a different daily pattern to bedrooms (evenings and weekends versus overnight), it's almost always worth its own zone on the manifold rather than sharing one with an adjoining room. This lets you heat the living room on a schedule that warms up before you get home in the evening, while bedrooms follow a completely different pattern. See our [complete zoning guide](/underfloor-heating-zoning-complete-guide/) for how to plan zones across a whole house, and our [smart thermostats guide](/smart-thermostats-underfloor-heating/) for controls that automate this scheduling.
In an open-plan living-kitchen-diner layout, it's also common to split what looks like "one room" into two or three zones. For example, a snug or reading corner may be used at different times to the main seating area. See our [zoning guide's zone planning examples](/underfloor-heating-zoning-complete-guide/#zone-planning-examples) for how installers typically divide open-plan spaces.

## Sizing the System
A living room's heat loss depends heavily on external wall and glazing area. An open-plan living-diner with bifold doors behaves quite differently to a smaller, more enclosed lounge. Don't assume a flat rate per m² without checking.
**[Use our free heat loss calculator →](/heat-loss-calculator/)** for a figure specific to the room's actual dimensions and glazing, then the [pipe spacing calculator](/underfloor-heating-pipe-spacing-calculator/) to size the loops.
## Costs
See our [full costs guide](/underfloor-heating-costs/) for the complete UK breakdown by room type, or run your own numbers with the [cost calculator](/underfloor-heating-cost-calculator/).
## Frequently Asked Questions
### Is underfloor heating worth it in a living room?
Yes, more so than in smaller rooms. The living room's long daily usage hours are exactly where wet UFH's lower running costs (versus electric) have time to offset the higher installation cost. Losing radiator wall space also matters more in a room with varied furniture layouts.
### What's the best flooring for a living room with underfloor heating?
Engineered wood and LVT with a wood effect are the most popular choices, both delivering solid heat output (56–68 W/m²) with good dimensional stability. Low-TOG carpet is a reasonable option in seating areas if comfort underfoot matters more than maximum heat output.
### Should the living room be its own heating zone?
Yes, in almost every case. Living rooms are typically used on a different daily schedule to bedrooms (evenings and weekends vs overnight), so a dedicated zone lets you heat the room on its own schedule rather than compromising between two rooms' different usage patterns.
## Related Reading
- [Best Flooring for Underfloor Heating](/best-flooring-underfloor-heating/)
- [Underfloor Heating Zoning Guide](/underfloor-heating-zoning-complete-guide/)
- [Electric vs Wet Underfloor Heating](/electric-vs-water-underfloor-heating-2026/)
- [Smart Thermostats for Underfloor Heating](/smart-thermostats-underfloor-heating/)
**Ready to plan your living room's heating?** Compare quotes from qualified installers via the [Underfloor Heating Directory](https://underfloorheating.directory/installers).
---
--- title: Underfloor Heating in a Loft Conversion: UK Guide 2026 description: Underfloor heating for loft conversions: compare wet and electric systems, floor height, joist depth, costs and insulation to choose the right solution. url: https://underfloorheating.info/underfloor-heating-loft-conversion/ published: 2026-07-24 updated: 2026-08-21 tags: ['loft conversion', 'underfloor heating loft', 'attic heating', 'electric UFH', 'between joist', 'floor height'] ---
# Underfloor Heating in a Loft Conversion: UK Guide 2026
> **Quick answer:** Underfloor heating works well in a loft conversion, but floor height is the deciding factor. Loft conversions almost always have limited headroom under sloped ceilings, so every millimetre of floor build-up matters more here than almost anywhere else. Thin electric mats (1.8–6mm) or between-joist wet systems (0mm above the deck) are the two realistic zero-or-near-zero-height options; a standard overlay wet system's 15–25mm build-up can be the difference between standing comfortably at the eaves and not. Explore more conversion guidance at [underfloorheating.info](https://underfloorheating.info/) and find suitable installers through the [Underfloor Heating Directory](https://underfloorheating.directory/).
**Planning a loft conversion?** Compare quotes from UFH installers experienced with loft conversions via the [Underfloor Heating Directory](https://underfloorheating.directory/installers).
## Why Floor Height Matters More in a Loft Conversion
Building Regulations set minimum head heights for habitable loft rooms, and a loft conversion typically starts with less headroom to spare than any other room, especially near the eaves, where the sloped ceiling meets the floor. Every millimetre added to the floor build-up eats into that already-tight headroom, which is why the UFH system choice matters more here than in a ground-floor retrofit where an extra 20mm rarely changes anything practical.
This is the same floor-height problem covered in our [general retrofitting guide](/retrofitting-underfloor-heating/), but sharper: a loft conversion's structural joists are also usually the ceiling of the room below, so there are extra constraints on what can be cut into or fixed onto them.

## System Options, by Floor Build-Up
| System | Floor build-up | System type | Best for |
|---|---|---|---|
| **Electric mat/loose wire** | 1.8–6mm | Electric | Bathrooms/en-suites, single rooms |
| **Between-joist (wet)** | 0mm above deck | Wet | Where joists are accessible from below during the conversion |
| **Low-profile overlay (wet)** | 15–25mm | Wet | Where a little more headroom is available |
### Electric Mats. The Simplest Low-Height Option
For a loft conversion bedroom or en-suite, a thin electric mat or loose-wire system adds as little as 1.8–6mm, making it the easiest way to add UFH without eating into precious headroom. See our [electric underfloor heating guide](/electric-underfloor-heating-systems/) for full system types and costs.
### Between-Joist Wet Systems
Because a loft conversion is new structural work, this is often the best moment to fit a between-joist wet system. Pipes and heat-spreader plates sit within the new floor joists themselves, adding zero height above the deck. This is the same technique used in [suspended timber floor retrofits](/underfloor-heating-suspended-timber-floor/) elsewhere, but it's easier to plan into a loft conversion because the project already involves installing or exposing the joists. An existing finished room would require access from below.
### Low-Profile Overlay
If there's a little more headroom, for example, where the loft has generous eaves height or the room isn't right at the sloped section, a standard low-profile overlay wet system (15–25mm) remains an option. It gives more flexibility on pipe layout than working strictly within joist depth.

## Insulation Under Sloped Ceilings
Loft conversions bring an insulation challenge that doesn't apply elsewhere: the sloped ceiling sections (the "rafters" part of a loft room) need their own insulation separate from the floor insulation. Getting this wrong undermines the UFH system's efficiency just as much as skipping floor insulation would. Make sure whoever designs the conversion's insulation package treats the floor, the knee walls, and the sloped ceiling as three separate elements, each needing adequate U-values. A heat loss calculation for the room (see below) is the only reliable way to confirm this before committing to a UFH system size.
## Sizing the System Correctly
Loft rooms have an unusual heat loss profile: less external wall than a ground-floor room of the same size, but often more roof area relative to floor area. They can also have weaker roof insulation than the rest of the house if the conversion was done to a budget. Don't assume a loft room behaves like a normal upstairs bedroom.
**[Use our free heat loss calculator →](/heat-loss-calculator/)** to get a heat loss figure specific to the room's actual dimensions, roof construction and glazing (including any roof windows, which lose heat faster than wall) before specifying pipe spacing or mat wattage.
## Costs
See our [full costs guide](/underfloor-heating-costs/) for the complete UK breakdown, or the [cost calculator](/underfloor-heating-cost-calculator/) for a personalised estimate.

## Building Regulations
A loft conversion is notifiable building work in its own right and needs to satisfy minimum head-height requirements alongside Part L (energy efficiency) and Part P (electrical safety) for the heating system. See our [UK building regulations guide](/uk-building-regulations-underfloor-heating/) for the full picture. Get the structural and insulation design signed off before committing to a UFH system, since the room's final floor level affects both.
## Frequently Asked Questions
### Can you have underfloor heating in a loft conversion?
Yes. Thin electric mats (1.8–6mm) or between-joist wet systems (0mm above the deck) are the two realistic options where headroom is tight, which is almost always the case. A standard overlay wet system (15–25mm) remains an option if there's a little more height to spare.
### Does underfloor heating reduce headroom in a loft conversion?
Any system adds some floor build-up except a between-joist wet system, which sits within the joists rather than on top. Electric mats are the thinnest surface-mounted option at 1.8–6mm. Given how tight headroom typically is under a sloped loft ceiling, this is worth deciding early in the conversion design rather than after the joists are already in.
### What heating system is best for a loft conversion?
It depends on floor height available and room use: electric mats for bathrooms and single rooms where headroom is tightest, between-joist wet systems where the joists are accessible during the conversion and lower running costs matter, and standard overlay wet systems where there's a little more height to spare.
## Related Reading
- [Retrofitting Underfloor Heating: Full UK Guide](/retrofitting-underfloor-heating/)
- [Underfloor Heating on Suspended Timber Floors](/underfloor-heating-suspended-timber-floor/)
- [Electric Underfloor Heating Systems](/electric-underfloor-heating-systems/)
- [UK Building Regulations for Underfloor Heating](/uk-building-regulations-underfloor-heating/)
**Ready to plan your loft conversion's heating?** Find installers experienced with loft conversions via the [Underfloor Heating Directory](https://underfloorheating.directory/installers).
---
--- title: Underfloor Heating on Suspended Timber Floors: UK Retrofit Guide 2026 description: Underfloor heating for suspended timber floors: compare between-joist and over-joist systems, insulation, floor height and costs for a smarter retrofit. url: https://underfloorheating.info/underfloor-heating-suspended-timber-floor/ published: 2026-07-24 updated: 2026-08-21 tags: ['suspended timber floor', 'timber floor', 'retrofit', 'between joist', 'over joist', 'wet UFH', 'electric UFH', 'period property'] ---
# Underfloor Heating on Suspended Timber Floors: UK Retrofit Guide 2026
> **Quick answer:** Yes, suspended timber floors can take underfloor heating using two main wet-system methods: **between-joist** (pipes and heat-spreader plates fitted in the void between joists, zero build-up above the deck) or **over-joist** (pre-grooved panels laid on top of the existing boards, adding more height but simpler to fit). Thin electric mats also work directly on top of a prepared timber subfloor. The milled screed technique used on concrete floors does **not** work on timber; between-joist is the equivalent zero-build-up route. Read on for how each method works, insulation requirements, and period-property considerations. Explore more retrofit guidance at [underfloorheating.info](https://underfloorheating.info/) and compare project options through the [Underfloor Heating Directory](https://underfloorheating.directory/).
**Planning a timber floor retrofit?** Compare quotes from UFH installers experienced with suspended timber floors via the [Underfloor Heating Directory](https://underfloorheating.directory/installers).
## Can you install underfloor heating on a suspended timber floor?
Yes. Suspended timber floors, common in older UK properties, upper floors, and some ground floors with a void beneath, are a well-established retrofit case for underfloor heating, though the approach differs from [solid concrete floors](/underfloor-heating-existing-concrete-floor/). Instead of milling or overlaying a slab, the system either sits within the joist void itself or on top of the existing boards.

## Between-joist vs over-joist: the two main methods
| Method | Floor build-up | How it works | Best for |
|---|---|---|---|
| **Between-joist** | 0mm above deck | Pipes + aluminium spreader plates fitted in the void between joists | Height-critical rooms, period properties |
| **Over-joist** | 15–22mm | Pre-grooved panels laid on top of existing boards | Simpler access, no under-floor work needed |
| **Electric mat/loose wire** | 1.8–6mm | Thin element laid directly on a prepared timber subfloor | Single rooms under tile, laminate or LVT |
### Between-joist systems
Heating pipes fit into the void between the floor joists, typically supported by aluminium heat-spreader plates that clip beneath the joist tops or sit in purpose-cut notches. Insulation below the plates directs heat upward rather than into the void beneath. This is the genuine zero-build-up option for a wet system on timber, equivalent in effect to [milled screed on a concrete floor](/milled-screed-underfloor-heating/), though the technique is completely different because there's no slab to mill into. It typically requires access from below (a cellar, crawl space, or by lifting boards from above) and works best where joist spacing and depth are known and consistent.
### Over-joist systems
Slim, pre-grooved panels sit directly on top of the joists or existing floorboards, with heating pipes pressed into the channels. This adds more height than between-joist (15–22mm) but is considerably simpler to install because it doesn't require access to the underside of the floor. Everything happens from above. It's the more common choice where joist access from below isn't practical, such as ground-floor rooms without a cellar or accessible void.

### Electric mats
A thin electric mat or loose-wire system can be laid on a prepared, level timber subfloor under most floor coverings, adding as little as 1.8–6mm. This is the simplest route for a single room and avoids joist-void work entirely, though, as with any electric system, running costs are higher than wet for larger areas. See our [electric underfloor heating guide](/electric-underfloor-heating-systems/) for full costs and system comparisons.
## Preparing a suspended timber floor for UFH
1. **Inspect the joists and boards.** Secure or replace any loose, warped or damaged boards to create a stable base; a structural engineer should assess the joists in older properties before any load-bearing work.
2. **Check joist spacing and depth.** These measurements determine whether standard spreader plates fit or a bespoke layout is needed.
3. **Maintain subfloor ventilation.** This is critical for timber floors; blocking air bricks or void ventilation to fit insulation risks moisture build-up and timber decay, so any insulation work must preserve existing airflow paths.
4. **Fit insulation.** Use flexible quilt insulation between joists (for between-joist systems) or rigid board over the existing deck (for over-joist systems), always positioned to direct heat upward.
## Period properties: what's different
Suspended timber floors are especially common in period properties, which brings a few extra considerations beyond a standard retrofit:
- **Uneven joists and boards** are more likely in older builds and often need packing or partial levelling before a between-joist system can sit flush.
- **Preserving historical features:** Original floorboards, skirting profiles, and thresholds may need careful removal and reinstatement rather than replacement.
- **Ventilation is non-negotiable:** Many period timber floors rely on underfloor airflow to prevent rot. Any UFH retrofit must maintain this, a detail installers unfamiliar with older housing stock commonly miss.
- **Structural assessment:** Always get a structural engineer's opinion on joist condition before loading a between-joist system into an old floor void.

## Costs
| Route | Typical cost (supply + install) | Notes |
|---|---|---|
| Electric mat (single room) | £60–£120/m² | Cheapest, simplest for one room |
| Between-joist (wet) | £135–£185/m² | Often higher labour if access from below is difficult |
| Over-joist (wet) | £135–£185/m² | Simpler fit, more floor height added |
Run your own numbers with the [underfloor heating cost calculator](/underfloor-heating-cost-calculator/), or see the full [costs guide](/underfloor-heating-costs/) for room-by-room examples.
## Frequently Asked Questions
### Can you put underfloor heating on a suspended timber floor?
Yes. Between-joist systems fit pipework and heat-spreader plates into the void beneath the boards for zero build-up above the deck; over-joist systems lay pre-grooved panels on top of the existing floor for a simpler but slightly higher-profile fit. Thin electric mats are also an option for single rooms.
### Does milled screed work on timber floors?
No. Milled screed (in-cut) UFH is a concrete/screed-specific technique that mills channels directly into a solid slab. There's no equivalent slab to mill on a suspended timber floor. Between-joist installation is the zero-build-up alternative for timber.
### What is the difference between between-joist and over-joist underfloor heating?
Between-joist systems fit within the existing joist void, usually requiring access from below and adding no height above the current deck. Over-joist systems lay pre-grooved panels on top of the existing boards, adding 15–22mm but avoiding any under-floor access requirements. They generally offer the simpler installation where below-floor access isn't available.
### Do suspended timber floors need extra ventilation with underfloor heating?
Yes, existing subfloor ventilation (air bricks, void airflow) must be maintained regardless of which UFH method is used. Blocking ventilation to fit insulation risks trapping moisture and causing timber decay, which is a common oversight in retrofit projects on older properties.
## Related reading
- [Retrofitting Underfloor Heating: Full UK Guide](/retrofitting-underfloor-heating/)
- [Underfloor Heating on Existing Concrete Floors](/underfloor-heating-existing-concrete-floor/)
- [Best Flooring for Underfloor Heating](/best-flooring-underfloor-heating/)
- [Underfloor Heating Costs UK](/underfloor-heating-costs/)
- [Electric Underfloor Heating Systems](/electric-underfloor-heating-systems/)
**Ready to get quotes?** Find installers experienced with timber floor retrofits via the [Underfloor Heating Directory](https://underfloorheating.directory/installers).
---
--- title: Underfloor Heating Wiring Diagrams: UK Guide 2026 description: Underfloor heating wiring diagrams explained: understand electric mats, thermostats, floor sensors, RCD protection and manifold wiring for a safer setup. url: https://underfloorheating.info/underfloor-heating-wiring-diagrams/ published: 2026-07-24 updated: 2026-08-21 tags: ['wiring diagram', 'electric underfloor heating wiring', 'thermostat wiring', 'manifold wiring diagram', 'RCD', 'Part P', 'wiring centre'] ---
# Underfloor Heating Wiring Diagrams: UK Guide 2026
> **Quick answer:** Electric underfloor heating wiring runs from the mains through an RCD/RCBO-protected circuit to a wiring centre or thermostat, then out to the heating mat or cable, with a floor sensor probe wired back to the thermostat to enforce the temperature limit. Wet (hydronic) underfloor heating uses a different wiring path entirely: room thermostats wire to a central wiring centre, which switches 24V or 230V actuators on the manifold and sends a call-for-heat signal to the boiler or heat pump. All fixed electrical work on either system falls under Part P and should be installed or signed off by a qualified electrician. Read on for the full wiring path, terminal-by-terminal, for both systems. Find more practical guidance at [underfloorheating.info](https://underfloorheating.info/) and qualified installers through the [Underfloor Heating Directory](https://underfloorheating.directory/).
**Planning your installation?** Compare quotes from qualified UFH installers and electricians via the [Underfloor Heating Directory](https://underfloorheating.directory/installers).
## Why electric and wet UFH wiring are completely different
It's worth being clear about this before going any further: "underfloor heating wiring" means two unrelated things depending on which system you have.
- **[Electric underfloor heating](/electric-underfloor-heating-systems/)** *is* the heating element, mains electricity flows through a resistive wire or mat, and the wiring diagram covers how that mains supply reaches the mat safely.
- **[Wet underfloor heating](/wet-underfloor-heating-ultimate-guide/)** uses electricity only for *control*, thermostats, actuators, and the pump. The heat itself comes from hot water; the wiring diagram covers how the electrical control layer switches that water on and off per zone.
If you're not sure which you have, see our [electric vs wet UFH comparison](/electric-vs-water-underfloor-heating-2026/) before working through the wiring below.

## Electric underfloor heating wiring diagram
**Typical electric UFH wiring path, mains to floor:**
1. **Consumer unit** → dedicated circuit, RCD or RCBO protected (30mA)
2. **Isolator switch** (double-pole, usually installed close to the room for the electrician's fused connection)
3. **Thermostat**, receives mains live and neutral, plus a floor sensor input
4. **Heating mat or loose wire**, switched output from the thermostat
5. **Floor sensor probe**, laid in the floor alongside the element, wired back to a dedicated sensor terminal on the thermostat (not the mains terminals)
### Terminal-by-terminal
Every electric UFH thermostat has broadly the same terminal groups, though exact labelling varies by manufacturer:
- **L (Live) and N (Neutral):** the incoming mains supply from the isolator.
- **Load / Output:** the switched live going to the heating mat or cable, this is what the thermostat turns on and off.
- **Earth:** bonded through the mat's earth braid (metal mesh backing on most mats) back to the circuit earth, critical for safety, and specifically checked during electrical testing.
- **Floor sensor (often marked "NTC" or "sensor"):** a separate low-voltage pair, entirely distinct from the mains terminals. This is what lets the thermostat cap the floor at a safe surface temperature rather than just reading air temperature.
### Single room vs multiple zones
A single-room installation (a bathroom mat, for example) is usually one thermostat wired directly to one mat, no separate wiring centre needed. For multiple electric zones (say, a kitchen and a hallway both fitted with mats), each zone typically gets its own thermostat on its own switched circuit, rather than sharing a wiring centre the way wet systems do. This keeps each zone's wiring simple, but does mean running a full circuit to each room rather than a single multi-zone hub.
### RCD, RCBO and Part P
All fixed electric UFH wiring is notifiable work under **Part P of the Building Regulations** and must be installed by a registered electrician (or inspected and signed off by one). Key requirements:
- **30mA RCD or RCBO protection** on the circuit, mandatory for any electrical circuit in a bathroom or wet area, and standard practice for UFH circuits generally.
- **Insulation resistance testing** of the mat before it's covered by screed or adhesive, done before and after laying to confirm no damage occurred during installation.
- **Certification**, the electrician issues a Minor Works or Electrical Installation Certificate, which you should keep with your home's documentation.
See our [UK building regulations for underfloor heating guide](/uk-building-regulations-underfloor-heating/) for the full Part P, Part L and BS EN 1264 picture across both system types.
## Wet UFH manifold wiring diagram
Wet system wiring is a control layer sitting alongside the manifold, not a replacement for it, if you haven't already, our [underfloor heating manifold guide](/underfloor-heating-manifold-guide/) covers what the manifold itself does. The wiring side connects three things: room thermostats, a central wiring centre, and the manifold's actuators.

**What's shown:** room thermostats (one per zone) wire back to the wiring centre, which distributes switching signals to each zone's actuator on the manifold. The wiring centre also sends a call-for-heat signal to the boiler or heat pump, and switches the circulation pump on once any zone opens.
**The wiring sequence:**
1. **Room thermostat calls for heat**, closes a relay, sending a low-voltage or mains signal (depending on thermostat type) back to the wiring centre.
2. **Wiring centre receives the call**, identifies which zone is calling and activates that zone's actuator.
3. **Actuator opens**, a 24V or 230V motorised valve on the manifold's return bar (see [manifold components](/underfloor-heating-manifold-guide/#manifold-components-explained) for how actuators sit on the manifold).
4. **Wiring centre signals the pump and heat source**, once at least one zone is open, the pump starts and a call-for-heat signal goes to the boiler or heat pump.
5. **All zones satisfied**, actuators close, pump stops after a short delay, heat source stops firing.
For the complete manifold wiring diagram, including wire colours, terminal layout guidance, and a downloadable PDF version to keep on site during installation, see the [wiring diagram section of our manifold guide](/underfloor-heating-manifold-guide/#underfloor-heating-manifold-wiring-diagram). Wire colours and terminal layout vary by manufacturer, so always follow the diagram supplied with your specific wiring centre and thermostats rather than a generic one.
### 2-wire, 3-wire and smart thermostat wiring
- **2-wire (mechanical/basic digital) thermostats:** simplest wiring, live and neutral only, switching the zone's actuator or mat directly or via the wiring centre.
- **3-wire thermostats:** add a permanent live feed for a backlit display or Wi-Fi connectivity, alongside the switched output.
- **Smart thermostats:** usually need a stable mains or battery-backed power supply in addition to the switching wire, since they need to stay connected to Wi-Fi even when not calling for heat. See our [smart thermostats for underfloor heating guide](/smart-thermostats-underfloor-heating/) for model-specific wiring notes and compatibility.

## Common wiring problems
These map directly onto the electrical causes covered in our [UFH problems and troubleshooting guide](/underfloor-heating-problems/) and [manifold troubleshooting section](/underfloor-heating-manifold-guide/#common-manifold-problems-and-solutions):
- **Zone not heating, actuator silent:** almost always a wiring centre or actuator wiring fault rather than a plumbing one, check for power at the wiring centre before assuming an airlock.
- **Floor sensor reading incorrectly or "E1/E2" error on thermostat:** usually a damaged or disconnected sensor probe wire, a common casualty of screed or tile adhesive work if the sensor route wasn't protected during installation.
- **Thermostat blank or unresponsive:** check the circuit breaker and RCD first; a tripped RCD is the most common cause and usually points to a fault elsewhere on the circuit rather than the thermostat itself.
**When to call an electrician rather than DIY:** any fault that involves opening the wiring centre, consumer unit, or isolator, or any suspected damage to the mains side of the circuit. See our [when to call a professional guide](/when-to-call-professional-underfloor-heating/) for the full decision framework.

## Frequently Asked Questions
### Does underfloor heating need an RCD?
Yes. All fixed electric UFH circuits require 30mA RCD or RCBO protection, and this is mandatory for any circuit in a bathroom or other wet area regardless of appliance type. Wet UFH systems also need RCD protection on the wiring centre and pump circuit, since these are mains-powered control components even though the heat itself comes from water.
### Can I wire underfloor heating myself?
Connecting the heating mat or cable to a thermostat is sometimes DIY-permitted, but the final connection to the mains, at the isolator, consumer unit, or fused spur, is notifiable electrical work under Part P and must be done or certified by a registered electrician. See our [DIY underfloor heating guide](/diy-underfloor-heating/) for exactly where the DIY/professional line sits.
### What is the wiring centre on an underfloor heating system?
The wiring centre is the control box for a wet UFH system, it receives signals from each zone's room thermostat and switches the corresponding actuator on the manifold, while also calling for heat from the boiler or heat pump and switching the circulation pump. It's the electrical equivalent of the manifold's plumbing role: one central point coordinating multiple independent zones.
### How do I wire a thermostat for underfloor heating?
For electric UFH, the thermostat takes mains live and neutral in, a switched live out to the heating mat, and a separate low-voltage floor sensor probe. For wet UFH, a room thermostat wires back to the wiring centre rather than directly to a heating element. In both cases, always follow the specific wiring diagram supplied with your thermostat model rather than a generic diagram, since terminal layouts vary between manufacturers.
### Why is my underfloor heating floor sensor not working?
A floor sensor reading error (often shown as "E1", "E2", or a dashed display) is usually caused by a damaged or disconnected sensor probe wire, most commonly from screed, self-levelling compound, or tile adhesive work carried out without protecting the sensor cable route. Check the sensor wire's continuity at the thermostat terminal before assuming the probe itself has failed.
## Related reading
- [Underfloor Heating Manifold Guide](/underfloor-heating-manifold-guide/), full manifold components, sizing and the detailed manifold wiring diagram
- [How to Balance & Bleed a Manifold](/how-to-balance-underfloor-heating-manifold/)
- [UK Building Regulations for Underfloor Heating](/uk-building-regulations-underfloor-heating/). Part P, Part L and BS EN 1264
- [Smart Thermostats for Underfloor Heating](/smart-thermostats-underfloor-heating/)
- [Underfloor Heating Problems & Troubleshooting](/underfloor-heating-problems/)
- [DIY Underfloor Heating: What You Can Do Yourself](/diy-underfloor-heating/)
**Ready to get the wiring done properly?** Find a qualified electrician or UFH installer via the [Underfloor Heating Directory](https://underfloorheating.directory/installers), or [download our free installation guide PDF](/underfloor-heating-installation-guide-pdf/) covering the whole process.
---
--- title: Vinyl & LVT Flooring for Underfloor Heating: UK Compatibility Guide 2026 description: Discover how vinyl and LVT flooring work with underfloor heating, including 27°C limits, TOG ratings, underlay and fitting tips for reliable heat output. url: https://underfloorheating.info/vinyl-lvt-underfloor-heating/ published: 2026-07-24 updated: 2026-08-21 tags: ['vinyl flooring', 'LVT', 'luxury vinyl tile', 'underfloor heating', 'TOG rating', 'floor sensor'] ---
# Vinyl & LVT Flooring for Underfloor Heating: UK Compatibility Guide 2026
> **Quick answer:** Yes, vinyl and LVT (Luxury Vinyl Tile) are among the best resilient floor coverings for underfloor heating. They conduct heat well (delivering around 68 W/m² typical output), carry a low TOG rating (0.1–0.5), and work with both wet and electric systems. The one rule that matters: most vinyl and LVT products carry a strict **27°C maximum surface temperature** (up to 29.4°C for some products). A floor sensor thermostat is essential to enforce this and protect the warranty. Explore more flooring guidance at [underfloorheating.info](https://underfloorheating.info/) and find experienced installers through the [Underfloor Heating Directory](https://underfloorheating.directory/).
**Choosing vinyl or LVT for your project?** Find UFH installers experienced with resilient flooring via the [Underfloor Heating Directory](https://underfloorheating.directory/installers).
## Is vinyl flooring suitable for underfloor heating?
Yes. Vinyl and LVT are genuinely well-suited to underfloor heating. They're thin, dense, and conduct heat efficiently, making them one of the more practical choices for any room. This guide covers the specifics; for the full comparison against tile, wood, laminate and carpet, see our [complete flooring compatibility guide](/best-flooring-underfloor-heating/).

## The 27°C ceiling
The single most important number for vinyl and LVT over UFH: **most products carry a 27°C maximum surface temperature**, with a small number of vinyl products rated to 29.4°C. Exceed it consistently and the material risks softening, discolouring, delaminating, or releasing more VOCs than it's designed to.
A **floor sensor thermostat** isn't optional here. A probe beneath the flooring, wired to the thermostat, is the only reliable way to enforce this limit and protect the manufacturer's warranty. Air-temperature-only control isn't a safe substitute, since the floor surface can run hotter than the room air suggests, particularly with fast-responding electric systems.
## TOG rating and thermal performance
| Metric | Vinyl / LVT value | What it means |
|---|---|---|
| Thermal conductivity | ★★★★☆ High (~68 W/m² typical output) | Heats up fast, strong warmth into the room |
| TOG / R-value | Low (0.1–0.5 TOG) | Minimal insulating effect, good for UFH |
| Max surface temperature | 26–27°C (up to 29.4°C for some products) | Strict limit vs tile's 29–30°C |
| Response time | Fast (30–45 min) | Comparable to tile |
At 68 W/m², vinyl and LVT sit just behind tile (71 W/m²) and ahead of laminate (60 W/m²) and engineered wood (56 W/m²) for heat output. See the [full comparison table](/best-flooring-underfloor-heating/#part-2-complete-ufh-flooring-compatibility-table) for how every material stacks up.

## Installation essentials
- **Expansion gap (10–15mm):** Leave this around the room's perimeter, covered by skirting or beading, to absorb the thermal movement vinyl and LVT undergo when heated.
- **UFH-specific underlay:** Use a dense, low-resistance, radiant-rated underlay, never a standard acoustic underlay that blocks the heat you're paying for.
- **Temperature-rated adhesive:** For glue-down LVT, use an adhesive rated for the sustained temperatures UFH produces, not a standard flooring adhesive.
- **Floor sensor control:** Wire a probe beneath the flooring to the thermostat to enforce the 27°C cap.
## Compatible systems
Vinyl and LVT work with both **wet (screeded or overlay)** and **electric (foil or embedded mat)** underfloor heating. Foil systems, where the heating cable sits between layers of reinforced aluminium foil, are specifically designed for use under floating floors like vinyl and laminate, helping distribute heat evenly beneath the covering. See our [electric underfloor heating guide](/electric-underfloor-heating-systems/) for foil system details.

## Vinyl/LVT vs other flooring for UFH
For the room-by-room recommendations behind this table, see our [best flooring guide's room selection section](/best-flooring-underfloor-heating/#room-by-room-selection-guide).
## Frequently Asked Questions
### Can you put underfloor heating under vinyl flooring?
Yes. Vinyl and LVT are compatible with both wet and electric underfloor heating, delivering strong heat output (around 68 W/m²) thanks to low thermal resistance. The main requirement is respecting the 27°C maximum surface temperature most products carry, enforced with a floor sensor thermostat.
### What TOG rating is vinyl flooring for underfloor heating?
Vinyl and LVT typically carry a TOG rating of 0.1–0.5, well within the 2.5 TOG ceiling for standard systems and the 1.5 TOG ceiling for heat pumps, making them one of the lower-resistance options alongside tile.
### Does LVT need a floor sensor with underfloor heating?
Yes, in practice. A floor-mounted probe wired to the thermostat is the only reliable way to enforce the 27°C surface temperature limit that most LVT products carry, and it's typically required to keep the manufacturer's warranty valid.
### Is LVT better than laminate for underfloor heating?
Both perform well, but LVT edges ahead on heat output (68 W/m² vs 60 W/m² for laminate) and water resistance, making it the stronger choice for bathrooms and kitchens. Laminate remains a solid, cost-effective choice for hallways and living areas.
## Related reading
- [Best Flooring for Underfloor Heating: Complete Guide](/best-flooring-underfloor-heating/)
- [Laminate & Engineered Wood for Underfloor Heating](/laminate-engineered-wood-underfloor-heating/)
- [Carpet for Underfloor Heating](/carpet-underfloor-heating/)
- [Underfloor Heating on Existing Concrete Floors](/underfloor-heating-existing-concrete-floor/)
- [Electric Underfloor Heating Systems](/electric-underfloor-heating-systems/)
**Ready to plan your flooring?** Compare quotes from installers experienced with vinyl and LVT over UFH via the [Underfloor Heating Directory](https://underfloorheating.directory/installers).
---
--- title: Milled Screed Underfloor Heating: UK Retrofit Guide 2026 description: Milled screed underfloor heating cuts channels into existing floors for a wet system with no build-up. Explore the process, costs and installer options. url: https://underfloorheating.info/milled-screed-underfloor-heating/ published: 2026-07-23 updated: 2026-08-21 tags: ['retrofit', 'milled screed', 'in-cut', 'chase-cutting', 'floor milling', 'concrete floors', 'wet UFH', 'installation'] ---
# Milled Screed Underfloor Heating: UK Retrofit Guide 2026
> **Quick answer:** Milled screed underfloor heating, also widely marketed in the UK as in-cut or chase-cut UFH, uses a diamond-bladed milling machine to cut shallow channels directly into an existing solid concrete or screed floor. A continuous 16mm pipe is pressed into the channels and the original flooring goes straight back down, with **zero increase in floor height**, even for a full wet (hydronic) system. It only works on solid concrete or screed floors with enough depth to mill into safely (roughly 75–100mm of combined slab and screed), not on suspended timber floors or thin, damaged or damp slabs. No UK provider publishes a per-square-metre rate; all quote on a project basis after a site survey. Research retrofit options at [underfloorheating.info](https://underfloorheating.info/) and find specialist installers through the [Underfloor Heating Directory](https://underfloorheating.directory/).
>
> 🧮 **[Compare this against standard retrofit costs with our free cost calculator →](/underfloor-heating-cost-calculator/)**
## What is milled screed underfloor heating?
Milled screed underfloor heating solves the problem that puts most homeowners off retrofitting a [wet (hydronic) system](/wet-underfloor-heating-ultimate-guide/): floor height. You'll also see it marketed in the UK as **in-cut** or **chase-cut** UFH. Standard retrofit options add a layer on top of the existing floor (a [low-profile overlay](/retrofitting-underfloor-heating/), typically 15–25mm) or replace it with a new thin screed.
Milling avoids both. It's genuinely **underfloor heating without screed**. The installer cuts *into* the slab that's already there, embeds the pipe flush with the surface, then puts the original floor finish straight back down.
Installers use several names for the method: "in-cut," "chase-cutting," "floor milling," "grooving," or "routing". They all mean the same thing. It's a genuine third retrofit option for wet UFH, alongside overlay systems and [between-joist installation](/retrofitting-underfloor-heating/) on timber floors.
## How the process works
Whichever provider you choose, the process is broadly the same:

1. **Strip the existing floor covering.** Carpet, tiles, laminate or vinyl is removed to expose the bare concrete or screed.
2. **Survey and design the pipe layout.** The installer maps out the channel pattern for the room, working around fixed features and any known services in the floor.
3. **Mill the channels.** A high-torque, depth-controlled milling machine (JK Floorheating uses its own "Floor-grinder"; other providers use similar diamond-bladed equipment) cuts shallow, evenly spaced grooves into the slab. The machine's integrated vacuum extraction keeps the process close to dust-free, which is what makes it practical to do this in an occupied home rather than requiring a full strip-out.
4. **Press-fit the pipe.** A single continuous run of 16mm pipe is pressed into the milled channels, one unbroken length per loop, with no joints hidden under the floor.
5. **Pressure-test the loop.** As with any wet system, the pipework is pressure-tested before anything is covered, to rule out leaks.
6. **Refit the flooring.** Because there's no new screed to pour, there's no screed curing time. Some providers (incut.co.uk, for example) apply a thin latex levelling compound over the milled channels to bring the surface back flat and smooth before flooring goes back down, distinct from a full screed pour, so it doesn't reintroduce a long curing wait. Providers commonly quote **1–2 days** to complete a room, with the system ready for commissioning almost immediately afterwards.

That last point matters. A standard wet retrofit with a new screed layer needs time to cure before the flooring goes down, and you then have to bring the system up to temperature gradually. Milling skips that wait entirely.
## Where it works, and where it doesn't
Milled screed UFH only works with concrete or screed. That's how you can install underfloor heating on a concrete floor without raising it. Our [full guide to UFH on existing concrete floors](/underfloor-heating-existing-concrete-floor/) compares it with overlay and electric options.
It **won't** work on suspended timber floors. For those, [between-joist retrofit systems](/underfloor-heating-suspended-timber-floor/) remain the zero-build-up route.
**Suitable for:**
- Solid concrete ground-floor slabs (the majority of UK homes built from the 1930s onwards)
- Existing screeded floors, including screeded extensions
- Rooms where floor height, door clearances or step-free thresholds rule out an overlay system
**Not suitable for:**
- Suspended timber floors
- Slabs that are thin, structurally compromised, or don't leave enough depth to mill safely, providers generally look for around 75–100mm of combined concrete and screed depth
- Floors with excessively high moisture levels
- Contaminated or unstable subfloors
The machine cuts into the slab, so the installer needs to confirm there's nothing critical in the way before milling starts. That includes existing pipework, cabling or underfloor voids. It's why every provider insists on a site visit and project drawings before quoting instead of pricing the job over the phone.
Floor-finish compatibility over a milled slab is the same as for any polished screed or concrete floor: see our [flooring guide's concrete/screed row](/best-flooring-underfloor-heating/) (27–29°C max surface temperature, virtually zero TOG) for finishing options, or our [screed guide](/underfloor-heating-screed/) if you're weighing a milled retrofit against pouring a conventional new screed over the same room.
## Planning a milled retrofit: manifold, zoning, pipe spacing and heat pumps
Milling changes how the pipe sits in the floor. It doesn't change the rest of the system design. Here's what that means for the usual planning decisions.
### Manifold placement
A milled retrofit doesn't change manifold planning. You still need a wall-mounted cabinet with the [standard clearances](/underfloor-heating-manifold-guide/): 500–1000mm off the floor, 300mm above for actuators, 150mm below for pipe bends, 200mm either side for access, and 500mm in front for working space. Ideally, keep it within 5–10m of the rooms it serves.
In my experience, using an existing understairs or utility cupboard is usually the cheapest option. It works the same way whether the pipe sits in a milled channel or under a poured screed.
### Zoning and circuit layout
Zoning works the same way on a milled system as on any wet UFH install. Each room or area gets its own loop back to the manifold, typically [3–5 zones for a 4-bedroom house](/underfloor-heating-zoning-complete-guide/) (living areas, sleeping areas, bathrooms, and optionally a home office).
There is one useful difference. Our zoning guide frames retrofit zoning around an 18–25mm overlay build-up, while a milled system adds genuinely zero floor height. That can make life easier when the existing rooms sit at slightly different floor levels.
### Pipe spacing choice
Milled channels are cut to whatever spacing the design calls for, the same spacing choices used across any wet UFH system, sized with our [pipe spacing calculator](/underfloor-heating-pipe-spacing-calculator/):
- **100mm** (~10m of pipe per m², 75–110 W/m²), conservatories, draughty rooms, high heat loss
- **150mm** (~6.67m per m², 60–85 W/m²), well-insulated homes, bathrooms, and the go-to spacing for heat pumps; also the most common spacing used across the UK
- **200mm** (~5m per m², 45–65 W/m²), new builds and well-insulated rooms, typically paired with a standard gas or oil boiler running at 45–50°C
As with any wet system, tighter spacing (100–150mm) is usually milled at external-wall perimeter zones, widening to 150–200mm towards the room centre. See our [pipe-per-m² guide](/how-much-underfloor-heating-pipe-per-m2/) for the full breakdown, the maximum single-loop length for 16mm pipe, the size used in milled installs, is around 100 metres.
### Heat pump compatibility
No UK provider publishes heat-pump performance data measured specifically for milled installs, so treat this as informed reasoning, not a proven figure. Our [heat pump guide](/underfloor-heating-heat-pumps-guide-2026/) shows that closer pipe spacing improves COP because the system can deliver the same heat output at a lower flow temperature. Less thermal mass sits between the pipe and the room.
A milled system takes that principle further. The pipe sits almost at the surface instead of being buried in 45–75mm of screed, so it could support an even lower flow temperature for a given output. The site's existing spacing and flow-temperature figures support that expectation, but no milling provider has published or measured it. If you're pairing a milled retrofit with a heat pump, ask for a heat-loss-based design. Don't assume a milled floor automatically outperforms a screeded one.
## Milled screed vs other retrofit methods

This is what a conventional full-buildup wet UFH floor looks like in cross-section: flooring, screed, pipe, insulation, then the subfloor. Milled screed goes straight from flooring to pipe, cut directly into the existing slab. That's where the height saving comes from.
| Retrofit method | Floor build-up | System type | Screed curing wait | Best suited to |
|---|---|---|---|---|
| Milled screed / in-cut | 0mm | Wet only | None, ready almost immediately | Solid concrete/screed floors where height is the deciding factor |
| [Low-profile overlay](/retrofitting-underfloor-heating/) | 15–25mm | Wet | Minimal (thin self-levelling layer) | Concrete or timber floors with some height to spare |
| [Between-joist](/retrofitting-underfloor-heating/) | 0mm above deck | Wet | None | Suspended timber floors only |
| Full screed replacement | 45–75mm (see our [screed guide](/underfloor-heating-screed/)) | Wet | Days to weeks | New builds, extensions, or floors already being dug up |
| Electric mat/loose wire | 1.8–6mm | Electric | None | Single rooms, bathrooms, any subfloor type |
So what's the real benefit? Our [main retrofit guide](/retrofitting-underfloor-heating/) sets out the usual hard choice: electric UFH is thin but more expensive to run, while wet UFH is cheaper to run but traditionally adds height.
Milled screed closes that gap on concrete and screed floors. You keep the running-cost advantage of a wet system without the floor-height penalty. It doesn't help with a suspended timber floor, though. There, between-joist installation is still the zero-build-up answer.
## Pros and cons
**Advantages:**
- **Zero floor build-up** for a genuine wet system, no threshold, door or skirting adjustments needed
- **No screed curing wait**, so rooms can often be back in use within a day or two of milling
- **Faster heat response than a full-screed system**, because the pipe sits close to the surface rather than buried in 45–75mm of screed
- **A single continuous pipe run per loop**, with no in-floor joints to fail
- **Dust-controlled installation**, thanks to vacuum-extracted milling equipment, making it more practical in an occupied, furnished home than a full screed replacement
**Disadvantages:**
- **Concrete/screed floors only**, not an option for suspended timber
- **Needs adequate slab depth**, so very thin or already-compromised floors may not qualify without further investigation
- **Requires a site survey before any quote**, there's no standard published rate, so budgeting takes an extra step compared with an overlay system
- **Professional-only at every stage, not just DIY-adjacent**, unlike [DIY-possible electric mats or surface-laid wet pipe](/diy-underfloor-heating/), the milling equipment, channel depth control and pipe-pressing process are proprietary to each specialist provider, and a mistake cuts into a structural slab rather than just failing a pipe clip
## Cost
None of the UK providers I researched for this guide publishes a standard price per square metre. Every quote follows a site survey and project drawings because the room count, slab condition and depth, pipe layout, manifold and controls all affect the price.
Some providers, including Outsourced Energy, offer an online calculator for a rough indication on simple, small projects. Once a job covers more than a couple of rooms, they move to bespoke, in-house pricing.
If you're budgeting, compare milled screed with [wet retrofit overlay systems](/underfloor-heating-costs/). Don't assume it's automatically cheaper or more expensive. The fair comparison includes the labour and disruption you avoid by not raising the floor, not just the milling cost on its own.
I'd get quotes from more than one specialist and ask each one to itemise the manifold, thermostats and making-good work separately from the milling and pipework.
## Who installs it in the UK
Milled screed / in-cut underfloor heating is offered by a small number of UK specialists, each with their own branded process and milling equipment. You can compare these and other vetted installers on the [Underfloor Heating Directory's milled underfloor heating page](https://underfloorheating.directory/milled-underfloor-heating):
- **[JK Floorheating](https://underfloorheating.directory/jk-floorheating)**. Dutch-founded, over 30 years in the trade, operating from several UK depots, using their own "Floor-grinder" milling equipment and branded Flextube pipe.
- **[Outsourced Energy](https://underfloorheating.directory/outsourced-energy-underfloor-heating-supplies)**. Devon-based, brands the method "IN-CUT," and publishes an online project cost calculator for smaller jobs.
- **[Channel Heat Systems](https://underfloorheating.directory/channel-heat-systems)** and **[Heatflow Installations](https://underfloorheating.directory/heatflow-installations)**, both offer floor milling as a dedicated retrofit service alongside conventional wet UFH installation.
- **[incut.co.uk](https://underfloorheating.directory/in-cut-heating)**, a Dorset-based specialist operating from Blandford Forum, milling channels into the existing floor and finishing with a latex levelling compound before flooring goes back down, using a dust-free vacuum extraction system.
**[View more milled/in-cut UFH installers →](https://underfloorheating.directory/milled-underfloor-heating)**
This isn't an exhaustive list, and I'm not recommending one provider over another. [Compare quotes from multiple specialists](https://underfloorheating.directory/milled-underfloor-heating) before deciding, as you would for any specialist installation.
## Frequently Asked Questions (FAQs)
### Does milled screed underfloor heating work with electric systems?
No. It's a wet (hydronic) technique, the milled channels are sized for water pipe, not electric heating cable or mat. If you want a zero-build-up electric option, [thin loose-wire or mat systems](/electric-underfloor-heating-systems/) already add very little height (as little as 1.8mm) without needing to mill the floor at all.
### Can milling be used on a floor that already has underfloor heating installed?
Providers assess this case by case. They need to know exactly where the existing pipework or cabling sits before milling anywhere near it. That's what the site survey should establish, so don't assume it's possible without one.
### How long does milled screed installation take?
Providers commonly quote around 1–2 days per room for the milling and pipe installation itself, with commissioning following shortly after, much faster than a full screed replacement, which needs days to weeks of curing time before flooring can go back down.
### Is milled screed cheaper than an overlay retrofit system?
There's no published rate for either method that allows a fair like-for-like comparison. Both need a site survey. Milling avoids the labour and disruption of raising floor levels (adjusting doors, thresholds and skirting), which can offset its specialist installation cost. Get quotes for both approaches on your project before deciding.
### Can you have underfloor heating without screed?
Yes. That's the defining feature of milled screed (in-cut) underfloor heating. The installer mills the pipe directly into the existing concrete or screed slab, so there's no new screed to pour or cure. It's the only way to get a full wet UFH system with genuinely zero floor build-up on a concrete or screed subfloor.
### Do you have to dig up the floor for milled underfloor heating?
No, that's the whole point of the method. The existing floor covering (carpet, tiles, laminate) is removed, but the slab itself is milled, not excavated or broken up. That's a key difference from a full screed replacement, which does involve breaking out the existing floor down to a level where a new screed can be poured.
### What machine is used to cut underfloor heating into concrete?
A high-torque, depth-controlled milling machine with an integrated vacuum extraction system, sometimes called a concrete router or concrete milling machine. JK Floorheating uses its own branded "Floor-grinder"; other UK providers use similar diamond-bladed equipment. The vacuum extraction is what keeps the process close to dust-free, making it practical in an occupied, furnished home.
### Do you need insulation under a milled underfloor heating system?
No new insulation layer is added as part of the milling process itself, the pipe is milled straight into the existing slab, unlike an overlay retrofit, which typically builds in an insulation layer as part of its board or panel system. Whether the existing slab already has adequate insulation below it (common in newer builds, less certain in older properties) is exactly the kind of thing a pre-milling site survey should establish.
### Does a milled system store heat as well as a full screed floor?
No. This is a genuine trade-off. A [full sand/cement screed](/underfloor-heating-screed/) (65–75mm) acts as a thermal store, holding enough heat to keep a room warm for 2–3 hours after the system switches off. A milled system doesn't have that extra thermal mass, so it heats up faster but also cools sooner.
Neither is automatically better. You're trading the screed's heat retention for lower floor height and faster installation, so choose the one that fits your priorities.
## Next steps
Want the full picture? Start with our [complete guide to retrofitting underfloor heating](/retrofitting-underfloor-heating/), which covers low-profile overlay and between-joist systems for timber floors. Our [guide to UFH on existing concrete floors](/underfloor-heating-existing-concrete-floor/) compares milling, overlay and electric mats side by side, including costs.
If floor height isn't a problem, compare milled screed with a [standard wet UFH installation](/wet-underfloor-heating-ultimate-guide/) on cost and running efficiency before you commit to a specialist milling provider.
**Considering a milled retrofit?** Compare quotes from specialist installers via the [Underfloor Heating Directory](https://underfloorheating.directory/milled-underfloor-heating).
---
--- title: Heated Driveways and Snow-Melting Systems: UK Costs description: Heated driveways in the UK: compare electric and wet snow-melting systems, typical installation costs and running costs to choose safer winter access. url: https://underfloorheating.info/heated-driveways-snow-melting-systems-uk/ published: 2026-07-20 updated: 2026-08-21 tags: ['heated driveway', 'driveway heating', 'snow melting systems', 'driveway heater', 'heated driveway mats', 'frost protection', 'external underfloor heating'] ---
# Heated Driveways and Snow-Melting Systems: UK Costs

> **Quick Answer**: A heated driveway costs **£70-£200 per m²** for the heating system installed, or around **£3,100** for a typical UK home. Electric cables or water pipes under the surface melt snow and ice automatically, triggered by a sensor that detects freezing temperatures and moisture together. Running costs are modest because the system only fires during actual snow and ice events. Explore more practical guidance at [underfloorheating.info](https://underfloorheating.info/) and find suitable specialists through the [Underfloor Heating Directory](https://underfloorheating.directory/).
A heated driveway does exactly what the name suggests. Heating cables or water pipes embedded beneath the surface warm it just enough to stop snow settling and ice forming, so the driveway clears itself while you stay indoors. It's the same technology as the [underfloor heating in your kitchen or bathroom](/how-does-underfloor-heating-work/), adapted for the outdoors, and a small group of UK specialists design and install it for homes, car parks, ramps and even roofs.
This guide covers how driveway heating works, what it costs per square metre in the UK, where snow melting systems make sense, and how to find an installer who's actually done this kind of work before.
## What Is a Heated Driveway?
There are two types of system, and they mirror the indoor split between electric and wet underfloor heating.
**Electric driveway heating** uses resistance heating cables or pre-spaced driveway heating mats laid beneath the surface. A typical snow melting cable gives out a fixed 25W per metre, and installers space the runs closer together where more output is needed. Laid at 80mm centres, that adds up to around 300W per square metre, enough to keep a surface clear at temperatures down to about -20°C. Electric systems suit most domestic driveways because they need no boiler connection, respond quickly and can be [zoned](/underfloor-heating-zoning-complete-guide/) to heat only the areas you choose, such as two wheel tracks rather than the full width. If you want the indoor equivalent for comparison, see our [electric underfloor heating guide](/electric-underfloor-heating-systems/).
**Wet (hydronic) driveway heating** circulates a heated water and glycol mix through tough PEX tubing under the surface, fed by a boiler or heat pump housed in a garage. Installation costs more because of the pipework, manifold and heat source, but running costs per kilowatt-hour of heat are lower. That's why wet systems tend to win on larger areas like commercial car parks and long private drives; the same logic applies to [wet underfloor heating](/wet-underfloor-heating-ultimate-guide/) indoors.
So what's actually different from indoor UFH? The job. A living room system raises a floor a few degrees above room temperature. A driveway heater has to push heat through concrete, asphalt or block paving against sub-zero air, wind and falling snow, so it runs at a much higher output per square metre and only when the weather demands it.
## How Driveway Heating Systems Work
Modern snow melting systems are automatic. You don't switch them on when the forecast looks grim.
A combined temperature and moisture sensor sits in or beside the heated surface. When the temperature drops near freezing and the sensor detects moisture at the same time, the combination that produces snow and ice, the controller switches the heating on. Once the surface is clear and dry, it switches off again.
This matters for running costs. The system sits idle for most of the winter and only draws power during and just after snowfall or freezing rain. Heating on temperature alone would waste energy on every cold, dry night.
Sizing is done per square metre. An installer will look at the surface material (concrete holds and spreads heat differently to asphalt or paving), the exposure of the site, local climate and how quickly the surface needs to clear, then specify cable spacing and total output to suit. Exposed or free-standing structures such as ramps and bridges get a layer of insulation beneath the heating so the energy goes up into the surface rather than down into the ground.
On a new driveway, the cables or pipes are laid during construction, in the screed, sand bed or asphalt layers. Retrofitting under an existing surface is sometimes possible but means lifting and relaying at least part of it, which is where much of the cost sits.

## Heated Driveway Cost UK
For the heating system itself, expect roughly **£70 to £200 per square metre** installed, depending on the system type, output and how the surface is built up. Industry cost guides put a typical domestic installation at around **£3,100**, with a realistic range of **£1,300 to £4,900**. A complete job including a new surface comes in higher: around £6,000 under concrete and £6,700 under asphalt on average.
| Item | Typical UK cost |
| :--- | :--- |
| Driveway heating system, installed | £70-£200 per m² |
| Typical domestic installation | £3,100 (range £1,300-£4,900) |
| Full installation under concrete | ~£6,000 |
| Full installation under asphalt | ~£6,700 |
| Removing existing driveway (machine) | ~£50 per m² |
| Removing existing driveway (by hand) | ~£125 per m² |
| Drainage channel and soakaway, if needed | ~£5,000 |
A few ways to keep the price down. Heating only the wheel tracks and a walking strip rather than the whole drive can halve the heated area. Timing the installation to coincide with a driveway you were replacing anyway removes the excavation cost from the equation. And on melt water: a driveway that clears itself produces water that has to go somewhere, so price in drainage from the start rather than discovering it later.
### What Does a Driveway Heater Cost to Run?
Running costs depend entirely on the weather, because a sensor-controlled system only runs when snow or ice is actually present. As a worked example, a 20m² heated area at 300W/m² draws 6kW, which at around 27p per kWh costs about £1.60 for each hour of melting. Most UK winters demand a modest number of running hours, which is why the sensor control matters more to your bill than the headline wattage.
For comparison with indoor systems, see our [underfloor heating cost guide](/underfloor-heating-costs/) and [running costs breakdown](/underfloor-heating-running-costs-2026/). The numbers above are for exterior snow melting only and sit well above indoor £/m² rates, because the output requirement is several times higher.
## Where Snow Melting Systems Are Used
Domestic driveways are the obvious application, but the same embedded-cable approach shows up in more places than most people expect.
**Ramps and loading bays.** An icy ramp is a real hazard for vehicles and staff, and gritting a steep slope is a losing battle. Underground car park entrances, commercial loading platforms and access ramps are among the most common commercial installations, and free-standing ramps are insulated underneath so the heat stays in the slab.
**Paths, steps and pedestrian areas.** Outdoor steps, walkways and entrances to public or commercial buildings, where a slip becomes a liability question as much as a safety one. Heating also removes the need for constant salting, which damages concrete and the surrounding planting over time.
**Roofs and gutters.** Self-regulating heating cables run along roof edges, valleys, gutters and downpipes to stop ice dams forming and to keep melt water draining. Self-regulating cable increases its output as the temperature falls, so it can run along a gutter without a separate controller.
**Exposed pipework.** The same cable family provides frost protection for external and unheated-space pipes, trace-heated along their length to stop freezing and bursts.
A snow melter, to use the term you'll see in some product listings, is simply any of these systems packaged for a specific surface. The underlying cable technology is shared across all of them.
### Heated Driveway Mats: The Plug-In Alternative
If embedding cables is more commitment than you want, portable heated driveway mats are laid on top of the surface and plugged in for the winter. A driveway heat mat of this kind clears a strip for wheels or a walkway rather than the whole drive, costs a few hundred pounds rather than a few thousand, and packs away in spring.
The trade-offs are appearance, trailing connections and coverage. They're a reasonable answer for a short path or a single parking spot, but for whole-driveway melting the embedded systems above do the job properly. Don't confuse them with indoor [underfloor heating mats](/underfloor-heating-mats-guide/), which are a different product for a different job.

## Are Heated Driveways Worth It in the UK?
Fair question, given how rarely much of the UK sees settled snow.
The case is strongest where one or more of these apply: a sloped or shaded drive that ices even when the road is clear, a household member for whom a fall would be serious, a property in the Pennines, Scotland or Northern Ireland where snow is a yearly certainty rather than an occasional event, or a commercial site with a duty of care to staff and visitors.
For a flat drive in the mild south that sees snow twice a winter, the maths is harder to make work, and a pair of heated mats may be the more sensible spend. If you're weighing up the indoor version of this question, we've covered it in [is underfloor heating worth it?](/is-underfloor-heating-worth-it/)
What the system replaces also counts for something: no early-morning shovelling, no grit staining the block paving, and no frost damage from repeated freeze-thaw cycles and salt, which shortens the life of concrete surfaces.
## Choosing a Specialist
Driveway heating is a niche within a niche. Plenty of firms install underfloor heating; far fewer have designed an exterior snow melting system, and the design questions are different: output per square metre for your local climate, sensor placement, drainage for melt water, and coordination with whoever is laying the surface. Ask directly for examples of exterior work, not just indoor UFH projects.
The vetting process is otherwise the same as for any underfloor heating job. Our guide to [UK installer qualifications](/underfloor-heating-installer-qualifications-uk/) covers what certifications to look for, and the directory's guide on [how to choose a UFH installer](https://underfloorheating.directory/guides/how-to-choose-ufh-installer) walks through the full selection process. You can also [browse vetted installers](https://underfloorheating.directory/installers) directly.
I'd ask any firm you shortlist whether they handle frost protection and snow melting alongside standard UFH. Many of the established specialists do without advertising it prominently.
## A UK Specialist in Practice: Gaia Climate Solutions
[Gaia Climate Solutions](https://underfloorheating.directory/gaia-underfloor-heating), a Suffolk-based firm with over 30 years in underfloor heating, is a good example of how this work sits alongside standard UFH. Alongside wet and electric indoor systems, Gaia designs and installs DEVI ice and snow melting systems for driveways, car parks, ramps, steps and loading platforms, plus roof and gutter de-icing and pipe frost protection.
Their ground systems pair DEVIflex heating cables with DEVIreg thermostats and sensors that register snow and ice automatically, and the systems they install protect surfaces at temperatures down to -30°C. One of their published case studies covers a frost protection system installed on the driveway of a London property, which is precisely the kind of exterior project this guide has been describing.
That combination of indoor underfloor heating and exterior snow melting from the same specialist is typical of the firms that do this well. The design skills carry over; only the application changes.
## Frequently Asked Questions
**How much does a heated driveway cost in the UK?**
Around £70 to £200 per m² for the heating system installed, with a typical domestic project at about £3,100 before any resurfacing. A complete new heated driveway averages £6,000 to £6,700 depending on the surface.
**Do heated driveways work with any surface?**
Systems are available for concrete, asphalt, block paving and stone. Asphalt needs cables rated for the high temperatures of laying, so tell your installer what surface you're planning.
**Can I add driveway heating to my existing driveway?**
Sometimes, but it means lifting and relaying part of the surface, and systems buried without inspection tend to carry short warranties. The economics are best when you're replacing the driveway anyway.
**How much electricity does a driveway heater use?**
Output runs at 250 to 300W per m², but a sensor-controlled system only runs during snow and ice events. A 20m² area costs roughly £1.60 per hour of melting at current electricity prices, and most winters require only a modest number of hours.
**Is planning permission needed?**
The heating itself doesn't need permission, but standard driveway rules still apply: in England, an impermeable surface over 5m² draining onto the road needs planning consent, so design melt water drainage in from the start.
---
New to underfloor heating altogether? [Start with our beginner's guide →](/underfloor-heating-beginners-guide/)
---
--- title: How to Balance & Bleed an Underfloor Heating Manifold (UK Guide 2026) description: Learn to balance and bleed an underfloor heating manifold, set correct flow rates, remove trapped air and restore even, efficient warmth across your home. url: https://underfloorheating.info/how-to-balance-underfloor-heating-manifold/ published: 2026-07-17 updated: 2026-08-21 tags: ['manifold balancing', 'bleeding underfloor heating', 'flow rate', 'commissioning', 'wet ufh', 'manifold maintenance'] ---
# How to Balance & Bleed an Underfloor Heating Manifold (UK Guide 2026)
> **Quick answer:** Balancing a manifold means adjusting each zone's flow gauge (also known as flow meters or rotameters) until it matches its target flow rate (from the system design), working from the longest loop first and rechecking every zone after each change, usually two or three passes. Bleeding means releasing trapped air from the air vent on the manifold, and from each zone in turn, until flow is smooth and quiet. Both take 30–60 minutes on a typical 6–8 zone system and need no special tools beyond a flathead screwdriver. For more system guidance, visit [underfloorheating.info](https://underfloorheating.info/) or find professional help through the [Underfloor Heating Directory](https://underfloorheating.directory/).
Balancing and bleeding are the two adjustments that decide whether an underfloor heating system delivers even, quiet, efficient warmth, or cold spots, noise, and higher bills. Both are done at the manifold. This guide walks through each process step by step. For a full breakdown of every manifold component referenced below, see our [complete underfloor heating manifold guide](/underfloor-heating-manifold-guide/).
## Why balancing matters
Every zone on a manifold is fed from the same pump and the same flow temperature, but loops are rarely identical, a bedroom loop might be 60m of pipe, while an open-plan kitchen-diner loop could be 120m. Left unbalanced, water takes the path of least resistance: short loops get more flow than they need, long loops get starved. The result is predictable, rooms nearest the manifold run warm, rooms furthest away stay cold, and the pump works harder than it should to compensate.

A correctly balanced system delivers even heat output across every zone, uses less pump energy, and puts less strain on the boiler or heat pump. It's also one of the few UFH adjustments a confident homeowner can do themselves, provided the system was designed with target flow rates for each zone, ask your installer for these figures, or your original commissioning sheet, before starting.
## What you'll need
- The system design or commissioning sheet showing target flow rate (L/min) for each zone
- A flathead screwdriver (for flow gauge caps and air vents on most manifolds)
- A notepad or phone to record settings as you go
- 30–60 minutes, with the system running
If you don't have target flow rates on file, a heating engineer can recalculate them from your pipe layout, or you can start from equal flow across all zones and fine-tune based on room-by-room temperature over the following few days.
## How to balance an underfloor heating manifold
1. **Open every valve fully.** Start with all isolation valves open and every flow gauge cap turned fully anti-clockwise (maximum flow), and run the pump on its highest setting. This gives you a baseline to work from.
2. **Identify your longest loop.** Check your design or commissioning sheet for the zone with the greatest pipe length, this loop has the most resistance and the least flow at baseline. Balance this one first.
3. **Read the flow gauge.** Look at the centre of the float inside the clear gauge cylinder, not the top. Let the reading settle for a few seconds before recording it.
4. **Adjust to target flow.** Turn the flow gauge cap clockwise to restrict flow, anti-clockwise to increase it. Work the longest loop toward its target flow rate first, since restricting the shorter loops will push more flow toward it automatically.
5. **Work through every other zone.** Move to the next-longest loop and repeat, adjusting each flow gauge until its reading matches the target for that zone.
6. **Recheck all zones.** Adjusting one flow gauge changes the pressure balance for every other zone on the manifold. Go back through all of them again, most systems need two or three full passes before every zone holds its target flow simultaneously.
7. **Verify with floor temperature.** After 2–3 hours of running, floor surface temperatures across zones should be within 2–3°C of each other. If one zone still runs noticeably cooler, recheck its flow gauge and loop for airlocks.
8. **Reduce pump speed.** Once every zone holds its target flow, drop the pump to the lowest speed setting that still maintains those flows. This cuts energy use and noise without affecting balance.
9. **Record your settings.** Write down the final flow gauge reading for each zone, plus the pump speed and flow temperature. You'll need these numbers if you ever rebalance after a floor covering change or system modification.
**Balancing rules worth remembering:** always balance the longest, highest-resistance loop first, restricting shorter loops naturally pushes more flow to it. Never judge balance from a single pass; flows interact across the whole manifold. And if a zone won't reach its target flow no matter how far you open the gauge, suspect an airlock before assuming the pump or pipe sizing is at fault (see bleeding, below).
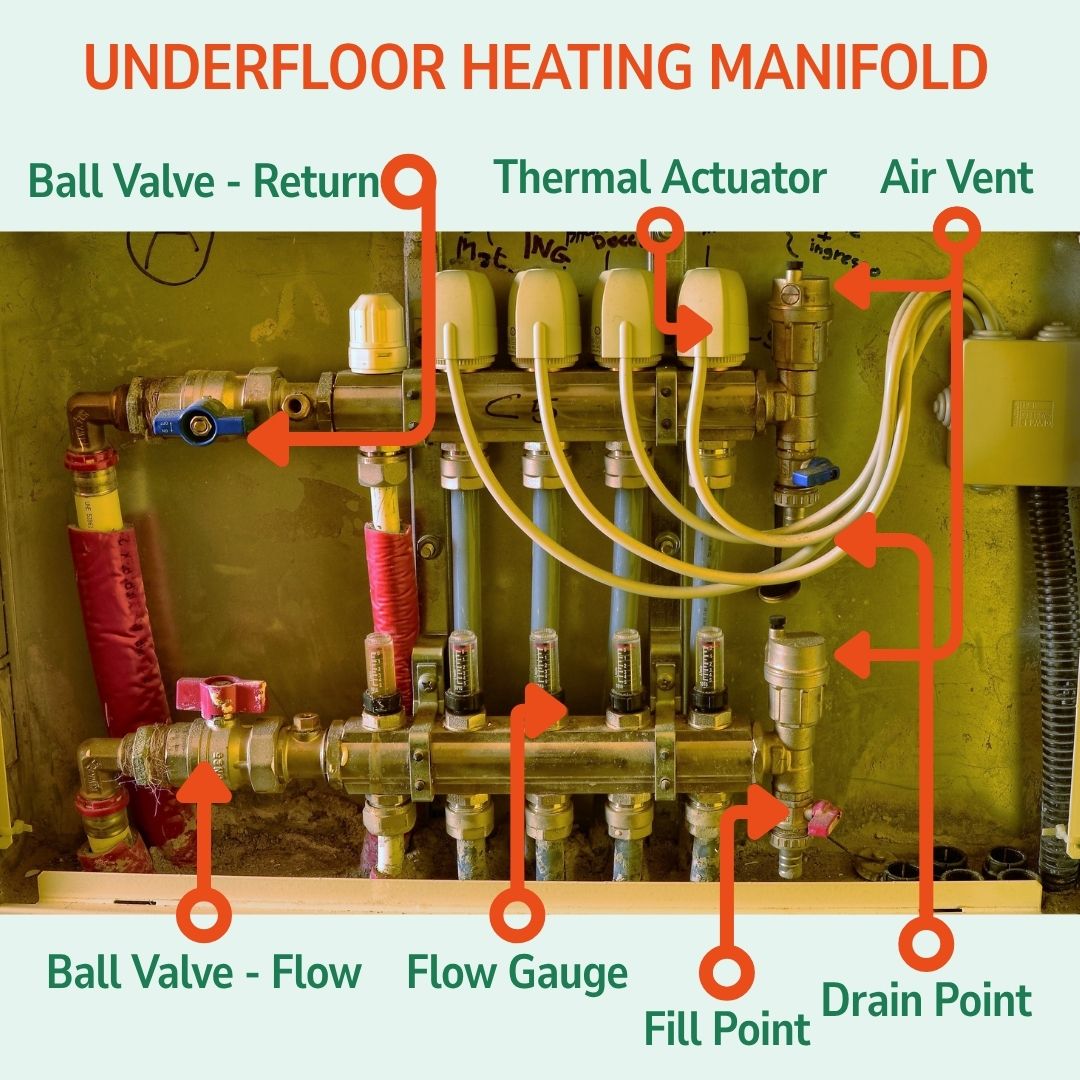
## How to bleed air from an underfloor heating manifold
Trapped air is the most common cause of a zone that won't heat, a noisy manifold, or a flow gauge reading that jumps around instead of settling. Bleeding clears it.
1. **Isolate one zone at a time.** Close the isolation valves on every zone except the one you're bleeding, and open its flow gauge fully. This forces the pump's full output through the single loop, which pushes trapped air toward the vent rather than just moving it around the system.
2. **Open the air vent.** Most manifolds have an automatic air vent that self-bleeds, plus a manual bleed point for a thorough purge, use a flathead screwdriver or bleed key depending on your model.
3. **Listen and watch for air.** You'll hear a hissing or spitting sound as air escapes, sometimes with a little water. Keep a cloth handy.
4. **Close once water flows steadily.** Once the hissing stops and only water comes through, close the vent.
5. **Move to the next zone.** Repeat isolating, opening the gauge, and bleeding for each zone in turn.
6. **Re-open all zones and check pressure.** Once every zone has been bled, reopen all isolation valves and check the system pressure gauge, bleeding releases some water, so you'll likely need to top up to the normal operating pressure (typically 1.0–1.5 bar cold).
7. **Re-check flow gauges.** Air often disguises itself as a balancing problem. After a full bleed, revisit your flow gauge readings, a zone that wouldn't hold its target flow before bleeding often settles immediately afterwards.

**When to bleed:** at initial commissioning, after any work that involves draining or opening the system, at the start of each heating season, and any time a zone develops a persistent cold spot, a noisy manifold, or an erratic flow gauge reading.

## Adjusting flow rate after the fact
Flow rates drift over time, a new carpet, a re-tiled kitchen, or a room that's colder than expected in practice can all mean the original commissioned settings no longer match how the room performs. To adjust:
- **Room running cold:** increase flow slightly at that zone's gauge (turn the cap anti-clockwise), then recheck every other zone, since you've just changed the pressure balance across the manifold.
- **Room running too warm:** reduce flow at that zone's gauge (clockwise), and again recheck the rest of the system afterwards.
- **Whole system underperforming:** check the blending valve's flow temperature setting before touching individual zones, a temperature that's crept below its intended set point will look like a balancing problem but isn't one.
Small adjustments are usually enough, move a gauge by a fraction of a litre per minute, wait a day, and reassess, rather than making large changes all at once.
## Signs your system needs rebalancing or bleeding
| Symptom | More likely balancing | More likely bleeding |
|---|---|---|
| One room consistently cooler than others | ✔️ | ✔️ |
| Flow gauge won't reach target however far it's opened | | ✔️ |
| Flow gauge reading jumps or fluctuates | | ✔️ |
| Clicking, humming or whooshing at the manifold | | ✔️ |
| Gradual drift after a flooring change | ✔️ | |
| Problem appears immediately after any work on the system | | ✔️ |
For issues that persist after both balancing and bleeding, see our [underfloor heating problems and troubleshooting guide](/underfloor-heating-problems/) or consider [calling a professional](/when-to-call-professional-underfloor-heating/).

## Frequently Asked Questions (FAQs)
### How often should I balance my underfloor heating manifold?
Balancing is normally a one-time commissioning task, revisited only if you change flooring in a specific room, extend the system, or notice uneven heating that persists after bleeding. Most systems don't need routine rebalancing.
### How often should I bleed my underfloor heating manifold?
Bleed at the start of each heating season (typically September or October) as part of annual maintenance, and immediately after any work that opens or drains the system. See our [annual UFH maintenance checklist](/annual-underfloor-heating-maintenance-checklist/) for the full seasonal routine.
### How do I adjust the flow rate on my underfloor heating manifold?
Turn the cap on that zone's flow gauge, clockwise to reduce flow, anti-clockwise to increase it, while watching the float inside the gauge settle at the new reading. Always recheck the other zones afterwards, since adjusting one gauge changes the flow balance across the whole manifold.
### Why won't one zone reach its target flow rate?
The most common cause is trapped air, isolate that zone and bleed it before assuming the pump or pipework is undersized. If it still won't reach target after bleeding, check the isolation valve is fully open and the actuator is opening completely.
### Can I balance an underfloor heating manifold myself?
Yes, if you have the target flow rates for each zone from your system design or commissioning sheet. Without those figures, you're guessing, get them from your installer, or have a heating engineer recalculate them from your pipe layout before you start.
**Need a professional check?** Find qualified underfloor heating installers through the [Underfloor Heating Directory](https://underfloorheating.directory/installers).
---
--- title: Renting with Underfloor Heating: What to Expect (UK Guide 2026) description: Renting with underfloor heating? Learn how it feels, whether low-and-constant heating saves money, and how to stay comfortable and control your bills. url: https://underfloorheating.info/renting-with-underfloor-heating/ published: 2026-07-16 updated: 2026-08-21 tags: ['renting', 'tenants', 'landlords', 'temperature', 'comfort', 'electric underfloor heating', 'wet underfloor heating'] ---
# Renting with Underfloor Heating: What to Expect (UK Guide 2026)
## Moving in without a say in the system
If you've only ever lived with radiators, moving into a rental with underfloor heating (UFH) as the only heat source is a bit of a leap into the unknown. You don't get to choose the system, you often don't get much choice over the settings either, and landlords tend to have a stock answer: "we keep it around 18°C to manage costs." That's not usually a brush-off. It's actually how UFH is meant to be run. But it does mean you're inheriting someone else's setup rather than dialling in your own, so it's worth understanding what you're actually getting before winter tests it. Find more practical guidance at [underfloorheating.info](https://underfloorheating.info/) and, when you are planning your own project, compare installers through the [Underfloor Heating Directory](https://underfloorheating.directory/).
For the basics of how the two main system types work, see our [beginner's guide to underfloor heating](/underfloor-heating-beginners-guide/).
## Why 18°C on underfloor heating doesn't feel like 18°C on a radiator

This is the biggest adjustment for anyone coming from radiators. A radiator heats the air around it, so when you walk into a cold room and switch one on, you get a noticeable blast of warmth within a few minutes. Underfloor heating doesn't work that way. It warms the floor's mass and radiates heat upward slowly and evenly, which means there's no "blast" to notice, and if it's been sitting at a steady 18°C, that's roughly what the room has felt like all day, not a temperature it's climbing towards.
Most people find this comfortable once they've adjusted, because radiant heat from below feels warmer than the same air temperature from a wall-mounted radiator (your feet aren't cold, and the heat doesn't collect near the ceiling the way convected heat does). But the first week or two can feel flat if you're expecting that familiar rush of warmth when you walk in from outside. Give it longer than a day or two before deciding it's not warm enough.
## Is your landlord's "low and constant" approach actually cheaper?
You may have seen advice saying that leaving heating on low all day costs more than turning it on only when needed; that's broadly true, and it's good general advice for radiator-based central heating. It is not true for underfloor heating built into a concrete or screed floor, and this is genuinely one of the few cases where the opposite advice applies.
A wet UFH slab has a huge amount of thermal mass. Heating it from cold takes hours, and once it's warm it holds that heat for hours after the system switches off. Cycling a system like that on and off wastes energy fighting its own thermal lag, so the standard professional recommendation for slab-based wet UFH is exactly what your landlord described: set it to a steady background temperature and leave it running, rather than switching it on and off like a radiator. If your system is electric rather than wet, this matters less, since electric mats respond faster, but it's still generally more efficient to avoid big swings.
So the "18°C constant to keep costs low" line isn't a landlord being tight-fisted; it's the right way to run this specific type of system. For more on how running costs actually break down between system types, see our guide to [underfloor heating running costs](/underfloor-heating-running-costs-2026/).
## Wet or electric? It changes what you can actually do
Before you plan around the system, find out which type you have, because it changes both your options and your risk if you do decide to push the temperature up:
- **Wet (hydronic) systems**, run off a boiler or heat pump through pipes in the floor, are slow to respond. Turning the thermostat up won't produce a noticeable change for hours, so day-to-day tweaking is largely pointless. Set a temperature and judge it over several days, not a single evening.
- **Electric systems**, using heating cables or mats, respond much faster but cost considerably more to run per hour, since you're paying electricity rates directly rather than a boiler's gas rate. If your landlord is on an electric system and mentioned "extra costs are on you," check what you're actually paying per degree before pushing it up for the whole flat.
See our full comparison in [electric vs water underfloor heating](/electric-vs-water-underfloor-heating-2026/) if you want the detail.
## Staying warm without touching the thermostat

Since you likely can't (or shouldn't) fiddle with the system daily, most of your comfort gains will come from everything around it rather than the heating itself:
- **Go easy on rugs.** A thick rug over a heated floor insulates it, which sounds cosy but actually blocks the heat from reaching the room; you end up with a warm rug and a cooler room than you'd have with nothing down at all. If you want rugs, keep them thin, and avoid covering large areas of a heated zone.
- **Curtains and draught-proofing matter more here than with radiators.** A radiator can compensate for heat loss around a draughty window by blasting out more heat on demand. UFH can't do that; it's running at a fixed, gentle output, so heat lost through gaps and glass isn't easily made up elsewhere. A draught excluder under the door or thicker curtains will do more for comfort than most other adjustments.
- **An electric blanket for the bed is worth it.** Bedrooms are usually kept cooler than living spaces even with UFH (16–19°C is the typical range recommended for adult bedrooms), and it's far cheaper to warm the bed directly than to push a whole zone up a couple of degrees just for bedtime.
- **Furniture placement matters more than people expect.** A sofa or bed sitting directly over a heated section blocks output in exactly the spot you want it, similar to the rug problem. Check for warm patches on the floor and try not to fully block them with large furniture where you can help it.
## When it's not just "getting used to it"
Feeling a bit cool for the first week is normal. These aren't:
- **Persistent condensation on windows or walls.** Underfloor heating run too low in a poorly ventilated room can tip into the range where condensation and damp start to form, particularly in older or less insulated properties. This is worth flagging to your landlord rather than just opening a window and hoping.
- **One room or zone that never warms up at all** while others do. That's a fault, not a setting, and should be reported. Our [troubleshooting guide](/underfloor-heating-problems/) covers what a working system should feel like if you want to compare notes before raising it.
- **The floor feeling hot in patches** rather than gently warm. That can indicate a system fault or, in electric systems, a damaged element, and is worth reporting rather than living with.
## Know where you stand legally

UK housing law sets minimum standards landlords must meet, including that a home must be capable of being kept warm enough to avoid harm to health, and 18°C is a commonly referenced benchmark for vulnerable occupants in official guidance. The exact legal obligations depend on your tenancy and circumstances, so if you're unsure whether what you're being offered meets the standard, [Shelter](https://www.shelter.org.uk/) and [gov.uk](https://www.gov.uk/private-renting/repairs) have up-to-date guidance on landlord repairing and heating obligations. This isn't legal advice, just a starting point for checking your specific situation.
## FAQs
### Is 18°C warm enough with underfloor heating?
For most people, yes, once you've adjusted to how radiant heat feels compared with a radiator, though it can feel cool in the first few days. If it consistently feels cold or you're seeing condensation, that's worth raising with your landlord rather than assuming it's just the system.
### Is it cheaper to leave underfloor heating on low all day?
For wet, slab-based systems, yes, this is standard advice and different from the usual "only heat when needed" guidance for radiators, because of how slowly the slab heats and cools. For electric systems the case is weaker, since they respond quickly and don't carry the same thermal mass.
### Do rugs stop underfloor heating from working?
They don't stop it outright, but a thick rug insulates the floor and reduces how much heat actually reaches the room, so it's counterproductive in a heated zone. Keep rugs thin or avoid them over the areas you most want warm.
### Can I use an electric blanket alongside underfloor heating?
Yes, and it's usually the cheapest way to add targeted warmth, particularly in a bedroom kept cooler than the rest of the flat.
### What temperature should each room actually be?
As a rough guide, living rooms are typically run at 20–22°C, bathrooms 22–24°C, and adult bedrooms 16–19°C. Your landlord's 18°C figure sits in the middle of that range and is a reasonable whole-flat baseline rather than an unusually low setting.
---
--- title: Boiler Upgrade Scheme Guide 2026: Grants, Rules and the 2030 Plan description: Boiler Upgrade Scheme guide for 2026: check grant values, eligibility, landlord rules and the path to 2030, then plan your underfloor heating upgrade. url: https://underfloorheating.info/boiler-upgrade-scheme-complete-guide/ published: 2026-07-15 updated: 2026-08-21 tags: ['boiler upgrade scheme', 'heat pump grant', 'clean heat market mechanism', 'warm homes plan', 'heat pumps', 'underfloor heating grants'] ---
# Boiler Upgrade Scheme Guide 2026: Grants, Rules and the 2030 Plan
> **Quick Answer:** The Boiler Upgrade Scheme (BUS) gives households in England and Wales £7,500 towards an air-to-water or ground source heat pump, £9,000 for off-grid oil and LPG homes until 31 March 2027, plus £2,500 for the newly eligible air-to-air heat pumps. The scheme now runs to 2030 with a £2.7 billion budget, EPC requirements have been scrapped, and your MCS-certified installer handles the whole application. The grant funds the heat pump, not the emitters, so if warm floors are part of your plan, budget for the underfloor heating separately. Research your heating options at [underfloorheating.info](https://underfloorheating.info/) and compare qualified professionals through the [Underfloor Heating Directory](https://underfloorheating.directory/).
## The national shift to clean heat
Heating our homes accounts for roughly 18% of the UK's carbon emissions, which makes the boiler hanging on your kitchen wall one of the country's biggest decarbonisation problems. The government's answer has two halves: pay households to switch (the Boiler Upgrade Scheme), and oblige manufacturers to sell the alternative (the Clean Heat Market Mechanism). Together they underpin a target of 450,000 low-carbon heating installations a year by 2030.
The BUS launched in 2022 as a capital grant scheme that knocks a fixed sum off the upfront cost of a heat pump or, in limited cases, a biomass boiler. It was originally due to end in 2028, but under the Warm Homes Plan announced in late 2025 it has been extended to March 2030 and funded with £2.7 billion, part of a wider £13.2 billion package. That long runway matters: it gives installers reason to train, manufacturers reason to invest, and homeowners reason to plan a switch around their own renovation timetable rather than a closing deadline.
For underfloor heating readers there is a thread running through this whole guide: heat pumps perform best at low flow temperatures, and wet underfloor heating is the emitter that suits them best. The grant never pays for the floor, but the floor often decides how well the grant-funded machine performs. Our [guide to underfloor heating with heat pumps](/underfloor-heating-heat-pumps-guide-2026/) covers that relationship in depth.
## Grant values in 2026
From 21 July 2026, the approved grant values are:
| Technology | Grant | Notes |
|---|---|---|
| Air-to-water heat pump | £7,500 | The standard route; drives radiators, underfloor heating and hot water |
| Ground source heat pump | £7,500 | Includes shared ground loops |
| Air-to-water or ground source heat pump (off-grid oil/LPG home) | £9,000 | Temporary uplift, 21 July 2026 – 31 March 2027 |
| Air-to-air heat pump | £2,500 | New for 2026; warm air units, no water circuit |
| Biomass boiler | £5,000 | Off-grid rural properties only |
Two of these lines deserve a closer look. The £9,000 uplift is targeted precisely: it applies only where an off-gas-grid property is replacing an oil or LPG system, and only for air-to-water or ground source heat pumps. Off-grid homes replacing coal, hybrids or old electric heating still receive £7,500. We covered the announcement and what it means for rural households in our [news report on the £9,000 grant](/news/bus-9000-heat-pump-grant-oil-homes/).
The air-to-air addition is the structural novelty. These units blow warmed air through wall-mounted indoor units, an air conditioner in reverse, and they can cool in summer as well as heat in winter. But there is no water circuit, so an air-to-air heat pump cannot drive wet underfloor heating and will not heat your hot water cylinder. If warm floors are the goal, the £2,500 tier is not your route; you need air-to-water. For homes weighing summer comfort, our [underfloor cooling vs air conditioning comparison](/underfloor-cooling-vs-air-conditioning/) explains the alternatives, including the fact that a wet underfloor system fed by a heat pump can itself provide [gentle cooling in summer](/heat-pump-underfloor-cooling/). Heat batteries, thermal stores that charge on cheap overnight electricity, have also been announced for £2,500 support under the expanded scheme, with eligibility to follow once product standards are finalised.

## Eligibility: can your property qualify?
The scheme applies to England and Wales only (Scotland runs its own Home Energy Scotland grant and loan). It is open to owner-occupiers, private landlords and second-home owners. The property must be replacing a fossil fuel system (gas, oil, LPG, coal) or direct electric heating; the new heat pump must generally cover both space heating and hot water (air-to-air aside), and capacity is capped at 45kWth.
The biggest change came on 28 April 2026, when the scheme was overhauled. An Energy Performance Certificate is no longer a precondition. Previously, you needed a valid EPC with no outstanding recommendations for loft or cavity wall insulation, a rule that stalled thousands of applications. Now, outstanding insulation recommendations no longer block eligibility, and a property without any EPC can qualify using alternative evidence (typically a fuel bill and photographs of the existing system) supplied by your installer. Insulation remains a very good idea. A leaky home blunts any heating system's economics, and heat loss determines how large a system you need, but it is advice now, not a gate.
Custom self-builds are eligible for heat pumps (though not biomass), provided you can show the home was built for your own use and has not been previously occupied. The notable exclusions are new-build developer properties, the [Future Homes Standard](/uk-building-regulations-underfloor-heating/) makes low-carbon heating the default in new construction from 2027, so no subsidy is needed, and most social housing, which is funded through separate programmes. Lower-income households in England may do better under the Warm Homes: Local Grant, which can fund a heat pump and insulation outright; see our [grants explainer](/news/underfloor-heating-grants-warm-homes-local-grant/) for how the schemes compare.

## The installer-led application process
You never apply to the government yourself. The process runs through your installer, in four steps.
**1. Find an MCS-certified installer.** Certification under the Microgeneration Certification Scheme is mandatory; it makes the installation grant-eligible and insurance-backed. The sister directory maintains a regional list of [MCS-approved installers](https://underfloorheating.directory/mcs-approved-installers) if you are starting from scratch; get more than one quote, and ask each installer what flow temperature they are designing to.
**2. Get a quote with the grant already deducted.** Installers are legally required to pass on the full grant value as an upfront discount. If a quote shows the full price with a vague promise of money back later, walk away.
**3. Voucher application and your consent.** The installer applies to Ofgem, which administers the scheme. You will receive an email asking you to confirm that the installer is acting on your behalf. The application cannot proceed without your consent. Vouchers are typically processed within a few weeks.
**4. Installation and redemption.** Once issued, the voucher is time-limited: three months to complete an air source installation, six months for ground source. After commissioning, the installer must submit the redemption claim within 120 days. None of this paperwork lands on you, but knowing the deadlines helps you hold a slow installer to account.
## Strategic notes for landlords
Private landlords are fully eligible, and there is no cap on the number of properties: a landlord can claim for every eligible building in a portfolio. With the government's proposed requirement for rented homes to reach EPC C by 2030, the BUS is increasingly being used as a compliance tool, a £7,500 subsidy towards works that lift the energy rating while future-proofing the heating. Note that the grant is not treated as taxable income, though it reduces the capital expenditure you can count towards any cost cap. For rental properties, pairing a heat pump with low-maintenance emitters matters more than in an owner-occupied home; a screeded wet underfloor system has no radiator valves to bleed and nothing on the walls to damage, though the [running costs](/underfloor-heating-running-costs-2026/) and installation disruption still need weighing per property.
## The other half: the Clean Heat Market Mechanism
While the BUS pulls demand, the Clean Heat Market Mechanism (CHMM) pushes supply. Since April 2025, large boiler manufacturers must earn credits equivalent to a percentage of their fossil fuel boiler sales through qualifying heat pump installations. 6% in the first scheme year, rising to 8% from April 2026, or pay £500 for each missed credit, or buy credits from competitors who over-deliver.
Critics called it a "boiler tax" and some manufacturers initially added surcharges to boiler prices. In practice, the sums involved are modest per boiler sold, and the mechanism's real effect is strategic: every major boiler brand now has a direct commercial reason to sell you a heat pump, train heat pump engineers, and price their heat pump range competitively. For consumers, that gradually means more installer availability and keener pricing, the quiet complement to the headline grants.
## Real-world considerations: costs, older homes, upkeep
A heat pump is roughly three times more efficient than a gas boiler, but electricity costs more per unit than gas, so the running-cost comparison depends on the gap between the two prices and on how efficiently the system runs. That efficiency is largely set by flow temperature, which is why emitters matter so much. A wet underfloor system lets the pump run at 35–45°C rather than pushing 55°C+ through undersized radiators; add a smart control strategy (see our [smart thermostats guide](/smart-thermostats-underfloor-heating/)) and a time-of-use tariff, and the economics improve further. Our guides to [underfloor heating running costs](/underfloor-heating-running-costs-2026/) and [whether underfloor heating is expensive to run](/is-underfloor-heating-expensive-to-run/) put numbers on this.
Older housing stock is not a dealbreaker. Victorian terraces have been successfully converted using a mix of fabric improvements, high-temperature heat pump models, oversized radiators, or underfloor heating in the rooms being renovated anyway. The honest rule of thumb: the worse the insulation, the more the design and the emitters matter, and the more valuable a careful heat-loss survey becomes. If a floor is coming up during renovation, that is usually the cheapest moment to fit a wet system. Retrofitting later is possible but more disruptive.
Maintenance is light: an annual service (often a warranty condition), keeping outdoor units clear of debris, and checking system pressure. Budget for it as you would a boiler service.

## Governance and consumer protection
Ofgem administers the scheme end to end: it processes vouchers, pays installers, and audits installations. Desk audits check paperwork; a minority of installations receive site audits to confirm the system matches the claim. This is fraud prevention, not suspicion of homeowners, and a legitimate installation has nothing to fear from it. If an application is rejected and you believe wrongly, you can ask Ofgem for a statutory review; complaints about workmanship go first to the installer, then to MCS and the relevant consumer code. Keep copies of the quote, the consent email and the commissioning certificate, the three documents that resolve most disputes.
## The roadmap to 2030
The pieces now fit together into something resembling a plan. The BUS runs to 2030 with £2.7 billion behind it. The CHMM ratchets manufacturer obligations upwards each year. The Future Homes Standard makes heat pumps the default in new homes from 2027, and, notably, the Warm Homes Plan dropped the rigid 2035 gas boiler ban in favour of incentives, a pragmatic shift that leaves existing homes moving at the pace of grants rather than prohibition.
For homeowners, the practical takeaway is that there is no cliff edge but there are windows: the £9,000 off-grid uplift ends on 31 March 2027, and grant values for later scheme years are not guaranteed to stay at today's levels. If a heating replacement is on your horizon, the sensible sequence is a heat-loss survey, a fabric check, an emitter decision, [wet underfloor heating, radiators, or a mix](/electric-vs-water-underfloor-heating-2026/), and then quotes from two or three [MCS-certified installers](https://underfloorheating.directory/mcs-approved-installers). The grant takes care of a meaningful slice of the heat pump; how warm the house feels, and what it costs to run, is decided by everything around it.
**Sources:** [GOV.UK. Notice of approved grant categories and values for the Boiler Upgrade Scheme (from 21 July 2026)](https://www.gov.uk/government/publications/boiler-upgrade-scheme-regulations-approved-standards-grant-categories-and-grant-levels/notice-of-approved-grant-categories-and-values-for-the-boiler-upgrade-scheme), [GOV.UK. Warm Homes Plan](https://www.gov.uk/government/publications/warm-homes-plan/warm-homes-plan-html), [GOV.UK. Discounts for families to keep warm in winter and cool in summer](https://www.gov.uk/government/news/discounts-for-families-to-keep-warm-in-winter-and-cool-in-summer), [Ofgem. Boiler Upgrade Scheme installer guidance v5](https://www.ofgem.gov.uk/sites/default/files/2026-04/boiler_upgrade_scheme_guidance_for_installers_V5_20260424143058.pdf), [GOV.UK. Clean Heat Market Mechanism: revisions ahead of Scheme Year 2](https://www.gov.uk/government/consultations/clean-heat-market-mechanism-revisions-ahead-of-scheme-year-2-20262027/clean-heat-market-mechanism-revisions-ahead-of-scheme-year-2-20262027-accessible-webpage), [Energy Saving Trust. Boiler Upgrade Scheme explained](https://energysavingtrust.org.uk/grants-and-loans/boiler-upgrade-scheme/)
---
--- title: Boiler Upgrade Scheme Changes on 21 July: £9,000 Grants Explained description: Boiler Upgrade Scheme rates change on 21 July 2026, with £9,000 grants for oil and LPG homes and support for air-to-air heat pumps. See what's changing. url: https://underfloorheating.info/news/bus-21-july-changes/ published: 2026-07-15 updated: 2026-08-21 tags: ['underfloor heating news', 'boiler upgrade scheme', 'heat pump grant', 'air-to-air heat pump', 'oil heating'] ---
# Boiler Upgrade Scheme Changes on 21 July: £9,000 Grants Explained
> **Quick Answer:** From Monday 21 July 2026, a new set of Boiler Upgrade Scheme grant values takes effect in England and Wales. Off-gas-grid homes replacing oil or LPG heating get £9,000 towards an air-to-water or ground source heat pump, up from £7,500. Less widely reported: air-to-air heat pumps join the scheme for the first time, with a £2,500 grant. That smaller grant has a big caveat for underfloor heating, air-to-air units cannot drive a wet underfloor system. Follow the latest underfloor heating guidance at [underfloorheating.info](https://underfloorheating.info/) and find qualified professionals through the [Underfloor Heating Directory](https://underfloorheating.directory/).
## What actually changes on 21 July
The Department for Energy Security and Net Zero (DESNZ) has published the formal notice of grant categories and values that apply from 21 July 2026, the third set since the Boiler Upgrade Scheme (BUS) launched. Most attention has gone to the headline uplift: households off the gas grid that currently heat with oil or LPG will be able to claim £9,000 towards an air-to-water or ground source heat pump, a 20% increase on the standard £7,500. We covered the background to that announcement, and why it matters for anyone weighing up a heating overhaul, in our [earlier report on the £9,000 grant](/news/bus-9000-heat-pump-grant-oil-homes/).
The uplift is temporary, running until 31 March 2027, and it is targeted. Reading the notice closely, the £9,000 rate applies only where an off-grid property is replacing an oil or LPG system specifically. Off-grid homes replacing coal, a fossil-fuel hybrid, or old electric heating still receive the standard £7,500, as do all on-grid homes swapping out a mains gas boiler. The £5,000 biomass boiler grant for off-grid properties is unchanged.
The quieter change is structural: for the first time, air-to-air heat pumps are eligible under the scheme, attracting a grant of £2,500 whether the property is on or off the gas grid. That opens the scheme to a much cheaper class of heating technology, and creates an obvious trap for anyone who assumes all heat pumps are interchangeable.

## The air-to-air caveat every underfloor heating reader should know
An air-to-water heat pump, the kind the £7,500 and £9,000 grants fund, heats water and circulates it through radiators or underfloor heating pipes, and typically provides your hot water too. It is the natural partner for a wet underfloor system, because underfloor heating's large surface area lets the pump run at the low flow temperatures where it is most efficient. Our [guide to underfloor heating with heat pumps](/underfloor-heating-heat-pumps-guide-2026/) covers that pairing in detail.
An air-to-air heat pump is a different machine. It blows warmed air into rooms through wall-mounted indoor units, essentially an air conditioner running in reverse. There is no water circuit, which means it cannot drive wet underfloor heating and does not heat your hot water cylinder. If your plan involves warm floors fed by a heat pump, the £2,500 air-to-air grant is not the route to it; you would need the air-to-water option, as our [electric vs water underfloor heating comparison](/electric-vs-water-underfloor-heating-2026/) explains from the emitter side.
That is not to dismiss air-to-air. For a small, well-insulated flat, or as an affordable first step away from expensive direct electric heating, a £2,500 subsidy on a system that can also cool in summer is a useful addition to the scheme, though air conditioning is not the only route to summer comfort, as our [underfloor cooling vs air conditioning comparison](/underfloor-cooling-vs-air-conditioning/) sets out. Some households may even combine one with [electric underfloor heating](/electric-underfloor-heating-systems/) in a bathroom, since electric mats run straight off the mains and need no heat pump at all. But the two grant tiers exist because the two technologies do different jobs, and the difference matters more for underfloor heating than for almost anything else.
## What to do if you're eligible
If you heat with oil or LPG and have been considering a switch, the practical position is simple: applications at the new £9,000 rate open on 21 July, the window closes at the end of March 2027, and the grant is claimed on your behalf by your installer rather than through a separate application. The installer must be MCS-certified, the sister directory keeps a regional list of [MCS-approved installers](https://underfloorheating.directory/mcs-approved-installers) if you are starting from scratch. Since this year's wider scheme overhaul, a valid EPC is no longer a strict precondition; your installer can evidence eligibility with fuel bills and photographs of the existing system instead.
Before committing, it is worth running the numbers on how you will distribute the heat. The grant funds the heat pump, not the emitters, so a new wet underfloor system, or upsized radiators, comes out of your own budget. Our guide to [underfloor heating running costs](/underfloor-heating-running-costs-2026/) is a sensible starting point, and July's electricity-versus-gas price gap, which narrowed at the last price cap change, has made the whole-system arithmetic slightly friendlier to electric heat than it was in the spring.

## The bottom line
Nothing about 21 July changes the fundamentals: heat pumps and wet underfloor heating remain a strong pairing, one that can even deliver [gentle underfloor cooling in summer](/heat-pump-underfloor-cooling/), and grants reward the switch without paying for the floor itself. The genuinely new element is choice. With air-to-air now inside the scheme at £2,500, homeowners face two grant tiers for two quite different technologies, and the cheaper one does not do warm floors. Read the category names carefully, ask your installer which type they are quoting for, and treat any advert implying a "£9,000 heat pump grant for everyone" with suspicion: the full uplift applies to off-grid oil and LPG homes only, for air-to-water and ground source systems, until the end of March 2027. For eligibility rules, the application process and the wider policy picture, our [complete guide to the Boiler Upgrade Scheme](/boiler-upgrade-scheme-complete-guide/) covers the scheme end to end.
**Sources:** [GOV.UK. Notice of approved grant categories and values for the Boiler Upgrade Scheme (from 21 July 2026)](https://www.gov.uk/government/publications/boiler-upgrade-scheme-regulations-approved-standards-grant-categories-and-grant-levels/notice-of-approved-grant-categories-and-values-for-the-boiler-upgrade-scheme), [GOV.UK. Thousands of homes will be eligible for £9,000 off a heat pump (DESNZ)](https://www.gov.uk/government/news/thousands-of-homes-will-be-eligible-for-9000-off-a-heat-pump), [Energy Saving Trust. Boiler Upgrade Scheme explained](https://energysavingtrust.org.uk/grants-and-loans/boiler-upgrade-scheme/)
---
--- title: £9,000 Heat Pump Grant for Oil-Heated Homes: Underfloor Heating description: The Boiler Upgrade Scheme offers £9,000 heat pump grants for oil and LPG homes in England and Wales from 21 July 2026. See how underfloor heating benefits. url: https://underfloorheating.info/news/bus-9000-heat-pump-grant-oil-homes/ published: 2026-06-29 updated: 2026-08-21 tags: ['underfloor heating news', 'boiler upgrade scheme', 'heat pump grant', 'oil heating', 'off-grid homes', 'net zero heating'] ---
# £9,000 Heat Pump Grant for Oil-Heated Homes: Underfloor Heating
> **Quick Answer:** From 21 July 2026, the Boiler Upgrade Scheme grant rises by 20%, from £7,500 to £9,000, for households in England and Wales that currently heat with oil or LPG and are off the gas grid. The uplift is temporary, running until 31 March 2027, and around 200,000 eligible homes are being contacted by post. The grant pays towards a heat pump, not underfloor heating itself, but because heat pumps work best with low-temperature systems, anyone making the switch should think carefully about the heat emitters they pair it with. Read more UK heating guidance at [underfloorheating.info](https://underfloorheating.info/) and compare qualified professionals through the [Underfloor Heating Directory](https://underfloorheating.directory/).
## What the government has announced
On 26 June 2026 the Department for Energy Security and Net Zero (DESNZ) confirmed that the Boiler Upgrade Scheme (BUS) grant for England and Wales will increase from £7,500 to £9,000 from 21 July 2026. The extra £1,500 is aimed specifically at rural households that rely on heating oil or LPG and have no mains gas connection.
The reasoning is straightforward. Oil and LPG sit outside Ofgem's energy price cap, so the households that use them have been more exposed to the price volatility of recent years than homes on mains gas. DESNZ frames the uplift as a way to help these households move to electric heat and gain more predictable bills. Leaflets explaining how to claim are being posted to roughly 200,000 eligible homes from the week beginning 29 June.
It is worth being clear about the scope. This is a temporary, targeted uplift, not a permanent increase to the headline grant. The £9,000 rate applies to eligible off-grid oil and LPG properties only, and runs from 21 July 2026 to 31 March 2027. The standard BUS grant of £7,500 remains in place for other eligible homes, including those replacing mains gas boilers with an air source or ground source heat pump.

## Why this matters for underfloor heating
The grant does not pay for underfloor heating, and it never has. BUS funds the heat pump and its installation, administered through an [MCS-approved installer](https://underfloorheating.directory/mcs-approved-installers). But the announcement is still relevant to anyone weighing up underfloor heating, because of how heat pumps actually work.
A heat pump is most efficient when it runs at a low flow temperature, typically around 35–45°C, compared with the 60–70°C an oil or gas boiler might use. The lower the temperature your heating system needs, the more heat the pump delivers for each unit of electricity, and the lower your running costs. That is exactly where underfloor heating comes into its own. Because it spreads warmth across a large surface area, a wet underfloor system can keep a room comfortable at flow temperatures a heat pump can supply happily. This is why the two technologies are so often discussed together, see our [guide to underfloor heating with heat pumps](/underfloor-heating-heat-pumps-guide-2026/) for the full picture.
That does not mean a heat pump only works with underfloor heating. Plenty of the case studies DESNZ highlighted involve upgraded radiators rather than a new floor, and oversized low-temperature radiators are a perfectly valid route. But if you are already planning a renovation, an extension, or a new screed floor, fitting underfloor heating at the same time as a heat pump can be a sensible pairing rather than an expensive afterthought. Retrofitting it later into an occupied home is more disruptive and costly, as our [retrofitting underfloor heating guide](/retrofitting-underfloor-heating/) explains.
## What to check before you commit
If you think you may be eligible, a few points are worth keeping in mind. First, the grant covers a portion of the heat pump cost, not the whole project, and not your heat emitters, so budget for the floor or radiator work separately and read up on [underfloor heating running costs](/underfloor-heating-running-costs-2026/) before you decide. Second, a heat pump needs a reasonably well-insulated home to perform well; if your property loses heat quickly, the running-cost savings will be smaller, so insulation is often the first job. Third, choosing between a wet underfloor system and electric mats matters here: only wet (water-fed) underfloor heating can be driven by a heat pump, whereas electric systems run directly off the grid, as set out in our [electric vs water underfloor heating comparison](/electric-vs-water-underfloor-heating-2026/).
It is also worth remembering that this is one of several overlapping schemes. Lower-income households in England may instead qualify for the Warm Homes: Local Grant, which can fund a heat pump and insulation outright; we cover that in our [grants explainer](/news/underfloor-heating-grants-warm-homes-local-grant/). The schemes have different eligibility rules, so it pays to check which route fits your circumstances rather than assuming one figure applies to everyone.

## The bottom line
For the roughly 200,000 off-grid oil and LPG households this uplift targets, an extra £1,500 is a meaningful nudge towards a heat pump, particularly for those who have felt the sharp end of unregulated fuel prices. It is not a reason to rush, and it does not change the fundamentals of underfloor heating. But if you are an off-grid household already thinking about replacing an ageing oil boiler, the maths has shifted a little in favour of acting before the window closes on 31 March 2027. As ever, the heat pump and the way you distribute its warmth are two halves of the same decision, and underfloor heating, where the budget and the building allow, remains one of the most efficient ways to make the most of one. A modern heat pump can even provide gentle [underfloor cooling in summer](/heat-pump-underfloor-cooling/), something an oil boiler never could.
If you are researching installers as part of a switch, the sister site lists [MCS-approved heat pump and underfloor heating installers](https://underfloorheating.directory/mcs-approved-installers) by region. And for the full picture of how the scheme works, eligibility, the installer-led process, landlord rules and the road to 2030, see our [complete guide to the Boiler Upgrade Scheme](/boiler-upgrade-scheme-complete-guide/).
**Sources:** [GOV.UK. Thousands of homes will be eligible for £9,000 off a heat pump (DESNZ, 26 June 2026)](https://www.gov.uk/government/news/thousands-of-homes-will-be-eligible-for-9000-off-a-heat-pump), [Energy Saving Trust. Boiler Upgrade Scheme](https://energysavingtrust.org.uk/grants-and-loans/boiler-upgrade-scheme/), [Find a grant. Boiler Upgrade Scheme (GOV.UK)](https://www.find-government-grants.service.gov.uk/grants/boiler-upgrade-scheme-1)
---
--- title: Underfloor Cooling vs Air Conditioning: UK Cost, Comfort and Practicality description: Compare underfloor cooling vs air conditioning for UK homes, including costs, comfort, noise and humidity control, to choose the best cooling solution. url: https://underfloorheating.info/underfloor-cooling-vs-air-conditioning/ published: 2026-06-29 updated: 2026-08-21 tags: ['underfloor cooling', 'air conditioning', 'heat pump', 'reversible heat pump', 'UFH cooling mode', 'home cooling uk'] ---
# Underfloor Cooling vs Air Conditioning: UK Cost, Comfort and Practicality
As UK summers get warmer, more homeowners are weighing up two very different ways to keep a house comfortable: running a reversible heat pump in [UFH cooling mode](/heat-pump-underfloor-cooling/) through the existing floor pipes, or fitting conventional air conditioning. They sound like competing answers to the same question, but they are not. They cool in fundamentally different ways, and the right choice depends far more on your home and your expectations than on which technology is "better". If you're new to underfloor heating generally, our [beginner's guide to underfloor heating](/underfloor-heating-beginners-guide/) and [underfloorheating.info](https://underfloorheating.info/) are good starting points before comparing cooling options, while the [Underfloor Heating Directory](https://underfloorheating.directory/) can help when you are ready to find an installer.
This guide compares the two head-to-head on the things that actually decide it: running cost, comfort, installation, and day-to-day practicality in a UK home.
> **Quick Answer:** Underfloor cooling is cheaper to run, silent, and completely hidden, but it cools gently (around 3 to 5°C), offers no dehumidification, and only suits well-insulated homes with a wet UFH system and a reversible heat pump. Air conditioning cools faster and harder, removes humidity, and works in almost any home, but it needs visible indoor units, costs more to install as a standalone system, and makes some noise. Many high-comfort UK homes use both: underfloor cooling for steady background cooling, and a small split unit in the one or two rooms that overheat.
## How each one actually cools
The core difference is radiant versus forced-air cooling.
Underfloor cooling circulates chilled water (around 16 to 20°C) through the loops already embedded in your floor. The cool surface quietly absorbs radiant heat from people, furniture, and the air above it. There is no fan, no airflow, and no sudden change, just a floor that sits a few degrees below room temperature and gently pulls the heat down over time. It is the same principle as the heating you already have, run in reverse.
Air conditioning does the opposite. A split unit blows room air across a cold refrigerant coil, dropping its temperature quickly and pushing it back out as a cool draught. Behind that coil, a compressor and expansion valve are running the same refrigeration cycle as the heat pump feeding your underfloor loops, compressing refrigerant gas, letting it expand and cool, then using a fan to force air across it rather than pumping chilled water through a floor. Because it moves air rather than waiting for heat to radiate, it reacts fast and can pull a room down much further. It also condenses moisture out of the air as it works, which is the dehumidification that underfloor cooling cannot provide.
This single distinction, patient radiant surface versus active forced air, explains almost every difference that follows.
## Running cost compared

This is where underfloor cooling makes its strongest case. Because a heat pump achieves a high efficiency in cooling mode (an EER of roughly 3.0 to 4.5) and you are reusing equipment you already own, the cost per unit of cooling delivered is very low.
| System | Typical EER / SEER | Cost per kWh of cooling (at 27p/kWh) |
|---|---|---|
| Reversible heat pump via UFH | 3.0 to 4.5 | £0.06 to £0.09 |
| Modern fixed split air-conditioner | 2.5 to 3.5 | £0.08 to £0.11 |
| Portable air-conditioner | 1.5 to 2.5 | £0.11 to £0.18 |
In practice, a well-insulated 100 m² home might spend somewhere in the region of £10 to £30 across an entire UK cooling season running underfloor cooling, because the season is short and the loads are modest. A fixed split system is still efficient, but costs more per delivered unit and is usually asked to do more work (faster, deeper cooling), so real-world bills tend to be higher. Portable units are the worst value of all and best avoided for anything beyond occasional use. For the wider picture on what wet systems cost to operate year-round, see the [underfloor heating running costs guide](/underfloor-heating-running-costs-2026/), or our [underfloor heating costs hub](/underfloor-heating-costs/) for installation and running costs across every system type.
The catch is capital cost. Underfloor cooling's running-cost advantage only holds if you already have, or are already installing, a reversible heat pump and a wet UFH system. Adding cooling to a heat pump you are buying anyway costs very little. Retrofitting a heat pump purely to gain cooling rarely makes financial sense, and in that situation a standalone air-conditioning system is usually the cheaper route to cooling.
## Comfort and air quality
Comfort is not just about temperature. It is about how the cooling feels, sounds, and affects the air.
Underfloor cooling wins on quietness and gentleness. There is no fan noise in the room, no draught, and no cold air blowing across you, qualities that matter most in bedrooms and at night. The cooling is even and low-level, with none of the hot-and-cold cycling a wall unit can produce. Because nothing is being blown around, it also does not stir up dust in the way forced air can.
Air conditioning wins on control and humidity. It can hold a precise setpoint, respond within minutes, and, crucially, dehumidify, typically pulling indoor relative humidity down towards the 40 to 60% range most people find comfortable. On a muggy UK summer day, that dehumidification can make a room feel more comfortable than a lower temperature alone would.
Underfloor cooling does the reverse: in humid conditions it has to *back off* to stay above the dew point, so it delivers least when humidity is highest, and it does nothing to bring room humidity down. (The [main cooling guide](/heat-pump-underfloor-cooling/) explains dew point control in detail, because it is the single most important design factor in any underfloor cooling system.) Homes relying on underfloor cooling alone usually manage humidity separately, through MVHR with a cooling coil or summer bypass, or a standalone whole-house dehumidifier, worth planning for before committing to underfloor-only cooling in an airtight modern build.
The honest summary: underfloor cooling is more pleasant when it is enough, and air conditioning is more capable when it is not.
## Noise levels compared
The "silent" claim for underfloor cooling is not just marketing; there genuinely is nothing to hear. The chilled water moves through pipes already buried in the floor, so the only sound anywhere near the room is whatever the heat pump's outdoor unit makes, and that is typically sited well away from bedrooms and living spaces.
Air conditioning is quieter than it used to be, but it is not silent. A modern split unit's indoor head typically runs at 19 to 26 dB(A) on its lowest fan setting, roughly the sound level of rustling leaves or a quiet library, rising into the high 30s or low 40s dB(A) on boost. That is unlikely to bother most people during the day, but it is the reason light sleepers often prefer underfloor cooling, or a split unit with a genuinely low "sleep mode", for bedrooms.
## Installation and disruption

If you already have wet UFH and are installing or upgrading to a reversible heat pump, underfloor cooling is close to free in installation terms, it is mostly a matter of specifying the right unit, enabling cooling in the controls, and adding dew point protection. No new pipework, no wall units, no holes through the building fabric.
Air conditioning is a separate installation. Each indoor unit needs wall space, refrigerant pipework routed back to an outdoor condenser, a condensate drain, and an electrical supply. A typical fitted multi-room split system runs to roughly £2,000 to £4,000 or more, and the indoor units are visible in every room they serve. It is more disruptive to retrofit, but it does not depend on you having underfloor heating or a heat pump at all, which is exactly why it works in homes where underfloor cooling cannot. If you're weighing this up as part of a wider retrofit, our [retrofitting underfloor heating guide](/retrofitting-underfloor-heating/) covers what's involved in adding wet UFH to an existing home in the first place.
## Controls and zoning

This is where air conditioning has a genuine practical edge. Each split unit is controlled independently, so you can cool one bedroom to 20°C while another room stays off entirely, and most systems support per-room scheduling through an app.
Underfloor cooling is usually a two-pipe system, the same pipes that carry hot water in winter carry chilled water in summer, so the whole house is in either heating mode or cooling mode at once. You cannot cool a south-facing living room while calling for heat in a cold north-facing bedroom on the same day. Our [smart thermostats for underfloor heating guide](/smart-thermostats-underfloor-heating/) covers the room-by-room setpoint control you do still get within cooling mode, and the [main cooling guide's explanation of two-pipe systems](/heat-pump-underfloor-cooling/) goes into the shoulder-season trade-offs this creates in more depth. In practice, most households manage it with a manual seasonal switchover date, or by pairing underfloor cooling with a small split unit in the one room that needs independent control.
## Which homes and rooms suit each

Underfloor cooling is fussy about the building. It needs a wet UFH system, electric mats cannot cool, so if you're deciding between systems from scratch, our [electric vs water underfloor heating comparison](/electric-vs-water-underfloor-heating-2026/) is worth reading before you commit either way. It also needs a reversible heat source (see our [heat pump and underfloor heating guide](/underfloor-heating-heat-pumps-guide-2026/) for compatible models), good insulation, and controllable humidity, broadly, new builds and deep retrofits. In a leaky older home, or one with large unshaded south-facing glazing, the floor simply cannot keep up. Floor finish matters too: hard, conductive finishes such as tile or stone transmit the cooling far more effectively than thick carpet, as covered in our [best flooring for underfloor heating guide](/best-flooring-underfloor-heating/).
Part of why UK homeowners are asking about cooling at all is Part O of the Building Regulations, which has required new-build homes in England to address overheating risk since June 2022, our [UK building regulations for underfloor heating guide](/uk-building-regulations-underfloor-heating/) explains what that means in practice. Underfloor cooling can contribute to an overheating strategy, but it works alongside passive measures like shading, not instead of them.
Air conditioning is far less fussy. It works in a Victorian terrace, a loft conversion, or a single overheating bedroom, regardless of the heating system. That flexibility, plus its speed and dehumidification, makes it the better tool for targeted, on-demand cooling, the bedroom you need cool by 10pm, or the home office that bakes in the afternoon.
## You don't have to choose just one
The most comfortable UK homes increasingly use both, and the combination plays to each system's strengths. Underfloor cooling handles the steady, whole-house background load quietly and cheaply, taking the general edge off the heat. A single small split unit then covers the one or two rooms that genuinely overheat, usually a south- or west-facing bedroom, where speed and dehumidification matter most. If you're still specifying a [wet underfloor heating system](/wet-underfloor-heating-ultimate-guide/) for a new build or major retrofit, it's worth designing in cooling capability from the outset rather than retrofitting it later.
This hybrid approach avoids the trap of asking underfloor cooling to do something it physically cannot (rapid, deep cooling against high solar gain) while keeping the cheap, silent comfort it does so well across the rest of the house.
## The verdict
| If your priority is… | Better choice |
|---|---|
| Lowest running cost (with a heat pump already) | Underfloor cooling |
| Silent, hidden, draught-free comfort | Underfloor cooling |
| Fast, deep cooling on demand | Air conditioning |
| Dehumidification on muggy days | Air conditioning |
| Cooling a single room or an older home | Air conditioning |
| Whole-house comfort in a new build / deep retrofit | Underfloor cooling (plus a split unit for problem rooms) |
For most people installing a heat pump in 2026, choosing a [reversible heat pump cooling](/heat-pump-underfloor-cooling/) capability is an easy win: the marginal cost is small and the running cost is tiny. Air conditioning earns its place where the home, the room, or the speed of cooling demands more than a gentle floor can give. The two are complements as often as they are rivals.
---
**Planning cooling on a heat pump installation?** Start with our [complete heat pump and underfloor cooling guide](/heat-pump-underfloor-cooling/) for model compatibility, dew point control, and UK running costs, then browse the [installer directory](https://underfloorheating.directory) to find a qualified MCS heat pump and UFH specialist near you.
---
--- title: July 2026 Price Cap: What the Energy Rise Means for Underfloor Heating description: Ofgem's price cap rises 13% from 1 July 2026. Gas is up 24% but electricity only 5%, here's what that shift means for underfloor heating running costs. url: https://underfloorheating.info/news/july-2026-price-cap-underfloor-heating/ published: 2026-06-19 updated: 2026-08-21 tags: ['underfloor heating news', 'energy price cap', 'running costs', 'ofgem', 'electric underfloor heating', 'heat pumps'] ---
# July 2026 Price Cap: What the Energy Rise Means for Underfloor Heating
> **Quick Answer:** From 1 July 2026, Ofgem's energy price cap rises by 13% to £1,862 a year for a typical dual-fuel household. The increase is uneven: gas unit rates jump by around 24% while electricity rises by only about 5%. That gap matters for underfloor heating, because it narrows the long-standing running-cost advantage that gas-fed systems have held over electric and heat-pump set-ups. Nobody needs to change their system because of this, but it does change the maths slightly when comparing options. Read further UK guidance at [underfloorheating.info](https://underfloorheating.info/). If you are choosing an installer or comparing systems and products, the sister directory at [underfloorheating.directory](https://underfloorheating.directory/) is a useful starting point.
## What Ofgem has announced
On 27 May 2026, Ofgem confirmed that the energy price cap for Great Britain will rise to £1,862 a year for a typical household paying by direct debit, up from £1,641, an increase of roughly 13%, or about £18 a month. The new cap applies from 1 July to 30 September 2026.

The headline figure is less useful than the detail underneath it. The cap is not a limit on your total bill; it caps the unit rates and standing charges, so households that use more energy pay more. More importantly for heating, the rise is split very unevenly between the two fuels. Ofgem says gas bills are climbing by around 24% while electricity bills rise by only about 5%. In unit-rate terms, gas moves to roughly 7.3p per kWh and electricity to around 26.1p per kWh, with standing charges of about 29p a day for gas and 57p a day for electricity. Ofgem attributes the increase mainly to higher wholesale gas prices.

It is worth remembering that these are national averages. Unit rates and standing charges vary by region because network costs differ across distribution areas, so your own figures may be a little higher or lower.
## Why this matters for underfloor heating
For years, the running-cost comparison between heating types has been dominated by one simple fact: electricity costs roughly four times as much per unit as gas. That is why [electric underfloor heating systems](/electric-underfloor-heating-systems/) have generally been recommended for smaller areas, bathrooms, en-suites, the odd kitchen, rather than whole houses, while larger homes have leaned towards wet systems fed by a gas boiler or, increasingly, a heat pump.
This price cap nudges that ratio. Before July, gas sat at about 5.7p and electricity at about 24.7p, a ratio of roughly 4.3 to 1. From July, gas rises faster than electricity, narrowing the ratio to closer to 3.6 to 1. The gap is still large, and gas remains much cheaper per unit, but the trend is the one to watch: each time gas rises faster than electricity, the case for direct electric heating and for heat pumps strengthens a little.

If you are weighing up your options, our guide to [electric versus water underfloor heating](/electric-vs-water-underfloor-heating-2026/) walks through where each makes sense, and the dedicated piece on [whether underfloor heating is expensive to run](/is-underfloor-heating-expensive-to-run/) explains how floor area, insulation and run-time affect the bill far more than the headline unit rate does.

## Heat pumps come out relatively well
The fuel most exposed to this rise is gas, and the system least exposed is the heat pump. Because a heat pump delivers roughly three to four units of heat for every unit of electricity it draws, a modest 5% rise in electricity prices has a much smaller effect on a heat-pump household's heating bill than a 24% gas rise has on a gas-boiler household.
Heat pumps and underfloor heating are also a natural technical pairing, since both work best at low flow temperatures. If you are thinking about that route, our [underfloor heating and heat pumps guide for 2026](/underfloor-heating-heat-pumps-guide-2026/) covers how the two work together and what to expect on running costs. None of this makes a heat pump automatically cheaper to run than a gas boiler today, that still depends on your home, your tariff and the quality of the installation, but the direction of travel in this price cap is favourable to it.
## What you should, and shouldn't, do
The sensible response to a price cap change is rarely to rush into anything. A few practical points:
This is a temporary three-month cap, not a permanent change. Ofgem resets it quarterly, and the autumn figure could move in either direction. It is not a reason to replace a working heating system.
Controls matter more than ever. Tight, room-by-room control is the cheapest way to cut a heating bill, and it makes a bigger difference than the unit-rate change itself. Our guide to [smart thermostats for underfloor heating](/smart-thermostats-underfloor-heating/) explains how zoning and scheduling keep run-time down.
Check whether a fixed tariff suits you. Around 40% of households are already on fixed deals and are unaffected by this rise. Fixing is not automatically cheaper, but it is worth comparing against the capped variable rate before 1 July.
For a fuller picture of where heating bills are heading this year, see our regularly updated [underfloor heating running costs guide for 2026](/underfloor-heating-running-costs-2026/).

## The bottom line
The July 2026 price cap raises bills for almost everyone, but it hits gas hardest. For underfloor heating, that gently improves the relative position of electric and heat-pump systems without overturning the basic picture: gas is still the cheaper fuel per unit, and the right choice still comes down to your home, not the headline. The most reliable saving remains using less energy through good controls and a well-designed system.
**Sources:**
- [Energy price cap will rise by 13% from July. Ofgem](https://www.ofgem.gov.uk/press-release/energy-price-cap-will-rise-13-july)
- [Changes to energy price cap between 1 July and 30 September 2026. Ofgem](https://www.ofgem.gov.uk/news/changes-energy-price-cap-between-1-july-and-30-september-2026)
- [Martin Lewis: July's 13% Energy Price Cap rise. MoneySavingExpert](https://www.moneysavingexpert.com/news/2026/05/martin-lewis-energy-price-cap-rise-july/)
- [Gas and electricity prices during the 'energy crisis' and beyond. House of Commons Library](https://commonslibrary.parliament.uk/research-briefings/cbp-9714/)
---
--- title: Underfloor Heating Grants UK: Warm Homes Local Grant Explained description: Warm Homes Local Grant funding can support heat pumps and insulation, but not underfloor heating directly. Check eligibility and plan your upgrade wisely. url: https://underfloorheating.info/news/underfloor-heating-grants-warm-homes-local-grant/ published: 2026-06-15 updated: 2026-08-21 tags: ['underfloor heating news', 'grants', 'warm homes local grant', 'heat pumps', 'energy efficiency', 'net zero', 'uk heating regulations'] ---
# Underfloor Heating Grants UK: Warm Homes Local Grant Explained
> **Quick Answer:** The **Warm Homes: Local Grant** offers eligible low-income households in England up to **£30,000** of fully funded home upgrades, up to £15,000 for a heat pump and up to £15,000 for insulation and other efficiency measures. It does **not** pay for underfloor heating on its own. But because it funds the heat pump that underfloor heating pairs with best, it is well worth understanding if you are planning a wider heating upgrade. To qualify you generally need a household income under £36,000 (or to be on means-tested benefits), to own or privately rent your home, and to have an EPC rating of D, E, F or G. Read more UK underfloor heating guidance at [underfloorheating.info](https://underfloorheating.info/) and find qualified specialists through the [Underfloor Heating Directory](https://underfloorheating.directory/).
## Can you get a grant for underfloor heating?
Not directly. A lot of coverage blurs that point. No current UK government scheme writes you a cheque specifically to install underfloor heating. The schemes fund **low-carbon heating** (overwhelmingly heat pumps) and **energy-efficiency measures** (insulation, draught-proofing, glazing, sometimes solar).
The reason underfloor heating still matters here is simple: a heat pump runs at its best with a large, low-temperature emitter, and that is exactly what [underfloor heating provides](/underfloor-heating-heat-pumps-guide-2026/). So if a grant is paying for your heat pump, underfloor heating is often the ideal way to deliver that heat, even if the floor system itself sits outside the grant.

## What is the Warm Homes: Local Grant?
The Warm Homes: Local Grant is part of the government's wider Warm Homes Plan. It runs from 2025 to 2028 and is delivered through individual **local councils** rather than applied for centrally. It is aimed at low-income households living in the least energy-efficient privately owned homes in England.
The scheme launched in June 2025 and proved extremely popular: many council portals temporarily closed to new applications late in 2025 while they worked through the backlog, with most reopening through spring 2026. Availability and exact rules therefore vary by council, so your local authority's page is always the definitive source.
## How much you can get
The headline figure is **up to £30,000 per property**, split into two pots:
- **Up to £15,000 for low-carbon heating**, in practice, an air source heat pump.
- **Up to £15,000 for energy-performance measures**, insulation, draught-proofing, double glazing and, in some cases, solar panels.
For most households the upgrades are fully funded, with no contribution required. The grant is separate from the [Boiler Upgrade Scheme](/underfloor-heating-heat-pumps-guide-2026/), which offers £7,500 towards a heat pump for able-to-pay households and is **not** income-restricted, so if you do not qualify for Warm Homes, that may be the route to look at instead.

## Who qualifies
Eligibility is set nationally but assessed by your council. As a general guide, you should be eligible if:
- Your **household income is under £36,000 a year**, or you receive means-tested benefits. Some councils will still consider you above that figure if your housing costs are high.
- You live in a **privately owned home**, either as the owner-occupier, or as a private tenant whose landlord agrees to the work.
- Your home has an **EPC rating of D, E, F or G** (the less efficient bands).
- You are **resident in England**. Scotland (Warmer Homes Scotland), Wales (the Optimised Retrofit Programme) and Northern Ireland (the Affordable Warmth Scheme) run their own equivalents.
## Where underfloor heating fits in
If you are moving to a heat pump, grant-funded or not, the emitters matter enormously. Heat pumps are most efficient when they deliver warmth at low flow temperatures, and [wet underfloor heating](/wet-underfloor-heating-ultimate-guide/) is the lowest-temperature emitter you can fit. That is why the two are so often specified together, and why a heat-pump grant can be the moment it makes sense to think about your floors.
A few practical points worth knowing:
- **Underfloor heating usually is not a grant-funded measure**, so if you want it you will typically pay for it yourself alongside the funded heat pump and insulation.
- **It can lower your running costs.** Pairing a heat pump with underfloor heating keeps flow temperatures down, which is exactly where heat pump efficiency, and your [day-to-day running costs](/underfloor-heating-running-costs-2026/), improve.
- **Retrofit is possible but needs planning**, especially around floor build-up and insulation. If you are weighing it against keeping radiators, our [wet versus electric comparison](/electric-vs-water-underfloor-heating-2026/) and our guide to [whether underfloor heating is worth it](/is-underfloor-heating-worth-it/) are good starting points.
Check how any work fits with the [UK building regulations for underfloor heating](/uk-building-regulations-underfloor-heating/), which set efficiency and zoning expectations for new installations.

## How to apply and what to check
Because the Warm Homes: Local Grant is run locally, you apply through **your own council**, not a national portal. Search your council's website for "Warm Homes: Local Grant", check whether its portal is currently open, and confirm the income and EPC criteria it is applying.
Whether you go through this grant or pay privately, an **MCS-certified installer** should carry out any heat pump work. This is a condition of the grant funding and your protection on quality. You can find vetted specialists in our sister directory of [MCS-approved underfloor heating and heat pump installers](https://underfloorheating.directory/mcs-approved-installers).
## The bottom line
The Warm Homes: Local Grant is a substantial offer of up to £30,000 for eligible English households, but it is a heat-pump-and-insulation scheme, not an underfloor heating grant. If you qualify and you are switching to a heat pump, that is precisely the point at which underfloor heating becomes worth costing in because it lets the heat pump run efficiently and keeps your bills down. Treat the grant as the trigger for a sensible whole-system upgrade. Check your council's current rules and use an MCS-certified installer for the heat pump itself.
## About the author
Damian Krzyzanowski is an underfloor heating content specialist and the founder of Underfloor Heating Hub. He focuses on turning installer, manufacturer and system-design experience into clear, jargon-free guidance for UK homeowners, from running costs and system choice to grants and regulation. Connect with him on [LinkedIn](https://uk.linkedin.com/in/damian-krzyzanowski-39b29834).
---
*This article is a general explainer, not financial advice; eligibility and amounts vary by council and may change. Check your local authority for current rules. Last reviewed 15 June 2026.*
**Sources:** [Warm Homes: Local Grant – guidance for local authorities (GOV.UK)](https://www.gov.uk/government/publications/warm-homes-local-grant); [Warm Homes: Local Grant Policy Guidance (GOV.UK PDF)](https://assets.publishing.service.gov.uk/media/6a4629fa732d8e7ce5f53b13/warm-homes-local-grant-policy-guidance-july-2026.pdf); [MoneySavingExpert – Warm Homes: Local Grant](https://www.moneysavingexpert.com/utilities/warm-homes-local-grant/); [Uswitch – Warm Homes: Local Grant scheme](https://www.uswitch.com/gas-electricity/guides/warm-homes-local-grant-scheme/).
---
--- title: Is Underfloor Heating Being Banned? The New Efficiency Rules Explained description: UK underfloor heating efficiency rules affect new electric products, not existing systems. Learn what changes in 2026 and avoid unnecessary replacements. url: https://underfloorheating.info/news/underfloor-heating-efficiency-rules-2026/ published: 2026-06-14 updated: 2026-08-21 tags: ['underfloor heating news', 'ecodesign', 'electric underfloor heating', 'heated towel rails', 'energy efficiency', 'net zero', 'uk heating regulations'] ---
# Is Underfloor Heating Being Banned? The New Efficiency Rules Explained
> **Quick Answer:** Underfloor heating is **not** being banned. Follow UK underfloor heating guidance at [underfloorheating.info](https://underfloorheating.info/) and find project support through the [Underfloor Heating Directory](https://underfloorheating.directory/). New government efficiency standards for electric local heaters, including electric underfloor heating, heated towel rails and storage heaters, are proposed to apply to **newly sold products only**, expected from 2027. Existing systems are unaffected: nobody has to rip anything out. The rules require better energy ratings, built-in temperature controls and low-power standby modes. Around half of current electric underfloor heating models and just over half of electric towel rails on sale today would need updating to comply.
## What has actually been announced?
Several newspapers have reported that the Energy Secretary, Ed Miliband, is "coming for" underfloor heating and "banning" heated towel rails as part of the government's net zero drive. The reality is narrower and a good deal less dramatic than the headlines suggest.
The [Department for Energy Security and Net Zero (DESNZ)](https://www.gov.uk/government/organisations/department-for-energy-security-and-net-zero) has consulted on updated **ecodesign** standards for what regulators call "local space heaters", a category that covers electric underfloor heating, electric panel and storage heaters, and electric heated towel rails. Ecodesign rules are the same mechanism that, over the past decade, has phased out the least efficient fridges, washing machines and light bulbs. They set a minimum performance bar that **new products** must clear to be sold.
The consultation, on *The Ecodesign for Energy-Related Products (Local Space Heaters and Separate Related Controls) Regulations 2026*, closed on 20 May 2026. The proposed standards are expected to take effect for new sales from 2027.

## The three things that are changing
For products sold once the rules take effect, three requirements stand out:
**Better minimum efficiency.** New electric heaters will need to meet a higher minimum energy performance standard. This is what removes the worst-performing models from the market. By the government's own estimate, roughly half of the electric underfloor heating models and just over half of the electric towel rails currently on sale would not meet the new bar without modification. Across all categories, about a third of current electric space-heating products are affected.
**Temperature controls as standard.** Every new heater will have to come with a control that manages its heat output, for example a thermostat, a timer, or a presence or open-window sensor. The aim is to stop electric heaters running flat out when nobody needs the heat, which is where a lot of wasted electricity goes.
**Low-power standby and "off" modes.** New products must include proper off, idle and standby modes with strict power limits, so they sip rather than gulp electricity when idle. Lower-powered heated towel rails would also be limited to running for a maximum number of hours in a single cycle, rather than being left on permanently.

## Will I have to remove my underfloor heating or towel rail?
No. This is the single most important point, and it is the one the headlines tend to skip.
Ecodesign standards apply at the **point of sale** of new products. They do not apply retroactively to equipment already installed in your home. If you already have electric underfloor heating in your bathroom or kitchen, or an electric towel rail on the wall, nothing about these rules requires you to change it, switch it off, or replace it.
The practical effect is the same as it was with old-style light bulbs: the inefficient versions gradually disappear from the shops, but the ones already in your home keep working until you choose to replace them. When you do come to replace a heater, the new one will simply be more efficient and better controlled.
## Why the government says it's doing this
DESNZ's stated rationale is that the measures "improve energy efficiency and reduce emissions, reflecting advances in product design and heating controls." The technology needed to make these heaters more efficient, including better controls, smarter sensors and lower standby draw, already exists and is widely used. The rules bring the minimum standard up to match what good products already do.
There is a household-bills argument too. A heater that won't run without a thermostat, and that drops to near-zero power when idle, costs less to run than one that has no controls and stays warm around the clock. For [electric underfloor heating, where running costs are the main drawback](/is-underfloor-heating-expensive-to-run/), better controls are exactly where savings come from.
## Why the headlines call it a "ban"
It is fair to say the policy has critics, and the framing is genuinely contested. Opposition politicians and several commentators have argued that the rules add cost and complexity, restrict consumer choice, and that removing "around a third" of products from the market amounts to a ban in all but name. Supporters counter that no specific technology is being prohibited, only the least efficient versions of it, and that manufacturers have years to adapt their ranges, as they did for previous ecodesign rounds.
Both things can be true at once: no homeowner is banned from having underfloor heating or a towel rail, *and* a meaningful share of today's specific models would need to change to stay on sale. Where you land on whether that is sensible standard-setting or government overreach is a political judgement rather than a technical one.
## What it means if you're planning a project
If you are specifying [electric underfloor heating](/electric-underfloor-heating-systems/) or a heated towel rail for a renovation or [new bathroom](/bathroom-underfloor-heating-guide/), the headline rules are good news for your bills rather than a problem:
- **Buy with controls in mind anyway.** A decent [smart or programmable thermostat](/smart-thermostats-underfloor-heating/) is already the difference between an electric system that's affordable to run and one that isn't. The new rules just make that the default.
- **Newer models will be more efficient, not unavailable.** Underfloor heating itself is not going anywhere. The market is shifting towards better-controlled products, which is the direction good installers already recommend.
- **Wet systems are untouched in the same way.** These ecodesign rules target electric local heaters, and wet systems pair especially well with [heat pumps](/underfloor-heating-heat-pumps-guide-2026/). If you're weighing up options, our [electric vs wet underfloor heating comparison](/electric-vs-water-underfloor-heating-2026/) walks through which suits your project, and the [running cost guide](/underfloor-heating-running-costs-2026/) shows where the money actually goes.
For renovations that touch the wider heating system, check how this sits alongside existing [UK building regulations for underfloor heating](/uk-building-regulations-underfloor-heating/), which already set efficiency and zoning expectations for new installations. If you are replacing an ageing system, you may qualify for [a government grant towards a heat pump](/news/underfloor-heating-grants-warm-homes-local-grant/).

If you decide to replace an ageing electric system or commission a new one, it pays to use a specialist who sizes and controls it properly. You can compare vetted UK installers and suppliers in our sister directory, and if you are still choosing between systems, our guide to [underfloor heating versus radiators](/underfloor-heating-vs-radiators/) weighs up comfort, efficiency and cost.
## Frequently asked questions
**Is underfloor heating banned in the UK?**
No. There is no ban on underfloor heating in the UK. New efficiency standards will apply to *newly sold* electric heaters from 2027, but existing systems are unaffected and underfloor heating continues to be sold and installed.
**Why is underfloor heating being "banned"?**
It isn't. The word "ban" comes from headlines about new ecodesign efficiency rules. The rules remove only the least efficient new electric products from sale; they do not prohibit underfloor heating as a technology.
**Is wet (water) underfloor heating affected?**
No. The rules target electric local space heaters. Wet underfloor heating, which works well with modern boilers and heat pumps, is not covered.
**When do the new underfloor heating rules start?**
The updated standards are expected to apply to new products from 2027, following a government consultation that closed on 20 May 2026.
**Do I need to remove my existing underfloor heating or towel rail?**
No. The standards apply at the point of sale of new products only. Anything already installed in your home can stay exactly as it is.
## The bottom line
The news that "underfloor heating is being banned" is an overstatement of a fairly routine efficiency update. New electric underfloor heating, towel rails and storage heaters sold from 2027 will need to be more efficient, come with temperature controls, and use less power on standby. Existing systems are unaffected. Underfloor heating as a technology continues exactly as before, with the least efficient products gradually phased out. The changes nudge the market towards the well-controlled, lower-running-cost systems that make electric underfloor heating worth having in the first place.
## About the author
Damian Krzyzanowski is an underfloor heating content specialist and the founder of Underfloor Heating Hub. He focuses on turning installer, manufacturer and system-design experience into clear, jargon-free guidance for UK homeowners, from running costs and system choice to regulatory changes like the one covered above. Connect with him on [LinkedIn](https://uk.linkedin.com/in/damian-krzyzanowski-39b29834).
---
*This article will be updated as the final regulations are published. Last reviewed 14 June 2026.*
**Sources:** Department for Energy Security and Net Zero consultation, *Updating standards for local space heating* (GOV.UK); *The Telegraph*; *GB News*; *The Daily Sceptic*; *Daily Express*.
---
--- title: Heat Pump and Underfloor Cooling in the UK: A Complete Practical Guide description: Learn how heat pumps provide underfloor cooling, including UK running costs, dew point control and suitable homes, so you can keep the home cool in summer. url: https://underfloorheating.info/heat-pump-underfloor-cooling/ published: 2026-05-20 updated: 2026-08-21 tags: ['heat pump', 'underfloor cooling', 'air source heat pump', 'underfloor heating', 'cooling', 'reversible heat pump'] ---
# Heat Pump and Underfloor Cooling in the UK: A Complete Practical Guide
Yes, the same pipes that warm your floor in winter can cool the house in summer, but you need a reversible heat pump and the right controls. Heatwaves in 2022, 2024, and 2025 pushed even well-built UK homes past comfortable limits, so cooling now deserves a place in the design.
If you’re new to pairing heat pumps with underfloor heating, my [complete heat pump + UFH guide](/underfloor-heating-heat-pumps-guide-2026/) covers COP, flow temperatures and costs. Here, I’ll focus on the trade-offs, costs, design constraints and practical quirks of cooling through the floor.

## Can a Heat Pump Really Cool My Home Through Underfloor Pipes?
> **Quick Answer:** Yes. A reversible heat pump can run your existing underfloor heating loops in reverse, sending chilled water at around 16 to 20°C through the same pipes that carry warm water in winter. The cool floor surface absorbs heat from the room, typically reducing indoor temperatures by 3 to 5°C in a well-insulated home.
Yes, and it isn’t a gimmick. A reversible heat pump can run your existing underfloor heating loops in reverse, sending chilled water through the same pipes that warm the floor in winter. The technology already works well in continental Europe, costs surprisingly little to run and makes more sense for UK homes as summers get warmer and new builds move away from gas.
People often misunderstand underfloor cooling. It isn’t a freezing floor or a hidden air-conditioner. It cools more gently, slowly and quietly than a wall-mounted split unit, and it comes with a different set of limits.
### How it actually works
In heating mode, your heat pump compresses refrigerant to extract warmth from the outdoor air (or ground) and sends warm water, typically 35 to 45°C, through the underfloor loops. A reversible model can flip its refrigerant cycle on demand. The compressor and expansion valve effectively swap roles, and the same loops now carry chilled water at roughly 16 to 20°C. The floor surface drops a few degrees, and that cool surface quietly absorbs radiant heat from people, furniture, and the warm air in the room.
It is the same physics as a chilled drink sweating on a summer afternoon, except in this case, the engineering job is to stop the floor from sweating. More on that below.
### What you get
A working underfloor cooling system, sized correctly and controlled properly, delivers:
- The same pipework as your existing UFH, with no ducts, no vents, and no wall units to look at
- Very high efficiency, typically 3 to 4 kWh of cooling per 1 kWh of electricity (an EER of 3 to 4)
- Near-silent operation in the conditioned space, with no fan noise, no airflow, and no drafts
- A useful 3 to 5°C reduction in indoor temperature in a well-insulated home
### What it will not do
Underfloor cooling cannot match the rapid temperature drop of a 12,000 BTU split air-conditioner during a heatwave. It offers no dehumidification, and in fact, controlling humidity becomes the single most important design factor. And it cannot cope on its own with rooms that have very high solar gain unless the building envelope is doing its share of the work.
Is it right for your home? That depends on how you built the house, which heat pump you have (or plan to install) and what you expect from the cooling. Let’s start with the part that catches installers out: condensation.
## Can You Convert Existing Underfloor Heating to Cooling?
> **Quick Answer:** You can convert existing underfloor heating to cooling only if it is a wet water-based system and the heat source can produce chilled water. Existing electric underfloor heating cannot be converted. Most successful conversions involve a reversible heat pump, compatible controls, dew point protection, and a check of the manifold, actuators, floor build-up, and room thermostats.
If you already have underfloor heating installed, the first question is not "can the pipes carry cold water?" They can. The real question is whether the rest of the system can control cold water safely.
| Existing system | Can it provide cooling? | What usually needs checking |
|---|---:|---|
| Wet UFH with reversible heat pump | Yes, if commissioned correctly | Cooling mode, dew point protection, room humidity sensing, manifold settings |
| Wet UFH with heat-only heat pump | Usually no without replacing or modifying the heat pump | Whether the exact model can be upgraded, and whether the cost makes sense |
| Wet UFH with gas, oil, or electric boiler | No, not on its own | A separate reversible heat pump or chiller would be needed |
| Electric UFH mats or loose cable | No | Electric resistance mats only heat; they cannot absorb heat from the room |
For an existing wet system, ask the installer to confirm five things before enabling cooling:
1. The heat pump is genuinely reversible and has cooling enabled.
2. The room controls can call for cooling, not just heating.
3. Dew point protection is active and based on representative room conditions.
4. The manifold, mixing valve, pump, and actuators can operate correctly in cooling mode.
5. The floor construction and floor finish can tolerate the proposed cooling temperatures.
If any of those are uncertain, do not simply run cold water through the underfloor pipes. The pipework is rarely the weak point; condensation control is.
## How Does Underfloor Cooling Actually Work?
> **Quick Answer:** Underfloor cooling uses the same refrigeration cycle as a heat pump in heating mode, but reversed. A four-way reversing valve inside the heat pump swaps the roles of the condenser and evaporator, causing the system to extract heat from the indoor water loop and dump it outside. Chilled water then flows through your underfloor manifold and pipework, cooling the floor surface and the room above.
A heat pump in cooling mode is not running a different technology. It is running the same vapour-compression refrigeration cycle that powers a fridge, a freezer, and every modern air-conditioner. The only thing that changes is the direction of heat flow.
### The reversible cycle in plain English
Inside any heat pump, refrigerant moves between four key components: a compressor, a condenser, an expansion valve, and an evaporator. In heating mode, the refrigerant picks up heat from outside air at the evaporator, the compressor raises its pressure (and therefore temperature), and the condenser dumps that heat into your water loop. The expansion valve then drops the pressure again to repeat the cycle.
A reversible heat pump adds one extra component: a four-way reversing valve. Flip it, and the condenser and evaporator effectively swap jobs. Now the indoor water loop is where heat is picked up, and the outdoor coil is where it is rejected. Your floor goes cold instead of warm.

### Flow temperatures matter
The flow temperature is the temperature of the water leaving the heat pump and entering your underfloor manifold. In heating mode, this is typically set between 35 and 45°C, depending on your home's heat loss. In cooling mode, the equivalent target is roughly 16 to 20°C.
This range is not arbitrary. Drop the flow temperature too low, and the floor surface drops below the dew point of the air in the room, which is when condensation forms. Push it too high, and there is not enough cooling capacity to make a noticeable difference. Modern controllers (covered later in this guide) calculate the safe minimum flow temperature continuously, based on indoor humidity.
### What is a safe temperature?
For most UK homes, a safe underfloor cooling flow temperature is usually around 16 to 20°C, but there is no single fixed number that is always safe. The safe limit changes with room temperature and humidity.
As a rule of thumb:
- **20°C flow:** safer, lower cooling output, useful in humid weather or cautious commissioning.
- **18°C flow:** common practical target where humidity is controlled.
- **16°C flow:** stronger cooling, but only safe where dew point protection is active and indoor humidity is low enough.
- **Below 16°C:** rarely sensible for domestic underfloor cooling unless a designer has specifically calculated the dew point margin.
This is why "can you run cold water through underfloor heating?" has a conditional answer. Yes, chilled water can run through wet UFH pipes, but the water must not make the floor surface colder than the room's dew point. The controller should maintain a safety margin, commonly 2 to 3°C above dew point.
### Why radiant cooling feels different from air conditioning
There is a physics reason that underfloor cooling feels comfortable at a room temperature that would feel too warm with air conditioning, and it is worth understanding because it affects how you design and use the system.
When you are sitting in a room, you exchange heat with your surroundings in four ways: radiation (~45%), convection (~30%), evaporation (~20%), and conduction (~5%). Nearly half of your body's heat leaves as thermal radiation to surrounding surfaces, not to the air. This is why standing next to a large cold window feels chilly even when the air temperature is perfectly comfortable: the window is drawing radiant heat from your body regardless of the air.
**Operative temperature** is the metric that captures this. It is a weighted average of the Mean Radiant Temperature (MRT, what surrounding surfaces radiate at you) and the room air temperature. Humans feel comfortable based on operative temperature, not air temperature alone.
Underfloor cooling directly lowers the MRT of the room. The floor has the highest "angle factor" of any surface relative to a standing or seated person, up to 0.46, because it is the surface with the greatest geometric exposure to the body. A 5°C drop in floor surface temperature lowers the room's MRT by around 2°C and the perceived operative temperature by around 1°C, with no air movement required.
The practical result: a room with radiant floor cooling at 26°C air temperature can feel as comfortable as an air-conditioned room at 24°C, because the operative temperature is the same. That matters directly for running costs, every degree you can raise the air temperature setpoint reduces the system's workload.
It also explains the draft-free quality. Air conditioning creates vertical temperature gradients (cool air pools near the floor, warmer air at head height). Underfloor cooling limits this gradient to less than 0.5 K, well within ISO 7730 comfort criteria for vertical temperature asymmetry.
### How much cooling can it actually deliver?
> **Quick Answer:** A wet underfloor system in cooling mode typically delivers around 15 to 25 watts of cooling per square metre of floor, rising towards 35 to 40 W/m² only in dry conditions with a low flow temperature. That is far less than the 80 to 100 W/m² the same floor produces in heating mode, because the dew point limits how cold the surface can safely go. This is the single biggest reason underfloor cooling is gentle rather than powerful.
The asymmetry between heating and cooling output catches people out. In heating mode, you might run 40°C water into a 21°C room, a gap of nearly 20°C, and the floor can pump out serious heat. In cooling mode, the chilled water is only around 18°C, the room is around 25°C, and the dew point caps how far the surface can drop below that. The usable temperature difference is small, so the cooling output is modest.
In practical terms, a 20 m² room might receive 300 to 500 watts of cooling from the floor. That comfortably handles the steady background heat load of a well-insulated room, but a single large south-facing window in the afternoon can admit 500 watts or more on its own. That is precisely why solar gain overwhelms underfloor cooling, and why shading and glazing choices matter as much as the system itself.
| Mode | Typical water temp | Usable surface gap | Output per m² |
|---|---|---|---|
| Heating | 35 to 45°C | Large | 80 to 100 W/m² |
| Cooling | 16 to 20°C | Small (dew-point limited) | 15 to 25 W/m² (up to ~40 in dry air) |
### Two-pipe vs four-pipe systems
Almost every UK domestic UFH system is a two-pipe system, meaning the same pipes carry either hot or cold water depending on the mode. This is fine for residential use, but it means you cannot have one room heating while another cools. The whole system is either in heating or cooling mode.
Four-pipe systems, which run separate flow and return pipes for heating and cooling, are mostly found in commercial buildings or very high-end residential projects. For the typical UK home, two-pipe is what you have and what you will plan around.
### The role of the manifold
The underfloor manifold is the central distribution point that splits flow between rooms. In cooling mode, it does the same job it does in heating: routing chilled water to each loop based on which thermostats are calling for cooling. Most modern manifolds do not need to be replaced when adding cooling, but the actuators and mixing valve setup may need attention. We will come back to this in the controls section.
## The main risk: dew point and condensation
> **Quick Answer:** When chilled water cools the floor surface below the dew point of the room's air, water vapour condenses on the floor. This causes slip hazards, flooring damage, and mould. Modern underfloor cooling systems prevent this by measuring indoor humidity continuously and raising the flow temperature whenever the floor surface gets too close to the dew point.
This is the section that no one writes properly. Most articles on UK websites either ignore the dew point problem entirely or wave at it vaguely as "a technical consideration". It is the single most important design factor in any underfloor cooling system, and it deserves a real explanation.
### What dew point actually means
Dew point is the temperature at which the water vapour in the air starts condensing into liquid water. The warmer the air and the more humid it is, the higher the dew point. Cool any surface below the dew point of the surrounding air, and water will form on it. This is why your bathroom mirror fogs up in a shower, and why a cold glass of water gets wet on the outside on a hot afternoon.
In a UK home on a humid summer day, the dew point is often between 14 and 18°C. The implication for underfloor cooling is simple: your floor surface cannot safely go below that temperature without condensation forming.

### Why condensation matters
A wet floor in cooling mode is not a small problem. It causes:
- Slip hazards, especially on tile and stone finishes
- Adhesive failure under engineered wood and LVT flooring
- Mould growth at floor edges, skirting, and under furniture
- Long-term damage to screed and structural elements if leaks form at joints
Once condensation forms, it can take hours to dry, and the damage may not show for months. This is why every cooling-capable system uses some form of dew point protection.
### How modern systems prevent condensation
There are two layers of protection in a properly designed system.
**Humidity sensors and dew point calculation.** A dedicated dew point sensor, or more commonly a combined temperature-and-humidity sensor in each room, feeds data to the controller. The controller calculates the current dew point in real time and sets a minimum allowable flow temperature, usually 2 to 3°C above the dew point as a safety margin.
**Floor surface temperature monitoring.** Some higher-end systems also measure the floor surface temperature directly, using sensors embedded in the screed. If the surface gets too close to the dew point, the flow temperature is raised, or cooling is paused entirely.
In practice, this means that on muggy days, the system cools less aggressively, and on dry days, it can run colder for more cooling capacity. The trade-off is automatic and invisible to the user, but only if the system has been specified and commissioned with cooling in mind.
### Ventilation and humidity load
There is one more piece of the puzzle. The amount of moisture in the air depends not just on outdoor conditions, but on what is happening inside the house. Cooking, showering, drying laundry, even breathing all add moisture to the air. In an airtight modern home, this matters.
This is why radiant cooling is formally described as a sensible-only system: it can absorb heat (sensible load) but it cannot remove moisture (latent load). For reliable operation, it must be paired with a system that handles humidity separately. In commercial and high-performance residential buildings, this partner is a Dedicated Outdoor Air System (DOAS) or Energy Recovery Ventilator (ERV), a ventilation unit that pre-conditions incoming air, controlling both temperature and moisture before it enters the occupied space. In UK residential buildings, the equivalent is MVHR (mechanical ventilation with heat recovery), ideally specified with a cooling coil or summer bypass to reduce the humidity load on the underfloor circuit.
For homes without MVHR, a standalone whole-house dehumidifier is the practical alternative. A portable dehumidifier in a single room is a stopgap, not a solution: it does not protect the rest of the circuit and adds a maintenance burden. If you are planning underfloor cooling in a home without mechanical ventilation, this is the conversation to have with your designer before committing to the system.
In older homes with passive ventilation, occupant behaviour matters more than in airtight modern builds: opening windows during humid weather can quickly raise indoor humidity to the point where underfloor cooling has to back off significantly.

## What Does Underfloor Cooling Cost to Run?
> **Quick Answer:** Running underfloor cooling from a heat pump typically costs between £0.07 and £0.12 per kWh of cooling delivered, based on UK electricity prices in 2026. This is roughly 30 to 50% cheaper than running a comparable split air-conditioner, because heat pumps achieve a higher EER (3.0 to 4.5) than typical split units (2.5 to 3.5).
The running cost question is where underfloor cooling really starts to look attractive, but only if you understand which efficiency figure to look at, and how it compares to the alternatives.
### EER, COP, and why both matter
These two acronyms cause endless confusion. Here is the short version:
- **COP (Coefficient of Performance)** measures heating efficiency. A COP of 4 means that for every 1 kWh of electricity used, the heat pump delivers 4 kWh of heat.
- **EER (Energy Efficiency Ratio)** measures cooling efficiency. An EER of 4 means that for every 1 kWh of electricity, the system delivers 4 kWh of cooling.
A heat pump's cooling EER is almost always lower than its heating COP for the same unit, because the temperature lift is in the opposite direction and the outdoor coil works harder when ambient air is hot. A unit with a heating COP of 4.5 might have a cooling EER of 3.5.
For seasonal averages, the equivalents are **SCOP** (seasonal heating) and **SEER** (seasonal cooling). Manufacturer brochures quote both, and SEER is the figure to compare for cooling cost.
### Real UK cost figures
At 2026 UK electricity prices (assume £0.27 per kWh on a standard variable tariff), the cost to deliver 1 kWh of cooling looks like this:
| System | Typical EER / SEER | Cost per kWh of cooling |
|---|---|---|
| Heat pump (cooling mode) via UFH | 3.0 to 4.5 | £0.06 to £0.09 |
| Modern split air-conditioner | 2.5 to 3.5 | £0.08 to £0.11 |
| Portable air-conditioner | 1.5 to 2.5 | £0.11 to £0.18 |
### Why the efficiency figures are better than they look
The EER values above seem modestly better than split AC, but the real efficiency advantage of underfloor cooling goes deeper than the headline numbers.
A conventional split air-conditioner must produce chilled water at around 7°C, because it cools a small coil that air is blown across at high speed. Underfloor cooling only needs water at 13 to 18°C, because the floor is a large surface doing the work gradually. The difference matters because producing colder water requires more compressor work, the refrigerant must overcome a greater temperature lift to reach it.
Think of it like lifting a box: raising it from waist height to a shelf takes less effort than lifting it from the floor. Raising the leaving water temperature from 7°C to 13°C alone can improve a heat pump's cooling EER by nearly 40%. In well-optimised installations where everything is sized correctly, effective COPs of 6.0 to 8.0 are achievable, roughly double what a typical split unit manages.
The real-world evidence backs this up. The Infosys SDB-1 project is widely cited as one of the most rigorous like-for-like comparisons of radiant cooling against conventional variable air volume (VAV) air conditioning in a large commercial building. Over a two-year operational window, the radiant section used 34% less energy than the VAV section, while scoring higher on occupant thermal satisfaction surveys. The physics here genuinely works in your favour.
A typical 100 m² well-insulated UK home might need 2 to 4 kWh of cooling per day during the warmest weeks of summer, which works out to roughly £0.20 to £0.40 per day to run the cooling. Over a typical UK cooling season of perhaps 30 to 50 active days, total running cost is in the £10 to £30 range.
That is genuinely cheap. The catch is the capital cost of the heat pump itself, which makes the overall comparison less simple. For a full breakdown of wet system running costs across all seasons, see my [underfloor heating running costs guide](/underfloor-heating-running-costs-2026/).
### Capital cost: reversible vs heat-only
A reversible heat pump costs more than a heat-only model, but typically only by around £200 to £600 at the equipment level. If you are installing a new heat pump anyway, the marginal cost of adding cooling capability is small, especially compared to the £2,000 to £4,000 cost of installing a separate split aircon system.
If you already have a heat-only heat pump installed, upgrading to add cooling is rarely economical. Most installations require replacing the heat pump itself, which makes the payback period long.
### The Boiler Upgrade Scheme
The UK Boiler Upgrade Scheme (BUS) offers a grant of £7,500 toward a heat pump installation. The grant applies to the heat pump regardless of whether it is reversible. This effectively means that cooling capability is heavily subsidised: if you are getting £7,500 toward a heat pump anyway, choosing a reversible model that can also cool is a much smaller incremental cost.

## Underfloor Cooling vs Air Conditioning
> **Quick Answer:** Underfloor cooling is quieter, hidden, and usually cheap to run, but it is slower and does not dehumidify. Air conditioning cools rooms faster, controls humidity better, and works in more homes, but it needs visible indoor units and usually costs more to install as a standalone system.
These systems solve different problems. Underfloor cooling is gentle, silent background cooling for a whole house that already has wet UFH and a reversible heat pump. Air conditioning is fast, active room cooling that works in any home regardless of heating system, and it dehumidifies as it runs, which underfloor cooling cannot do. Many high-comfort homes use both: underfloor cooling for the baseline load, and a small split unit only in the room or two that overheats.
For the full head-to-head on running costs, noise levels, controls, and which rooms suit each, see our dedicated [underfloor cooling vs air conditioning comparison](/underfloor-cooling-vs-air-conditioning/).
## Which Heat Pumps Support Cooling?
> **Quick Answer:** Not every heat pump model can deliver cooling. The main UK-available reversible air source heat pumps include the Daikin Altherma 3, Vaillant aroTHERM Plus, Mitsubishi Ecodan PUZ-WM (cooling-capable variants), Samsung EHS Mono HT Quiet, and LG Therma V. Ground source options include the NIBE S1255 and selected Kensa models. Always confirm with the manufacturer or installer that the specific model supports active cooling.
This is the question that catches most homeowners and even some installers. UK heat pump marketing focuses overwhelmingly on heating performance, and cooling is often a footnote on a spec sheet. Here is a clearer picture of what is currently available.
### Air source heat pumps with cooling capability
The major manufacturers selling reversible air source heat pumps in the UK include:
- **Daikin Altherma 3 R** and **Altherma 3 H HT.** Reversible, with cooling EER typically 3.5 to 4.5 depending on conditions and model size. Daikin is by far the most commonly installed brand for UFH cooling in the UK.
- **Vaillant aroTHERM Plus.** Reversible model available. Pair with the sensoCOMFORT control system for cooling mode management.
- **Mitsubishi Ecodan PUZ-WM series.** Some variants are reversible; check the model code carefully. The standard EH series is heating-only.
- **Samsung EHS Mono HT Quiet.** Cooling-capable, often used in new-build developments.
- **LG Therma V Monobloc R32.** Selected models are reversible.
- **Panasonic Aquarea T-CAP.** Reversible model available.
Other UK-market names homeowners commonly ask about include Toshiba Estia and Ideal heat pumps. The important point is not the brand name alone, but the exact model and controller package. Some ranges include both heating-only and reversible variants, and cooling may require an installer setting, an accessory board, or a coding plug before it appears in the controls.
| Brand or range | Cooling note |
|---|---|
| Daikin Altherma | Reversible variants are common, but confirm the exact outdoor unit and controller setup |
| Vaillant aroTHERM Plus | Cooling-capable setups exist, but commissioning and room/dew point sensing matter |
| Mitsubishi Ecodan | Some variants are cooling-capable; model codes need checking carefully |
| Panasonic Aquarea | Reversible options are available in selected ranges |
| Samsung EHS | Cooling-capable models are available, including newer heating/cooling packages |
| LG Therma V | Selected models support cooling |
| Toshiba Estia | Check the specific model and control configuration |
| Ideal heat pumps | Confirm whether the exact unit and controls support cooling before assuming |
### Ground source heat pumps with cooling
Ground source units can also provide cooling, often more efficiently than air source because the ground stays cool in summer. The notable UK options are:
- **NIBE S1255** with the cooling module (passive cooling possible with very high efficiency)
- **Kensa Shoebox** and **Compact** (active cooling only on selected models)
Passive cooling from a ground source system is genuinely interesting: the ground loop is cool enough in summer to feed the underfloor system directly with minimal compressor work, giving SEER figures of 15 or higher. The catch is that not all ground arrays are sized for this, and retrofitting passive cooling onto an existing GSHP installation is often impractical.
### What to ask before buying
When specifying a new heat pump with cooling in mind, the questions to put to your installer are:
1. Is this exact model reversible, and what is its rated cooling capacity?
2. What is the SEER for the cooling mode at typical UK summer conditions?
3. Is dew point protection included as standard, or does it need to be added at the control level?
4. Will the controller automatically manage cooling, or is it a manual mode switch?
5. What is the minimum flow temperature the unit can deliver, and is it safe for typical UK humidity?
If your installer cannot answer these, find one who can. Check our guide on [underfloor heating installer qualifications](/underfloor-heating-installer-qualifications-uk/) for what to look for when hiring.
## Which Homes Are Suitable for Underfloor Cooling?
> **Quick Answer:** Underfloor cooling works best in well-insulated homes (new builds and deep retrofits) with a [wet UFH system](/wet-underfloor-heating-ultimate-guide/) in a screed or solid concrete slab, low solar gain, and either mechanical ventilation or careful occupant control of indoor humidity. Older, leaky homes with electric underfloor mat heating cannot use this approach.
The hard truth is that underfloor cooling is not for every house. The technology has real constraints, and trying to force it into the wrong building will lead to disappointment, condensation problems, or both.
### New builds vs retrofits
New builds are the easiest case. If the home is being designed from scratch with a heat pump and wet UFH, adding cooling is mostly a matter of specifying a reversible heat pump and ensuring the control system supports cooling mode. Capital cost is minimal.
Retrofits are harder but possible. If you already have a wet UFH system installed and are planning to install or upgrade your heat pump, the cooling capability can usually be added without touching the floor. However, retrofit homes are often poorly insulated, which limits the practical benefit of the cooling.
[Electric underfloor heating](/electric-underfloor-heating-systems/) (resistance mat) cannot do cooling. It only generates heat, never absorbs it. If your underfloor system is electric, you would need to install a completely new wet system.
### Slab and screed considerations
The floor construction matters because the thermal mass of the floor affects how cooling behaves.
- **Solid concrete slab with embedded pipes** (typical new-build ground floor): high thermal mass, slow response, very stable cooling once at temperature. Ideal for steady cooling but slow to react to sudden hot afternoons.
- **Screed over insulation with pipes in the screed** (common upstairs in new builds): medium thermal mass, faster response.
- **Suspended timber floors with pipes between joists**: low thermal mass, fastest response but lower cooling capacity. Often used in retrofits, and the cooling output per square metre is typically lower than slab-based systems.
**Pipe spacing for new cooling installations.** If you are designing a new system that will include cooling from the outset, closer pipe centres improve capacity. A spacing of 150mm (6-inch) on-centre is better suited to cooling compared to the 225mm (9-inch) spacing common in heating-only systems. The tighter spacing increases surface coverage and reduces the floor surface temperature needed to achieve a given output, which in turn gives you more headroom above the dew point. Existing systems cannot change pipe spacing after the screed is poured, so this is design guidance for new builds or major retrofits where the floor is being opened up.
For fastest thermal response, a 100mm (4-inch) screed with pipes positioned 40 to 50mm below the surface is preferable to a deeper slab with pipes at 75mm or more. Shallower placement means less thermal mass to condition before the surface responds, which suits the variable demand of a typical UK summer.
### Insulation, glazing, and solar gain
The biggest variable in cooling load is solar gain through windows. A south-facing room with large glazing can easily overwhelm the cooling capacity of underfloor pipes alone, especially in late afternoon. External shading (shutters, brise soleil, awnings), solar control glazing, and night-time ventilation are all important pairs to underfloor cooling.
Insulation matters too. A home that cannot keep heat out in summer will not be effectively cooled by an underfloor system. As a rough guide, homes that meet Building Regulations Part L 2025 standards or Passivhaus standards are well-suited. Older homes (pre-2010 building regulations) often need fabric upgrades before cooling makes sense.

## Underfloor Cooling for Bedrooms and Night-Time Comfort
> **Quick Answer:** Bedrooms are where underfloor cooling is most valuable in the UK, because the gentle, silent, draught-free output suits sleeping far better than a wall-mounted split unit, and the floor's thermal mass can hold coolness through the night. Upstairs cooling capacity is usually lower than downstairs, though, because bedroom floors are often screed or suspended timber with less thermal mass than a ground-floor slab.
Most people who want summer cooling in the UK want it for one reason above all: to sleep through a heatwave. This is where underfloor cooling quietly excels. There is no fan whirring on the wall, no draught blowing across the bed, and nothing to wake you when it cycles. For light sleepers, that alone can be worth more than the extra few degrees a split unit would deliver.
The slab's thermal mass works in your favour overnight. A useful tactic is to pre-cool the floor in the evening, ideally on cheaper off-peak electricity, then let the room coast on the stored coolness through the small hours. A heavy ground-floor slab does this best; lighter upstairs build-ups respond faster but store less, so they benefit from running a little longer into the night.
Two limitations matter for bedrooms specifically. First, evening solar gain on south- and west-facing rooms is the hardest case, and underfloor cooling alone rarely beats it without external shading and some night-time ventilation. Second, in a two-pipe system the whole house shares one mode, so you cannot cool an overheating south-facing bedroom while a cool north-facing room calls for heat on the same shoulder-season night. For rooms that consistently overheat, many homeowners pair underfloor cooling for the baseline with a single small split unit in the worst bedroom.
## Does a Cooled Floor Feel Cold or Damp Underfoot?
> **Quick Answer:** No. In cooling mode the floor surface only drops to around 19 to 22°C, a few degrees below normal room temperature, so it feels neutral or pleasantly cool rather than cold. Because a correctly commissioned system keeps the surface above the dew point, the floor stays dry. A floor that ever feels wet is a sign that dew point protection has failed, not normal operation.
A common worry is that cooling will leave you with an unpleasantly cold, clammy floor. In practice it does not. Where a heated floor sits at around 25 to 28°C, a cooled floor sits only slightly below room temperature, so barefoot it reads as cool and fresh rather than cold. And the entire point of dew point control is to keep the surface above the temperature at which moisture would form, so a properly working system never produces a damp or slippery floor.
Floor finish changes how noticeable the effect is. Tile and natural stone conduct well and transmit the cool surface efficiently, quartzite, for example, has a thermal conductivity of around 5.4 W/m·K, which is as good as it gets for a domestic floor. Porcelain tile is similarly high. Engineered wood is workable if the manufacturer provides a conductivity rating. Thick carpet is the worst case: carpet and underlay combined should stay below 2.5 TOG if you want meaningful cooling output, and ideally below 1.5 TOG. Above 2.5 TOG, the insulation effect blunts the system to the point where the cooling is barely noticeable underfoot. If you are choosing a finish with cooling in mind, our [best flooring for underfloor heating guide](/best-flooring-underfloor-heating/) covers the same conductivity trade-offs in detail.
## Building Regulations, Planning Permission and Part O
> **Quick Answer:** You almost never need planning permission for underfloor cooling itself, because it is hidden pipework. What is regulated is the heat pump's outdoor unit, which usually falls under permitted development if it meets the MCS 020 noise limits and siting rules. For new builds the key rule is Part O (overheating), in force in England since 2022; underfloor cooling can form part of an overheating strategy, though Part O expects passive measures such as shading and ventilation first. Wet cooling systems should be designed to BS EN 1264.
This is the side of underfloor cooling that homeowners rarely think about until an installer or building control officer raises it, so it is worth setting out clearly.
### Planning permission
The cooling function adds no visible equipment, so it triggers no planning requirement on its own. The question is really about the heat pump. An air source heat pump's outdoor unit normally sits within permitted development rights, provided it meets siting and noise conditions, including the MCS 020 noise assessment and limits on proximity to the boundary. Conservation areas, listed buildings, and flats are treated differently, so check your local rules before assuming permitted development applies. Ground source systems raise no comparable visible-unit issue.
### Part O and new builds
For any new dwelling in England, Part O of the Building Regulations (overheating) has applied since June 2022. It requires designers to limit unwanted solar gains and to provide an adequate means of removing excess heat. Compliance is demonstrated either through a simplified method (limits on glazing area and openable window provision) or through dynamic thermal modelling to CIBSE TM59. Underfloor cooling can contribute to the heat-removal side of that strategy, but Part O is deliberately weighted towards passive measures first, so cooling should be treated as a complement to shading and ventilation, not a substitute for them.
### Standards and paperwork
Water-based cooling should follow BS EN 1264, the European standard for embedded surface heating and cooling, which most manufacturers and warranty providers expect. Part L still governs the insulation and efficiency of the wider system, and Part P applies to any electrical control work. Keep the commissioning sheets (including the dew point safety margin that was set), as-built drawings, the manufacturer warranty, and the MCS certificate if a heat pump is involved; these matter for the Boiler Upgrade Scheme, resale, and insurance. Our [UK building regulations for underfloor heating guide](/uk-building-regulations-underfloor-heating/) covers Part L, Part P, and BS EN 1264 in more depth. Regulations and permitted-development thresholds change, so confirm the current position with your installer or local authority before work begins.
## How Do You Switch the System Into Cooling Mode?
> **Quick Answer:** On most modern heat pump systems, cooling mode is triggered automatically by the controller based on indoor temperature, outdoor temperature, and the selected operating mode. The homeowner typically only needs to set the cooling setpoint on the thermostat. Manual mode switching is still available on most systems for installers and advanced users.
This is where forums and Reddit threads currently dominate the search results, because installers and manufacturers do not document the operational details clearly. Here is how it actually works in practice.
### Automatic changeover
The vast majority of heat pump installations use automatic changeover, controlled by the heat pump's own controller (or a paired thermostat). The logic is usually:
1. The user sets a cooling setpoint on the thermostat (for example, 23°C).
2. The user enables cooling mode in the controller, either manually or via a seasonal schedule.
3. When indoor temperature exceeds the cooling setpoint and outdoor temperature is above a threshold (often 18 to 20°C), the heat pump switches into cooling mode.
4. The flow temperature is adjusted in real time based on indoor humidity and the calculated dew point.
5. When indoor temperature drops to or below the setpoint, the heat pump pauses or switches off.
Most modern controllers (Daikin Madoka, Vaillant sensoCOMFORT, Mitsubishi Ecodan controller, Heatmiser NeoStat E with cooling mode) handle all of this automatically. For a broader look at control options, our [smart thermostats for underfloor heating guide](/smart-thermostats-underfloor-heating/) covers compatibility and features.
### How the system partially regulates itself
One useful property of radiant cooling, described in ISO 11855, is the self-regulating effect. As room temperature rises, the temperature difference between the warm air and the cooled floor surface increases. A larger temperature gap means more heat transfer per square metre, so cooling output rises naturally without waiting for the controller to respond.
In practice, the system pushes back harder during the hottest part of a hot day without any active intervention. It does not replace dew point control or proper sizing, but it does give radiant floors a built-in thermal buffer that fan-based systems lack.
### Manual mode switching
In some installations, particularly older ones, the changeover is manual. The homeowner or installer switches the heat pump into cooling mode at the start of summer and back into heating mode in autumn. This is less convenient but avoids any risk of accidental mode-switching on shoulder-season days.
### Thermostat behaviour in cooling mode
In a wet UFH system, the same room thermostat is typically used for both heating and cooling, but the logic flips. In heating mode, the thermostat calls for flow when the room is below the setpoint. In cooling mode, the thermostat calls for flow when the room is above the setpoint. Most modern programmable thermostats handle this transparently, but older models may need replacement or reconfiguration.
Worth noting: in a two-pipe system, all rooms share the same mode. You cannot have one room calling for heat while another calls for cooling. This catches some homeowners out, especially in shoulder seasons when a north-facing room might still feel cold while a south-facing room is overheating.
### Manifold, mixing valves, and actuators
In heating mode, a mixing valve at the manifold often blends return water with flow water to drop the supply temperature down to the safe UFH range (typically 35 to 45°C). In cooling mode, this same valve may need to be either fully open (passing through the heat pump's chilled water directly) or reconfigured for the cooling flow rates.
The actuators on each zone valve work the same way in cooling mode: they open when the room calls for flow and close when it does not. No additional hardware is usually required, but the manifold may need a small reconfiguration. A qualified installer can confirm this in an hour.

## Do You Need a Humidistat or Dew Point Sensor?
> **Quick Answer:** You need dew point protection, but that does not always mean adding a separate manifold-mounted humidistat. Many modern heat pump controllers manage cooling safety through approved room sensors, humidity sensing, and flow-temperature control. A standalone humidistat or pipe-clamp dew point switch is mainly used where the main controller cannot calculate dew point or needs a hard-wired safety cut-out.
This is one of the most common real-world questions once homeowners see underfloor cooling diagrams. The small sensor shown near a manifold is not a universal part recommendation. It is an example of condensation protection. Whether you need something like that depends on how your heat pump, room controls, wiring centre, manifold actuators, and cooling enable signal are designed to work together.
### Humidistat vs dew point control
A basic humidistat measures relative humidity and switches at a set percentage. That is useful information, but it is not the same as full dew point control. Dew point depends on both temperature and humidity. For underfloor cooling, the controller needs to know when the floor, pipework, or water flow temperature is getting too close to the point where moisture will condense.
Proper dew point protection usually works in one of three ways:
- **Controller-based dew point calculation:** the heat pump or room controller reads indoor temperature and humidity, calculates the dew point, and raises the chilled-water flow temperature before the floor gets too cold.
- **Room humidity sensors:** one or more room units measure humidity where people actually live, which is usually more useful than measuring only at the manifold.
- **Pipe or manifold safety cut-out:** a dew point switch on the pipework interrupts cooling if condensation risk appears. This is a useful backup on some systems, but it may only protect the pipework around the manifold, not every floor surface in every room.
### Why generic sensors can be a bad fit
Modern heat pump systems often communicate through manufacturer-specific control buses or wiring centres. A third-party humidistat may not be able to tell the heat pump to lift the cooling flow temperature; it may only be able to cut a pump, close a valve, or interrupt a demand signal. That might be acceptable if it has been designed into the system, but it should not be added casually.
For example, systems using Vaillant, Daikin, Mitsubishi, Panasonic, Samsung, LG, Nu-Heat, Heatmiser, or other controls may all handle cooling interlocks differently. Some rely on approved room controllers. Some need specific humidity-capable room sensors. Some use a volt-free dew point switch as a safety input. Some manifold wiring centres are 230V, others are 24V, and the actuators may be normally closed or normally open.
The practical rule is simple: do not buy a generic "underfloor cooling humidistat" until the installer or manufacturer has confirmed exactly where it connects and what it is allowed to switch.
### Sensor location matters
The humidity reading must represent the rooms being cooled, not just the easiest place to mount a sensor. A controller in a warm plant room, airing cupboard, cylinder cupboard, or loft-adjacent manifold space may see lower relative humidity than the bedrooms, kitchen, bathrooms, or open-plan living areas. That can make the system think condensation risk is lower than it really is.
MVHR data can be useful here because extract air often gives a better picture of the occupied rooms than a plant-room sensor. If the MVHR reports 55 to 65% relative humidity while the heat pump controller in a plant room reports 45 to 50%, the controller may not be seeing the worst-case moisture condition. South-facing rooms, loft conversions, bathrooms, and rooms with different floor build-ups can also have different surface temperatures and condensation risk.
This is especially important with overfloor or low-profile wet UFH panels that include chipboard, MDF, aluminium diffuser plates, or timber-based cover boards. These systems can work well for heating, but they are less forgiving if condensation forms under floor finishes or around panel joints. If the existing room thermostats only measure air temperature, ask whether humidity-capable room sensors or a separate dew point safety input are needed before enabling cooling.
### What to ask your installer
Before commissioning underfloor cooling, ask:
1. Is cooling enabled in the heat pump controller, or is the unit still configured as heating-only?
2. Is automatic cooling enabled, or does the system need a manual summer changeover?
3. Is dew point monitoring active, and what sensor is providing temperature and humidity data?
4. Is that sensor located in an occupied room, or only in a plant room or near the manifold?
5. Does the controller raise the flow temperature automatically when humidity rises?
6. Is there a separate pipe, manifold, or wiring-centre cut-out for condensation risk?
7. Are the room thermostats, manifold actuators, and wiring centre compatible with cooling mode?
8. What minimum cooling flow temperature and dew point safety margin have been commissioned?
If the installer cannot answer those questions, pause before running cold water through the floor. Underfloor cooling is safe when dew point protection is designed in; it is risky when the system is simply switched to a low fixed flow temperature and left to hope for the best.
## What About Hot Water When the Heat Pump Is Cooling?
> **Quick Answer:** A standard domestic heat pump can only run in one mode at a time, so it cannot cool your floor and heat your hot water cylinder simultaneously. In summer it briefly pauses cooling, uses a three-way diverter valve to flip into heating mode, reheats the cylinder (typically once or twice a day for 20 to 40 minutes), then returns to cooling. Hot water takes priority. A small but growing class of "multi-function" heat-recovery heat pumps *can* do both at once, using the heat pulled out of your rooms to warm the water for free.
Homeowners planning a reversible system ask me this a lot. Hot water and underfloor cooling work together without a problem, but the detail lies in *how* the system manages them.
### Why one heat pump can't cool and heat water at the same time
Almost every domestic heat pump sold in the UK (Daikin Altherma, Vaillant aroTHERM, Mitsubishi Ecodan, LG Therma V, Samsung Mono) is a single-circuit machine. Its refrigerant cycle can run one way to make heat or the other way to make cold, but not both at once. Domestic hot water needs a flow temperature of roughly 48 to 55°C; cooling needs chilled water at 16 to 20°C. There is no way to produce both from the same compressor circuit at the same moment.
So the system time-shares. It spends most of a summer day in cooling mode, and steps away briefly when the hot water cylinder needs topping up.
### How it works in practice: hot water priority
A three-way diverter valve on the water side decides where the heat pump's output goes: to the underfloor loops, or to the coil inside your hot water cylinder. When the cylinder thermostat calls for reheat, the controller runs a short sequence:
1. Cooling pauses, and the refrigerant pressures are allowed to equalise (a built-in delay of two to three minutes).
2. The reversing valve flips the cycle back into heating mode.
3. The diverter valve sends flow to the cylinder coil instead of the floor.
4. The cylinder heats to its target temperature.
5. The system switches back to cooling and resumes cooling the floor.
Hot water is given priority because a slightly warmer floor for half an hour is a minor comfort issue, whereas a cold shower is not. In a well-sized system the cylinder reheats once or twice a day, each cycle lasting roughly 20 to 40 minutes. Because the floor slab holds its temperature thanks to its thermal mass, the room barely registers the pause.

### Keeping the interruption small
A few design and settings choices keep the daily hot water pause from eating into your cooling:
- **Schedule reheat for cooler hours.** Setting the cylinder to heat in the early morning means the cooling interruption falls outside the hottest part of the afternoon, when you most want the cooling running. It usually lines up with cheaper off-peak electricity too.
- **Avoid "reheat only" tank mode.** Daikin and other manufacturers warn that this setting causes frequent and long interruptions to space cooling. A scheduled or eco heat-up profile is far better.
- **Size the cylinder properly.** A cylinder large enough to cover a day's demand in one or two reheats (commonly 180 to 250 litres for a family) keeps the number of interruptions low.
- **Consider a solar PV diverter or immersion top-up.** If you have solar panels, diverting surplus PV to the cylinder immersion can cover much of your summer hot water without the heat pump interrupting cooling at all.
### Simultaneous cooling and hot water: heat-recovery heat pumps
There is a more elegant answer, and it is starting to reach UK homes. A **multi-function** or **heat-recovery** heat pump captures the heat it removes from your house during cooling and, instead of rejecting it outdoors, routes it straight into the hot water cylinder. You get cooling and hot water at the same time, and the hot water is effectively free because it is made from waste heat you were throwing away anyway.
The efficiency gains are real: independent studies put the saving at around a third of the electricity compared with producing cooling and hot water separately, with heat recovery covering well over half of summer hot water demand.
Until recently this was a commercial-only feature, found in the VRF systems used in offices. For 2026, manufacturers are bringing it to residential. Samsung's latest EHS ClimateHub, shown at MCE 2026, supports simultaneous water cooling and hot water with heat recovery and quotes a COP as high as 8 in recovery mode. Expect a price premium and limited installer familiarity for now, so for most retrofits the diverter-and-priority arrangement above is what you will actually be offered, and in practice it works well.
If hot water performance in summer matters to you, it is worth putting two questions to your installer: how the system prioritises hot water versus cooling, and whether a heat-recovery model is worth the premium for your home.
## Common Problems and How to Troubleshoot Them
> **Quick Answer:** The most common underfloor cooling issues are: cooling not feeling cold enough (usually a sign of high humidity or undersized system), condensation forming on the floor (dew point protection not working), one room cooler than another (zone balance), and the system not switching into cooling mode (controller settings or thermostat configuration).
Most problems with underfloor cooling come from a small set of root causes. Working through them in order usually finds the issue.
### "It does not feel cold enough"
Underfloor cooling delivers a 3 to 5°C reduction in air temperature in a well-suited home. It is not designed to deliver the rapid 8 to 10°C drop of a split air-conditioner. If the room is too warm:
- Check indoor humidity. On muggy days, the system raises the flow temperature for dew point safety, which reduces cooling capacity.
- Check solar gain. A south-facing room with no shading will outpace any underfloor cooling system in late afternoon.
- Check that all manifold loops in the room are flowing. A stuck actuator can shut off cooling to one zone without warning.
### Condensation on the floor
This should never happen on a properly designed system. If it does:
- Confirm that humidity sensing is enabled and the dew point calculation is active. Some installers leave this disabled by accident.
- Check the humidity sensor itself; if it has failed or been disconnected, the controller may default to a fixed flow temperature that is too low for current conditions.
- Increase the safety margin in the controller (typical default is 2°C above dew point; raising to 3 or 4°C may be appropriate in humid environments).
### One room cooler than another
In a two-pipe system, this is usually a balance issue at the manifold. Flow meters on each loop show the actual flow rate; if a colder room is getting too much flow, throttling it slightly will redistribute cooling to warmer zones. This is the same balancing logic as in heating mode, just inverted.
### Cooling mode does not engage
Common causes:
- The controller is in heating mode or off, not in cooling or automatic.
- The cooling setpoint is set higher than the current room temperature, so the system is not calling for cooling.
- The outdoor temperature is below the cooling enable threshold (often 18 or 20°C); the system will not run if the outside is cooler than the inside.
- A safety interlock is active. Some systems disable cooling if humidity is above a certain threshold for an extended period.
If none of these resolves the issue, contact the installer. Most cooling mode failures trace back to commissioning settings rather than equipment faults.
### Hot water runs short on hot days
If the cylinder struggles to keep up in summer, the cause is usually the cooling/hot-water priority balance rather than a fault:
- Check that hot water is set to priority over cooling, so the cylinder always reheats when called.
- Move the scheduled reheat to a cooler part of the day, or add a second reheat slot, so the tank is never left depleted through the afternoon.
- If the cylinder is undersized for the household, a solar PV diverter or immersion top-up can cover the shortfall without interrupting cooling.
## Shoulder Seasons and System Maintenance
> **Quick Answer:** Spring and autumn are the awkward months for any two-pipe underfloor cooling system, because the whole house shares one mode and you cannot heat one room while cooling another. Most households manage with a manual seasonal switchover date or rely on the slab's thermal mass to coast through ambiguous days. Annual hydronic maintenance, degassing and magnetic filter cleaning, keeps performance consistent year to year.
### Managing shoulder seasons
The two-pipe limitation is felt most acutely in spring and autumn. A cold north-facing bedroom may need warmth in the morning while a south-facing living room is already overheating by noon. The system can only be in one mode at a time.
Practical approaches:
- **Manual switchover date.** Set cooling mode to begin in late May or early June, when consistent overnight warmth means heating is genuinely not needed. Switch back to heating mode in autumn when night temperatures consistently drop below around 12°C. This suits most UK climates and is the simplest approach.
- **Coast on thermal mass.** A well-insulated home with a thick concrete slab can often get through transitional days on stored temperature from the previous mode, without the system actively heating or cooling at all. The heavier the slab, the longer this works.
- **Targeted split unit.** If one room consistently overheats while the rest of the house is comfortable, a small split air-conditioner in that room is often easier than adjusting the switchover date for the entire system.
### Annual maintenance
Hydronic systems, including cooling circuits, perform best with basic annual attention:
- **Degassing.** Air trapped in the water circuit reduces flow efficiency and can cause pump noise. Automatic air vents help during normal operation; a manual bleed of the manifold and any high points once a year keeps the circuit clear.
- **Magnetic filter.** A magnetic filter on the return pipework captures iron oxide sludge (magnetite) before it can deposit in the heat pump heat exchanger or manifold valves. Clean the filter annually, or more often in the first year or two of a new system when the circuit is still shedding debris.
- **Glycol check.** If your system uses antifreeze (more common where the heat pump's outdoor pipework can reach below freezing), check the glycol concentration and freeze protection rating annually.
None of this is time-consuming. A qualified engineer can cover all of it in an annual service visit alongside the heat pump's own maintenance schedule.
## When does underfloor cooling make sense?
> **Quick Answer:** Underfloor cooling makes sense in new builds and well-insulated retrofits with wet UFH, a planned heat pump installation, and an MVHR system. It does not make sense in poorly insulated homes, electric UFH systems, or homes with very high solar gain that cannot be controlled with shading.
So, should you install it? Use this straightforward framework.
**Strong candidates for underfloor cooling:**
- New builds with heat pump and wet UFH already specified
- Deep retrofits with full insulation upgrade and MVHR installation
- Homes already overheating in summer with a heat pump installation planned
- Homeowners who want quiet, hidden cooling and accept that it works gradually
**Marginal cases:**
- Existing wet UFH installations with a heat-only heat pump (cooling upgrade requires heat pump replacement, often not economical)
- Older homes with partial insulation upgrades (cooling capacity may be limited)
- Homes with large unshaded south-facing glazing (will likely need supplementary cooling for those rooms)
**Not suitable:**
- Electric underfloor heating systems (no water loop to chill)
- Homes without a heat pump or budget to install one
- Homes where rapid, on-demand cooling is the priority (a split aircon is genuinely better here)
For most UK homeowners considering a heat pump in 2026, I’d choose a reversible model. The extra capital cost is small, running costs are low and the system stays quiet and out of sight. The cooling is gentle, but it can still make the difference between a comfortable summer night and a sleepless one.
Ready to get quotes? My [underfloor heating quotation guide](/underfloor-heating-quotation/) explains what a good quote should include.
This technology won’t turn a poorly insulated Victorian terrace into a refrigerated bunker. In the right home, though, good controls and realistic expectations give you quiet, efficient cooling with no wall units. That’s the real takeaway.
---
**Thinking about cooling on your next heat pump installation?** The team at [Underfloor Heating Hub](https://underfloorheating.info) covers the full UK underfloor heating market, including heat pump compatibility, retrofit feasibility, and finding a qualified MCS installer. You can browse our [installer directory](https://underfloorheating.directory) to find local heat pump and UFH specialists in your area, or jump straight to the [underfloor heating & cooling specialists page](https://underfloorheating.directory/underfloor-heating-cooling) for reversible heat pump installers.
---
--- title: Underfloor Heating Installer Qualifications UK: Hiring Checklist description: Check UK underfloor heating installer qualifications, including Part P, Gas Safe, MCS, insurance, references and handover paperwork. Hire with confidence. url: https://underfloorheating.info/underfloor-heating-installer-qualifications-uk/ published: 2026-05-14 updated: 2026-08-21 tags: ['underfloor heating installer qualifications', 'qualified ufh installer', 'part p electrician', 'gas safe heating engineer', 'mcs heat pump installer', 'ufh certification uk'] ---
# Underfloor Heating Installer Qualifications UK: Hiring Checklist
> **Quick answer:** A good UK underfloor heating installer should prove the right qualification for the part of the job they're doing. Electric UFH final connections need a competent electrician, often Part P registered for domestic work. Wet UFH needs a qualified plumber or heating engineer, Gas Safe registration if gas boiler work is involved, and ideally MCS competence if the system connects to a heat pump. Always check insurance, recent UFH references, design paperwork, test results, and handover documents before paying the final balance. Read more UK guidance at [underfloorheating.info](https://underfloorheating.info/) and compare professionals through the [Underfloor Heating Directory](https://underfloorheating.directory/).
Choosing an installer isn't just about finding someone who can lay mats or clip pipe. The critical work is often hidden: electrical testing, pressure testing, flow temperature design, zoning, manifold setup, commissioning, and certification.
Rush or skip those steps and the floor may look finished on day one, but problems can appear months later as cold spots, nuisance tripping, cracked finishes, warranty disputes, or expensive access work.
This guide explains what qualifications and proof to ask for before hiring a UK underfloor heating installer.
**Planning a project now?** Compare trusted installers through the [Underfloor Heating Directory](https://underfloorheating.directory/installers) and ask each contractor for the checks below.

## The Qualification Depends on the System
There's no single "underfloor heating licence" covering every UK project. The right competence depends on system type and work package.
| Work involved | Who should handle it | Proof to ask for |
| --- | --- | --- |
| Electric UFH mat or cable layout | Experienced installer, tiler, or competent DIYer for layout only | Manufacturer training, photos of recent jobs, resistance test records |
| Electric UFH final wiring | Qualified electrician | Part P registration where applicable, electrical certificates, public liability insurance |
| Wet UFH pipe laying | UFH installer, plumber, or heating engineer | Recent UFH references, pressure test procedure, manufacturer training |
| Manifold and controls | Heating engineer or experienced UFH specialist | Commissioning records, balancing method, control wiring competence |
| Gas boiler connection | Gas Safe registered engineer | Gas Safe registration number and boiler work category |
| Heat pump integration | Heat pump designer or MCS installer | MCS certification where grant-funded or required, heat loss calculations, flow temperature design |
| Screed and floor finish | Screeder, tiler, or flooring specialist | UFH-compatible product knowledge, drying and commissioning programme |
For the wider legal context, read the [UK Building Regulations for Underfloor Heating](/uk-building-regulations-underfloor-heating/) guide.
## Electric Underfloor Heating: What to Check
Electric UFH is often called DIY-friendly, but that only applies to physical prep and mat laying. Final electrical connection and safety testing are not casual DIY jobs.
For electric systems, ask:
- Who will make the final electrical connection?
- Is the electrician registered with a competent person scheme such as NICEIC, NAPIT, ELECSA, or another recognised provider?
- Will they issue an Electrical Installation Certificate or Minor Electrical Installation Works Certificate?
- Will they record resistance and insulation readings before, during, and after floor covering installation?
- Is the circuit RCD protected?
- Does the thermostat load rating match the heating mat or cable load?
- Is the work notifiable under Part P, and who will handle notification if required?
Useful reference: [Approved Document P: Electrical safety](https://www.gov.uk/government/publications/electrical-safety-approved-document-p).
The minimum trust signal isn't "they've fitted these before." It's documented testing and certification. Electric UFH faults can be difficult and expensive to repair once covered by tile adhesive, levelling compound, or flooring.
For more detail on installation steps, see the [electric underfloor heating systems guide](/electric-underfloor-heating-systems/) and the [DIY underfloor heating guide](/diy-underfloor-heating/).
## Wet Underfloor Heating: What to Check
Wet UFH competence is about design, pipework, pressure testing, controls, and commissioning. Pipe can be laid neatly and still perform badly if circuits are too long, floor insulation is poor, or the manifold is never balanced.
For wet systems, ask:
- Who designed the pipe layout and circuit lengths?
- Has a room-by-room heat loss calculation been completed?
- What pipe spacing is being used in each room?
- What pressure test will be carried out before screed or floor covering?
- Will the system be pressure-tested while screed is poured?
- Who will balance the manifold and set flow rates?
- What flow temperature is the system designed for?
- Will you receive an as-built pipe layout?
- What commissioning document will be handed over?
If the project modifies or connects a gas boiler, a Gas Safe registered engineer must complete the boiler work. Check the engineer on the [Gas Safe Register](https://www.gassaferegister.co.uk/).
For wet system design basics, read the [underfloor heating design and planning guide](/underfloor-heating-design-planning/) and [underfloor heating manifold guide](/underfloor-heating-manifold-guide/).

## Heat Pump Projects Need Extra Scrutiny
Underfloor heating and heat pumps work well together, but only when the system is designed for low flow temperatures. A heat pump installer who simply connects to a poorly designed UFH system can leave you with high running costs and disappointing room temperatures.
For heat pump-linked UFH, ask for:
- Room-by-room heat loss calculations
- Target flow temperatures, ideally around 35-45°C where practical
- Pipe spacing designed for low-temperature output
- Floor covering temperature limits
- Buffer tank, pump, and control strategy if required
- MCS certification if the project depends on grants or formal heat pump sign-off
Useful reference: [MCS standards and guidance](https://mcscertified.com/who-we-are/standards-governance/).
For a deeper explanation, use the [underfloor heating with heat pumps guide](/underfloor-heating-heat-pumps-guide-2026/).
## Insurance and Business Checks
Qualifications are only part of the picture. Before you hire anyone, ask for:
- Public liability insurance
- Professional indemnity insurance if they're designing the system
- Written quote with scope, exclusions, and payment stages
- Company address and registration details where applicable
- Recent underfloor heating project examples
- At least two recent references
- Warranty terms for labour and components
- Clear responsibility split between electrician, plumber, screeder, tiler, and main contractor
This matters because UFH projects often involve multiple trades. If no one's named as responsible for testing before the floor is covered, mistakes fall between trades.

## The Handover Paperwork You Should Receive
Don't treat handover paperwork as admin. It's your evidence if something fails, if you sell the property, or if a warranty claim is needed.
For electric UFH, ask for:
- Electrical certificate
- Part P notification where applicable
- Resistance test readings
- Insulation resistance test readings
- Thermostat instructions
- Product warranty registration
- Mat or cable layout photos
For wet UFH, ask for:
- Pipe layout drawing or photos
- Pressure test record
- Commissioning sheet
- Manifold flow rate settings
- Controls and thermostat instructions
- Screed drying and heat-up programme
- Product warranties
- Boiler or heat pump integration notes
If an installer can't explain the handover pack before the job starts, that's a warning sign.
## Red Flags When Comparing Installers
Be cautious if you hear any of these:
- "You don't need a certificate for electric underfloor heating."
- "We always use the same pipe spacing; no heat loss calculation needed."
- "The screed can be heated straight away."
- "We'll pressure test it later after the floor is down."
- "No need for photos; the pipe will be fine."
- "Any thermostat will work."
- "We can connect the boiler even though we're not Gas Safe registered."
- "The quote is cheaper if you pay cash and skip paperwork."
The problem with underfloor heating is that many mistakes are hidden. A cheaper quote becomes expensive if it excludes design, testing, certification, or proper commissioning.
For quote comparison help, read the [underfloor heating quotation guide](/underfloor-heating-quotation/).
## Questions to Ask Before Hiring
Use these before signing:
1. Which parts of the job will you do, and which will another trade do?
2. Who is responsible for system design?
3. Can you show recent UFH projects similar to mine?
4. What qualifications or registrations apply to this job?
5. What certificates will I receive?
6. What test readings will be recorded?
7. What happens if the floor covering installer damages a cable or pipe?
8. Who registers the warranty?
9. What is excluded from the quote?
10. What deposit and staged payments are required?
Good installers answer directly. Weak ones give vague answers or push you to decide quickly.
## Final Advice
The best installer isn't necessarily the cheapest or the one who can start tomorrow. The best installer explains the design, proves the right competence, documents the tests, and leaves you with a clear handover pack.
For electric UFH, prioritise electrical safety and certification. For wet UFH, prioritise heat loss design, pipe layout, pressure testing, and commissioning. For heat pump projects, prioritise low-temperature design and MCS-aware installation.
**Ready to compare installers?** Use the [Underfloor Heating Directory](https://underfloorheating.directory/installers) to find local professionals, then use this checklist before choosing who to hire.
Already have a system and dealing with a fault rather than a new installation? Our [guide to when to call a professional for UFH repairs](/when-to-call-professional-underfloor-heating/) covers the qualifications to look for on the repair side, plus typical call-out costs.
---
--- title: Fastwarm Underfloor Heating Review 2026: Products and Verdict description: Read our Fastwarm underfloor heating review covering electric mats, WiFi thermostats, running costs and customer ratings. Choose with confidence in 2026. url: https://underfloorheating.info/fastwarm-underfloor-heating-review/ published: 2026-05-05 updated: 2026-08-21 tags: ['fastwarm underfloor heating', 'fastwarm reviews', 'fastwarm thermostat', 'fastwarm 200w', 'fastwarm wifi thermostat', 'fastwarm trustpilot', 'fastwarm electric mat', 'fastwarm review UK'] ---
# Fastwarm Underfloor Heating Review 2026: Products and Verdict
> **Quick answer:** Fastwarm offers electric and water-based systems for UK projects, with thin electric cables, long warranties and strong customer feedback. Read independent planning guidance at [underfloorheating.info](https://underfloorheating.info/) and compare installation options through the [Underfloor Heating Directory](https://underfloorheating.directory/).
## At a glance
| | |
|---|---|
| **Trustpilot** | ⭐ 4.9/5 (2,600+ reviews) |
| **Cable thickness** | 2mm (thinnest on UK market) |
| **Cable warranty** | 50 years |
| **Systems offered** | Electric mats, loose-wire, water UFH |
| **Smart thermostat app** | Smart Life (Tuya-based, 2.4GHz required) |
| **Premium thermostats** | Heatmiser range available |
| **Design service** | Free bespoke CAD layout |
| **Where to buy** | fastwarm.com, B&Q, Amazon |
| **Best for** | Online buyers wanting fast delivery and strong support |
---
## What is Fastwarm?
Fastwarm is one of the UK's fastest-growing online underfloor heating suppliers. The company was incorporated in 2020, though the team behind it brings over two decades of experience in the underfloor heating industry. That background shows: product specs are well-chosen, technical support is knowledgeable, and the documentation is more comprehensive than you'd expect from a brand of this age.
The pitch is straightforward: quality electric and water-based UFH systems, sold online, dispatched quickly, with strong customer support baked in. The company has also begun expanding into trade, with field sales representatives now covering the UK merchant market.
Their Trustpilot rating sits at 4.9/5 from more than 2,600 verified buyers, which is about as strong as it gets in the home heating sector. It's not marketing copy; it reflects something real about how they handle customer queries and resolve problems.
If you're new to underfloor heating entirely, it's worth reading our [beginner's guide to underfloor heating](/underfloor-heating-beginners-guide/) first, then come back when you're ready to compare suppliers.
---

## Fastwarm product range
Fastwarm offers three main types of underfloor heating system, putting them in the same territory as the bigger brands.
### Electric heating mats
The mat systems are what most Fastwarm customers buy. You roll them out on a prepared subfloor, tile or board over the top, connect to a thermostat, and you're done. They're designed for bathrooms, kitchens, conservatories, and single-room retrofits.
The key spec: **2mm Teflon-coated dual-core heating cable**. At 2mm, these are among the thinnest electric cables sold in the UK, which matters when you're tiling. Every millimetre of cable height affects adhesive bed depth and potentially your finished floor level.
**Wattage options: 150W/m² vs 200W/m²**
Fastwarm mats come in two output ratings, and this is where a lot of buyers hesitate.
- **150W/m²** is suitable for rooms where underfloor heating is the secondary heat source, supplementing radiators, or in spaces that already retain heat well (a bathroom that warms quickly, for instance).
- **200W/m²** is the stronger option, recommended when UFH is the primary or sole heat source in a room, or where floors have higher thermal mass (stone tiles, thick porcelain, concrete screed).
The **Fastwarm 200W electric mat kit** has become one of their most searched products. If you're doing a tiled bathroom or kitchen floor and want the heating to function as the primary warmth source rather than a luxury extra, 200W/m² is the right choice. The higher output means faster heat-up times and the ability to keep pace with heat loss on cold days.
Kits come in standard sizes from 1m² upward, and Fastwarm's free design service will produce a layout for irregular rooms. As a rough guide, expect to budget £15–£30 per m² for the mat itself, depending on wattage and kit size.
### Loose-wire electric kits
For rooms that aren't a clean rectangle (utility rooms with island units, L-shaped bathrooms, open-plan kitchens), loose-wire systems offer flexibility that mat systems cannot match. You lay individual cable in a custom pattern, typically at 50-150mm spacing depending on output required, securing it as you go, then tile or screed over the top.
It's more involved to install than rolling out a mat, but the result is a fully bespoke cable layout optimised for your exact space.
### Water underfloor heating systems
Fastwarm also supply wet (water-based) UFH kits: manifolds, pipe, insulation boards, thermostats. These are whole-house systems connected to your boiler or heat pump, typically installed during new builds or major renovations.
Water systems are significantly more efficient to run than electric over the long term. If you're heating more than one or two rooms, or pairing with a [heat pump](/underfloor-heating-heat-pumps-guide-2026/), wet UFH nearly always makes more financial sense. See our full guide to [wet underfloor heating systems](/wet-underfloor-heating-ultimate-guide/) for the detail on that decision.
---
## Fastwarm thermostat review
The thermostat is where most customer questions originate, and according to search data, it's what the majority of people looking into Fastwarm actually want to understand. So let's be thorough.
### Standard digital thermostats
Fastwarm's entry-level option is a straightforward programmable digital unit. You can set heating schedules, adjust floor temperature limits, and the included floor sensor probe sits in the screed or adhesive bed to prevent the floor surface from overheating. This matters particularly with expensive flooring materials: engineered wood, LVT, and certain stone finishes have manufacturer-specified maximum floor temperatures, and the sensor cuts power if that limit is reached.
Most customers find the standard thermostat perfectly adequate for a bathroom or single-room installation.
### The Heatmiser range
For buyers who want a premium wired or wireless thermostat, Fastwarm stock Heatmiser controls. Heatmiser is a well-established UK thermostat manufacturer with a strong trade reputation, and their Neo range is a step up in build quality and functionality. If you're having an electrician install the system and they prefer a brand they already know, Heatmiser is a credible choice.
### The WiFi smart thermostat (Smart Life / Tuya)
For remote smartphone control, Fastwarm offer a WiFi-enabled thermostat. Unlike brands that develop proprietary apps, this thermostat runs on the **Smart Life platform**, which is built on Tuya's widely-used smart home infrastructure. Smart Life is available on iOS and Android and is the same app used by hundreds of compatible smart home devices globally.
In practice, this is both a strength and a limitation. The app is mature, reliable, and familiar to anyone already in the Tuya ecosystem. On the other hand, if you were hoping for a branded Fastwarm experience with detailed energy monitoring or integration with a specific smart home platform, this is a more generic setup.
**The 2.4GHz network requirement**
This is the most common issue reported by Fastwarm thermostat owners, and it isn't prominently flagged in the packaging.
The Fastwarm WiFi thermostat **only connects to 2.4GHz wireless networks**. It will not connect to 5GHz.
Modern routers typically broadcast both frequencies. Some use a combined 'smart' network that assigns devices automatically, which usually works fine. Others broadcast two separate networks (e.g. "MyHome" at 2.4GHz and "MyHome_5G" at 5GHz). If that's your setup, connect the thermostat to the 2.4GHz version explicitly.
If you're unsure which your router uses, check the admin panel (usually at 192.168.1.1 or via your ISP's app) and look for band settings. Temporarily labelling your 2.4GHz network with a distinct name during setup saves a lot of frustration.
**App setup: what to expect**
Download Smart Life, create an account, and pair the thermostat using a QR code or manual connection process. The pairing has been streamlined in recent app versions. One consistent piece of feedback from customers: the in-app screens don't always match the printed manual exactly. If the two diverge during setup, follow the app.
Once connected, Smart Life gives you:
- Remote temperature adjustment
- Weekly scheduling with multiple daily time periods
- Holiday mode
- Floor temperature limit setting (this is the overheating protection for your flooring, set it according to the flooring manufacturer's guidance)
For most tile floors you can safely set the limit to 27-28°C. Engineered wood, LVT, and laminate flooring typically require a maximum of 27°C; always check your flooring manufacturer's specification before setting this, as exceeding it can void the floor warranty.
For a broader look at smart thermostat options and how they compare, see our guide to [smart thermostats for underfloor heating](/smart-thermostats-underfloor-heating/).
---

## Installing Fastwarm under tiles
Tile floors are the most popular application for Fastwarm electric mats. Tiles conduct heat well, and a 200W mat under porcelain or ceramic creates a genuinely warm floor within 20-30 minutes.
### Do you need backer board?
If you're laying tiles on a timber subfloor (joists and plywood), you need a tile backer board. It creates a stable, non-flexing base for the tiles and also insulates below the heating cables so heat travels upward rather than into the floor structure.
Cement fibreboard backer (6-12mm thick) is the standard choice. Some installers prefer XPS (extruded polystyrene) insulation boards specifically rated for electric underfloor heating; these reflect heat back upward and can improve system efficiency noticeably.
On a solid concrete subfloor, backer board isn't always necessary, but insulation below the cable is still recommended on a ground floor slab. Without it, you're heating the concrete rather than the room above.
### Step-by-step: Fastwarm mat under tiles
1. Prepare the subfloor: clean, level, and dry. Grind back any high spots.
2. On timber: fix backer boards using screws and tile adhesive, then tape the joints.
3. Dry-lay the mat to check positioning. Keep cables at least 50mm from walls and clear of permanent fixtures.
4. Mark the thermostat position and route the cable conduit down the wall.
5. Bed the mat into flexible tile adhesive. Do not cut the heating cable; you can cut the mesh between runs to navigate around obstacles.
6. Insert the floor sensor probe in a separate conduit between two cable runs, typically 300-500mm from the wall.
7. Allow adhesive to fully cure before switching on: minimum 24 hours for rapid-setting adhesive, 72 hours for standard.
8. Connect to the thermostat following the wiring diagram, or have a qualified electrician do it.
If you encounter problems after installation, our [underfloor heating troubleshooting guide](/underfloor-heating-problems/) covers cold spots, sensor errors, and thermostat faults in detail.
---
## Fastwarm running costs
Electric underfloor heating costs more to run than wet systems, but for individual rooms it's the most practical option.
A rough guide for a 200W/m² Fastwarm mat in a typical bathroom:
- **Floor area**: 4m² (small-medium bathroom)
- **Installed wattage**: 800W (4m² × 200W/m²)
- **Daily use**: 2 hours on a schedule
- **Daily energy use**: 1.6 kWh
- **Daily cost at 24p/kWh**: approximately 38p
- **Annual cost**: approximately £140 at 2 hours per day (real usage will typically be lower)
Good thermostat scheduling cuts actual run time significantly. A well-insulated bathroom doesn't need continuous heating; the thermostat cycles the mat in short bursts to maintain the set temperature.
For detailed cost modelling across different room sizes and usage patterns, use our [underfloor heating cost calculator](/underfloor-heating-cost-calculator/) or read the full [underfloor heating running costs guide](/underfloor-heating-costs/).
---

## What do customers actually say?
Fastwarm's 4.9/5 Trustpilot score is the highest of any major UK underfloor heating supplier. With 2,600+ reviews, it's a meaningful sample.
The consistent themes in positive reviews:
- **Technical support quality**: multiple reviewers specifically mention calling with installation questions and getting knowledgeable, patient responses. For a product many DIYers are tackling for the first time, this matters.
- **Delivery speed**: next-day dispatch is mentioned frequently, which is useful when you've booked a tiler and need materials to arrive on time.
- **Free design service**: the CAD layout drawings remove guesswork about mat sizing and cable routing.
- **Product quality**: very few complaints about defective cables or thermostats.
The negatives that do appear:
- **WiFi thermostat setup**: the 2.4GHz requirement catches people out, and the manual-vs-app inconsistency adds unnecessary friction.
- **Brand recognition with trades**: some customers report that their electrician or tiler hadn't heard of Fastwarm and was initially sceptical. This isn't a quality issue, but it's worth knowing if you're relying on a third party to sign off the work. Fastwarm's move into merchant sales and trade representation should improve this over time.
---
## Fastwarm vs the competition
### Fastwarm vs ProWarm
ProWarm is the other UK brand that regularly tops DIY underfloor heating recommendations. If you are weighing up brands before fitting a system, our [underfloor heating installation guide](/underfloor-heating-installation-guide/) explains the practical installation stages. Both sit in the mid-price bracket, both offer electric and water systems, and both have strong Trustpilot scores (ProWarm at 4.8/5 from 1,000+ reviews).
Fastwarm's edge: thinner cables (2mm), a marginally better Trustpilot rating, and fast delivery.
ProWarm's edge: longer market presence and better trade recognition, which counts when an installer needs to specify a brand they're confident recommending.
### Fastwarm vs Warmup
Warmup is the premium option: higher prices, but an exceptional smart thermostat ecosystem (the 6iE is genuinely the best electric UFH thermostat on the market) and decades of brand heritage.
If smart home integration, energy monitoring, and a polished app are priorities, Warmup is probably the better choice. If you want strong value, fast delivery, and are comfortable configuring the thermostat yourself via Smart Life, Fastwarm delivers most of what you need for less money.
Our [complete UK underfloor heating brands guide](/underfloor-heating-brands/) covers the full comparison across eight suppliers.
**A note on Screwfix:** Fastwarm isn't stocked there, but if you need trade-counter collection, Screwfix carries Klima (a solid budget option), alongside Warmup and Sunstone. See our [underfloor heating mats guide](/underfloor-heating-mats-guide/) for a full breakdown of which brands are available where.
---
## Pros and cons
**Pros:**
- 4.9/5 Trustpilot rating, the highest of any major UK UFH supplier
- 2mm cables, the thinnest available and ideal for tight tiling tolerances
- 50-year cable warranty
- Heatmiser thermostats available for trade-quality control
- Free bespoke design service with CAD drawings
- Fast UK delivery; products available from fastwarm.com, B&Q, and Amazon
- Excellent telephone technical support
**Cons:**
- WiFi thermostat requires 2.4GHz only, which is poorly communicated in the packaging
- Smart Life app is generic rather than purpose-built for heating
- Less trade brand recognition than Warmup or ProWarm (improving as they expand into merchants)
- Water system range is less comprehensive than specialist wet-system suppliers
---
## Who should buy Fastwarm?
Fastwarm makes most sense for:
- Bathroom, kitchen, or utility room electric mat installations
- Online buyers who need fast delivery to fit a booked tiler's schedule
- Competent DIYers who are comfortable calling technical support when needed
- Anyone tiling over the mat who wants the thinnest possible cable profile
It's probably not the right call if:
- Your electrician or installer has a strong preference for a brand they already know
- You want the most sophisticated smart thermostat on the market (look at Warmup's 6iE)
- You're heating a whole house and need a comprehensive wet system with full trade support
---
## Verdict
Fastwarm is a genuinely good product backed by exceptional customer satisfaction. The 4.9/5 Trustpilot rating reflects real strengths: quick delivery, helpful technical support, and reliable product quality across the range.
The 2mm cables are a tangible advantage for anyone tiling, and the 50-year warranty is hard to argue with. The WiFi thermostat works well once you navigate the 2.4GHz requirement, and knowing it runs on Smart Life sets realistic expectations about the app experience. For buyers who want a step up in controls, the Heatmiser range is a solid option.
Fastwarm is to electric underfloor heating what Wunda is to wet systems: a newer, leaner online brand that has earned its reputation through execution. Both punch above their weight. See our [Wunda underfloor heating review](/wunda-underfloor-heating-review/) if you're weighing up whether to go electric or water-based.
**Rating: 4.5/5**. Recommended, especially for electric mat installations under tiles.
---
*New to underfloor heating? [Start with our beginner's guide →](/underfloor-heating-beginners-guide/)*
---
--- title: Underfloor Heating Mats UK: The Complete Guide 2026 description: Underfloor heating mats suit tiles, laminate and wood, with prices from £20 per m². Compare types, leading UK brands and choose the right system today. url: https://underfloorheating.info/underfloor-heating-mats-guide/ published: 2026-05-03 updated: 2026-08-21 tags: ['underfloor heating mats', 'electric underfloor heating mat', 'heating mat', 'matting for underfloor heating', 'underfloor heating for tiles', 'underfloor heating for laminate', 'underfloor heating mats uk'] ---
# Underfloor Heating Mats UK: The Complete Guide 2026
> **Quick Answer:** An underfloor heating mat is a pre-spaced electric heating cable fixed to a mesh or foil backing, the fastest way to add warm floors to any room. **Mesh mats** embed in tile adhesive for tiled floors. **Foil mats** lay dry under floating laminate or engineered wood. **Loose cable** fits irregular shapes. Costs range from £20–£65/m² for materials. A Part P certified electrician must make the final connection. Explore more advice at [underfloorheating.info](https://underfloorheating.info/) and find project support through the [Underfloor Heating Directory](https://underfloorheating.directory/).
---
## What is an underfloor heating mat?
An underfloor heating mat is simply an electric resistance cable fixed to a flexible fibreglass mesh or aluminium foil backing. It arrives pre-spaced and ready to unroll, so you don't have to clip individual cables across the floor. That makes the installation faster and more consistent than a loose cable system.
Mats are the most popular form of [electric underfloor heating](/electric-underfloor-heating-systems/) in the UK, with millions installed in bathrooms, kitchens and ensuites. They sit directly beneath the floor finish, either in tile adhesive, under a thin layer of self-levelling compound or dry-laid beneath a floating floor. A dedicated thermostat controls the temperature.
For a comparison of electric mats versus a full wet (water-based) system, see our [Electric vs Water UFH Guide](/electric-vs-water-underfloor-heating-2026/).
---
## The three types of underfloor heating mat
So which mat do you need? There are three formats, and each suits a different floor type and installation method.
### 1. Mesh heating mats (most popular)
A resistance cable is woven in a continuous serpentine pattern across a fibreglass mesh backing, pre-fixed at a consistent spacing of 65–80mm between runs. The mesh has a self-adhesive backing to stick to the subfloor during installation.
- **Profile:** 3–6mm (cable + adhesive or SLC)
- **Wattage:** 150W/m² (standard) or 200W/m² (higher output for colder rooms)
- **Best for:** Tiles, porcelain, stone, polished concrete, any floor embedded in adhesive or thin screed
- **Not suitable for:** Floating floors without self-levelling compound
### 2. Foil heating mats (for floating floors)
A carbon ink heating element is printed between layers of reinforced aluminium foil. These are dry-laid, no adhesive required, directly on the subfloor beneath a floating floor finish.
- **Profile:** 0.5–3mm (ultra-thin)
- **Wattage:** Typically 80–130W/m²
- **Best for:** Laminate, floating engineered wood, LVT/vinyl click floors
- **Not suitable for:** Wet rooms, tiled floors, or anywhere requiring adhesive embedding
### 3. Loose cable (most flexible)
A single cable on a reel, fixed with cable clips or spacing strips at your chosen spacing. More time-consuming to install but fits any room shape perfectly, including L-shapes and areas with many obstacles.
- **Profile:** 2–4mm
- **Wattage:** 150–200W/m² depending on spacing
- **Best for:** Irregularly shaped rooms, experienced installers
- **Not suitable for:** First-time DIY, spacing consistency is critical
| Type | Profile | Wattage | Best floor type | DIY-friendly? |
|:---|:---|:---|:---|:---|
| Mesh mat | 3–6mm | 150–200W/m² | Tiles, stone, SLC finishes | ✅ Yes |
| Foil mat | 0.5–3mm | 80–130W/m² | Laminate, LVT, floating | ✅ Yes |
| Loose cable | 2–4mm | 150–200W/m² | Any floor (with SLC) | ⚠️ Experienced only |
---
## Which mat for which floor? The complete compatibility guide
The floor finish decides which mat you can use. Get that pairing wrong and you can damage the floor, which is one of the most common installation problems I see. Here's what works with each common UK floor type.
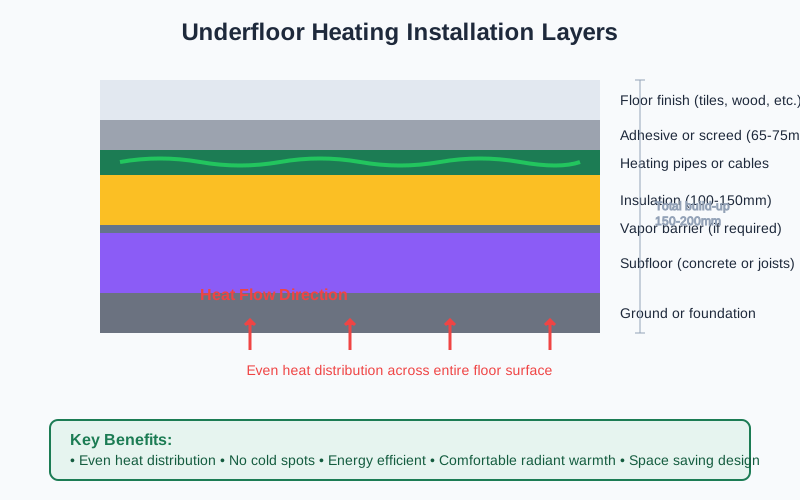
### Tiles, porcelain, and stone ✅ Best performance
**Use: Mesh mat (150W/m²)**
Tiles are the ideal partner for UFH mats. The mesh mat lies on the insulation board and tiles are set directly on top in flexible tile adhesive (3–5mm depth). No screed or self-levelling compound is needed in most cases, the tile adhesive encases and protects the mat while transferring heat efficiently into the dense tile surface.
- Heat-up time: 30–45 minutes
- Efficiency: ★★★★★
- Leave a 50mm gap around the perimeter and skip under bath panels, shower trays, and toilet pedestals
- Use **flexible tile adhesive only** (standard rigid adhesive can crack due to thermal expansion)
For room-specific guidance, see our [Bathroom UFH Guide](/bathroom-underfloor-heating-guide/) and [Kitchen UFH Guide](/kitchen-underfloor-heating/).
### Laminate flooring ⚠️ Foil mat only
**Use: Foil mat, not a mesh mat**
This is the most frequently misunderstood pairing. A standard mesh mat cannot be embedded in adhesive under a floating laminate floor. Laminate must float freely to expand and contract with temperature; adding a screed or adhesive layer beneath it causes buckling and voids the floor warranty.
The correct solution is a **foil mat laid dry** directly on the insulation board, with the laminate clicked in place on top. No adhesive. No screed.
**Essential checks before purchasing:**
- The laminate must be explicitly rated for underfloor heating use
- Maximum floor surface temperature: **27°C**
- Maximum combined thermal resistance of laminate plus underlay: **1.5 tog**, check the packaging; standard foam underlay typically exceeds this
- Use a UFH-compatible underlay (typically 3mm maximum, with low tog rating)
### Engineered wood
**Use: Mesh mat (under 10–15mm SLC) or foil mat (if floating installation)**
Engineered wood can be glued or floated, and the installation method determines which mat type to use:
- **Glued-down:** Mesh mat under 10–15mm self-levelling compound. Allow SLC to cure fully before laying.
- **Floating:** Foil mat, same approach as laminate. Check manufacturer's tog specification.
- Maximum floor temperature: 27°C
- Confirm the product is explicitly UFH-rated, many engineered wood products are not
### Vinyl / LVT (Luxury Vinyl Tile)
**Use: Foil mat (floating) or mesh mat (under thin SLC)**
LVT is one of the most forgiving options. Both approaches work well:
- Foil mat under click-fit LVT: fast, minimal height addition
- Mesh mat under 10mm SLC: suits glued-down LVT installations
- LVT's low thermal resistance means fast heat-up times
- Check maximum temperature for the specific product (usually 27–29°C)
For a full flooring guide including tog ratings by material, see our [Best Flooring for UFH Guide](/best-flooring-underfloor-heating/).
### Concrete floors
**Use: Mesh mat or loose cable**
Concrete is the most common subfloor for UFH mat installations. The critical step is insulation: without rigid boards beneath the mat, up to 40% of heat escapes downward into the slab.
1. Lay rigid XPS insulation boards (minimum 20mm for upper floors, 50mm+ for ground floors)
2. Roll out the mesh mat on top of the insulation
3. Apply 10–15mm self-levelling compound, or tile adhesive if tiling directly
For more on concrete-specific installations, see our [Retrofitting UFH Guide](/retrofitting-underfloor-heating/).
### Suspended timber and wooden floors
**Use: Foil mat (dry under boards) or loose cable with spreader plates**
Timber floors require care, adding SLC above joists is not appropriate without a structural assessment. Better options:
- **Foil mat under floorboards:** Works when boards are being lifted anyway. Minimal height addition.
- **Between-joist installation:** Loose cable with aluminium heat spreader plates fitted between the joists. Zero floor height addition.
Avoid mesh mats that require SLC on suspended timber floors unless the structure has been assessed for the load and moisture.
### Carpet
**Use: Mesh mat (under SLC), with caveats**
Carpet is the least efficient pairing, so I wouldn't recommend it as a primary heat source.
- Maximum combined tog: **2.5 tog** (carpet plus underlay, most standard carpets and underlays exceed this)
- Heat output reduced by 30–50% compared to tiles
- Heat-up time: 60–90 minutes
- Running costs significantly higher
Carpet over a UFH mat can work for occasional comfort, such as warming a bedroom floor on winter mornings. If you're relying on it to heat the room properly, the efficiency loss makes it a poor investment.
---
## Costs: what should you pay in 2026?
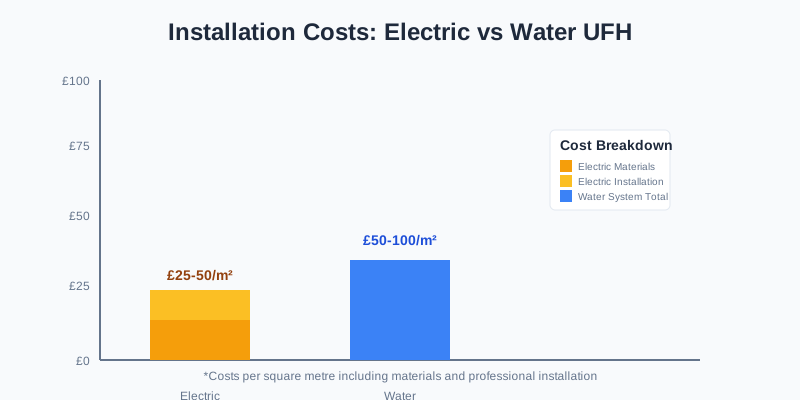
### Materials cost (mat only, per m²)
| Brand | Mat type | Wattage | Price per m² |
|:---|:---|:---|:---|
| Blyss (B&Q) | Mesh | 150W | £20–30 |
| Klima | Mesh | 150W | £25–38 |
| Ecofloor | Mesh | 150/200W | £28–45 |
| ProWarm | Mesh + Foil | 150/200W | £30–50 |
| Fastwarm | Mesh | 150/200W | £30–55 |
| Devi (Danfoss) | Mesh | 150/200W | £35–55 |
| Warmup | Mesh + Foil | 150/200W | £40–65 |
### Full room cost estimate (materials + installation)
| Room | Area | System | Estimated all-in cost |
|:---|:---|:---|:---|
| Ensuite | 3m² | Mesh mat + basic thermostat | £350–550 |
| Bathroom | 6m² | Mesh mat + programmable thermostat | £600–900 |
| Kitchen | 10m² | Mesh mat + smart thermostat | £900–1,400 |
| Living room | 15m² | Mesh mat + smart thermostat | £1,200–2,000 |
**Additional costs to budget:**
- Thermostat: £40–80 (basic), £80–150 (programmable), £120–250 (smart WiFi)
- Rigid insulation boards: £8–15/m²
- Part P electrical connection and compliance certificate: £150–300
- Tile adhesive or self-levelling compound: £5–20/m²
For a full cost breakdown including wet system pricing and ROI analysis, see our [Underfloor Heating Costs Guide](/underfloor-heating-costs/).
---
## Top UK underfloor heating mat brands
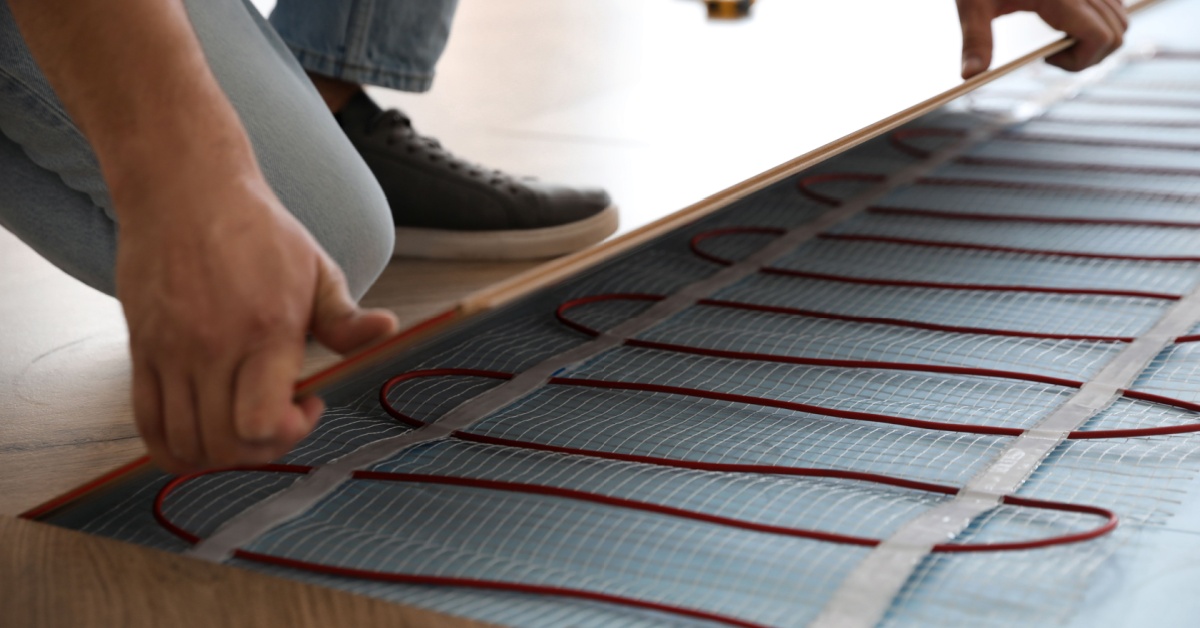
### Warmup, market leader
Warmup's **StickyMat** (150W/m²) and **SpeedHeat** (200W/m²) are the most widely installed UFH mats in the UK. The self-adhesive mesh simplifies installation, and Warmup backs every mat with a **25-year warranty**, the longest on the market.
- **Best for:** Any installation where longevity and warranty matter most
- **Where to buy:** B&Q, warmup.co.uk direct, electrical wholesalers
- **Price:** £40–65/m²
- **Pairs with:** Warmup 3iE or 6iE smart thermostats (energy monitoring, app control)
### ProWarm, best mid-range
ProWarm is a solid mid-range choice with a loyal installer following. It comes in 150W and 200W formats, and the clear installation documents make it a sensible option for your first DIY job.
- **Best for:** Value-conscious projects, professional installers
- **Where to buy:** Toolstation, floorheat.co.uk
- **Price:** £30–50/m²
- **Warranty:** 10 years
### Devi (Danfoss), professional grade
Professional electricians specify Danish-engineered Devi systems regularly. The DEVImat series has a strong reputation for precision and consistency, and contractors often choose it when they need a dependable commercial system.
- **Best for:** Professional installations, high-specification projects
- **Where to buy:** Trade electrical wholesalers
- **Price:** £35–55/m²
- **Warranty:** 10–20 years
### Klima, best budget option
Klima is the accessible budget choice at Screwfix. The mats offer reasonable quality for the money and suit a small bathroom where you want warm tiles without a large upfront cost.
- **Best for:** Small rooms (3–6m²) on a tight budget
- **Where to buy:** Screwfix (next-day click & collect)
- **Price:** £25–38/m²
- **Warranty:** 10 years
### Blyss. B&Q entry-level
Blyss is B&Q's own-brand UFH mat and an easy option for a very small bathroom. It also makes sense if you want simple in-store returns or need to pick up the rest of your tiling materials in the same trip.
- **Best for:** 3–4m² bathrooms, lowest possible outlay
- **Where to buy:** B&Q in-store and online
- **Price:** £20–30/m²
- **Warranty:** 5–10 years
For a broader comparison including wet system brands, see our [Best Underfloor Heating Brands UK Guide](/underfloor-heating-brands/). If you're considering Fastwarm specifically, our [Fastwarm underfloor heating review](/fastwarm-underfloor-heating-review/) covers their mat range, 200W options, and thermostat setup in detail.
---
## Where to buy: UK retailer comparison
| Retailer | Brands available | Range | Delivery options |
|:---|:---|:---|:---|
| **Screwfix** | Klima | Budget | Free click & collect, next-day delivery |
| **B&Q** | Blyss, Warmup | Budget–Premium | In-store + delivery |
| **Toolstation** | ProWarm | Mid-range | Free click & collect, next-day |
| **Wickes** | ProWarm (limited) | Mid-range | Delivery or in-store |
| **warmup.co.uk** | Warmup full range | Premium | Direct + free design service |
| **floorheat.co.uk** | ProWarm full range | Mid-range | Online direct |
**My buying tip:** Screwfix and Toolstation offer the best mix of next-day availability and competitive pricing. For rooms larger than 8m², or a whole-project order, go direct to Warmup or ProWarm. Their technical design teams will check your layout and confirm the sizing before despatch at no extra cost.
---
## How to install an underfloor heating mat: step by step
Our [DIY UFH Installation Guide](/underfloor-heating-installation-guide/) covers both electric and wet systems in full. For a mesh mat under tiles, this is the core process:
### Step 1: Calculate your heated area
Measure the total floor area, then subtract every permanent fixture: bath, toilet pedestal, shower tray, kitchen units and built-in wardrobes. Only heat the walkable floor. Putting mat under fixed items wastes energy and risks overheating.
### Step 2: Lay insulation boards first
This is the step most DIYers skip, and the efficiency suffers. Lay rigid XPS insulation boards across the entire prepared subfloor before the mat goes down. They direct heat upwards instead of losing it into the slab or joists below. Without insulation, you lose 30–50% of your heat output.
### Step 3: Unroll and fix the mat
Unroll from the thermostat wall outward. Use the self-adhesive backing to fix the mat as you go. The mesh can be cut between cable runs to navigate around obstacles and corners, **cut the mesh only, never the heating cable**. Keep cable runs parallel and never allow cables to cross or overlap.
### Step 4: Test resistance before covering
Measure the mat's resistance with a multimeter and compare to the value printed on the packaging. The reading should be within ±10% of the specification. Record this figure, you will need it if you ever need to make a warranty claim. If you skip this test and later damage the cable during tiling, proving the cable was undamaged before cover is impossible.
### Step 5: Run the floor sensor probe
Thread the floor temperature sensor probe from the thermostat location to the floor, placing the sensor tip centrally between two cable runs in the middle of the heated area. Run the probe in a conduit so it can be replaced in future without lifting tiles. This sensor is how the thermostat prevents the floor from overheating.
### Step 6: Cover the mat
**For tiles:** Apply flexible tile adhesive directly over the mat (3–5mm depth) and tile immediately. Do not use rigid adhesive, it cracks under thermal cycling.
**For other floors:** Apply 10–15mm self-levelling compound and allow it to cure fully (minimum 24–48 hours before walking on it; follow manufacturer's guidance for full cure before laying floor finish).
### Step 7: Electrical connection (certified electrician only)
Under UK Building Regulations [Part P](/uk-building-regulations-underfloor-heating/), a certified electrician must connect the mat tails and thermostat to the mains supply, conduct insulation resistance testing, and issue a Minor Electrical Works Certificate. This is a legal requirement, not optional, and most mat warranties also require it.
---
## Wiring: how mats connect to your thermostat

Plan the conduit runs before you lay the floor. Once the tiles are down, you can't add cable routes.
### Basic wiring principle
The mat has two cable tails. Current flows in at one tail, travels through the entire heating cable, and returns at the other tail. Both tails run back to the thermostat.
```
Mains (dedicated RCD-protected circuit, 2.5mm²)
↓
Thermostat ← Floor sensor probe (between cable runs)
↓
Mat, tail 1 (Live out) → heating cable → tail 2 (Neutral return)
```
The floor sensor probe is a separate two-wire cable that runs from the thermostat to the floor, monitoring surface temperature. Run it in a 10mm conduit so the probe tip sits centrally between two cable runs, and so the probe can be replaced without disturbing the floor.
### Multiple mats in one room
If your room requires more than one mat, wire both in **parallel**, separate pairs of tails back to the same thermostat terminals (or a contactor relay if the combined load exceeds 3kW). Never wire mats in series.
### Maximum load per circuit
Standard practice: **maximum 3kW per thermostat and circuit**. At 150W/m² this allows up to **20m²** per circuit. Larger rooms require either a contactor relay (controlled by the thermostat) or separate circuits with individual thermostats.
### S-plan integration
For properties where UFH electric mats need to integrate with an existing S-plan central heating programmer, the UFH thermostat can receive an enable signal from the programmer. This is uncommon in typical single-room installations but relevant if you want the electric UFH to follow the same heating schedule as the rest of the house. Your electrician can wire this as part of the connection.
For thermostat recommendations and smart controls options, see our [Smart Thermostats for UFH Guide](/smart-thermostats-underfloor-heating/).
---
## Frequently asked questions
### Can you cut an underfloor heating mat?
Yes, you can cut the **mesh backing**, but **never cut the heating cable**. Cutting the mesh lets you fold the mat to change direction and navigate obstacles. Use scissors to cut cleanly between cable runs, then fold and redirect. The cable must remain a continuous, unbroken loop throughout.
### What is the difference between 150W/m² and 200W/m²?
**150W/m²** is the standard for well-insulated rooms with efficient flooring (tiles, LVT, stone). Correct for most UK bathrooms and kitchens.
**200W/m²** is for rooms needing higher output, poorly insulated ground floors, extensions, or rooms with less conductive flooring (carpet, thick engineered wood). It heats faster but uses more electricity.
As a rule: use 200W/m² for concrete ground floors and any room that struggles to reach temperature with 150W. Use 150W/m² for upper floors and well-insulated spaces.
### How thick is an underfloor heating mat?
- Mesh mat cable alone: ~3mm
- Mesh mat + tile adhesive: 6–10mm total
- Mesh mat + self-levelling compound: 12–20mm total
- Foil mat: 0.5–3mm
Electric mats have one of the smallest floor height impacts of any heating system, far lower than the 50–100mm required for a screeded wet system. See our [retrofitting guide](/retrofitting-underfloor-heating/) for a full comparison of floor build-ups.
### How long do underfloor heating mats last?
Quality mats from established brands last **25–40 years**. The resistance cable is sealed in thermoplastic insulation and embedded in adhesive, protecting it from mechanical damage. The thermostat may need replacing after 10–15 years. There are no moving parts. Provided the cable is not damaged during installation, the most common cause of early failure, there is very little to go wrong.
### What size mat do I need?
Mats come in fixed sizes: typically 1m², 1.5m², 2m², 3m², 4m², 5m², 6m², 8m², 10m², 12m², 15m², and 16m².
Measure your **heated floor area**, total room floor area minus fixed furniture footprints. Always round up to the nearest available mat size. Never fold, overlap, or bunch a mat to fit a smaller space, this creates hotspots that damage the floor and void the warranty.
### Can underfloor heating mats cause problems?
The most common issues are:
1. **Cable damage during installation**, cutting or piercing the cable accidentally. Prevented by always testing resistance before and after covering.
2. **Cold spots**, usually caused by cable overlap or insufficient insulation. Check layout before covering.
3. **Thermostat or sensor failure**, both are easy to diagnose and straightforward to replace without disturbing the floor.
4. **Incompatible floor coverings**, particularly floating floors laid over mesh mats without proper SLC, or carpets with tog values too high.
For fault diagnosis, see our [UFH Troubleshooting Guide](/underfloor-heating-problems/).
---
The decision comes down to three factors: **floor type, room size, and budget**.
- **Tiled bathroom under £600:** Klima or Blyss 150W mesh mat from Screwfix or B&Q. Reliable and straightforward.
- **Kitchen or ensuite, best long-term quality:** Warmup StickyMat 150W or ProWarm equivalent. The 25-year warranty is worth paying for on a floor you won't be lifting again for decades.
- **Laminate or floating engineered wood:** Foil mat only, confirm your floor product is UFH-rated and your underlay is below 1.5 tog.
- **Awkwardly shaped room:** Loose cable rather than mesh mats, more installation effort, but precise coverage.
For rooms larger than 15m² being used as a primary heat source, running costs for electric mats will be significant, review our [running costs guide](/is-underfloor-heating-expensive-to-run/) to compare against a [wet system](/wet-underfloor-heating-ultimate-guide/).
**Ready to plan your project?** Use our [Heat Loss Calculator](/heat-loss-calculator/) to confirm your room's heating requirements, then compare mat kits and full system options from [leading UK brands](/underfloor-heating-brands/).
**Need a professional installer?** Find certified UFH specialists via the [Underfloor Heating Directory](https://underfloorheating.directory/installers).
---
--- title: Is Underfloor Heating Expensive to Run? Complete UK Cost Guide 2026 description: Underfloor heating running costs compared: see electric and wet system prices, annual UK estimates and practical ways to reduce your energy bills today. url: https://underfloorheating.info/is-underfloor-heating-expensive-to-run/ published: 2026-04-12 updated: 2026-08-21 tags: ['underfloor heating running costs', 'ufh running cost', 'electric underfloor heating cost', 'wet underfloor heating cost', 'heating costs uk', 'is underfloor heating expensive'] ---
# Is Underfloor Heating Expensive to Run? Complete UK Cost Guide 2026
> **Quick Answer:** In the UK, running electric underfloor heating costs around 24.5p/kWh, while a gas-powered wet system costs only 6p/kWh. For a 15m² living room used 6 hours a day, this means an electric system can cost over £1,200 annually, whereas a wet system would be under £200. Your final bill comes down to your system type, insulation, and controls. Compare further advice at [underfloorheating.info](https://underfloorheating.info/) and find local professionals through the [Underfloor Heating Directory](https://underfloorheating.directory/).
>
> 🧮 **[Use our free cost calculator for a personalised installation and running cost estimate →](/underfloor-heating-cost-calculator/)**
---
## Introduction: The myth of expensive underfloor heating
One of the most common questions we hear is: "Is underfloor heating expensive to run?" Many homeowners are drawn to the idea of luxurious, evenly heated floors but hesitate, fearing that this comfort comes with a punishingly high energy bill.
The truth is, the running [cost of underfloor heating](/underfloor-heating-costs/) (UFH) is not a simple yes or no answer. It is one of the most efficient ways to heat your home, but its affordability depends entirely on the type of system you choose, how well your home is insulated, and how you control it.
This guide provides a clear, data-driven breakdown of the real costs for 2026. We'll dismantle the myths and give you the figures you need to decide if UFH is the right financial choice for your property. By the end, you'll understand why a well-planned water-based system can actually be cheaper to run than traditional radiators.
**Ready to get accurate quotes?** Compare prices from trusted underfloor heating installers via the [Underfloor Heating Directory](https://underfloorheating.directory/get-quotes).
## How UFH works and why it's different from radiators
To understand the costs, it helps to understand the technology. Traditional radiators work primarily through convection. They heat the air directly next to them, which then rises, circulates around the room, and slowly cools, creating air currents and potential cold spots.
Underfloor heating, by contrast, uses radiant heat. The entire floor surface gently warms up and radiates heat upwards, warming objects and people in the room directly. This is a much more efficient method of heat transfer, similar to how the sun warms the earth. Because the heat is evenly distributed and comes from below, you can often feel perfectly comfortable at a lower overall air temperature, typically 1-2°C lower than with radiators. This small difference is the first step to significant energy savings.
Furthermore, UFH systems operate at much lower flow temperatures, typically 35-45°C, compared to the 60-75°C required by standard radiators. This makes them the perfect partner for modern, high-efficiency condensing boilers and, crucially, air source heat pumps.

## The single biggest factor: electric vs. wet (water) systems
The most critical decision affecting your running costs is the type of system you install. For a detailed breakdown, see our complete guide to [electric vs water underfloor heating](/electric-vs-water-underfloor-heating-2026/). Let's break down the two main options here.
* **Electric UFH:** A network of heating wires, often pre-spaced on a mat, installed under the floor. It's simple, fast to install, and has a lower upfront cost.
* **Wet (Water) UFH:** A series of pipes are laid beneath the floor, through which warm water from your central heating system (e.g., a gas boiler or heat pump) is circulated. It's more complex and expensive to install but offers vastly lower running costs.
The reason for the cost difference is simple: the price of fuel. Based on the April-June 2026 Ofgem Price Cap, the figures are stark:
* Electricity: ~24.5p per kilowatt-hour (kWh)
* Gas: ~6.0p per kilowatt-hour (kWh)
Electricity is, therefore, around four times more expensive than gas per unit of energy. This directly translates into the running costs of your heating system.
### Comparison table: Running costs at a glance
This table, based on figures from industry analysis, shows the dramatic difference for heating a typical 15m² living area for six hours a day.
| Feature | [Electric UFH](/electric-underfloor-heating-systems/) | Wet (Water) UFH |
| :--- | :--- | :--- |
| Cost per kWh (2026) | ~24.5p | ~6.0p (Gas Boiler) |
| Daily Cost (15m²) | £3.31 | £0.54 |
| **Annual Cost (15m²)** | **~£1,208** | **~£197** |
| Best For | Small rooms (<10m²), bathrooms, secondary heating | Whole houses, new builds, large rooms, primary heating |
| Heat-up Time | Fast (30-60 mins) | Slow (2-4 hours) |
| Installation Cost | Lower | Higher |
The conclusion is clear: for anything other than a small bathroom or occasional use, a wet system is the only financially sensible option for long-term, whole-room heating.
## The 4 factors that determine your final running costs
Think of these four elements as the control panel for your heating bills. Getting them right will ensure your system is as cheap to run as possible.
### Insulation: the non-negotiable cost saver
This is the most critical factor. Without proper insulation, a significant portion of the heat generated by your UFH system will be lost downwards into the subfloor or foundations. You'll be paying to heat the ground beneath your house.

High-quality insulation boards installed directly beneath the heating pipes or mats are essential. They act as a barrier, pushing the heat upwards into the room. The impact is huge; multiple manufacturers, including ThermoSphere and Warmup, state that good insulation can **cut running costs by up to 50%**. It also dramatically reduces the system's heat-up time.
### Smart thermostats & zoning
How you control your heating is just as important as the system itself. A basic on/off thermostat is inefficient. A modern smart thermostat, however, offers intelligent control that minimises energy waste. For more on this, see our [guide to smart thermostats for underfloor heating](/smart-thermostats-underfloor-heating/).
* **Smart Learning:** Many thermostats learn your household's routine and optimise the heating schedule automatically.
* **Zoning:** This allows you to control different rooms (zones) independently. You can heat your home office during the day and your living room in the evening, rather than heating the whole house unnecessarily.
* **Energy Monitoring:** See exactly how much energy you're using, allowing you to make informed adjustments.
The savings are significant. Warmup claims its smart thermostat can save users up to £400 per year on energy bills, while Wundagroup suggests that combining UFH with smart zoning can lead to total energy savings of up to 50%.

### Room size and usage patterns
As the table above shows, the viability of electric UFH plummets as room size increases. It should be treated as a solution for targeted warmth in small, well-defined areas.
How you use the system also matters. UFH systems, particularly wet ones with a screed layer, have a high thermal mass. This means they are slow to heat up but also slow to cool down. It is far more efficient to run them at a lower, steady temperature for longer periods than to use short, high-temperature bursts, which require the system to overcome a cold start each time.
### Your energy tariff
The final multiplier for your bill is the rate you pay for your energy. The 24.5p/kWh and 6p/kWh figures are based on the national average price cap. If you are on a fixed-rate tariff or a special economy tariff (e.g., for electric vehicle charging overnight), your costs will vary. Always use the specific rate from your own bill to calculate your personal running costs.

## Underfloor heating vs. radiators: which is cheaper to run?
This is a key question for anyone planning a new heating system. While radiators have a lower installation cost, a well-designed wet underfloor heating system is typically more efficient to run.
Leading manufacturer [Wundagroup](/wunda-underfloor-heating-review/) estimates that their water-based UFH systems can be up to **25% cheaper to run than radiators**. The reasons for this are rooted in building physics:
1. **Lower Flow Temperatures:** As mentioned, UFH runs at 35-45°C. A condensing gas boiler is most efficient when operating at these lower temperatures.
2. **Better Heat Distribution:** The even, radiant heat from the floor provides superior comfort at a lower air temperature, reducing the total energy demand.
So, while the upfront investment is higher, the lifetime running costs of a wet UFH system are lower, providing a solid return on investment over many years.

## The UK's green future: heat pumps and UFH
As the UK moves towards its net-zero targets, gas boilers are being phased out in new builds from 2025 under the Future Homes Standard. The replacement of choice is the air source heat pump.
Heat pumps work like a refrigerator in reverse, extracting ambient heat from the outside air. They are incredibly efficient, but they work best when producing water at low temperatures (below 50°C). This makes them a perfect match for wet underfloor heating and a poor match for traditional radiators, which need high-temperature water to be effective.
Installing a wet UFH system today is not just an efficient choice for a gas boiler; it's a future-proof decision that prepares your home for the next generation of low-carbon heating technology. You can learn more in our [guide to underfloor heating with heat pumps](/underfloor-heating-heat-pumps-guide-2026/).

## Frequently asked questions (FAQs)
### Is electric underfloor heating very expensive to run?
Yes, if used as a primary heat source in anything but a very small room. A 15m² living room can cost over £1,200 per year to heat. It is only cost-effective for small bathrooms or kitchens (under 10m²) where it's used for short periods to take the chill off the floor.
### How much does it cost to run UFH per hour?
For a typical 150W/m² system: an electric system in a 10m² room costs approximately 37p per hour. A wet (gas) system heating the same room would cost around 9p per hour.
### Can I lower my running costs after installation?
Absolutely. The single best upgrade is to install a smart thermostat if you don't already have one. This gives you precise control over your heating schedule and energy use. Beyond that, improving your home's general insulation (loft, walls, windows) will have a significant impact.
### Is underfloor heating cheaper than radiators in the long run?
A wet underfloor heating system generally is. While the installation cost is higher, the improved efficiency (up to 25% better than radiators) leads to lower annual energy bills, providing savings that accumulate over the system's long lifespan.
### Does UFH use a lot of electricity?
Electric UFH systems are purely powered by electricity and have a high consumption rate. Wet UFH systems use a very small amount of electricity to power the manifold pump and controls, but the primary energy for heating the water comes from your main heat source, such as a gas boiler or heat pump.
---
So, is underfloor heating expensive to run? The answer is a clear "it depends".
* **[Electric Underfloor Heating](/electric-underfloor-heating-systems/)** is a luxury product for targeted applications. If you want to heat a large room or your entire house with it, it will be very expensive. But for a small bathroom where you want warm tiles underfoot for 30 minutes in the morning, it is an affordable and effective solution.
* **Wet (Water) Underfloor Heating** is a strategic investment in your home's long-term efficiency. It has a higher upfront cost but delivers lower running bills than radiators, superior comfort, and is perfectly aligned with the future of low-carbon heating like heat pumps.
The final choice depends on your project, budget, and long-term goals. For most, a wet system is the most sensible and cost-effective path to whole-house comfort.
When you're ready to choose a supplier, see our [Best Underfloor Heating Brands UK Guide](/underfloor-heating-brands/) comparing leading manufacturers, warranties, and system quality.
**Want to calculate costs for your specific room?** Try the [official underfloorheating.info Running Cost Calculator](/underfloor-heating-running-costs-2026/). Or read our full analysis: [Is Underfloor Heating Worth It?](/is-underfloor-heating-worth-it/)
**Ready to get professional quotes?** [Compare prices from trusted UK installers via the Underfloor Heating Directory](https://underfloorheating.directory/get-quotes).
---
--- title: How Much Underfloor Heating Pipe Per m²? The Complete Guide description: Calculate how much underfloor heating pipe you need per m², with spacing, circuit limits, layouts and wastage explained for an accurate installation plan. url: https://underfloorheating.info/how-much-underfloor-heating-pipe-per-m2/ published: 2026-04-03 updated: 2026-08-21 tags: ['underfloor heating', 'pipe sizing', 'UFH installation', 'DIY'] ---
# How Much Underfloor Heating Pipe Per m²? The Complete Guide
**Quick Answer**
**Need professional installation?** Use [underfloorheating.info](https://underfloorheating.info/) to plan your system, browse the [Underfloor Heating Directory](https://underfloorheating.directory/), or find qualified wet UFH installers via the [installer listings](https://underfloorheating.directory/installers).
> Underfloor heating typically needs **5 to 10 metres of pipe per square metre**, depending on your chosen spacing:
> - 200mm spacing (standard for boilers): 5m/m²
> - 150mm spacing (recommended for heat pumps): 6.67m/m²
> - 100mm spacing (high output/conservatories): 10m/m²
>
> Plus another 5–10m for the pipes connecting to your manifold (we call these "tails").
---
## Why pipe quantity matters
For most wet underfloor heating systems, you’ll need **5 to 10 metres of pipe per square metre**. The exact amount matters because it doesn’t only decide how much pipe you buy. It decides whether the system can heat the room properly.
The amount of pipe you put in the floor affects everything:
- **Heat output**. Closer spacing means more warmth
- **Efficiency**. You don't want to over-pipe or under-pipe
- **Cost**. More pipe means more money on materials
- **Circuit design**. There's a maximum length each loop can be
I’ll show you how to calculate the pipe, which factors matter and how the numbers work in real rooms. You’ll then know what to order for any room in the house.
---
## What is pipe spacing?
*Pipe spacing*, also called *pipe centres*, means the distance between the centre of one heating pipe and the centre of the next. We measure it in millimetres, and it’s one of the most important decisions you’ll make.
Put the pipes close together (say 100mm apart) and you’ll fit more pipe into each square metre, which gives you more heat output. Move them further apart (200mm) and you’ll use less pipe but get less heat per square metre.
One important point: all the calculations below assume **16mm diameter pipe**, the UK standard for wet UFH. If you’re using 15mm or 20mm, the pipe-per-m² figures stay the same, but you’ll need to adjust the maximum circuit lengths.
---
## The Three Spacing Options
There are three main spacing choices in the UK, each with its own strengths.
### 100mm. Maximum Output
| What you get | Value |
|--------------|-------|
| Pipe per m² | ~10 metres |
| Heat output | 75–110 W/m² |
| Best for | Conservatories, draughty rooms, high heat loss |
| Typical use | Large windows, single glazing, fast warm-up needed |
100mm spacing gives you the most heat because you’re packing the floor with pipe. I’d use it in a room that loses a lot of heat or needs a quick response. The downside? You need much more pipe and may hit the circuit length limits.
### 150mm. The Sweet Spot
| What you get | Value |
|--------------|-------|
| Pipe per m² | ~6.67 metres |
| Heat output | 60–85 W/m² |
| Best for | Well-insulated homes, bathrooms, heat pumps |
| Typical use | The go-to for heat pumps; good value for money |
Most UK homes use 150mm. It gives you a good balance of comfort, efficiency and material cost. If you’ve got a heat pump, which runs cooler than a boiler, 150mm is usually the widest spacing I’d consider.
### 200mm. Most Economical
| What you get | Value |
|--------------|-------|
| Pipe per m² | 5 metres |
| Heat output | 45–65 W/m² |
| Best for | [New builds](/underfloor-heating-new-builds/), good insulation, bedrooms, living rooms |
| Typical use | Standard gas or oil boilers running at 45–50°C |
200mm uses the least pipe, but it also delivers the least heat. It works fine in modern, well-insulated properties, especially when paired with a conventional boiler that can run hotter.
---
## How to Calculate What You Need (The Right Way)
Can you just multiply the room area by the right figure? Yes, but that’s only the start. A proper calculation includes three things:
1. **Base pipe length**, area × your spacing multiplier
2. **Manifold tails**, the feed and return pipes that connect the loop to the manifold
3. **Wastage**, about 5% for cuts, mistakes, bent sections
Let's go step by step.
### Step 1: Base Pipe Length
Take your room area and multiply by the right number:
- 100mm spacing: area × 10
- 150mm spacing: area × 6.67
- 200mm spacing: area × 5
*Example:* A 20m² living room with 150mm spacing:
20 × 6.67 = **133.4m** of base pipe

### Step 2: Add the Tails
The pipe doesn't just lie in loops on the floor. You also need feed and return pipes running to and from the manifold. Account for:
- How far the manifold is from the room
- 1 metre up the wall to reach the manifold connections
- Both flow and return (so multiply by 2)
- About 5% extra for bends and fittings
**Formula:** `((manifold distance + 1m) × 2) × 1.05 = tails length`
*Example:* Manifold is 5m away:
((5 + 1) × 2) × 1.05 = 12.6m
### Step 3: Add Wastage
Things go wrong, you cut a length too short, a section gets kinked, you need an extra bend. Standard practice is to add **5%** to cover this.
**Formula:** `base pipe length × 0.05 = wastage`
*Example:* 133.4m × 0.05 = 6.7m
### Step 4: Total It Up
**Total pipe = base pipe + tails + wastage**
*Example:* 133.4 + 12.6 + 6.7 = **153m**
You'd need to buy a 160m coil (or the equivalent in smaller lengths) of 16mm PERT-AL-PERT pipe.
> **My tip:** Always round up. Running out of pipe halfway through the job is nobody's idea of fun.
---
## What Actually Affects Your Spacing Choice?
Choosing spacing isn't just about picking a number from a table. You need to think about your specific situation.
### Heat Loss Matters
If the room loses heat quickly, think large single-glazed windows, poor insulation, exterior walls, you'll need closer spacing to keep it warm. When in doubt, go closer or get a proper heat loss calculation done.
### Boiler or Heat Pump? That's Key
This is often the deciding factor:
- **Boilers** run at 45–50°C, returning at 30–35°C. The hot water carries more energy, so you can get away with wider spacing (200mm).
- **Heat pumps** are happiest at 35–40°C flow, returning around 30°C. Cooler water means each metre of pipe delivers less heat, so you need more pipe per m², typically 150mm minimum, sometimes 100mm in tricky rooms.
If you're going with a heat pump, start at 150mm and only widen to 200mm after confirming (via heat loss calc) that the output will be sufficient.
### What's Your Floor Covering?
Different finishes affect how much heat reaches the room:
- **Tile & stone** conduct heat well, standard spacing usually fine
- **Carpet** acts as insulation, reducing output, you might need closer spacing
- **Timber** has a maximum floor temperature of 27°C to prevent drying out, make sure your spacing can hit the required output at that limit
Always check with the floor manufacturer that their product is suitable for underfloor heating and what temperature limits apply.
### Room by Room
Bathrooms often get 150mm spacing, they're small, tiled (high heat loss), and people want them warm quickly. Bedrooms and living rooms can usually manage with 200mm, especially if the house is well insulated.
---
## Circuit Length: Don't Overdo It
For 16mm PERT-AL-PERT pipe, the **maximum circuit length is 100 metres**. Go longer and you'll get pressure drop, the water at the far end of the loop will be cooler, leading to uneven heating.
If your calculation exceeds 100m, you need to split the room into multiple circuits. For example, a 25m² room at 150mm spacing needs about 167m of base pipe, that's two circuits of roughly 85m each.
**Manifold capacity** matters too. Most manifolds have between 2 and 12 ports. Plan so each circuit stays under 100m and all your circuits fit the manifold.
**Location** is another consideration. Keep the manifold as close as possible to the rooms it serves, within 5–10m is a good target. In two-storey homes, it's common to put the manifold in the hallway or under the stairs on the ground floor and run pipes up to the first floor.
---
## Pipe Diameter: What Size Should You Use?
While 16mm is the standard, you might see 15mm or 20mm in some systems.
| Size | Max circuit length | Best for | Things to consider |
|------|-------------------|----------|-------------------|
| **15mm** | 80–90m | Small rooms (bathrooms, WCs) | Easier to bend around obstacles, but short runs limit coverage |
| **16mm** | 100m | Most homes | Great balance of flow and flexibility; industry standard |
| **20mm** | 120–140m | Large open-plan areas, commercial | Higher flow rate, less pressure drop, but stiffer and needs gentler bends |
If you use a different diameter, adjust your circuit length limits accordingly, but the pipe-per-m² multipliers stay the same.
---
## Edge Zones: Heating Just the Perimeter
Here’s a useful installer’s technique: use closer spacing along external walls and standard spacing through the middle of the room. We call it *edge zone heating* or *perimeter heating*.
**Why bother?**
- External walls and windows lose more heat
- Stops cold spots developing near walls
- Makes the room feel more comfortable overall
- More efficient than spacing the whole floor at 150mm
**How to do it:**
- Perimeter zone: typically 1 metre wide along external walls
- Spacing in edge zone: 100–150mm (depending on insulation)
- Spacing in main area: 150–200mm

> **Professional note:** Our calculator gives overall spacing recommendations. If you want edge zones, you'll need to adjust manually or talk to an installer who can design a proper layout.
---
## Spiral or Serpentine: Which Layout?
Once you know how much pipe you need, you need to lay it. There are two main patterns.
### Spiral (Snail). The Better Choice

**Pros:**
- Flow and return pipes run side by side
- Gives even heat across the whole floor
- No hot-to-cold temperature gradient
- Most efficient use of pipe
- Works great in large rooms
**Use it when:** You want the best comfort and the room shape allows it.
### Serpentine (Back-and-Forth). Simpler

**How it works:** Pipes run in parallel lines, switching direction at each wall.
**Characteristics:**
- Easier to install, especially in narrow spaces
- Temperature drops from inlet to outlet (warmer at one end, cooler at the other)
- Can create hot and cold spots in big rooms
- Less efficient than spiral
**Use it when:** You're working with hallways, corridors, or tight spaces where the pipe has to follow a strict rectangular path.
---
## Dealing with Odd-Shaped Rooms
Not every room is a neat rectangle. Here's how to handle L-shapes, bays, and obstacles.
### Split into Rectangles
Break complex shapes into smaller rectangles. Calculate each one separately and add up the pipe lengths. You'll probably need multiple circuits.
### Subtract Fixed Objects
If there's a large kitchen island, built-in wardrobe, or other permanent fixture taking up space (over 1m²), subtract that area from your total. No point counting pipe that would go under a solid object.
### Add Extra for Awkwardness
Irregular layouts usually need **10–15% more pipe** because you can't maintain perfect spacing and have to route around things. Factor that in.
### Multiple Circuits for Complex Shapes
Very irregular rooms (L-shapes, lots of protrusions) often work better with several smaller circuits rather than one long, winding loop. This also helps you stay under the 100m circuit limit.
---
## Common Mistakes. And How to Avoid Them
1. **Forgetting the tails**. The manifold connection pipes are easy to overlook. You can end up 10–20m short.
2. **Circuits too long**. Over 100m and you'll get uneven heating and pressure issues.
3. **One spacing fits all**. Different rooms (and even zones) often need different pipe centres.
4. **No wastage allowance**. Always add 5% for cuts, mistakes, damaged sections.
5. **Ignoring insulation**. Poor insulation means you'll need closer spacing to achieve the same comfort.
6. **Wrong pipe diameter for the job**. 15mm might look tidier, but it won't cover a large room in one circuit.
7. **Exceeding floor temperature limits**. Tiles: max 29°C, timber: max 27°C. Go higher and you'll damage the floor.
---
## Real-World Examples
Let's look at three common scenarios.
### Example 1: Bathroom with a Heat Pump
**Room:** 8m² bathroom
**Heat source:** Air source heat pump
**Floor:** Tiled, screed
**Manifold distance:** 3m
Choice: 150mm spacing (good for heat pumps)
- Base pipe: 8 × 6.67 = 53.4m
- Tails: ((3 + 1) × 2) × 1.05 = 8.4m
- Wastage: 53.4 × 0.05 = 2.7m
- **Total:** 64.5m → buy a 70m coil
Single circuit, no problem with the 100m limit.
### Example 2: Open-Plan [Kitchen](/kitchen-underfloor-heating/)/Living with a Boiler
**Room:** 35m² open plan
**Heat source:** Gas boiler
**Floor:** Oak boards (max 27°C)
**Manifold distance:** 8m
Choice: 200mm spacing (boiler can run hotter)
- Base pipe: 35 × 5 = 175m → over 100m, so need 2 circuits (about 88m each)
- Tails per circuit: ((8 + 1) × 2) × 1.05 = 18.9m
- Wastage per circuit: 88 × 0.05 = 4.4m
- **Total per circuit:** ~112m → buy two 120m coils (or one 200m + one 100m)
### Example 3: [Conservatory](/conservatory-underfloor-heating/). Needs More Heat
**Room:** 12m² conservatory, single-glazed
**Heat source:** Boiler (high flow temp)
**Manifold distance:** 5m
Choice: 100mm spacing (high heat loss)
- Base pipe: 12 × 10 = 120m → need two circuits (60m each)
- Tails per circuit: ((5 + 1) × 2) × 1.05 = 12.6m
- Wastage per circuit: 60 × 0.05 = 3m
- **Total per circuit:** ~76m → buy two 80m coils
---
## Frequently Asked Questions
### What spacing do most people use?
150mm is the most common in the UK, it's a good balance between heat output and cost, and it works with both boilers and heat pumps. But the right choice depends on your specific heat loss, insulation, and heat source.
### Can I use different spacings in different rooms?
Yes. It’s normal to vary the spacing from room to room. Bathrooms often get 150mm and bedrooms 200mm. Each room has its own circuit on the manifold, so you can set a different spacing for each.
### Spiral or serpentine layout, which is better?
Spiral (sometimes called snail pattern) is the better choice for most installations. The flow and return pipes run side by side, giving much more even heat across the floor. Serpentine is simpler to install but you'll get a temperature gradient, warmer near the inlet, cooler at the far end.
### What spacing for a heat pump?
Heat pumps typically need 150mm spacing because they run at lower temperatures (35–40°C). In a poorly insulated room or a conservatory, you might need to drop to 100mm. We've got a dedicated heat pump guide that goes into more detail.
### Are these calculations accurate?
Professional designers use these industry-standard methods. For a larger project or complex layout, I’d still ask a qualified installer to complete a proper heat loss calculation and optimise the pipe layout for the room.
### My room isn't a rectangle, what now?
- Break it into rectangular zones and calculate each separately
- Subtract areas taken up by large fixed objects (kitchen islands, built-in wardrobes) over 1m²
- Add 10–15% extra pipe for awkward routing around obstacles
- Very irregular rooms often need multiple circuits anyway
---
## Get it right first time
Start with the basic multipliers: 5m/m², 6.67m/m² or 10m/m². They give you a quick answer, but you still need to include tails and wastage if you want to order the right amount.
Key takeaways:
- Pick spacing based on your **heat source**, **insulation**, and **room type**
- Keep circuits under **100m** for 16mm pipe
- Don't forget the **tails** to the manifold
- Add **5% wastage**
- Try our Pipe Spacing Calculator for an instant recommendation
My advice is simple: choose the spacing from the heat loss, keep each circuit within its limit and include the tails before you order. Get those points right and the system will heat evenly for years.
---
## Next Steps
Ready to move ahead? Here’s what I’d do:
1. **Use our calculator**, Pipe Spacing Calculator, for instant recommendations tailored to your room.
2. **Work out installation costs** with our UFH Cost Calculator.
3. **Read the Design & Planning Guide** to understand heat loss calculations and system sizing.
4. **Find professional installers** via Underfloor Heating Directory, a curated UK-wide list of UFH specialists.
---
## About This Guide
This article is part of **underfloorheating.info**, my independent guide to underfloor heating systems, installation and maintenance. I’m not tied to any manufacturer. I want to give you clear, practical advice so you can decide what’s right for your home.
Got questions or feedback? Get in touch.
**Ready for professional installation?** Connect with vetted wet UFH installers through the [Underfloor Heating Directory](https://underfloorheating.directory/installers).
---
--- title: Conservatory Underfloor Heating: UK Costs, Systems & Heat Loss description: Explore conservatory underfloor heating costs, best system options, heat loss and insulation needs to choose an efficient solution for year-round comfort. url: https://underfloorheating.info/conservatory-underfloor-heating/ published: 2026-03-17 updated: 2026-08-21 tags: ['conservatory underfloor heating', 'conservatory heating', 'underfloor heating conservatory cost', 'electric conservatory heating', 'conservatory UFH UK'] ---
# Conservatory Underfloor Heating: UK Costs, Systems & Heat Loss
> **Quick Answer:** For most UK conservatories (12-20 m2), I’d choose electric underfloor heating. It costs roughly **£600-£1,200 installed**. The main problem isn't the UFH itself - it's heat loss from glazing and weak insulation. If you've converted the room to a solid-roof extension and insulated the floor, a wet system can make sense. That costs around **£1,200-£2,500 installed** for a 15 m2 space. Use [underfloorheating.info](https://underfloorheating.info/) for practical planning guidance and the [Underfloor Heating Directory](https://underfloorheating.directory/) when you’re ready to compare installers.

Underfloor heating suits a conservatory on paper: warm floors, clear walls, no bulky radiators and a clean look. The catch? Conservatories are among the hardest rooms in the house to heat. They have lots of glass, big temperature swings and often very little insulation under the floor.
I’ll show you the realistic costs, what works in a UK conservatory and how to decide whether UFH makes sense in yours.
**Considering UFH for your conservatory?** Get quotes from qualified installers via the [Underfloor Heating Directory](https://underfloorheating.directory/get-quotes) and ensure a warm, comfortable space.
---
## Why conservatories are challenging to heat
Conservatories lose heat faster than almost any other part of the home. The reasons are simple:
- High glazing ratio (heat escapes quickly)
- Large temperature swings between day and night
- Floor insulation often missing or minimal
- Roof type matters (polycarbonate loses huge amounts of heat)
A conservatory isn't just another room. It's more like a greenhouse unless it's been upgraded to a proper extension.
---
## Will UFH actually keep a conservatory warm?
The honest answer is yes, but only if you’ve insulated the conservatory well enough. If the roof and glazing leak heat, UFH will struggle just like any other heating system.
Think of UFH as the *delivery method*, not the fix. If you’re losing heat through the roof, you’ll still feel cold, only more evenly cold.
What helps most:
- Solid or tiled roof conversion
- Double (or triple) glazing
- Proper floor insulation
- Draught-proofing
If those aren't in place, UFH alone won't solve the problem.

---
## Electric vs wet UFH for conservatories
Here's the short version:
- Electric UFH is usually best for a standalone conservatory (simple, fast, no boiler connection).
- Wet UFH is usually best for a solid-roof extension connected to the house heating system.
### Side-by-side comparison
| Feature | Electric UFH | Wet UFH |
|---|---|---|
| Install cost | **£600-£1,200** (15 m2) | **£1,200-£2,500** (15 m2) |
| Best for | Standalone conservatories | Solid-roof extensions |
| Running cost | Higher (electricity) | Lower (gas/heat pump) |
| Install complexity | Low | Medium-high |
| Warm-up time | Faster | Slower but steady |
| Disruption | Low | Higher |
For system overviews, see: [Electric UFH Systems](/electric-underfloor-heating-systems/) and [Wet UFH Guide](/wet-underfloor-heating-ultimate-guide/).

---
## How a solid roof changes the decision
If you’ve converted a conservatory to a solid-roof extension, the heating maths changes completely. You now have:
- Better insulation
- More stable temperatures
- A room that behaves more like a kitchen-diner or lounge
Wet UFH now becomes viable and is often the better long-term choice, especially if you already have a boiler or heat pump.
If you're still on a polycarbonate roof, electric UFH is the only sensible option - but only if you accept higher running costs.

---
## Conservatory UFH costs (realistic UK numbers)
Your final cost depends on the size, insulation and whether you’re connecting to the existing heating. These figures give you realistic averages for UK projects.
### Electric UFH (15 m2 conservatory)
- Supply + install: **£600-£1,200**
- Extras: thermostat, floor sensor, adhesive/screed
### Wet UFH (15 m2 conservatory)
- Supply + install: **£1,200-£2,500**
- Extras: manifold connection, screed, pump, controls
If you want a tailored estimate, use the [UFH Cost Calculator](/underfloor-heating-cost-calculator/) (there's a conservatory option).

---
## Insulation requirements (this is the real decision)
Insulation affects UFH performance more than anything else. Here’s the reality:
- Polycarbonate roof: UFH struggles. Expect large heat loss.
- Double-glazed glass roof: workable, but still leaky.
- Solid insulated roof: UFH works properly.
For the floor, you need insulation boards under the mat or pipes. Without them, you're heating the ground.
Rule of thumb: If the conservatory feels cold even with existing heating, UFH will not fix it unless insulation improves.

---
## Heat output for conservatories (don't under-spec it)
Conservatories lose more heat than most rooms, so the **heat output per m2** usually needs to be higher. As a rough guide:
- Electric UFH often sits around **150-200 W/m2** in conservatories
- Lower outputs can feel sluggish in winter unless insulation is excellent
This is why electric UFH works best when it's used in short bursts, or when the conservatory is well insulated and upgraded to a solid roof.
---
## Running costs (realistic examples)
### Electric UFH example
**12 m2 mat, 150W/m2, 4 hours/day**
- Load: **1.8 kW**
- Daily use: **7.2 kWh**
- Cost at **27p/kWh:** **~£1.94/day**
### Wet UFH example
**15 m2 on gas, steady background heat**
- Lower flow temperatures reduce running cost
- Typical daily cost: **~£0.55-£0.90/day** depending on insulation
So electric works well for seasonal use, but gets expensive if you run it heavily every day.
See the full breakdown here: [UFH Running Costs 2026](/underfloor-heating-running-costs-2026/).
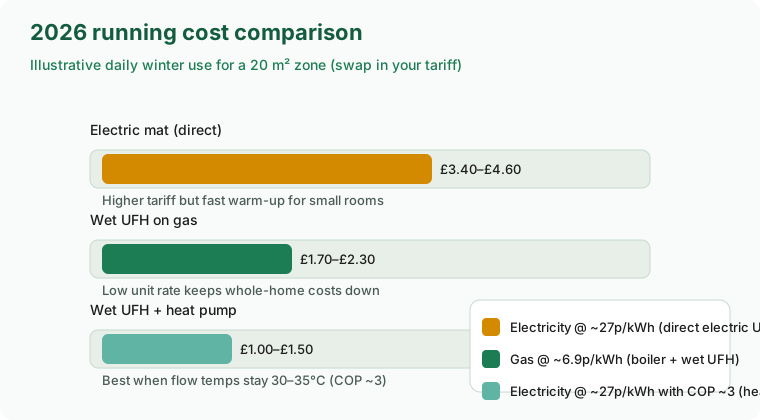
---
## Layout considerations for conservatory UFH
Conservatories often have fixed furniture and large glazed edges. Layout matters:
- Don't heat under fixed appliances (fridges, storage units)
- Keep pipes/mats away from conservatory base walls with insulation strips
- Measure only the heated area, not the total room size
- Use perimeter insulation to stop edge heat loss
A poorly planned layout can cut performance dramatically.
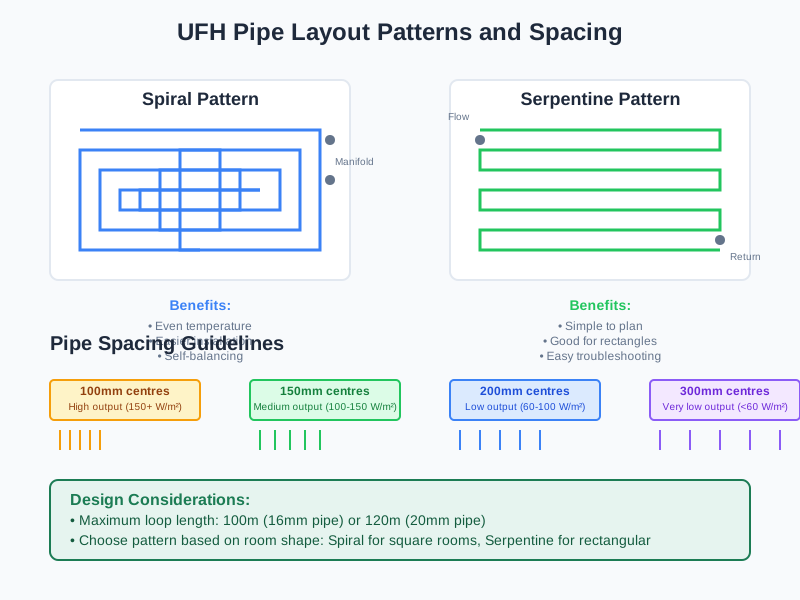
---
## UFH installation process (what actually happens)
Whether electric or wet, the steps look like this:
1) Subfloor prep - clean and level
2) Insulation layer - essential for efficiency
3) Mat or pipe layout - planned around appliances and doorways
4) Floor sensor - protects flooring from overheating (max **28°C**)
5) Screed or adhesive - locks in the system
6) Commissioning - gradual warm-up to avoid cracking
For full steps, see the [UFH Installation Guide](/underfloor-heating-installation-guide/).

---
## Kitchen-diner conservatory extensions (common UK case)
The most popular UK project is a rear extension that merges a kitchen with a conservatory-style space. These often have:
- Large glazed doors
- Open-plan layouts
- High foot traffic
In these cases, UFH makes sense if the extension is properly insulated and you're already doing floor work. Wet UFH is usually the better long-term choice because the area is larger and used daily.

---
## Do you need planning permission?
For UFH alone, you don’t need planning permission.
But building regulations apply if you're doing electrical work (Part P) or converting the conservatory into an extension.
Key points:
- Part P for electrical connections (electric UFH must be signed off)
- Part L for insulation and energy efficiency if the conservatory becomes a true extension
Read more here: [UK Building Regulations for UFH](/uk-building-regulations-underfloor-heating/).
---
## Common mistakes (and how to avoid them)
- Skipping insulation → you'll lose heat straight into the slab
- Using UFH without a roof upgrade → never feels warm
- Heating under fixed furniture → wasted energy
- No zoning → expensive and inefficient
If you fix those, UFH works well even in tricky spaces.

---
## Alternatives to UFH in a conservatory
If your conservatory is poorly insulated, UFH might not be the best first step. Alternatives include:
- Infrared panels (targeted heat, lower install cost)
- Modern radiators with smart controls
- Air-to-air heat pump if you're upgrading anyway
But if you're renovating, UFH is still the most comfortable long-term solution.
---
## So, is it worth it?
For a broader analysis of UFH value across all room types, see [Is Underfloor Heating Worth It?](/is-underfloor-heating-worth-it/)
Yes, if:
- You've insulated the roof and floor
- You use the conservatory daily
- You want the cleanest, most comfortable heat
Maybe not, if:
- You still have a polycarbonate roof
- You only use the room occasionally
- You need quick, cheap heat
UFH gives you comfort and even heat. It won't fix a cold conservatory on its own. Insulation does that.
---
## Conservatory roof types and what they mean for UFH
The roof is the biggest heat-loss surface in most conservatories. UFH can only keep up if the roof isn't leaking heat faster than you can supply it.
### Polycarbonate roofs
- Very poor insulation
- Huge night-time heat loss
- UFH will feel weak unless you run it hard (high running cost)
### Double-glazed glass roofs
- Better than polycarbonate but still leaky
- Works for shoulder seasons (spring/autumn)
- Struggles in cold snaps unless the floor and walls are insulated
### Solid or tiled roofs
- The best option for UFH
- Keeps heat in and stabilises temperature
- Turns a conservatory into a true extension
If you’re serious about UFH, start with a solid roof conversion. It’s the most effective upgrade you can make.

---
## Floor build-up and height: the hidden constraint
Many conservatories have limited floor height. Insulation boards, UFH and a new floor finish can raise it by **20-50mm** or more. That sounds small, but it can cause:
- Door threshold issues
- Trip hazards at room transitions
- Reduced head height under low roofs
Low-profile UFH systems can reduce the build-up, but they cost more. If you’re retrofitting, measure the available height before you commit. I’ve seen this catch people out.

---
## Solid roof conversion + UFH: realistic budget
If you’re converting a conservatory into a full extension, UFH becomes far more viable, but the total project cost changes. Here’s a rough ballpark for UK projects:
- Solid roof conversion: £6,000-£15,000 (varies massively by size and spec)
- **Wet UFH for 15-20 m2:** £1,200-£2,500 installed
- Floor insulation upgrade: £300-£800
That puts many projects in the **£8k-£18k** range overall. It’s not cheap, but you end up with a room you can use all year.
---
## Heat loss: why glazing matters more than the heater
A conservatory is mostly walls of glass. It looks good, but loses far more heat through its envelope than a typical room.
If the conservatory loses heat faster than the UFH can replace it, you’ll always feel chilly. Before you spend money on a new heating system, check:
- Glazing quality (single vs double)
- Roof insulation (polycarbonate vs solid)
- Floor insulation (boards under the UFH)
- Draughts around frames and doors
The order of priority is: roof → glazing → floor → draughts → heating.
---
## Thermostats and zoning (don't skip this)
Conservatories often need a different heating schedule than the rest of the house. Zoning makes that possible.
- Separate thermostat for the conservatory
- Floor sensor to protect tiles or LVT
- Timed schedules to avoid heating when unused
With a smart thermostat, you can pre-warm the room before you use it and let the temperature drop afterwards. I’d use that approach to keep running costs under control.
If you want deeper guidance: [Smart Thermostats for UFH](/smart-thermostats-underfloor-heating/).
---
## When UFH is not the right choice
UFH isn't always the answer. It's not the best option when:
- The conservatory has a polycarbonate roof and no insulation plan
- You only use the room a few times a month
- You need fast, responsive heat without renovation work
In those cases, a small electric radiator or infrared panel may be more practical, even if it doesn’t look as neat.
---
## Quick conservatory decision checklist
- [ ] Roof upgraded or already solid
- [ ] Double glazing in good condition
- [ ] Floor insulation included
- [ ] Floor height allows UFH build-up
- [ ] You'll use the room regularly
If you can tick **4 or 5**, UFH is usually worth it.
---
## Glazing and insulation quick comparison
| Roof / glazing type | Heat loss risk | UFH performance | Notes |
|---|---|---|---|
| Polycarbonate roof + older glazing | High | Poor | UFH struggles, high running cost |
| Double-glazed glass roof | Medium-high | Moderate | OK for spring/autumn use |
| Solid roof + double glazing | Low | Good | Best setup for year-round comfort |
If you're not sure what you have, look at the roof build-up or ask the installer. The difference in winter comfort is huge.
---
## Maintenance and lifespan in a conservatory
Conservatory UFH doesn't need special maintenance, but keep these practical points in mind:
- Electric systems are basically maintenance-free once installed.
- Wet systems need occasional checks on the manifold, pump, and actuators.
- If the conservatory is more exposed to temperature swings, make sure the system is commissioned properly to avoid screed stress.
With good installation, electric UFH often lasts **20-25 years**, and wet pipework can last **50+ years**.
---
## Choosing an installer (what to ask)
A good installer will ask about insulation before selling you UFH. If they don’t, I’d treat that as a red flag. Ask:
- Will you include floor insulation in the quote?
- What floor build-up height should I expect?
- Do I need a separate thermostat and floor sensor?
- For wet systems: where will the manifold be located?
If you want a quick ballpark before calling installers, start with the [UFH Cost Calculator](/underfloor-heating-cost-calculator/).
---
## A quick real-world sanity check
If your conservatory feels like the outdoors on a cold morning, you don’t have a heating problem. You have a building-fabric problem. UFH can’t beat a room that leaks heat in every direction. Fix the envelope first and UFH becomes the most comfortable heating you can put in the space.
---
## Frequently Asked Questions
### Is underfloor heating good for a conservatory?
Yes, but only if the conservatory is well insulated. Otherwise heat loss is the real problem.
### How much does conservatory underfloor heating cost?
Electric systems are usually **£600-£1,200** for a 12-20 m2 conservatory. Wet systems are **£1,200-£2,500** for a similar size if connected to the house heating. See the full [underfloor heating cost guide](/underfloor-heating-costs/) for wider UK price ranges.
### Can UFH work with a polycarbonate roof?
It can, but performance is poor. You'll lose heat quickly and pay higher running costs.
### Is electric or wet UFH better for conservatories?
Electric is best for standalone conservatories. Wet is best for solid-roof extensions or large spaces linked to the home.
### Do I need building regs approval for UFH in a conservatory?
UFH alone doesn't need planning permission, but electrical work must comply with Part P. Extensions may need Part L compliance.
### How do I estimate conservatory UFH costs?
Use the [UFH Cost Calculator](/underfloor-heating-cost-calculator/), which includes a conservatory option.
**Ready to make your conservatory comfortable year-round?** Find trusted installers who specialise in conservatory UFH through the [Underfloor Heating Directory](https://underfloorheating.directory/get-quotes).
---
--- title: Wunda Underfloor Heating Review 2026: Cost, Pros & Installation description: Read our Wunda underfloor heating review covering Rapid Response costs, DIY installation and WundaSmart controls, so you can decide if it suits your home. url: https://underfloorheating.info/wunda-underfloor-heating-review/ published: 2026-03-17 updated: 2026-08-21 tags: ['wunda underfloor heating', 'wunda review', 'wunda rapid response', 'wundatherm', 'wunda cost', 'wunda vs warmup', 'wunda review UK', 'overfloor heating'] ---
# Wunda Underfloor Heating Review 2026: Cost, Pros & Installation
## At a glance
**Ready to explore brands?** Read independent UFH guidance at [underfloorheating.info](https://underfloorheating.info/), explore the [Underfloor Heating Directory](https://underfloorheating.directory/), and find top underfloor heating manufacturers via the [Underfloor Heating Directory](https://underfloorheating.directory/manufacturers).
Wunda is a UK-based manufacturer (based in Chepstow, Wales) that's been making water-based underfloor heating since 2006. They sell direct to homeowners and tradespeople without middlemen. Their main product is the Rapid Response® overfloor system, which goes on top of your existing floor rather than being dug in. They also offer traditional screed systems and between-joist options.
Their pitch is simple: replace your radiators with a system that heats up in 30-40 minutes, costs less to run, and frees up your wall space. They've built a loyal following, especially among renovators who want wet UFH without ripping up concrete floors.
This review covers what Wunda actually offers, what it costs, what real customers say, and how it stacks up against alternatives.
## Who are Wunda?
Wunda Group has been around since 2006. It's a specialist manufacturer that has carved out a niche in retrofit wet UFH. The company designs, manufactures and supports everything from its UK base.
A few things that stand out about them:
- They sell direct, no distributors or showrooms (keeps prices down)
- Free system design and layout plans for every project
- UK-based technical support, 6 days a week
- They'll beat any like-for-like quote
- Backed by £10m product liability insurance with AXA
Their Trustpilot rating is strong (4.8/5 from thousands of reviews), and customer service comes up repeatedly in positive reviews, something that's genuinely rare in this industry.

## Wunda's product range
### Rapid Response® overfloor heating (main product)
This is what most people buy from Wunda. It's an overfloor system: the boards sit on top of your existing floor, and you lay your final floor finish on top. No digging, no screed, no weeks of disruption.
**How it works:**
1. Pre-formed aluminium-coated EPS boards are bonded to your existing floor with spray adhesive
2. 16mm or 20mm heating pipe pushes into pre-formed grooves in the boards
3. Pipe connects to a manifold (typically hidden in a cupboard or under stairs)
4. Your chosen floor finish goes straight on top, carpet, wood, laminate, vinyl, tiles, or stone
**Key specs:**
- Board thickness: 16mm or 20mm (plus your floor finish on top)
- Pipe size: 16mm continuous, no joins under the floor
- Heat-up time: 30-40 minutes
- Operating temperature: 35-45°C
- Compatible with any heat source: gas boiler, oil boiler, heat pump, biomass
The aluminium coating on the boards is the key to the "rapid response" claim. It spreads heat quickly and evenly across the floor surface, unlike screed systems that need to warm up a thick layer of concrete first.
### Screed underfloor heating
Wunda also offers traditional screed systems for new builds and major renovations where you're already pouring new floors. These are standard wet UFH systems, with pipe clipped to insulation and then covered with screed. They take longer to heat up than the Rapid Response® system but offer better thermal mass (holds heat longer).
### Joist-mounted systems
For suspended timber floors, Wunda offers between-joist solutions. The pipe sits between floor joists with aluminium heat transfer plates, making the system suitable for upstairs rooms in older properties with suspended floors.
### WundaSmart controls
Wunda's own smart control system. It's been reviewed by TechRadar (4.5/5) and was Good Housekeeping Approved in 2023.
**What it does:**
- Control each room independently via app (iOS and Android)
- Voice control through Alexa and Google Home
- Geofencing, heating adjusts based on your phone's location
- Adaptive start, learns how long your home takes to heat up
- Open window detection, pauses heating if a draught is detected
- E Ink room thermostats (battery-powered, no wiring needed for retrofit)
**What's good about it:**
- Separate room thermostats (not built into the radiator head) give more accurate temperature readings
- Uses its own RF signal, so it needs no Wi-Fi repeaters and works in large properties
- Supports up to 30 rooms and 50 devices
- Data stays local (not cloud-dependent), and the system works even if your internet goes down
**Pricing:**
- HubSwitch (main controller): included in system quotes
- Room thermostats: £49.95 each
- Screenless thermostats: £40 each
- Smart radiator heads: £55.95 each (for radiators elsewhere in the house)
- UFH wiring centre: £99.95 per manifold

## Wunda Pricing (2026): What Does It Actually Cost?
Wunda publishes indicative pricing on their website. **These are system-only costs (exc VAT);** installation labour is separate.
Unlike many competitors who sell through plumbing merchants (adding a 20-40% markup), Wunda sells direct from the manufacturer. This keeps the price of the core materials highly competitive.
| Project Size & Type | Average Area | Approx. System Price (exc VAT) |
|---------|------|------------------------|
| **Single Room Retrofit** | 15-25m² | £500-£900 |
| **4-Bed House, Ground Floor** | ~57m² | From £1,899 |
| **4-Bed House, Two Floors** | ~127m² | From £3,499 |
### What's included in that price:
- **Rapid Response® boards:** The core of the system (16mm or 20mm).
- **16mm heating pipe:** Continuous, multi-layer pipe (no joins under the floor).
- **Manifold with pump:** The central distribution point.
- **WundaSmart wiring centre:** The hub for the controls.
- **Free system design & layout plans:** Tailored specifically for your home.
- **Technical support:** UK-based help during and after installation.
### What's NOT included (Budget for these extras):
- **WundaSmart room thermostats:** From £40 each for the screenless versions, up to £49.95 for the E-Ink displays.
- **Installation labour:** If you aren't doing it DIY, expect to pay £1,000-£3,000 depending on the project size.
- **Plumber and Electrician:** You *must* use a qualified plumber for the manifold-to-boiler connection, and an electrician for the smart controls.
- **Floor prep and final finish:** Your chosen carpet, tiles, or wood, plus any required self-levelling compound or tile adhesive.
**How this compares:** Wunda's pricing is extremely competitive for wet overfloor systems. For a typical 4-bed house doing a full ground floor renovation, budget around £3,500-£5,500 all-in (system + installation + controls).
For an instant estimate tailored to your room size, use our free **[Underfloor Heating Cost Calculator](/underfloor-heating-cost-calculator/)**. Or, for a broader look at overall UFH costs across the UK, see our full [underfloor heating costs guide](/underfloor-heating-costs/).
## What real customers say
### The good
**Customer service is the standout.** Across Trustpilot, forums, and YouTube reviews, Wunda's support team gets consistent praise:
> "I have asked a few questions of your support team in the past and every one has been dealt with efficiently and in a very friendly and non-technical manner.", Peter, Trustpilot
> "I must congratulate your Tech Help people, for their generous and thorough help. That kind of customer service is pretty rare these days.", George Malcolm Tyrrell, Trustpilot
**The system works as advertised.** Meg Coates, a DIY renovator who documented her Wunda install on YouTube, ran it through a full UK winter in her 1940s bungalow. Her verdict: the room gets "really warm, to the point that my dog genuinely doesn't like it." She says she'd absolutely do it again and regrets not running it through the whole downstairs.
**Installation is genuinely DIY-friendly.** Multiple forum users and video reviewers confirm the boards are straightforward to lay. One MoneySavingExpert user said: "I fitted it myself, phoned a couple of times for advice during commission, company happy to help. I would use them again."
**Heat-up time is real.** The 30-40 minute claim holds up. Meg Coates noted about 45 minutes with her floor finish down, which is comparable to radiator warm-up times.
### The less good
**Overfloor height increase.** The 16mm or 20mm boards plus your floor finish means you'll have a step up at doorways. If you're doing the whole floor level, this is manageable. If you're only doing one room, you'll notice the transition. Meg's biggest regret was not running it everywhere, partly because of the step between her UFH room and the rest of the house.
**Traditional thermostats look dated.** This came up on the Overclockers forum: the standard Wunda thermostats (non-smart) look a bit old-fashioned. The WundaSmart E Ink thermostats solve this, but they're an extra cost.
**Water-only, no electric option.** If you just want to warm a small bathroom floor, Wunda isn't the right tool. Electric UFH from [Warmup](/smart-thermostats-underfloor-heating/) or ProWarm is simpler for single-room jobs.
**Requires a plumber and electrician.** Unlike electric UFH mats which a competent DIYer can fully install, Wunda's wet system needs a plumber for the final connections and an electrician for the controls. Factor this into your budget.
## Installation: Can You Really DIY It?
A huge part of Wunda’s appeal is the **Rapid Response® Overfloor System**, which is specifically marketed toward DIYers. So, how hard is it really?
According to hundreds of customer reviews and DIY videos, installing the boards and pipes is straightforward for anyone competent at DIY. It works like a large puzzle:
1. **Floor Prep:** The existing floor (concrete or wood) must be clean, dry, and perfectly flat. This is critical.
2. **Laying the Boards:** The 16mm or 20mm EPS boards are glued directly onto the subfloor using an approved spray adhesive. You follow the free layout plan provided by Wunda’s design team, cutting boards where necessary to fit the room’s shape.
3. **Running the Pipe:** Once the adhesive sets, you literally "walk" the 16mm heating pipe into the pre-cut grooves in the aluminium-coated boards. Because the plan dictates the exact loops, there is no guesswork, and importantly, **no joins under the floor** to cause future leaks.
4. **Testing:** The system must be pressure tested to ensure there are no faults in the pipe before the final floor finish goes down.
### The Catch (Where You Need Pros)
While you can lay the boards and pipes yourself (saving hundreds, potentially thousands on labour), **you cannot commission the system**.
* **A Plumber:** Must connect the manifold to your central heating system (boiler or heat pump) and ensure it’s balanced correctly.
* **An Electrician:** Must safely wire the WundaSmart controls, thermostats, and the manifold pump into your home’s electrical circuit.
**Flooring Considerations:** Wunda’s system works with several floor finishes, but you must follow the company's specific flooring guides. For example, if laying Luxury Vinyl Tiles (LVT), you'll need to install Wunda Duo Board (with a vapour barrier) or a self-levelling compound *over* the heating pipes first. For wood or laminate, an XPS underlay is typically required. All installations will require a temperature-sensing floor probe to ensure the floor doesn't overheat.

## Wunda vs the competition
### Wunda vs Warmup
| | Wunda | Warmup |
|---|---|---|
| System type | Water (wet) only | Electric and water |
| Best for | Whole-house retrofits, replacing radiators | Single rooms, bathrooms, smart control |
| Heat-up time | 30-40 minutes | Electric: minutes; Water: varies |
| Running costs | Low (water-based) | Electric: high for large areas |
| Smart controls | WundaSmart (4.5/5 TechRadar) | 6iE WiFi thermostat (industry-leading) |
| DIY-friendly | Yes (boards) | Yes (electric mats) |
| Pricing | From £1,899 (57m² system) | Electric mats from £100/room |
**Bottom line:** Different tools for different jobs. Wunda wins for whole-house wet heating projects. Warmup wins for bathroom electric mats and premium smart thermostat tech.
### Wunda vs ProWarm
| | Wunda | ProWarm |
|---|---|---|
| System type | Water only | Electric and water |
| Supply model | Direct from manufacturer | Direct (trade supplier) |
| Best known for | Rapid Response® overfloor | Value electric mats, lifetime warranty |
| Support | UK team, 6 days/week | Online/phone support |
| Smart controls | WundaSmart | Third-party thermostats |
**Bottom line:** ProWarm is the go-to for budget electric UFH. Wunda is the specialist for wet overfloor systems. For whole-house retrofits, Wunda's system design service is a real advantage.
### Wunda vs Continal
| | Wunda | Continal |
|---|---|---|
| System type | Water (wet) only | Water (wet) only |
| Supply model | Direct to homeowners and trade | Direct, trade-focused |
| Best known for | Rapid Response® overfloor retrofit | Bespoke system design for self-builds and complex trade projects |
| Trustpilot rating | 4.8/5 | 4.9/5 |
| Showroom access | Chepstow, Wales | Limited, based in Cornwall |
| Best for | Homeowners doing their own retrofit | Plumbers, builders, and heating engineers on new builds |
**Bottom line:** Both are direct-supply wet UFH specialists with excellent customer service reputations, but they serve different buyers. Wunda is built around homeowner-facing retrofit (free layout plans, DIY-friendly boards, UK support line). Continal leans trade-focused, better suited to self-builders working with a plumber or heating engineer on a bespoke new-build design.
### Wunda vs traditional screed UFH
If you're doing a new build or major renovation where screed is going down anyway, a traditional screed system (from brands like Polypipe, Uponor, or John Guest) might make more sense. Screed gives better thermal mass; the floor holds heat longer once warm.
But for retrofits, Wunda's Rapid Response® system has clear advantages:
- No need to dig up floors or pour screed
- Much faster heat-up time (30-40 min vs 2-4 hours for screed)
- Lower disruption, done in days, not weeks
- Works on top of existing concrete, timber, or any solid floor
For more on retrofitting UFH, see our [retrofitting underfloor heating guide](/retrofitting-underfloor-heating/).
## Warranty and guarantees
Wunda backs its systems with a **manufacturer's warranty on the pipe and boards**, and the whole business is covered by **£10m product liability insurance with AXA**, which matters if something ever goes wrong post-installation. As with any UFH brand, the pipe warranty (long-term, decades-scale) is separate from workmanship. Your installer's own warranty covers the labour, so always check both when comparing quotes. See our [underfloor heating quotation guide](/underfloor-heating-quotation/) for what to check on any UFH quote, Wunda included.
## Wunda pros and cons summary
**Pros:**
- Fast heat-up time (30-40 minutes), genuinely responsive
- No floor excavation needed, ideal for retrofits
- Direct manufacturer pricing, competitive
- Excellent UK customer support (6 days/week)
- Free system design and layout plans
- Works with any heat source including heat pumps
- No pipe joins under the floor, 100% leak-proof claim
- DIY-friendly board installation
- WundaSmart controls well-reviewed
**Cons:**
- Water systems only, no electric option for small rooms
- Floor height increase (16-20mm + floor finish)
- Needs plumber and electrician for final install
- Standard thermostats look dated (smart ones cost extra)
- Not ideal for single-room jobs (overkill)
- Limited brand recognition compared to Warmup or Uponor
## Who should buy Wunda?
**Wunda is a good fit if you're:**
- Renovating and want to replace radiators with UFH
- Retrofitting a whole floor or whole house
- Happy with a water-based system connected to your boiler or heat pump
- A competent DIYer who wants to do the boards yourself
- Looking for good after-sales support
**Look elsewhere if you:**
- Just want to warm a bathroom floor (electric is simpler and cheaper for this)
- Are doing a new build with screed already planned (use a traditional screed system from Polypipe or Uponor)
- Want the most advanced smart thermostat on the market (Warmup's 6iE edges it)
- Need a system that's fully DIY-installable end-to-end (electric mats don't need a plumber)
## How to get a quote from Wunda
Wunda offers free, no-obligation estimates. You can:
1. Send your floor plans through their website (wundagroup.com)
2. Call them on 01291 634 149
3. Book a showroom visit
They'll design your system, specify zones, and provide a detailed layout plan, all free. The plan tells you (or your installer) exactly where every board and pipe run goes.
For a full breakdown of what UFH costs across all brands and system types, see our [underfloor heating costs guide](/underfloor-heating-costs/). If you're comparing wet vs electric systems more broadly, our [electric vs water UFH comparison](/electric-vs-water-underfloor-heating-2026/) covers the key decision points.
## The bottom line
Wunda fills a genuine gap in the UK UFH market. The company specialises in water-based overfloor heating and does it well. The Rapid Response® system addresses the main complaint about wet UFH (slow heat-up). The pricing is fair for what you get, and the customer support is good.
If you're renovating and want to ditch your radiators for something more comfortable and efficient, Wunda is worth getting a quote from. Just know what you're buying: it's a whole-room or whole-house solution, not a quick bathroom floor warming job.
**Compare brands?** Explore leading underfloor heating manufacturers on the [Underfloor Heating Directory](https://underfloorheating.directory/manufacturers).
---
--- title: Is Underfloor Heating Worth It? Pros, Cons & Real UK Costs (2026) description: Is underfloor heating worth it? Compare UK installation costs, key pros and cons, and suitability for renovations to make the right choice for your home. url: https://underfloorheating.info/is-underfloor-heating-worth-it/ published: 2026-03-15 updated: 2026-08-21 tags: ['is underfloor heating worth it', 'underfloor heating pros and cons', 'underfloor heating UK', 'electric underfloor heating', 'wet underfloor heating'] ---
# Is Underfloor Heating Worth It? Pros, Cons & Real UK Costs (2026)
> **Quick Answer:** Underfloor heating is usually worth it in UK renovations or new builds where you're already lifting floors and want even heat, warm floors, and clean walls. It's less worth it for a quick, low‑budget retrofit in a single room. Typical installed costs are **£40–£90/m²** for electric systems and **£90–£190/m²** for wet systems. Running costs can be lower than radiators in well‑insulated homes, especially with a heat pump. Explore more advice at [underfloorheating.info](https://underfloorheating.info/) and find suitable installers through the [Underfloor Heating Directory](https://underfloorheating.directory/).
**Considering UFH?** Compare installers and get quotes via the [Underfloor Heating Directory](https://underfloorheating.directory/get-quotes).

Underfloor heating (UFH) is one of those upgrades that people either love or regret. The people who love it usually planned it into a renovation or new build, insulated properly, and understood the slower heat-up time. The people who regret it usually expected instant heat in a cold, draughty room and tried to do it on the cheap.
This guide keeps it honest: the real pros and cons, when it makes sense, and when it doesn't.
---
## The simple decision: worth it or not?
Worth it if:
- You're already renovating or building, so floor access is easy.
- You want even heat and warm floors, not quick blasts of heat.
- You care about clean wall space and furniture freedom.
- You plan to stay in the home long enough to enjoy the comfort and efficiency.
Not worth it if:
- You need a quick, cheap heating fix.
- You're only doing a tiny room and can't justify the cost.
- You can't raise floor height at all.
- The home is poorly insulated and loses heat fast.

---
## Pros of underfloor heating (the real benefits)
### 1) Comfort you actually feel
UFH heats from the ground up, which means the warmest air is where you live, not at the ceiling. Rooms feel more even, with fewer cold spots and less draughting.
### 2) More usable space
No radiators means you can use more wall space for furniture, storage, or open layouts. It sounds minor until you're trying to lay out a small room.
### 3) Lower running costs (for wet systems)
Wet UFH runs at lower flow temperatures than radiators. In a well-insulated home, that can reduce energy use and smooth out heating bills. If you're running a heat pump, it's the best-matched system.
### 4) Quiet and low-maintenance
Once installed properly, UFH just sits there doing its job. No clanking rads, no bleeding, no hot surfaces.
### 5) Summer cooling capability
Homes with wet UFH and a reversible heat pump can also use the same pipework to cool rooms in summer. Read more: [heat pump underfloor cooling](/heat-pump-underfloor-cooling/).
---
## Cons of underfloor heating (the real downsides)
### 1) Higher upfront cost
UFH costs more to install than radiators. That's the biggest drawback for most households.
### 2) More disruption for retrofit
Retrofitting means lifting floors, adding insulation, and often raising floor height. That's messy and can affect doors and thresholds.
### 3) Slower heat-up (especially wet UFH)
Wet systems are designed for steady background heat, not rapid warm-ups. If you like quick heat in the morning, radiators win.
### 4) Furniture and flooring limits
Thick rugs or very high-tog carpets block heat. Some flooring types need careful temperature limits.
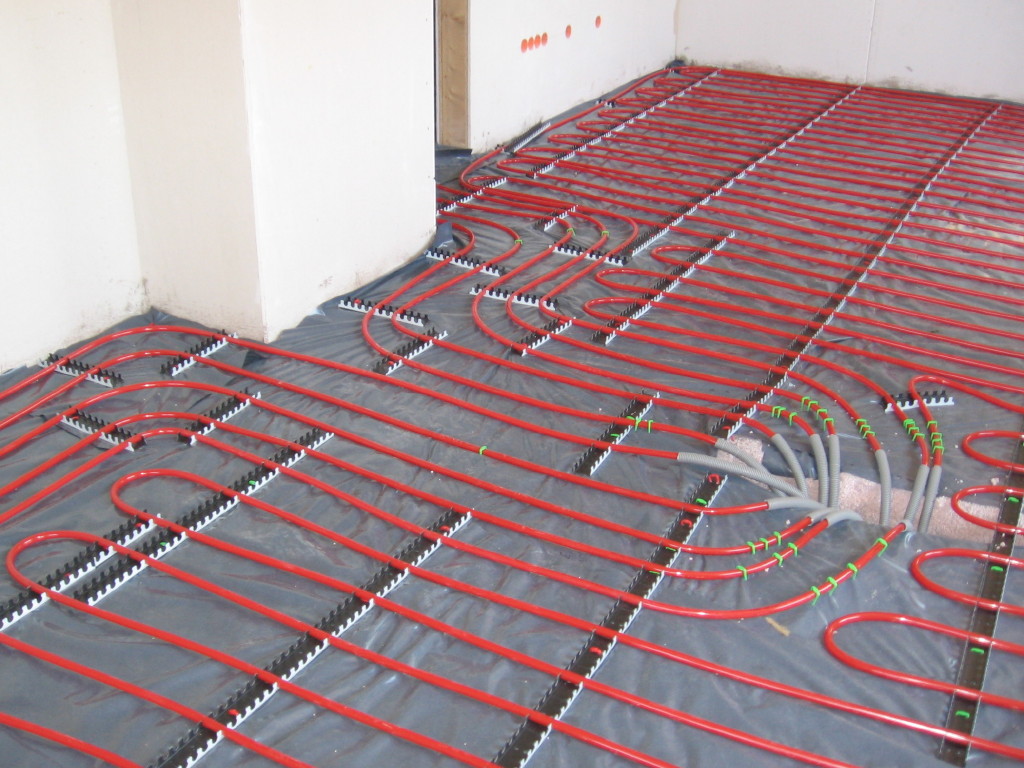
---
## Electric vs wet: which is more "worth it"?
Here's the blunt version:
- Electric UFH is cheaper and easier to fit, great for small rooms.
- Wet UFH costs more to install but is cheaper to run and better for larger areas.
### Typical installed costs (UK)
- Electric UFH: **£40-£90/m2**
- Wet UFH: **£90-£190/m2**
For a detailed breakdown, see the full guide: [Underfloor Heating Costs](/underfloor-heating-costs/).

---
## New build vs retrofit: the biggest cost difference
### New builds
- Easiest time to install UFH
- No floors to lift
- Insulation can be designed in from day one
- Cheaper labour
### Retrofits
- Floor height becomes an issue
- Low-profile systems are often required
- Labour costs go up fast
If you're already replacing flooring, retrofit UFH can be a good option. If you're not touching the floors, it's usually not worth the disruption.

---
## Is UFH worth it in specific rooms?
### Bathrooms
Yes, almost always. Small area, big comfort impact. Electric mats are common and quick to install.
### Kitchens
Usually yes, especially with hard floors. Kitchens are high-traffic and benefit from even warmth. See: [Kitchen UFH costs and systems](/underfloor-heating-costs/).
### Living rooms / open plan
Often yes, particularly in renovations or extensions. Larger areas suit wet systems.
### Bedrooms
Worth it if you choose the right flooring and keep carpet tog low. Works well with zoning.

---
## Does UFH save money to run?
It depends on the system and insulation:
- Wet UFH can be cheaper to run than radiators because it uses lower flow temperatures.
- Electric UFH is usually more expensive to run, so it's best for small areas or occasional use.
Typical UK energy rates used across the site:
- Electricity: ~**27p/kWh**
- Gas: ~**6.9p/kWh**
For real examples and updated tariffs, see: [UFH Running Costs 2026](/underfloor-heating-running-costs-2026/).

---
## UFH vs radiators: which is better long-term?
### UFH wins on
- Comfort (even heat)
- Space (no radiators)
- Efficiency (especially with heat pumps)
### Radiators win on
- Upfront cost
- Speed of heat-up
- Ease of retrofit
If you're planning a long-term renovation, UFH often wins. If you just need quick heat, radiators are the simple option.
---
## What about insulation?
UFH doesn't fix a cold, poorly insulated home. It only spreads heat more evenly. If heat is leaking out through walls, floors, or glazing, you'll still be cold - and your bills will climb.
If your home is draughty, prioritise insulation first. UFH becomes far more effective once heat loss is under control.
---
## The hidden costs people miss
When comparing quotes, make sure these are included:
- Floor insulation boards
- Floor levelling or screed
- Thermostats and zoning
- Door trimming (if floor height rises)
Missing these is how "cheap" quotes become expensive.

---
## Realistic examples (UK)
### Example 1: 12 m2 bathroom (electric)
- System + install: **£500-£900**
- Running cost (short bursts): low, but still higher than gas
- Worth it for comfort
### Example 2: 25 m2 open-plan kitchen (wet)
- System + install: **£2,250-£4,750**
- Lower running cost than radiators over time
- Worth it if renovating the floor anyway
### Example 3: Whole ground floor (70 m2, wet)
- System + install: **£6,300-£13,300**
- Best for long-term homes with good insulation
For quicker estimates, use the [UFH Cost Calculator](/underfloor-heating-cost-calculator/).
---
## Planning tips that make UFH worth it
1) Insulate properly - it's the make-or-break factor.
2) Choose the right system - electric for small areas, wet for larger.
3) Plan your floor build-up - avoid surprises with doors and thresholds.
4) Zone rooms properly - don't heat spaces you don't use.
5) Use the right flooring - avoid thick rugs and high-tog carpet.
See flooring guidance here: [Best Flooring for Underfloor Heating](/best-flooring-underfloor-heating/).

---
## Common myths (and the truth)
Myth: UFH heats the room instantly
- Truth: wet UFH is slow. It's designed for steady warmth, not quick blasts.
Myth: UFH only works with tile
- Truth: it works under most floors if the materials are compatible.
Myth: UFH is always cheaper to run
- Truth: wet UFH can be. Electric usually isn't unless used sparingly.
---
## Is UFH worth it if you're selling soon?
If you're selling in the near future, the payback is less clear. UFH can make a home feel more premium, but the cost might not be recovered fully.
If you're staying long-term, comfort and running efficiency matter more - and that's where UFH shines.
---
## Final verdict
If you want comfort, clear walls, and steady warmth - and you're already working on the floors - UFH is usually worth it. If you want the cheapest, fastest fix, stick with radiators.
Either way, the decision should be based on your room size, insulation level, and how you use the space.
---
## A realistic cost vs comfort breakdown
If you want to judge UFH fairly, compare like with like. Radiators are cheaper to install, but UFH can give lower running costs and better comfort when the home is insulated and the system is zoned properly.
**Example: 30 m2 open-plan kitchen-diner (wet UFH)**
- Installed cost: **£2,700-£5,700** (using £90-£190/m2)
- Typical flow temperature: **35-40°C**
- Efficiency advantage: lower flow temps can reduce boiler cycling and improve heat pump efficiency
**Example: 30 m2 open-plan kitchen-diner (radiators)**
- Installed cost: **£1,200-£2,000** (radiators + pipework)
- Typical flow temperature: **65-75°C**
- Faster heat-up, but less even heat and more wall space used
If you're staying in the home long-term, UFH can win on comfort and aesthetics even if the payback isn't dramatic. If you're moving in a couple of years, radiators are usually the rational choice.

---
## Heat-up time: what to expect
This is where expectations go wrong.
- Electric UFH can feel warm in **30-60 minutes** depending on floor type.
- Wet UFH is slower, often **1-3 hours** to noticeably raise room temperature.
UFH is about *steady background heat*, not rapid temperature swings. If you want instant heat in a cold morning, radiators (or a hybrid system) are still useful.
---
## Flooring compatibility: what works best
Best performers
- Tile and porcelain (great heat transfer)
- Stone (excellent thermal mass)
Good options
- LVT / vinyl (check manufacturer rating)
- Engineered wood (stable, but keep surface temp below 27°C)
Possible but limited
- Carpet (combined tog should be low; check underlay)
If you're unsure, check the flooring guide: [Best Flooring for UFH](/best-flooring-underfloor-heating/).

---
## Zoning and thermostats: the hidden performance boost
UFH only makes sense if you can control it properly. Zoning lets you heat the rooms you actually use, and keep bedrooms or spare rooms cooler.
- One thermostat per room is ideal
- Use floor sensors in tiled areas to protect flooring
- Smart thermostats can automate schedules without overheating
If you want to go deeper on controls: [Smart Thermostats for UFH](/smart-thermostats-underfloor-heating/).

---
## Wet UFH maintenance and lifespan
A wet UFH system isn't high-maintenance, but it isn't zero-maintenance either. In most cases, the pipework is designed to last decades. The parts that need attention are usually:
- Manifolds and pumps
- Actuators
- Thermostats
If you keep the system clean, balanced, and correctly commissioned, wet UFH can last **50+ years**. Electric systems are simpler but have a shorter typical lifespan (around **20-25 years**).
---

## Hybrid systems: when UFH and radiators work together
You don't have to go all-in. A hybrid approach is common in the UK: UFH downstairs, radiators upstairs. That gives you warm floors where you live, while keeping fast heat-up in bedrooms.
Hybrid setups make sense if:
- You're renovating the ground floor only
- You want to keep disruption minimal upstairs
- You have a limited budget but want the main comfort benefits
---

## Quick checklist before you decide
- [ ] Is the floor being lifted anyway?
- [ ] Is the home reasonably insulated?
- [ ] Do you want steady heat or rapid warm-up?
- [ ] Is the room large enough to justify wet UFH?
- [ ] Will you stay in the home long enough to enjoy the upgrade?
If you can tick most of those, UFH is usually worth it.
---
## What installation actually involves (quick overview)
Most people underestimate how much prep matters. A good UFH install isn't just the mats or pipes - it's the whole floor build-up. The basic flow is:
1) Subfloor prep - clean, level, and stable.
2) Insulation layer - stops heat disappearing into the slab.
3) UFH layer - mats for electric, pipes for wet systems.
4) Sensor and thermostat - especially important under tile.
5) Screed or adhesive - locks the system in place.
6) Commissioning - gentle warm-up to avoid cracks.
Skipping insulation or rushing commissioning is where most failures happen. If you want a step-by-step guide, see the [UFH Installation Guide](/underfloor-heating-installation-guide/).

---
## Running cost example (electric vs wet)
Electric example: 10 m2 bathroom mat at 150W/m2 used 3 hours/day
- Power draw: 1.5 kW
- Daily use: 4.5 kWh
- Cost at 27p/kWh: **~£1.22/day**
Wet example: 30 m2 living room on gas, steady background heat
- Heat demand varies, but lower flow temps can reduce boiler cycling
- Gas at 6.9p/kWh makes long-run costs cheaper than electric
This is why electric UFH is great for small rooms but expensive as a whole-house solution.
---
## One more thing: UFH isn't a magic fix
UFH makes a comfortable home feel even better, but it can't rescue a cold, draughty property on its own. If you're losing heat through thin walls, single glazing, or no floor insulation, you'll still feel cold - just more evenly cold. Fix the heat loss first and UFH starts to shine.
---

## Frequently Asked Questions
### Is underfloor heating cheaper to run than radiators?
Wet UFH can be cheaper to run in well-insulated homes because it operates at lower flow temperatures. Electric UFH usually costs more to run.
### Does underfloor heating work with heat pumps?
Yes. UFH is one of the best matches for heat pumps. Learn more in the [Heat Pumps + UFH Guide](/underfloor-heating-heat-pumps-guide-2026/).
### Can I install underfloor heating myself?
Electric mats can be laid DIY, but final electrical connections must be done by a qualified electrician. Wet systems usually require a professional installer.
### Will underfloor heating work under carpet or laminate?
Yes, but the combined tog value must be low enough. Use UFH-rated underlay and follow temperature limits.
### How long does underfloor heating last?
Electric systems often last 20-25 years. Wet pipework can last 50+ years when installed properly.
### Do I need planning permission for UFH?
Not usually for UFH alone. Building regulations still apply, especially Part P for electrical work.
---
If you want a cost-focused version with a detailed ROI table, I can add one.
**Ready to decide?** Compare installers and get quotes via the [Underfloor Heating Directory](https://underfloorheating.directory/get-quotes). Already have a quote? [Check if it's competitive →](https://underfloorheating.directory/analyse-quote)
---
--- title: Underfloor Heating Quotation Guide to Avoid Costly Mistakes description: Confused by underfloor heating quotes? Our 2026 guide breaks down installation costs per m², exposes hidden fees, and helps you compare quotes like a pro. url: https://underfloorheating.info/underfloor-heating-quotation/ published: 2025-12-30 updated: 2026-08-21 tags: ['Quotation'] ---
# Underfloor Heating Quotation Guide to Avoid Costly Mistakes
## Introduction: Average UK market rates:
Getting a straight answer on underfloor heating costs can be frustrating. You ask for a price and get a list of caveats. Use the guidance at [underfloorheating.info](https://underfloorheating.info/) to prepare your project, then visit the [Underfloor Heating Directory](https://underfloorheating.directory/) when you’re ready to compare your options.
There’s a good reason for that. An **Underfloor Heating Quotation** isn't like buying a radiator off the shelf. Your floor layout, insulation levels and heat source all affect the work, so one price won't fit every project.
You still need a useful baseline. Here are the average 2026 market rates for the UK.
### At a Glance: Typical Installation Costs (2026)
| System Type | New Build (per m²) | Renovation (per m²) | Best Use Case |
|---------|---------------------|------------------|-----------|
| **Electric (Dry)** | £50 - £75 | £60 - £85 | Bathrooms, single rooms, kitchen retrofits. |
| **Water (Wet)** | £85 - £100 | £95 - £135+ | Whole house, extensions, open-plan living. |
*Note: These figures estimate "supply and fit". Regional labour rates, especially in London, can push these higher.*
**Ready to request quotes?** Get free, no-obligation estimates from professional installers via the [Underfloor Heating Directory](https://underfloorheating.directory/get-quotes).
---
## System Selection: The First Price Pivot
Your quote hinges on one basic choice: water or electric?
The costs work very differently for each.
### Electric (Dry) Systems
Think of this as the lightweight option. Electric systems use thin wires or mats that sit directly beneath your tiles or timber, and they’re quick to install.
* **The Cost Dynamic:** Low upfront cost. High running cost.
* **Why choose it?** If you’re doing up a bathroom or small kitchen, it makes sense. You don't need a plumber, and an electrician and tiler can sort it out in a day. The [electric underfloor heating cost per square metre](/underfloor-heating-costs/) usually lands between **£50 and £85**.
* **The Catch:** Electricity is expensive. Use it across a large open-plan living area and your monthly bills will climb fast.
### Water-Based (Wet) Systems
This is the heavy hitter. Warm water runs through durable pipes embedded in your floor.
* **The Cost Dynamic:** High upfront cost. Low running cost.
* **Why choose it?** It’s extremely efficient. Pair it with a heat pump and running costs are minimal. It’s the standard choice for new builds and major renovations.
* **The Catch:** Installation is invasive. You’ll need manifolds, plumbing connections and often a fresh layer of screed. That’s why the `wet underfloor heating installation cost` is higher, typically **£90 to £185 per m²**.

---
## The "Hidden Costs" Your Quote Might Miss

This is where I see homeowners get caught out.
A "cheaper" quote can look attractive because it leaves out essential preparation. Check for these line items when you compare quotes. If they aren't there, ask why.
Before you compare prices, check whether each quote includes the right qualified trades. Our [underfloor heating installer qualifications guide](/underfloor-heating-installer-qualifications-uk/) explains what to ask for on electric, wet, gas boiler, and heat pump projects.
### 1. The Screed Factor
With a wet system, screed usually covers the pipes. Who’s paying for it?
Some installers include the pipe laying but *not* the screed pouring. Liquid screed conducts heat brilliantly, but it’s not cheap. If it’s missing from the quote, add **£15 - £25 per m²** to your budget straight away.
### 2. Floor Height Adjustments
Retrofitting? Watch the finished floor height.
Even "low profile" systems add 15-20mm. That sounds negligible, but your doors may no longer close. You’ll need to trim them, remove and refit skirting boards, and possibly cut down kitchen plinths.
Does your heating engineer do carpentry? Probably not. You’ll need a joiner.
### 3. Electrical Upgrades
Wet systems need a manifold, the manifold needs a wiring centre, and the wiring centre needs a spur from your consumer unit.
If your current fuse box is ancient or full, you might need an upgrade for the new pumps and zone controls. A standard plumbing quote rarely includes this electrical work.
### 4. Insulation Boards
I can't stress this enough: **Do not skip insulation.**
Some quotes leave out insulation boards to keep the price down. Without them, you’re paying to heat the earth beneath your house. Make sure your quote specifies *high-performance* insulation (like PIR boards), not just a thin reflective foil.

---
## Running Costs & ROI: The Long Game
Don't judge the job on the installation price alone.
The initial outlay might make you wince, especially next to a bog-standard radiator swap. But long-term efficiency gains, often hovering around the 25% mark, change the financial picture.

**Monthly Cost Estimates (10m² Room):**
* **Electric System:** £2.25 - £4.17 per month.
* **Wet System:** £0.42 - £1.00 per month.
*Based on standard 2026 energy caps. Actual costs depend on your insulation.*
If you’re renovating a whole floor, the wet system pays for itself. It adds value to the property too. Estate agents love listing "underfloor heating" as a premium feature.
> **Tip:** Considering a heat pump? A wet UFH system is its perfect partner. They both thrive at low flow temperatures (35°C - 45°C), maximising your system's efficiency (CoP). Check out our [Heat Loss Calculator](/heat-loss-calculator/) to see what your home needs.
---
## How to Compare Quotes (The "Apples-to-Apples" Checklist)

You’ve got three quotes, and one is £2,000 cheaper than the others. Before you bite their hand off, run each one through this checklist.
* [ ] **Scope:** Is it "Supply & Fit" or just "Supply"?
* [ ] **Manifold:** Is the manifold and mixing unit included? (Expensive kit).
* [ ] **Controls:** Does it include thermostats for every room? Are they smart/WiFi enabled? See our [Smart Thermostats for Underfloor Heating guide](/smart-thermostats-underfloor-heating/) for what to look for.
* [ ] **Commissioning:** Will they pressure test the system and fill it with inhibited water?
* [ ] **Waste:** Will they take the rubbish away? (Packaging fills a skip fast).
* [ ] **Warranty:** Is the warranty on the *pipe* (usually 50 years) or the *workmanship* (usually 1-2 years)? You need both.
> **Already have quotes in hand?** Upload them to the [UFH Quote Analyser](https://underfloorheating.directory/analyse-quote) to instantly check if the price is competitive and spot any missing line items.
---
## Frequently Asked Questions
**How much should underfloor heating cost for a 20m² room?**
For a wet system, I’d expect you to pay between £2,500 and £3,500 fully installed. Electric might come in closer to £1,200 - £1,500, though running costs will be higher.
**Do you have to dig up the floor?**
Not always. In new builds, it goes in the floor slab. For renovations, you can use "overlay" systems that sit directly on your existing floorboards or concrete. They’re thin (15mm-20mm), so you avoid the mess of excavation.
**Which type of underfloor heating is the cheapest to run?**
Water-based (wet) systems are significantly cheaper to run because gas and heat pump energy tariffs are lower than standard electricity tariffs. If you have solar panels, electric heating becomes much more viable.
**Is underfloor heating worth it?**
For comfort? Yes. You get no cold spots and no ugly radiators taking up wall space. Financially, it makes sense if you plan to stay in the home for a few years or you’re pairing it with a heat pump.
---
## Ready to get accurate numbers?
Don't guess. Every house has a different heat profile.
Use these tools to refine your plan before you call installers.
* [**Heat Loss Calculator**](/heat-loss-calculator/) - Find out how much power you actually need.
* [**Electric UFH Guide**](/electric-underfloor-heating-systems/) - Deep dive into electric options.
*Disclaimer: Prices cited are based on UK market averages for 2026 and subject to regional variation.*
**Ready to get your quotes?** Compare installers and request competitive quotes through the [Underfloor Heating Directory](https://underfloorheating.directory/get-quotes).
---
--- title: Underfloor Heating Running Costs UK 2026: From £0.55/Day. Worked Examples description: Underfloor heating running costs start from £0.55 a day. See 2026 UK rates, room-by-room examples and practical tips to reduce household energy bills. url: https://underfloorheating.info/underfloor-heating-running-costs-2026/ published: 2025-12-15 updated: 2026-08-21 tags: ['underfloor heating running costs', '2026 energy prices', 'electric underfloor heating', 'wet underfloor heating', 'ufh efficiency'] ---
# Underfloor Heating Running Costs UK 2026: From £0.55/Day. Worked Examples
> **Quick Answer:** A 6 m² bathroom electric mat costs £0.55–£0.75/day to run (2 hrs/day at 27p/kWh). A 12 m² kitchen wet UFH on gas costs £1.60–£2.40/day (8 hrs/day at 6.9p/kWh). A 30 m² open-plan space with a heat pump runs at £3.20–£4.70/day. Full worked examples, efficiency tips, and calculator method below.
> For more UK heating guidance, visit [underfloorheating.info](https://underfloorheating.info/) or compare local options through the [Underfloor Heating Directory](https://underfloorheating.directory/).
>
> 🧮 **[Get a personalised running cost estimate with our free calculator →](/underfloor-heating-cost-calculator/)**
This is the **operating cost guide**. If you need supply and installation prices first, start with the [underfloor heating costs guide](/underfloor-heating-costs/). If you’re choosing between electric and wet UFH, use the [electric vs wet comparison](/electric-vs-water-underfloor-heating-2026/). Here, I’m focusing on what the system costs once it’s installed.
One question comes up constantly when I speak to heating engineers and homeowners across the UK: "Will this bankrupt me?"
The honest answer? Underfloor heating *can* cost less to run than radiators, but the design and controls have to be right. I’ve seen systems that looked expensive at first turn out to be very efficient. I’ve also seen others cost a fortune because nobody considered insulation or flow temperature tuning.
For this 2026 guide, I’ve used current UK price cap figures, realistic efficiency numbers from actual installations and clear worked examples. You can use them to set a sensible budget or spot when something isn’t right with your current system.
## What you'll actually pay in 2026
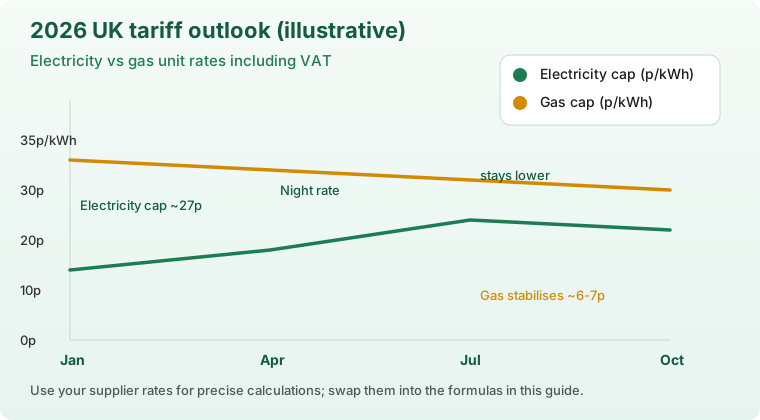
- Per m² (heated):
- Electric mats: £0.23–£0.31 per hour at the 2026 cap (unit rates of ~27p/kWh; 170–230 W/m² output used intermittently).
- Water (gas boiler): £0.06–£0.10 per hour (gas at ~6.9p/kWh; 75–90% system efficiency).
- Water (heat pump assist): £0.04–£0.07 per hour (electricity at ~27p/kWh; COP 2.8–3.5 on low flow temperatures).
- Per room, typical winter schedule:
- 6 m² bathroom electric mat (2 hours/day): £0.55–£0.75/day.
- 12 m² kitchen wet UFH on gas (8 hours/day with setback): £1.60–£2.40/day.
- 30 m² open-plan space with heat pump (10 hours/day, weather-compensated): £3.20–£4.70/day.
These figures assume good insulation and the correct flow temperatures. If your system cycles on and off frequently, or your floor covering insulates the pipes, expect to land at the upper end of the ranges.
## How to calculate your own running costs
If you’ve got a design sheet or know your system’s basic specs, you can work this out yourself. The formula is straightforward. Here’s the method I use when I assess a system for someone.
First, figure out how much heat you actually need
Start here. You need either:
- For electric mats: the wattage per m² (usually printed on the product)
- For wet systems: your room's heat loss (W) from a proper heat loss calculation, or ask your installer for the pipe output per circuit
Don't guess. A rough estimate now leads to nasty surprises later.
Next, account for real-world efficiency
This is where most people go wrong. Electric heating is 100% efficient at the point of use, but thermostat cycling adds about 5–10% overhead. Gas boilers deliver 75–90% seasonal efficiency depending on the system and maintenance.
Heat pumps need more care because their COP (coefficient of performance) changes with flow temperature. Run one at 45°C and you'll see COP of 2.5–3.0. Run it at 30°C and that climbs to 3.5–4.0. Use your actual design flow temperature, not the best number in the brochure.
Then run the simple daily cost calculation
Multiply it out:
- Daily cost (£) = (Heat demand in kW ÷ efficiency) × your tariff (£/kWh) × hours it runs per day
For example: A 12 m² room with 70 W/m² design load = 0.84 kW demand. Gas boiler at 85% efficiency. Gas at 6.9p/kWh. Running 8 hours a day:
- (0.84 ÷ 0.85) × £0.069 × 8 = £0.55/day or about £16.50/month during winter.
Finally, account for your control strategy
Controls matter more than most people think. A system that holds a steady low temperature uses less energy than one cycling between off and full blast. Weather compensation (adjusting flow temperature based on outdoor temperature) cuts waste significantly.
Night setback *does* help, but don't drop the temperature too far. A long reheat cycle in the morning can wipe out the savings.
If you don't have a heat loss calculation, use typical values: 60–80 W/m² for modern well-insulated rooms, 90–120 W/m² for older properties without upgrades. Measure only the *heated* area, not the full room footprint.
## 2026 UK energy price benchmarks (price cap)
| Tariff type | Unit rate (inc. VAT) | Standing charge (daily) | Notes |
| :--- | :--- | :--- | :--- |
| Electricity (Typical Direct Debit) | ~27p/kWh | ~60p | Use for electric UFH or heat pump electricity draw. |
| Dual-rate Economy 7 (night) | 12–15p/kWh | ~60p | Useful if pre-heating floors overnight; day rate higher (32–35p/kWh). |
| Gas (Typical Direct Debit) | ~6.9p/kWh | ~29p | Use for boiler-supplied wet UFH. |
These are rounded averages for winter 2026–2027 Ofgem caps. Regional variance and supplier discounts apply; swap in your own rates for accuracy.
## System-by-system comparison for 2026

### Electric underfloor heating: the responsive option
Electric works best in bathrooms, small kitchens, loft conversions or rooms you only use occasionally. Why? It responds quickly. Turn it on and you’ve got warmth in 30–60 minutes. The trade-off is the roughly 27p per kWh tariff, which adds up if you run it all day.
What works well is using electric as a *targeted* solution. A 6 m² bathroom mat running 2 hours a day costs less than £25/month, even in winter. Add a good thermostat with a floor sensor (the 28–29°C limit is key because you don't want scalding floors). Presence detection also keeps bills in check in rooms you only use now and then.
Don't run an electric mat constantly "just in case."
### Water (wet) underfloor heating on a gas boiler
This is the traditional choice for whole-house heating, and it still makes sense if you’ve already got a condensing boiler. The numbers work because gas costs far less per kWh (6.9p) than electricity.
What do I see installers get wrong? Flow temperature. Run gas UFH at 55–60°C and you lose the efficiency benefits. Keep it below 45–50°C and your boiler stays in condensing mode, where it’s 10–15% more efficient.
Smart zoning and weather compensation pay for themselves within a year by preventing energy-wasting short-cycling and overshoot. Balance the circuits too. I’ve seen manifolds where one zone gets all the heat and others get nothing, forcing the owner to raise the flow temperature to compensate.
### Water UFH with a heat pump: the efficient play
Heat pumps are the lowest-cost option *if* you’ve insulated properly and can run low flow temperatures (30–35°C). Under those conditions, COP climbs to 3.5–4.0, so you get 3.5 to 4 units of heat for every unit of electricity you consume.
The problem? People pair heat pumps with poor floor insulation or high-tog carpets, forcing higher flow temperatures. COP drops to 2.5–2.8 and it’s no longer the bargain it should be.
Don't fiddle with the setpoint constantly. Let weather compensation do its job. Pair a heat pump with smart controls and low-tog flooring, and you’ll have the cheapest heating in your street.
One bonus if you choose a reversible model: the same heat pump can run [underfloor cooling](/heat-pump-underfloor-cooling/) in summer for pennies per day, since cooling EERs of 3 to 4.5 keep the delivered cost very low.
## Room-by-room worked examples
| Scenario | Assumptions | Daily runtime | Estimated daily cost | Why it lands here |
| :--- | :--- | :--- | :--- | :--- |
| Small bathroom (6 m² electric mat) | 200 W/m² output, 80% heated area, 27p/kWh electricity | 2 hours split morning/evening | £0.55–£0.75 | High output density but short, targeted use keeps totals manageable. |
| Kitchen/diner (12 m² wet UFH on gas) | 70 W/m² design load, 85% heated area, boiler at 85% efficiency, 6.9p/kWh gas | 8 hours with 2°C night setback | £1.60–£2.40 | Low unit rate offsets long runtime; efficiency improves with balanced circuits. |
| Open-plan living (30 m² heat pump UFH) | 55 W/m² design load, COP 3.1 at 33°C flow, 27p/kWh electricity | 10 hours with weather compensation | £3.20–£4.70 | Higher hours but strong COP keeps delivered cost competitive with radiators. |
Use these as guardrails. If your property has solid floors without insulation or drafty glazing, add 20–30% to the figures.
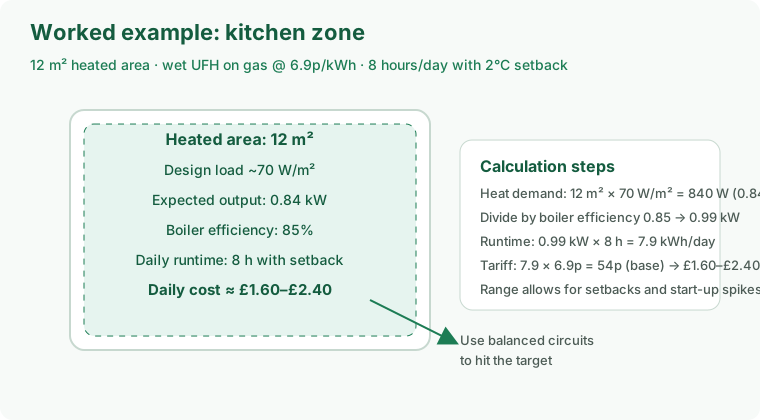
## The real efficiency levers (and which ones matter most)
Not every efficiency tweak delivers the same result. Some save £5/month. Others save £50. Here’s what makes a real difference based on what I’ve seen in installations.
1. Insulation and floor buildup, this is the heavyweight
This is the single biggest factor. I’ve seen systems that looked expensive run cheaply because someone invested in proper insulation, and vice versa. Thin insulation or high-tog carpets force higher flow temperatures, which destroys efficiency across every system type.
Aim for <0.15 m²K/W resistance. Include perimeter insulation at screed edges (where heat leaks to the ground). If you're using carpet, choose low-tog (<0.5 tog). The upfront cost of good insulation pays back within 2–3 winters and improves comfort dramatically.
2. Flow temperature, worth 10–15% of your running cost
Start wet systems at 30–35°C. Only increase the temperature in 2°C steps if rooms won't reach setpoint. Heat pumps get expensive fast at high temperatures, and lower temperatures also transform gas boiler efficiency. Run a condensing boiler at 40°C instead of 55°C and you’re looking at 10–15% less gas consumption. That’s real money.
3. Smart zoning and scheduling. 40–50% savings potential
Don't heat the study if nobody works there, and don't run bathrooms at the same temperature as living areas. Group rooms by how you use them.
Weather compensation adjusts flow temperature based on outdoor weather, preventing wasteful overshoot on mild days. I’ve seen this cut winter bills by £40–60/month in open-plan homes.
4. Smart thermostats and floor sensors, prevents costly mistakes
These aren't just nice extras. A floor probe in a bathroom prevents overheating (you don't want 32°C floors). Open-window detection stops the heating when someone’s venting, while adaptive learning remembers your routine and preheat times. Together, they prevent the constant boiler cycling that kills efficiency.
5. Floor coverings, seems minor but adds up
Tiles and engineered wood are ideal. Vinyl is fine. Thick underlay or rugs can add 0.5 tog or more, though, which forces higher temperatures.
I once consulted on a renovation where the owners had put 2.5-tog wool rugs over UFH after installation. Costs went up 20% compared with the design estimates. Swapping to low-tog rugs immediately cut £25/month off the bill.
6. Manifold balance and annual maintenance, the overlooked efficiency killer
Bleed air out of the circuits and check manifold flow rates once a year. Make sure the pump’s proportional pressure valve works (a pump set too high causes short cycling and noise). This work doesn't cost much, but it prevents the constant on/off cycling that burns energy.
I found the wrong pump setting on one system. Fixing it cut £15/month off the gas bill.
## What to ask an installer before accepting a quote
You lock in most running costs before the floor goes down. Before you accept a UFH quote, ask:
- What heat loss figure has been used for each room?
- What flow temperature is the wet UFH designed around?
- What COP is assumed if a heat pump is involved?
- What insulation layer is included below the system?
- What floor covering and tog or thermal resistance has been assumed?
- How will each zone be controlled and balanced?
If an installer can't answer those questions, their running-cost estimate is only a guess. For quote structure and red flags, use the [underfloor heating quotation guide](/underfloor-heating-quotation/).
## How UFH compares to radiators in 2026
- Comfort: UFH delivers even, low-level warmth and reduces convective draughts. Radiators create hot–cold spots and can feel stuffy at higher flow temperatures.
- Efficiency: With low flow temperatures (30–45°C), UFH keeps condensing boilers in condensing mode and maximises heat pump COP, typically cutting energy use by 10–25% versus well-sized radiators.
- Control and zoning: UFH allows granular zoning room by room; radiator TRVs often allow less precision unless paired with smart heads.
- When radiators still win: Quick warm-up in seldom-used rooms, heritage properties with limited floor build-up, or ultra-low budgets where capital cost trumps long-term running efficiency.
## Maintenance and troubleshooting: catch problems before they cost you money
If your running costs look suspiciously high, check these things first.
Do rooms take forever to reach temperature (>2 hours)? Does the manifold sound like a coffee machine? Does the boiler cycle on and off constantly, even on mild days? These are the red flags I see when something isn’t right.
You can do these quick checks yourself:
1. Check your thermostats, especially in bathrooms. If you’re running a floor probe, the limit should be 28–29°C. If the thermostat reads air temperature instead, it’ll overshoot and waste energy.
2. Look at the manifold flow meters. If one circuit gets 15 L/min and another only gets 5 L/min, they’re unbalanced. That cheaper circuit won't heat properly, so your system works harder to compensate. Balancing takes 20 minutes and saves money every month.
3. Check your setback temperatures. A 1–2°C night setback saves energy. Drop it by 5°C or switch it off completely, though, and you force a long morning reheat cycle that costs more than you saved overnight.
When you need to call your installer:
Call your installer if circuits still contain air after bleeding, if you can't get rooms above 18°C without running flow temperatures above 50°C (design issue or insulation problem), or if the boiler’s hunting (constantly cycling). That’s beyond a DIY fix. You’ve probably got a deeper issue with circuit design, balancing or the property’s insulation.
[Check out our Underfloor Heating Manifold Guide](/underfloor-heating-manifold-guide/) for more detail on maintaining your system.
## Frequently asked questions
### [Is underfloor heating worth it in 2026?](/is-underfloor-heating-worth-it/)
Yes, but with caveats. Pair UFH with a heat pump or modern condensing boiler in a well-insulated home and you’ll get comfortable heating that costs less than radiators. Put it in a draughty 1970s terrace with thin insulation and high ceilings, and you might not see the savings.
Do the heat loss calculation first. If your heating demand is reasonable, UFH is worth it.
### How do I budget for seasonal changes?
Take the daily cost figures above and multiply them by the number of days you expect to heat that month. Winter (Dec–Feb) typically runs 1.5–2× hotter than autumn and spring, so factor that in.
Summer bathroom boosts on electric mats usually cost pocket change, even for 2–3 months: less than £10/month usually. Winter heating is the big cost. Budget for it.
### Do I really need separate thermostats for each zone?
Ideally, yes, but it depends on how you live. If you heat the whole house to the same temperature, one thermostat’s fine. If you’ve got an unused study, a guest bedroom or different comfort preferences around the house, separate controls (or a multi-zone smart system) pay for themselves within 1–2 years because you stop heating empty rooms. It’s also the only way to keep flow temperatures optimised across different zones.
## Helpful resources and next steps
- [Electric vs wet underfloor heating comparison](/electric-vs-water-underfloor-heating-2026/)
- [Electric underfloor heating systems guide](/electric-underfloor-heating-systems/)
- [Wet underfloor heating design and installation](/wet-underfloor-heating-ultimate-guide/)
- [Best flooring for underfloor heating](/best-flooring-underfloor-heating/)
- [Smart thermostat tips for UFH](/smart-thermostats-underfloor-heating/)
- [Common underfloor heating problems and fixes](/underfloor-heating-problems/)
Update these inputs with your latest tariff each quarter. If you’re renovating or specifying a new system, take these calculations and your installer’s heat loss data and lock in low running costs before the floor goes down.
---
--- title: Annual Underfloor Heating Maintenance Checklist: Complete UK Guide description: Follow this annual underfloor heating maintenance checklist to improve efficiency, spot faults and keep your UK system reliable throughout every season. url: https://underfloorheating.info/annual-underfloor-heating-maintenance-checklist/ published: 2025-11-23 updated: 2026-08-21 tags: ['underfloor heating maintenance', 'ufh checklist', 'annual service', 'preventive maintenance', 'heating maintenance', 'ufh care'] ---
# Annual Underfloor Heating Maintenance Checklist: Complete UK Guide
## Your Complete Annual Maintenance Checklist for Underfloor Heating
A well-maintained underfloor heating system can last 50+ years for wet systems and 20-30+ years for electric systems. But this longevity doesn't happen by accident. Regular, proactive maintenance prevents costly breakdowns, maintains peak efficiency, and protects your investment. Explore more practical advice at [underfloorheating.info](https://underfloorheating.info/) and find qualified professionals through the [Underfloor Heating Directory](https://underfloorheating.directory/).
This comprehensive checklist provides a practical, seasonal maintenance schedule for both electric and water-based underfloor heating systems in UK homes.

New to underfloor heating? Start with our [Beginner's Guide to Underfloor Heating](/underfloor-heating-beginners-guide/) to understand system basics first.
**Need professional maintenance?** Find qualified underfloor heating engineers who can service your system via the [Underfloor Heating Directory](https://underfloorheating.directory/installers).
## Why Annual Maintenance Matters
Regular maintenance isn't just about fixing problems when they occur; it's about preventing them entirely.
**The benefits of preventive maintenance:**
- **Prevents costly breakdowns:** Early detection stops minor issues becoming major failures
- **Maintains efficiency:** A well-serviced system runs at peak performance, reducing energy bills by up to 15%
- **Extends system lifespan:** Properly maintained systems outlast neglected ones by decades
- **Preserves warranty:** Most manufacturers require proof of annual servicing
- **Saves money:** A £150 annual service costs far less than a £1,000+ emergency repair
- **Maintains property value:** Well-maintained heating systems add to resale value
For detailed cost information including maintenance expenses and ROI calculations, see our [Underfloor Heating Costs Guide](/underfloor-heating-costs/).
## Monthly Quick Checks (5 Minutes)
These simple monthly checks take just five minutes but catch most common issues before they become problems.
### For All Systems
**Thermostat Function Check:**
- ☐ Test thermostat response (adjust temperature up, confirm heating activates)
- ☐ Check display clarity and accuracy
- ☐ Verify room temperature reading seems accurate
- ☐ Confirm heating schedules are correct for current season
- ☐ Test heating turns off when target temperature reached
**Battery Check (Wireless Thermostats):**
- ☐ Check battery level indicator
- ☐ Replace batteries if low (typically once yearly)
- ☐ Keep spare batteries on hand
### For Wet Systems Only
**Pressure Gauge Check:**
- ☐ Check pressure gauge when system is cold
- ☐ Confirm reading is in green zone (typically 1.0-1.5 bar)
- ☐ Top up if pressure has dropped below 1.0 bar
- ☐ Note any frequent pressure loss (indicates potential leak)
**Visual Manifold Inspection:**
- ☐ Check for drips or moisture around manifold connections
- ☐ Look for corrosion or water stains
- ☐ Ensure area around manifold is clear and accessible
- ☐ Check actuators have power indicator lights on (when calling for heat)
[Check out our Underfloor Heating Manifold Guide](/underfloor-heating-manifold-guide/)
**Listen for Unusual Sounds:**
- ☐ System should operate silently or with gentle water flow sound
- ☐ Note any gurgling (indicates air in system)
- ☐ Note any banging or clicking (indicates actuator or valve issues)
## Quarterly Seasonal Checks
Perform these more detailed checks at the start of each season to prepare your system for changing demands.
### Spring (March-April)
**End of Heating Season Maintenance:**
- ☐ Review winter energy consumption and compare to previous years
- ☐ Note any cold spots or uneven heating that developed
- ☐ Clean dust from thermostats and sensor areas
- ☐ Consider reducing heating schedules as weather warms
- ☐ Schedule annual professional service (wet systems)
### Summer (June-July)
**Off-Season Care:**
- ☐ Test system briefly to ensure it still functions
- ☐ Check system pressure hasn't dropped (wet systems)
- ☐ Clean or replace air filters on heat source (boilers/heat pumps)
- ☐ Review and update heating schedules for next season
- ☐ Inspect accessible pipework for any visible issues
### Autumn (September-October)
**Pre-Heating Season Preparation:**
This is the most important quarterly check. See detailed checklist below in "Pre-Heating Season Preparation" section.
### Winter (December-January)
**Peak Season Monitoring:**
- ☐ Monitor energy consumption and system performance
- ☐ Check all zones heating evenly and adequately
- ☐ Verify no cold spots have developed
- ☐ Ensure thermostats accurately reflect room temperatures
- ☐ Top up system pressure if needed (wet systems)

## Annual Professional Service
Professional servicing is essential for wet systems and recommended every 2-3 years for electric systems.
### What to Expect from a Professional Service
**For Wet (Hydronic) Systems (Annual):**
A qualified heating engineer should perform these comprehensive checks:
**System Water Quality:**
- Water sample analysis for correct inhibitor concentration
- pH level testing to prevent corrosion
- System flush if water is dirty or contaminated
- Refill with correctly treated water
**Component Inspection:**
- Circulation pump operation and speed settings
- All manifold actuators open and close correctly
- Blending valve function and temperature mixing
- Flow meters showing correct rates for each zone
- Expansion vessel pre-charge pressure
- All isolation valves operating smoothly
**System Testing:**
- Pressure test to check for leaks
- Temperature differential between flow and return
- Even heat distribution across all zones
- Thermostat calibration and response times
**Safety Checks:**
- Pressure relief valve operation
- All electrical connections secure
- No signs of leaks, corrosion, or wear
- System pressure correct when hot and cold
**Documentation:**
- Service record updated
- Any issues noted for future monitoring
- Recommendations for repairs or upgrades
**Typical Cost:** £120-£200 for annual service
For comprehensive troubleshooting guidance when issues arise, see our [Underfloor Heating Problems & Troubleshooting Guide](/underfloor-heating-problems/).
**For Electric Systems (Every 2-3 Years):**
A qualified electrician should perform:
**Electrical Safety Tests:**
- RCD (Residual Current Device) trip test
- Insulation resistance test (should read >200 MΩ)
- Continuity check of heating elements
- Earth bonding verification
- Connection tightness check
**Thermostat Testing:**
- Accurate temperature sensing
- Correct heating activation/deactivation
- Floor sensor probe resistance measurement
- All modes and settings functioning
**System Performance:**
- Even heat distribution verification
- Warm-up time assessment
- No signs of cable damage or overheating
**Typical Cost:** £80-£150 for electrical testing and inspection
## Electric System-Specific Annual Checklist
Electric underfloor heating is largely "fit and forget," but these annual checks ensure continued safe operation.
### DIY Annual Checks for Electric UFH
Not sure which tasks you can tackle yourself? See our [DIY Underfloor Heating guide](/diy-underfloor-heating/) for a full breakdown of what's safe to do yourself and what needs a professional. For the original fitting process, use our [underfloor heating installation guide](/underfloor-heating-installation-guide/).
**Thermostat Performance:**
- ☐ Test all heating modes (comfort, economy, manual)
- ☐ Verify floor sensor reading seems accurate
- ☐ Check floor temperature limit setting (should be 27-35°C)
- ☐ Confirm heating cycles correctly (turns on/off at set points)
- ☐ Test manual override function
**Heat Distribution:**
- ☐ Check for any cold spots in heated area
- ☐ Verify even heat across entire floor
- ☐ Ensure no areas feel excessively hot
- ☐ Check heat-up time hasn't increased
**Safety Checks:**
- ☐ Verify RCD trips correctly (press test button on consumer unit)
- ☐ Check no circuit breaker trips when system operates
- ☐ Inspect fused spur for any scorching or damage
- ☐ Ensure no burning smell during operation
**Floor Covering:**
- ☐ Check no new heavy furniture placed over heated area
- ☐ Verify rugs/mats aren't causing hot spots at sensor
- ☐ Inspect floor covering for any heat damage
### Professional Electrical Testing (Every 2-3 Years)
Book a qualified electrician to perform:
- ☐ Insulation resistance test (megger test)
- ☐ RCD operation verification
- ☐ Heating element continuity check
- ☐ Floor sensor resistance measurement
- ☐ Connection inspection and tightness check
For more details on electric systems, see our [Complete Electric Underfloor Heating Guide](/electric-underfloor-heating-systems/).
## Wet System-Specific Annual Checklist
Water-based systems have more components requiring regular attention, particularly before each heating season.
### DIY Annual Checks for Wet UFH
**System Pressure Management:**
- ☐ Check pressure when cold (should be 1.0-1.5 bar)
- ☐ Check pressure when hot (should be 1.5-2.0 bar)
- ☐ Top up if required using filling loop
- ☐ Check expansion vessel pre-charge pressure
- ☐ Note frequency of pressure loss (indicates leak if frequent)
**Manifold Inspection:**
- ☐ Check all actuators moving freely
- ☐ Test each actuator opens when thermostat calls for heat
- ☐ Check visual indicators on actuators
- ☐ Inspect all connections for leaks or weeping
- ☐ Verify flow meters showing movement on active zones
- ☐ Check blending valve operation
- ☐ Ensure isolation valves in correct positions
[Check out our Underfloor Heating Manifold Guide](/underfloor-heating-manifold-guide/)
**System Bleeding:**
- ☐ Bleed each zone to remove trapped air
- ☐ Check for airlocks causing cold spots
- ☐ Re-pressurise system after bleeding
- ☐ Run each zone individually to verify water flow
**Circulation Pump:**
- ☐ Listen for pump operation (low hum when system on)
- ☐ Feel pump body for slight vibration
- ☐ Check pump speed setting appropriate for system
- ☐ Verify no unusual noise or excessive heat
**Heat Source Check:**
- ☐ Boiler/heat pump operating correctly
- ☐ Flow temperature appropriate (typically 35-50°C for UFH)
- ☐ No error codes displayed
- ☐ System fires when UFH calls for heat
For complete wet system information, see our [Ultimate Guide to Wet Underfloor Heating](/wet-underfloor-heating-ultimate-guide/).
## Pre-Heating Season Preparation (September/October)
This is the most critical maintenance period. Perform these checks before the heating season begins to avoid mid-winter breakdowns.
### Complete Pre-Season Checklist
**4-6 Weeks Before Heating Season:**
**System Testing:**
- ☐ Turn system on and test all zones heat correctly
- ☐ Run each zone for minimum 30 minutes
- ☐ Check all zones reach target temperature
- ☐ Verify no cold spots or uneven heating
- ☐ Test heating turns off when temperature reached
**Thermostat Preparation:**
- ☐ Update heating schedules for autumn/winter
- ☐ Replace thermostat batteries (wireless models)
- ☐ Calibrate thermostats if readings seem inaccurate
- ☐ Test all zones' thermostats individually
- ☐ Verify smart thermostat Wi-Fi connection
- ☐ Update thermostat firmware if available
**Wet System Specific:**
- ☐ Check and adjust system pressure
- ☐ Bleed all zones to remove summer air accumulation
- ☐ Test all manifold actuators open and close
- ☐ Check circulation pump operates correctly
- ☐ Verify blending valve set to correct temperature
- ☐ Inspect for any leaks that developed over summer
- ☐ Book annual professional service if not already done
**Electric System Specific:**
- ☐ Test RCD operation
- ☐ Check fused spur and connections
- ☐ Verify floor sensor functioning
- ☐ Test system doesn't trip circuit breaker
**Heat Source Preparation:**
- ☐ Boiler annual service completed
- ☐ Heat pump serviced and refrigerant checked
- ☐ System pressure correct
- ☐ No error codes or faults
**Control System:**
- ☐ Update zoning schedules
- ☐ Review and optimise heating times
- ☐ Set appropriate temperatures (18-21°C typical)
- ☐ Configure setback temperatures for economy
For guidance on optimising your heating zones, see our [Underfloor Heating Zoning Guide](/underfloor-heating-zoning-complete-guide/).

## Record Keeping & Maintenance Log
Keeping accurate records helps track system performance and assists professionals when servicing.
### What to Record
Create a simple maintenance log with these details:
**Monthly Records:**
- Date of check
- System pressure reading (wet systems)
- Any unusual observations
- Thermostat battery replacements
**Annual Service Records:**
- Date of service
- Engineer's name and company
- Work performed
- Parts replaced
- Issues found and resolved
- Inhibitor concentration (wet systems)
- Test results (insulation resistance for electric)
- Cost of service
- Next service due date
**System Events:**
- Any breakdowns or faults
- Repairs carried out
- Parts replaced with dates
- Warranty claims
- Modifications or upgrades
**Energy Monitoring:**
- Monthly energy consumption
- Year-on-year comparison
- Any significant changes requiring investigation
### Sample Maintenance Log Template
```
Annual UFH Maintenance Log - [Your Address]
System Type: [Electric / Wet / Both]
Installation Date: [Date]
Installer: [Company Name]
--- Monthly Checks ---
Date: ___ / ___ / _____
System Pressure: ___ bar (wet only)
Thermostat Function: OK / Issues
Batteries Replaced: Yes / No
Unusual Sounds: None / [Describe]
Notes: ___________________
--- Annual Service ---
Date: ___ / ___ / _____
Service Engineer: ___________________
Company: ___________________
Work Performed: ___________________
Issues Found: ___________________
Parts Replaced: ___________________
Cost: £ _____
Next Service Due: ___ / ___ / _____
```
## When to Call a Professional
Some maintenance tasks require professional expertise. Know when to call for help.
For detailed guidance on finding qualified professionals, cost expectations, and what to expect from professional visits, see our [Complete Guide: When to Call a Professional for UFH Repairs](/when-to-call-professional-underfloor-heating/).
### Immediate Professional Callout Required
Contact a heating engineer or electrician immediately if you notice:
**Wet Systems:**
- ☐ Persistent pressure drops requiring frequent top-ups
- ☐ Damp patches on floors or walls near UFH
- ☐ Complete system failure despite correct pressure
- ☐ Multiple zones not heating
- ☐ Loud banging, grinding, or continuous gurgling noises
- ☐ Pump running but no heat to any zone
- ☐ Visible leaks at manifold or connections
- ☐ Boiler lockout errors related to UFH
**Electric Systems:**
- ☐ RCD or circuit breaker trips repeatedly
- ☐ Burning smell from any component
- ☐ No heat despite thermostat calling for heat
- ☐ Extremely hot spots on floor surface
- ☐ Persistent error codes on thermostat
- ☐ Scorching visible on fused spur
**Both Systems:**
- ☐ Any smell of burning
- ☐ Electrical sparking or burning at any connection
- ☐ Complete system failure with no obvious cause
- ☐ Suspected damage to in-floor components
### Non-Urgent Professional Service Needed
Schedule a professional visit within 1-2 weeks for:
- ☐ Single zone not heating (after checking thermostat/batteries)
- ☐ Minor pressure loss requiring top-up every few months
- ☐ Intermittent heating in some zones
- ☐ Slightly uneven heating across large areas
- ☐ Suspected airlock that won't bleed
- ☐ Actuator not responding to thermostat
- ☐ Noisy pump or unusual vibration
- ☐ Pre-season service and testing
For detailed troubleshooting before calling a professional, consult our [UFH Problems & Solutions Guide](/underfloor-heating-problems/).
## Seasonal Maintenance Calendar at a Glance
Use this quick reference to plan your maintenance throughout the year.
| Month | Maintenance Tasks |
|-------|-------------------|
| **January** | Monthly checks, monitor peak season performance |
| **February** | Monthly checks, note any issues for spring service |
| **March** | Monthly checks, review winter energy use |
| **April** | Quarterly check, reduce heating schedules |
| **May** | Monthly checks, minimal heating required |
| **June** | Quarterly check, summer maintenance |
| **July** | Test system briefly, check pressure |
| **August** | Monthly checks, prepare for pre-season service |
| **September** | **Critical: Full pre-heating season checklist** |
| **October** | Annual professional service (wet systems) |
| **November** | Monthly checks, verify all zones heating correctly |
| **December** | Quarterly check, monitor peak performance |
## Maintenance Costs: What to Budget
Understanding typical costs helps you budget for proper system care.
### Annual Maintenance Costs (2026 UK Prices)
**Wet Systems:**
- DIY monthly/quarterly checks: £0 (your time only)
- Annual professional service: £120-£200
- Inhibitor replacement: £40-£80 (every 3-5 years)
- Actuator replacement: £30-£60 per unit if needed
- Pump replacement: £150-£300 (typically 10-20 year lifespan)
**Electric Systems:**
- DIY checks: £0 (your time only)
- Professional electrical testing: £80-£150 (every 2-3 years)
- Thermostat replacement: £80-£250 (typically 10-15 year lifespan)
- Floor sensor replacement: £50-£120 if needed
**Budgeting Recommendation:**
- Wet systems: Budget £150-£250 annually
- Electric systems: Budget £30-£60 annually
This is far less than emergency repair costs, which typically start at £200 call-out + parts and can exceed £1,000 for major failures.
For complete cost breakdowns, see our [Ultimate UFH Costs Guide](/underfloor-heating-costs/).
## Common Maintenance Mistakes to Avoid
Avoid these frequent errors that can damage your system or void warranties.
### Top Mistakes
**1. Skipping Annual Service on Wet Systems**
- Consequence: Sludge build-up, efficiency loss, component failure
- Prevention: Book service every September/October
**2. Ignoring Pressure Drops**
- Consequence: Undetected leaks cause major damage
- Prevention: Top up immediately, investigate if frequent
**3. Wrong Inhibitor Concentration**
- Consequence: Corrosion damages pipes, manifold, heat exchanger
- Prevention: Professional testing during annual service
**4. Leaving Filling Loop Connected**
- Consequence: Continuous pressure rise, safety valve discharge
- Prevention: Always disconnect after use
**5. Not Bleeding System Before Winter**
- Consequence: Cold spots, inefficient heating, high bills
- Prevention: Bleed all zones each September
**6. Neglecting Thermostat Batteries**
- Consequence: System shutdown in mid-winter
- Prevention: Replace annually in autumn
**7. DIY Repairs on Electric Cables**
- Consequence: Electric shock, fire risk, voided warranty
- Prevention: Always use qualified electrician
**8. Ignoring Error Codes**
- Consequence: Minor issues become major failures
- Prevention: Investigate all error codes promptly
**9. Not Testing System Before Winter**
- Consequence: Breakdowns in coldest weather when engineers busiest
- Prevention: Full test in September
**10. Poor Record Keeping**
- Consequence: Warranty claims denied, difficult to diagnose recurring issues
- Prevention: Maintain detailed maintenance log
## Maximising System Efficiency
Proper maintenance includes optimising system settings for efficiency.
### Efficiency Optimisation Checklist
**Temperature Settings:**
- ☐ Set flow temperature to 40-45°C (wet systems with heat pump)
- ☐ Use 18-20°C room temperature (not 22-24°C)
- ☐ Enable night setback to 16-17°C
- ☐ Adjust temperature by season (lower in autumn/spring)
**Scheduling:**
- ☐ Use zone-based scheduling (heat occupied rooms only)
- ☐ Implement warm-up period (1-2 hours before occupancy)
- ☐ Avoid complete on/off cycles (maintain low background temperature)
- ☐ Update schedules when routines change
**Smart Features:**
- ☐ Enable weather compensation if available
- ☐ Use geofencing for automatic adjustment
- ☐ Set holiday mode when away
- ☐ Enable adaptive start for optimal timing
**System Setup:**
- ☐ Verify correct pipe spacing / cable spacing for room
- ☐ Ensure adequate insulation under system
- ☐ Check floor covering TOG rating <2.5
- ☐ Remove unnecessary rugs over heated areas
For advanced control options, see our [Smart Thermostats for UFH Guide](/smart-thermostats-underfloor-heating/).
## UFH with Heat Pumps: Special Considerations
Heat pump systems require specific maintenance attention for optimal performance.
### Additional Heat Pump UFH Checks
**Monthly:**
- ☐ Check heat pump display for error codes
- ☐ Verify flow temperature (should be 35-45°C)
- ☐ Monitor COP (Coefficient of Performance) if available
- ☐ Check defrost cycles operating normally (winter)
**Annually:**
- ☐ Professional heat pump service
- ☐ Refrigerant levels checked
- ☐ Heat exchanger cleaned
- ☐ Condensate drain cleared
- ☐ Flow and return temperatures optimised
- ☐ Buffer tank inspected (if fitted)
**System Optimisation:**
- ☐ Flow temperature set to lowest that maintains comfort
- ☐ Weather compensation enabled and calibrated
- ☐ System runs longer at lower temperature (more efficient)
- ☐ Avoid rapid cycling (system should run continuously)
For complete guidance, see our [Underfloor Heating & Heat Pumps Ultimate Guide](/underfloor-heating-heat-pumps-guide-2026/).
A well-maintained underfloor heating system is one of the most reliable, efficient, and comfortable heating solutions available. The key to achieving decades of trouble-free operation is simple: consistent, preventive maintenance.
**Key Takeaways:**
1. **Monthly checks take 5 minutes** but catch most issues early
2. **Pre-heating season preparation** (September/October) is critical
3. **Annual professional service** for wet systems is essential, not optional
4. **Record keeping** helps track performance and assists with warranty claims
5. **Preventive maintenance costs 10-15%** of emergency repair costs
**Your Action Plan:**
- ☐ Print or bookmark this checklist for easy reference
- ☐ Add monthly checks to your calendar
- ☐ Book annual professional service now for September/October
- ☐ Create a maintenance log to track all work
- ☐ Budget £150-£250 annually for wet systems, £30-£60 for electric
By following this comprehensive maintenance schedule, you'll ensure your underfloor heating system delivers consistent comfort, maintains peak efficiency, and provides decades of reliable service.
**Further Reading:**
- [UFH Maintenance Guide: Detailed Technical Information](/underfloor-heating-maintenance-guide/)
- [Troubleshooting Common UFH Problems](/underfloor-heating-problems/)
- [Complete UFH Costs & ROI Analysis](/underfloor-heating-costs/)
- [Beginner's Guide to Underfloor Heating](/underfloor-heating-beginners-guide/)
Remember: A small investment in preventive maintenance protects your much larger investment in underfloor heating, ensuring comfort, efficiency, and value for decades to come.
**Ready to schedule your annual service?** Browse trusted professionals on the [Underfloor Heating Directory](https://underfloorheating.directory/installers) and ensure your system stays in peak condition.
---
--- title: How Does Underfloor Heating Work? Complete UK Guide 2026 description: Understand exactly how underfloor heating works. Clear explanations of electric and wet systems, heating cycles, and why UFH is more efficient than radiators. url: https://underfloorheating.info/how-does-underfloor-heating-work/ published: 2025-11-23 updated: 2026-08-21 tags: ['how ufh works', 'underfloor heating explained', 'radiant heating', 'ufh principle', 'heating systems', 'home heating'] ---
# How Does Underfloor Heating Work? Complete UK Guide 2026
## How does underfloor heating work?
**Ready to start your project?** Learn more at [underfloorheating.info](https://underfloorheating.info/), explore the [Underfloor Heating Directory](https://underfloorheating.directory/), or find qualified underfloor heating installers through the [installer listings](https://underfloorheating.directory/installers).
Underfloor heating transforms your entire floor into a gentle, consistent heat source that warms your home from the ground up. But how exactly does this invisible heating system create such comfortable warmth? This detailed guide explains the science, components, and heating cycles that make underfloor heating one of the most efficient ways to heat UK homes.
Whether you're considering underfloor heating for a new project or simply curious about how your existing system operates, understanding the mechanics helps you appreciate why this heating method is rapidly replacing traditional radiators.

New to underfloor heating? Start with our [Complete Beginner's Guide to Underfloor Heating](/underfloor-heating-beginners-guide/) for an overview of system types, costs, and installation.
## The basic principle: radiant heat vs convection
Understanding how underfloor heating works starts with understanding radiant heat, a clearly different type of warmth compared to traditional radiators.
### How traditional radiators work (convection)
Traditional radiators heat your home through convection. Here's the process:
1. Hot water enters the radiator from the boiler
2. The radiator heats the air directly touching it
3. Warm air rises to the ceiling
4. Cool air sinks to the floor
5. This creates continuous air circulation, a "convection current"
The problem with convection:
- Ceiling becomes warmest (wasted heat)
- Floor remains coldest (where you actually are)
- Creates temperature stratification (hot head, cold feet)
- Circulates dust and allergens
- Requires high temperatures (60-80°C) for fast heat
### How underfloor heating works (radiant heat)
Underfloor heating uses radiant heat, the same type of warmth you feel from the sun on a cold day. Here's how it's different:
1. The entire floor surface becomes a gentle heat emitter
2. Heat radiates upward, warming objects and people directly
3. No air circulation required
4. Temperature is warmest at floor level, cooler at ceiling height
5. Creates an even, comfortable temperature throughout the room
The advantages of radiant heat:
- Warmest where you need it (at floor level)
- Even temperature distribution (no hot/cold spots)
- Operates at lower temperatures (25-35°C floor surface)
- Doesn't circulate dust or allergens
- Feels warmer at lower air temperatures (energy savings)
- Silent operation (no air movement sounds)
The science behind the comfort:
Radiant heat warms solid objects, including your body, directly through infrared radiation. You feel warm even if the air temperature is slightly lower. This is why you can set your thermostat 2-3°C lower with underfloor heating compared to radiators while feeling equally comfortable.
This 2-3°C reduction translates to around 10–15% energy savings in many homes on heating bills. For detailed cost analysis, see our [Underfloor Heating Costs Guide](/underfloor-heating-costs/).

## The two main system types
There are two clearly different ways to create radiant floor heat: electric and wet (hydronic) systems. Both produce the same comfortable radiant warmth but use different energy sources and components.
### Quick comparison
| Aspect | Electric UFH | Wet (Hydronic) UFH |
|--------|--------------|-------------------|
| Heat source | Electrical resistance | Hot water circulation |
| Energy type | Electricity | Gas/oil boiler, heat pump, renewable |
| Installation | Quick, minimal floor build-up | Complex, significant floor build-up |
| Response time | Fast (30-60 minutes) | Slow (2-4 hours) |
| Running costs | Higher (3-4x more than gas) | Lower (efficient with gas/heat pump) |
| Best for | Single rooms, bathrooms, retrofits | Whole house, [new builds](/underfloor-heating-new-builds/), extensions |
| Maintenance | Minimal (fit and forget) | Annual service required |
Now let's understand exactly how each system creates heat.
## How electric underfloor heating works
Electric underfloor heating is elegantly simple: electricity flows through special cables that convert electrical energy into heat through resistance.
### The basic components
1. Heating Cable/Mat
- Thin electrical cable (typically 3-4mm diameter)
- Often pre-spaced on a mesh mat for easy installation
- Made from resistance wire that heats up when electricity flows through it
- Similar principle to an electric kettle or toaster element
2. Thermostat with Floor Sensor
- Wall-mounted control unit
- Thin sensor probe installed in the floor between heating cables
- Measures actual floor temperature
- Switches power on/off to maintain target temperature
3. Power Supply
- Dedicated circuit from consumer unit (fuse box)
- Protected by RCD (Residual Current Device) for safety
- Fused spur near thermostat
- Typically 13-16A circuit depending on system size
### How the heating cycle works
Thermostat Calls for Heat
- Room temperature drops below target setting
- Thermostat activates and closes electrical relay
- Power flows from consumer unit to heating mat
Cables Generate Heat
- Electricity flows through resistance heating cable
- Electrical energy converts to heat (resistive heating)
- Cable temperature rises to approximately 40-45°C
- Heat conducts into the floor covering above
Floor Surface Warms
- Floor covering (tiles, laminate, etc.) warms up
- Surface temperature reaches 25-30°C (comfortable for bare feet)
- Heat begins radiating upward into the room
- Objects and people absorb radiant warmth
Floor Sensor Monitors Temperature
- Sensor probe continuously measures actual floor temperature
- Prevents overheating (protects floor covering)
- Ensures efficient operation
Target Temperature Reached
- Floor reaches set temperature
- Thermostat opens relay, cutting power to cables
- Heating stops but floor retains warmth
- Gradual cool-down begins
Cycle Repeats
- Floor temperature drops slightly
- Thermostat reactivates heating
- Short bursts of heating maintain constant comfort
Typical Timing:
- Heat-up time: 30-60 minutes (from cold)
- Heating cycle: 10-20 minutes on, 20-40 minutes off
- Daily operation: 3-6 hours total heating time (depending on insulation)
### The role of insulation
Insulation boards beneath the heating mat are critical:
- Without insulation: 30-50% of heat escapes downward
- With insulation: 95%+ of heat radiates upward
- Insulation boards reflect heat upward into the living space
- Essential for efficiency and running cost control
For complete details on electric systems, see our [Electric Underfloor Heating Guide](/electric-underfloor-heating-systems/).
### Power consumption example
A 5m² bathroom with 150W/m² heating mat:
- Total power: 5m² × 150W/m² = 750W
- Cost per hour: 750W × £0.30/kWh = £0.225 per hour
- Daily use (2 hours): £0.45 per day
- Monthly cost: approximately £13-14
## How wet (hydronic) underfloor heating works
Wet underfloor heating circulates warm water through a network of pipes buried in the floor. It's more complex than electric systems but cheaper to run for whole-house heating.
### The basic components
1. Heat Source
- Gas or oil boiler
- Air source or ground source heat pump
- Biomass boiler
- Solar thermal (supplementary)
- Heats water to 35-50°C (lower than radiator systems)
2. Manifold (Distribution Centre)
- Central hub connecting all heating zones
- Flow side (hot water out to zones)
- Return side (cooler water back from zones)
- Individual controls for each zone/room
- Flow meters showing water circulation rate
[Check out our Underfloor Heating Manifold Guide](/underfloor-heating-manifold-guide/)
3. Underfloor Pipes
- Continuous flexible plastic pipes (typically 16mm PEX or PE-RT)
- One continuous pipe per zone (no joints buried in floor)
- Spaced 100-300mm apart depending on heat requirement
- Embedded in screed or clipped to insulation boards
- Can last 50+ years with no maintenance
4. Circulation Pump
- Pushes water through the pipe network
- Typically adjustable speed settings
- Low energy consumption (40-80W)
- Overcomes resistance in pipes
5. Blending Valve (Mixing Valve)
- Mixes hot boiler water with cooler return water
- Achieves correct UFH temperature (35-50°C)
- Protects floor from excessive heat
- Essential because boilers heat to 70-80°C
6. Actuators
- Motorised valve heads on manifold
- One per zone
- Opens/closes flow to individual rooms
- Controlled by zone thermostats
- Physical pin rises when calling for heat
7. Zone Thermostats
- One per room or zone
- Calls for heat when temperature drops
- Signals actuator to open
- Independent temperature control per room
### How the heating cycle works
Thermostat Calls for Heat
- Room temperature drops below target
- Thermostat sends signal to wiring centre
- Wiring centre activates corresponding actuator
- Actuator opens valve for that zone on manifold
Heat Source Activated
- Wiring centre signals boiler/heat pump to fire
- Heat source begins heating water
- Water temperature rises to set point (35-50°C for UFH)
- Blending valve ensures correct temperature
Circulation Pump Starts
- Pump activates (if not already running)
- Begins circulating water through system
- Creates pressure to push water through pipe network
- Overcomes resistance in narrow pipes
Water Enters Zone
- Hot water flows from manifold into zone's pipe loop
- Travels through continuous pipe embedded in floor
- Heat transfers from water into surrounding screed
- Water temperature drops as it gives up heat (typically 5-10°C drop)
Screed/Floor Warms Up
- Screed surrounding pipes heats up slowly
- Large thermal mass stores significant heat
- Heat conducts through floor covering
- Floor surface reaches 25-30°C
Radiant Heat Emission
- Warm floor radiates heat upward
- Room temperature gradually rises
- Objects and people absorb warmth
- Even heat distribution across entire floor
Return Flow
- Cooler water (now 30-40°C) returns to manifold
- Flows back through blending valve
- Mixed with fresh hot water from boiler
- Re-circulated through the system
Target Temperature Reached
- Room thermostat satisfied
- Signals actuator to close zone valve
- Flow stops to that zone
- Other zones may continue heating
All Zones Satisfied
- All actuators closed
- Boiler stops firing
- Pump stops circulating (after short delay)
- System enters standby mode
Thermal Mass Retains Heat
- Screed continues releasing stored heat
- Floor gradually cools
- Can maintain warmth for 1-2 hours after heating stops
- Efficient use of energy
Typical Timing:
- Heat-up time: 2-4 hours (from cold)
- Operating pattern: Continuous low-level heating rather than on/off cycles
- Daily operation: 6-12 hours of circulation (depending on weather)
- Setback periods: Lower temperature maintained overnight
### The importance of thermal mass
The screed in wet systems is a heat battery:
- Stores large amounts of thermal energy
- Releases heat slowly and evenly
- Prevents rapid temperature swings
- Maintains comfort between heating cycles
- Ideal for heat pump systems (which prefer constant operation)
For complete wet system details, see our [Wet Underfloor Heating Ultimate Guide](/wet-underfloor-heating-ultimate-guide/).
### Energy consumption example
A 50m² ground floor with wet UFH:
- Design heat loss: 2.5kW (well-insulated home)
- Gas boiler efficiency: 92%
- Cost per hour: 2.5kW × £0.06/kWh (gas) = £0.15 per hour
- Daily use (8 hours): £1.20 per day
- Monthly cost: approximately £36
Compare to electric: £1.80 per day or £54 per month (3x more expensive)

## Key components explained in detail
Understanding individual components helps you appreciate how the system works as a whole.
### Thermostats: the brain of the system
How thermostats control temperature:
Floor sensor mode:
- Sensor probe measures actual floor temperature
- Prevents floor overheating (important for wood floors)
- Thermostat maintains floor at set temperature (e.g., 27°C)
- Room temperature is byproduct of floor temperature
Air sensor mode:
- Built-in sensor measures room air temperature
- Thermostat maintains room at set temperature (e.g., 21°C)
- Floor temperature varies depending on heat loss
- More precise room temperature control
Dual sensor mode (recommended):
- Uses both floor and air sensors
- Maintains target room temperature
- Prevents floor exceeding maximum safe temperature
- Best of both control methods
For detailed thermostat guidance, see our [Smart Thermostats for UFH Guide](/smart-thermostats-underfloor-heating/).
### Zoning: independent room control
How zoning works:
Zoning divides your home into independently controlled areas:
- Each zone has its own thermostat
- Each zone has dedicated actuator (wet) or separate circuit (electric)
- Rooms can be different temperatures
- Occupied rooms heat, unoccupied rooms don't
- Significant energy savings (15-30%)
Common zoning configurations:
- Living areas (main living room)
- Kitchen/dining
- Master bedroom
- Other bedrooms (grouped)
- Bathrooms (individual)
For detailed zoning strategies, see our [Underfloor Heating Zoning Guide](/underfloor-heating-zoning-complete-guide/).
### Manifolds: the control centre (wet systems)
Manifold functions:
Flow side (top bar):
- Hot water from blending valve
- Distributes to each zone
- Flow meters show circulation rate
- Manual shut-off valves per zone
Return side (bottom bar):
- Collects cooler water from zones
- Returns to blending valve/boiler
- Actuators mounted here
- Temperature sensors
Why manifolds are essential:
- One boiler serves multiple zones
- Balances flow between zones
- Allows independent zone control
- Provides central maintenance point
[Check out our Underfloor Heating Manifold Guide](/underfloor-heating-manifold-guide/)
### Insulation: the unsung hero
Why insulation is critical:
Without adequate insulation:
- 30-50% heat escapes downward
- System cannot reach target temperature
- Running costs skyrocket
- Floor never feels warm enough
- System appears "not working"
With proper insulation:
- 95%+ of heat directs upward
- Rapid heat-up times
- Lower running costs
- Comfortable floor temperatures
- Efficient operation
Insulation requirements:
- Minimum: 20-25mm high-density insulation board
- Ground floors: 50-100mm recommended
- Upper floors: 10-20mm minimum
- Heat loss areas: Up to 150mm
## The complete heating cycle: a day in the life
Understanding how your system operates throughout the day helps you optimise its performance.
### Morning start-up (6:00 am)
Scheduled heating activation:
1. Programmable thermostat reaches scheduled time
- Timer activates heating program
- Target temperature increases from 16°C (setback) to 21°C (comfort)
2. Electric System Response:
- Heating activates within seconds
- Floor sensor confirms power flowing
- Floor begins warming immediately
- Noticeable warmth within 15-20 minutes
- Target reached in 30-60 minutes
3. Wet System Response:
- Boiler pre-heat begins (if configured)
- Actuators open for occupied zones
- Circulation pump starts
- Gradual warm-up over 1-2 hours
- Thermal mass begins absorbing heat
### Daytime maintenance (9:00 am – 5:00 pm)
Steady-state operation:
Electric System Pattern:
- Short heating cycles (10-20 minutes)
- Long off periods (30-60 minutes)
- Frequency depends on insulation and external temperature
- Floor sensor prevents overshooting
Wet System Pattern:
- Continuous low-level circulation
- Boiler modulates output (doesn't cycle on/off constantly)
- Actuators open/close as individual zones demand
- Very stable room temperatures
### Unoccupied period (9:00 am – 5:00 pm, if away)
Energy-saving setback:
Smart Programming:
- Temperature reduces to 18-19°C (not completely off)
- Maintains background warmth
- Prevents long re-heat times
- Protects against condensation/damp
Why not turn completely off:
- Wet systems: Re-heating large thermal mass costs more energy
- Electric systems: Can be turned off (lower thermal mass)
- Building fabric retains some warmth
- Faster return to comfort when reactivating
### Evening comfort (5:00 pm – 11:00 pm)
Peak occupation period:
- System maintains target comfort temperature
- Zoning ensures only occupied rooms heat fully
- Living areas at 21°C
- Bedrooms remain at lower temperature until later
- Maximum comfort, controlled costs
### Night setback (11:00 pm – 6:00 am)
Overnight temperature reduction:
- Temperature reduces to 16-18°C
- Bedrooms under duvets don't need high temperature
- Significant energy savings
- Thermal mass in wet systems retains warmth for hours
- System ready for morning restart
### Weekend/holiday mode
Extended absence:
- Frost protection mode (typically 10-12°C minimum)
- Prevents frozen pipes in winter
- Minimal energy consumption
- Protects property from damp/condensation

## Why underfloor heating is more efficient
The physics of radiant heat combined with low-temperature operation creates significant efficiency advantages.
### Lower operating temperatures
Radiator Systems:
- Require 60-80°C water temperature
- High boiler temperature = more energy input
- More heat lost in pipes and boiler
- Boiler operates inefficiently (especially condensing boilers)
Underfloor Heating:
- Operates at 35-50°C water temperature
- Low boiler temperature = less energy input
- Minimal heat loss in distribution
- Boiler operates in efficient condensing mode
Condensing Boiler Efficiency:
- At 80°C flow temperature: ~85% efficient
- At 40°C flow temperature: ~95% efficient
- 10% efficiency improvement = 10% lower gas bills
### Perfect match for heat pumps
Heat pumps become dramatically more efficient at lower temperatures:
Heat Pump COP (Coefficient of Performance):
- At 55°C output: COP of 3.0 (3kW heat per 1kW electricity)
- At 35°C output: COP of 4.0-4.5 (4-4.5kW heat per 1kW electricity)
- 33-50% efficiency improvement with UFH
This is why underfloor heating is considered essential for heat pump installations. For complete guidance, see our [Underfloor Heating & Heat Pumps Guide](/underfloor-heating-heat-pumps-guide-2026/).
### Larger surface area = lower temperature
The Physics:
- Radiators: Small surface area requires high temperature
- UFH: Entire floor is heat emitter (50x larger surface area)
- Same heat output achieved at much lower temperature
- Lower temperature = less energy input required
Example:
- 1m² radiator at 70°C outputs 1,500W
- 50m² floor at 27°C outputs 3,750W
- UFH produces more heat at lower temperature
### Even heat distribution
Radiator Hot Spots:
- 80% of heat near radiator
- Cold spots far from radiator
- Thermostat in wrong location causes under/overheating
- Wasted energy heating empty ceiling space
UFH Even Coverage:
- Uniform heat across entire floor
- No hot or cold spots
- Thermostat accurately represents room average
- Heat where you need it (floor level)
### Radiant comfort = lower air temperature
You feel comfortable at 2-3°C lower air temperature with radiant heat:
Radiator System:
- Air temperature: 22°C to feel comfortable
- Annual heating degree days: 2,800°C-days
UFH System:
- Air temperature: 19-20°C to feel equally comfortable
- Annual heating degree days: 2,500°C-days
- ~10% reduction in heating load
### Reduced heat loss
Lower internal temperature means slower heat escape:
- Every 1°C lower internal temperature = ~8% heat loss reduction
- 2°C lower with UFH = 16% less heat loss through walls/windows
- Compounds with other efficiency benefits
### No stratification
Radiator Systems:
- Hot air at ceiling (can be 5-7°C warmer than floor)
- Cool air at floor
- Average temperature must be higher to feel comfortable
- Wasted heat at ceiling level
UFH Systems:
- Warmest at floor (25-30°C)
- Cooler at ceiling (18-19°C)
- Ideal temperature gradient
- All heat is useful heat
## Common questions about how UFH works
### How long does underfloor heating take to heat a room?
Electric Systems:
- Feel warmth at floor: 15-30 minutes
- Comfortable floor temperature: 30-60 minutes
- Room air temperature comfortable: 60-90 minutes
- Depends on floor covering (tiles fast, carpet slow)
Wet Systems:
- Feel warmth at floor: 60-90 minutes
- Comfortable floor temperature: 2-3 hours
- Room air temperature comfortable: 3-4 hours
- Initial heat-up from cold (subsequent cycles faster)
- High thermal mass = slow response but long heat retention
Why so different?
- Electric: Low thermal mass, direct heating element
- Wet: High thermal mass (screed), indirect heating via water
Optimisation:
- Don't turn UFH completely off (maintain background heat)
- Use advance start features on smart thermostats
- Schedule heating 1-2 hours before occupancy
### Does underfloor heating heat the air or the floor?
Both, but in sequence:
1. Primary: Floor heating
- Heating element/water warms the floor structure
- Floor surface reaches 25-30°C
2. Secondary: Radiant warming
- Warm floor emits infrared radiation
- Objects, walls, furniture absorb radiation
- People directly warmed by radiation
3. Tertiary: Air warming
- Air touching warm floor heats slightly
- Warm air rises gently (minimal convection)
- Room air temperature increases gradually
The comfort factor:
- You feel warm before air temperature fully rises
- Radiant heat warms your skin directly
- Why you feel comfortable at lower air temperature
- More natural, comfortable warmth
### Can underfloor heating be used as the sole heat source?
Yes, but with proper design:
Requirements for Primary Heating:
1. Adequate heat output:
- Electric: 150-200W/m² maximum
- Wet: 75-100W/m² typical
- Home heat loss must not exceed UFH output
2. Good insulation:
- Modern Building Regulations compliance
- Double/triple glazing
- Minimal draughts
- Below 100W/m² heat loss
3. Sufficient floor coverage:
- At least 80% of floor area heated
- Key living spaces fully covered
- Consider supplementary heating in bathrooms (underfloor + towel rail)
When supplementary heat needed:
- Poorly insulated older properties
- Large glass areas (conservatories)
- Room heat loss >100W/m²
- Historic buildings with restrictions
For system sizing, see our [UFH Design & Planning Guide](/underfloor-heating-design-planning/).
### Does UFH work with all floor types?
Works with most, but efficiency varies:
Excellent (High Conductivity):
- Ceramic/porcelain tiles
- Natural stone
- Polished concrete
- Heat transfers rapidly, system works efficiently
Good (Acceptable Conductivity):
- Engineered wood (UFH-rated)
- Luxury vinyl tiles (LVT)
- Laminate flooring (UFH-rated)
- Lower conductivity requires higher water temperatures or longer heating times
Moderate (Insulating Effect):
- Carpet + underlay (combined TOG <2.5)
- Thicker engineered wood
- System still works but less efficiently
- May struggle to reach target temperature in very cold weather
Not Recommended:
- Solid wood flooring (expansion/contraction issues)
- Very thick carpet (TOG >2.5)
- Rubber flooring (can degrade)
The TOG Rating:
- Measures thermal resistance
- Lower TOG = better heat transfer
- Aim for TOG <1.5 for optimal performance
- Check manufacturer compatibility
For complete flooring guidance, see our [Best Flooring for UFH Guide](/best-flooring-underfloor-heating/).
### What temperature does underfloor heating run at?
Floor Surface Temperature:
- Comfortable range: 23-29°C
- Typical setting: 27°C for living areas
- Bathrooms: 28-30°C
- Wood floors: Maximum 27°C (to prevent damage)
Water Temperature (Wet Systems):
- Flow temperature: 35-50°C
- Return temperature: 30-40°C
- Temperature drop across system: 5-10°C
- Much lower than radiators (60-80°C)
Why So Low:
- Large surface area (entire floor)
- Efficient heat transfer
- Radiant heat feels warmer than air temperature
- Lower temperatures = higher efficiency
### Does UFH use a lot of electricity/gas?
Electric UFH:
- Higher running cost due to electricity price
- 5m² bathroom: ~£0.40-0.60 per day (2 hours use)
- Not economical for whole-house primary heating
- Best for small spaces, occasional use
Wet UFH (Gas Boiler):
- Lower running cost (gas cheaper than electricity)
- 100m² home: ~£600-900 per year
- More economical than radiators (10-15% savings)
- Suitable for whole-house heating
Wet UFH (Heat Pump):
- Moderate running cost (electricity, but very efficient)
- COP of 3.5-4.5 means 1kW electricity = 4kW heat
- Similar or lower cost than gas boiler
- Most efficient UFH solution
Factors Affecting Consumption:
- Property insulation (biggest factor)
- External temperature
- Target internal temperature
- Heating schedule efficiency
- System design and installation quality
For detailed running cost analysis, see our [UFH Costs Guide](/underfloor-heating-costs/).
### Is underfloor heating safe?
Yes, when properly installed:
Electrical Safety (Electric Systems):
- Protected by RCD (30mA) at consumer unit
- Installed by qualified electrician
- Tested before covering
- Double insulated heating cables
- Floor sensor prevents overheating
Water Safety (Wet Systems):
- Closed-loop system (no cross-contamination)
- Installed by qualified heating engineer
- Pressure tested before commissioning
- Modern pipes last 50+ years
- Floor temperature too low to scald
Physical Safety:
- No hot surfaces to burn yourself on
- No sharp radiator corners for children
- Reduced fire risk (no overheating radiators)
- No risk of steam burns from valves
Air Quality:
- No dust circulation (unlike convection heating)
- Better for asthma and allergy sufferers
- No combustion in living space (unlike gas fires)
### Why does UFH take longer to heat up than radiators?
Thermal Mass and Heat Transfer:
Radiators (Fast Response):
- Low thermal mass (just radiator panel and water)
- High temperature (60-80°C)
- Direct air heating (convection)
- Feel warm within 10-15 minutes
Electric UFH (Medium Response):
- Low thermal mass (just floor covering)
- Direct heating element under floor
- Gradual heat transfer through floor covering
- Feel warm within 30-60 minutes
Wet UFH (Slow Response):
- High thermal mass (65-75mm screed + water)
- Lower temperature (35-50°C)
- Indirect heating (water → screed → floor → air)
- Must heat large mass of screed first
- Feel warm within 2-4 hours
The Trade-Off:
- Slow heat-up = annoyance
- High thermal mass = excellent heat retention
- Stays warm for hours after heating stops
- More stable temperatures
- More efficient overall
Solution:
- Don't turn UFH completely off
- Maintain background temperature (16-18°C)
- Use scheduled advance start
- Plan heating around lifestyle
## System comparisons: electric vs wet UFH
### When to choose electric UFH
Ideal Scenarios:
- Single room retrofit (bathroom, kitchen, [conservatory](/conservatory-underfloor-heating/))
- Small to medium rooms (<20m²)
- Occasional/supplementary heating
- Quick installation needed
- Minimal floor build-up required (thin mats ~3mm)
- [DIY installation](/diy-underfloor-heating/) capability
- Lower upfront budget
How It Works Best:
- Short heating periods (1-3 hours per day)
- Immediate warmth needed (quick response)
- Rooms with good insulation
- Supplementing existing heating system
For complete electric system details, see our [Electric UFH Complete Guide](/electric-underfloor-heating-systems/).
### When to choose wet UFH
Ideal Scenarios:
- New build or major renovation
- Whole-house heating solution
- Primary heating system
- Large areas (>20m² per zone)
- Have or planning heat pump
- Long-term energy efficiency priority
- All-day heating required
How It Works Best:
- Continuous or long heating periods (6+ hours daily)
- Constant background warmth maintained
- Well-insulated modern properties
- Integration with renewable heat sources
For complete wet system details, see our [Wet UFH Ultimate Guide](/wet-underfloor-heating-ultimate-guide/).
## Maximising how your UFH works
Understanding how your system works helps you operate it efficiently.
### Optimisation tips
1. Understand Your System's Response Time
- Electric: Can heat on-demand, turn off when leaving
- Wet: Better maintaining constant temperature than cycling
2. Use Setback, Not Off
- Lower temperature when away (16-18°C)
- Don't turn completely off
- Faster return to comfort
- More efficient overall
3. Zone Correctly
- Heat occupied rooms only
- Different temperatures suit different rooms
- Bedrooms cooler than living areas
- Bathrooms warmest
For detailed zoning strategies, see our [UFH Zoning Guide](/underfloor-heating-zoning-complete-guide/).
4. Match Floor Covering to Use
- High-use areas: Tiles for quick response
- Bedrooms: Engineered wood or carpet for comfort
- Bathrooms: Stone or tiles for warmth and durability
5. Maintain Your System
- Annual professional service (wet systems)
- Check thermostat batteries
- Bleed air from wet systems annually
- Keep manifold area accessible
For maintenance guidance, see our [Annual UFH Maintenance Checklist](/annual-underfloor-heating-maintenance-checklist/).
6. Smart Controls
- Weather compensation adjusts to external temperature
- Learning thermostats optimise schedules
- Remote control prevents wasted heating
- Zone-by-zone control maximises efficiency
For smart control options, see our [Smart Thermostats for UFH Guide](/smart-thermostats-underfloor-heating/).
Underfloor heating works by converting your floor into a large, low-temperature radiant heat emitter. Whether through electrical resistance (electric systems) or circulating warm water (wet systems), the result is the same: comfortable, even, efficient warmth from the ground up.
Main points:
1. Radiant heat is different - Warms objects and people directly, not just air
2. Lower temperatures are more efficient - 35-50°C vs 60-80°C for radiators
3. Two system types - Electric (quick, simple, higher running cost) vs Wet (complex, cheaper to run)
4. Thermal mass matters - Wet systems slow to heat but retain warmth longer
5. Perfect for heat pumps - Low operating temperature maximises efficiency
6. Even heat distribution - No hot/cold spots, warmest where you need it
7. Requires different thinking - Maintain background heat, don't turn completely off
Understanding how your underfloor heating works helps you:
- Operate it efficiently
- Set realistic expectations
- Troubleshoot issues
- Make informed decisions about installation
- Maximise comfort and minimise costs
Further Reading:
- [Complete Beginner's Guide to Underfloor Heating](/underfloor-heating-beginners-guide/)
- [Electric vs Wet UFH: Which to Choose?](/electric-vs-water-underfloor-heating-2026/)
- [UFH Installation Guide](/underfloor-heating-installation-guide/)
- [Complete UFH Costs & ROI](/underfloor-heating-costs/)
- [Retrofitting UFH in Existing Homes](/retrofitting-underfloor-heating/)
Now that you understand how underfloor heating works, you can make confident decisions about design, installation, and operation for decades of comfortable, efficient heating.
**Take the next step?** Compare free quotes from professional UFH installers via the [Underfloor Heating Directory](https://underfloorheating.directory/installers).
---
--- title: Underfloor Heating Manifold Diagram & Guide: How It Works (UK 2026) description: Use our underfloor heating manifold diagram to understand flow, return, actuators, balancing, sizing and faults, so your wet UFH system works efficiently. url: https://underfloorheating.info/underfloor-heating-manifold-guide/ published: 2025-11-22 updated: 2026-08-21 tags: ['ufh manifold', 'manifold diagram', 'manifold wiring diagram', 'manifold guide', 'wet ufh', 'hydronic heating', 'manifold components', 'manifold sizing', 'manifold brands'] ---
# Underfloor Heating Manifold Diagram & Guide: How It Works (UK 2026)
## Underfloor Heating Manifolds: What They Do and How They Work
**Ready to start your project?** Find qualified underfloor heating installers through the [Underfloor Heating Directory](https://underfloorheating.directory/installers), plan your next step at the [Underfloor Heating Directory homepage](https://underfloorheating.directory/), or explore more practical guidance at [underfloorheating.info](https://underfloorheating.info/).
The manifold controls every wet underfloor heating system. It may look complicated, but the valves, gauges and actuators simply distribute hot water between individual zones and give you room-by-room temperature control. If you're installing, maintaining or troubleshooting wet UFH, you need to know how this part works and how to size it.
I'll take you through the basics first, then cover balancing, sizing and fault finding.

**What this diagram shows** (left to right, top to bottom):
1. **Ball valve – return:** manual shut-off on the return bar, isolates the whole manifold for maintenance.
2. **Thermal actuators:** one per zone, on top of the return bar, these are the motorised valves that open and close each room's circuit.
3. **Air vent:** bleed point for trapped air, usually at the end of the flow bar.
4. **Ball valve – flow:** manual shut-off on the flow (supply) bar.
5. **Flow gauges (also called flow meters, or rotameters):** one per zone, showing live flow rate in litres/minute, the main tool used for balancing. This guide uses "flow gauge," but you'll see the same component called a flow meter elsewhere.
6. **Fill point:** connection used to fill and pressurise the system during commissioning.
7. **Drain point:** connection used to drain the manifold for maintenance or replacement.
## How does an underfloor heating manifold work?
An underfloor heating manifold takes hot water from a boiler or heat pump and splits it between separate pipe loops, one per room or zone. Each zone has its own actuator and flow gauge on the manifold, so a thermostat can open or close that zone's valve independently while the others keep running. Water leaves via the flow bar, passes through the floor loop giving up its heat, and comes back cooler through the return bar to be reheated. This is what allows one wet underfloor heating system to give every room its own temperature.
## Manifold explained in 60 seconds
- What it is: A small metal assembly that splits hot water from your boiler or heat pump into multiple floor circuits.
- Why it matters: One manifold controls every room independently via flow meters and actuators.
- Flow side (top): Hot water in → flow meters → each circuit.
- Return side (bottom): Cooler water back from each circuit → return to heat source.
- Actuators: Tiny motorised valves that open/close each zone on demand.
- Blending valve: Mixs hot boiler water with cooler return water to hit the right UFH temperature (35–50°C).
- Pump: Pushes water through the loops.
[Jump to full component guide ↓](#manifold-components-explained)
New to wet underfloor heating? Start with our [Complete Wet UFH Guide](/wet-underfloor-heating-ultimate-guide/) for system fundamentals, or see our [How Does Underfloor Heating Work](/how-does-underfloor-heating-work/) guide to understand the basics first.
## What Is an Underfloor Heating Manifold?
A manifold takes hot water from your boiler or heat pump and divides it between multiple heating zones, typically individual rooms or areas. Think of it as a roundabout for water: one way in from the heat source and several ways out to the rooms.
### The Core Functions
**1. Water Distribution**
- Receives hot water from single heat source
- Divides flow between multiple pipe loops
- Each loop serves one zone/room
- Returns cooler water back to heat source
**2. Independent Zone Control**
- Each zone controlled by dedicated actuator
- Actuators open/close valves based on thermostat demand
- Zones heat independently
- Unoccupied rooms don't consume energy
**3. Flow Balancing**
- Adjustable flow rate for each zone
- Ensures correct heat output per room
- Compensates for different loop lengths
- Optimises system efficiency
**4. System Monitoring**
- Flow meters show water circulation per zone
- Temperature gauges monitor system operation
- Pressure indication
- Visual confirmation of system status
**5. Maintenance Access**
- Central location for air bleeding
- Isolation valves for individual zones
- Easy actuator replacement
- Diagnostic point for problems
### Why Manifolds Are Essential
Without a manifold:
- Cannot have multiple independently controlled zones
- Cannot balance different loop lengths
- Difficult to isolate individual zones
- No visual indication of system operation
- Complex to commission and maintain
With a properly specified manifold:
- Room-by-room temperature control
- Optimal comfort and efficiency
- Easy troubleshooting
- Simple maintenance
- Professional, organized installation
## Manifold Components Explained
Know what each component does and you'll find it much easier to diagnose faults, commission the system and explain a problem to a heating engineer.

### Flow Bar (Supply Side)
The flow bar is the assembly that distributes hot water to each zone. Depending on the manifold model and how it's mounted, this can be the top or bottom bar, check your unit's labelling rather than assuming a fixed position.
Key Components on Flow Bar:
**1. Inlet Connection**
- Typically 1" BSP or 3/4" BSP
- Connects to blending valve output
- Hot water entry point (35-50°C)
- Usually positioned on left end
**2. Flow Meters (Rotameters)**
- Clear plastic cylinders with floating indicator
- Shows real-time flow rate in litres/minute
- Adjustable cap to set target flow
- Essential for balancing system
- Typical range: 0.5-4 L/min
How Flow Meters Work:
- Water flow lifts internal float
- Float position indicates flow rate
- Reading scale calibrated in L/min
- Higher float = more flow
- Adjust top cap to restrict or increase flow
**3. Isolation Valves**
- Manual shut-off for each zone
- Allows individual loop isolation
- Useful for maintenance or repairs
- Ball valve or gate valve design
- Lever or screw adjustment
**4. Air Vents**
- Automatic or manual bleed points
- Releases trapped air from system
- Usually one per 2-4 zones
- Critical for preventing airlocks
- Manual vents require annual bleeding
**5. Drain/Fill Points**
- Allow system draining for maintenance
- Located at flow bar ends
- Standard hose connection
- Used during commissioning
### Return Bar (Return Side)
The return bar collects cooler water from each zone and returns it to the heat source. It sits opposite the flow bar, top or bottom depending on the model.
Key Components on Return Bar:
**1. Zone Connections**
- One connection per heating loop
- Typically 16mm or 20mm push-fit
- Secure pipe coupling system
- Labelled for identification
**2. Actuators (Thermostatic Heads)**
- Motorised valve operators
- One per zone
- Controlled by zone thermostat
- Opens/closes valve when zone calls for heat
- 24V or 230V operation
Actuator Operation:
- Thermostat satisfied: Valve closes, no flow
- Thermostat calling: Actuator opens valve
- Motorised pin pushes valve open
- Visual indicator shows valve position
- Typically takes 2-3 minutes to fully open/close
**3. Return Temperature Sensors**
- Measure water temperature leaving zone
- Useful for system diagnostics
- Confirms zone is circulating
- Helps identify problems
- Not always fitted on basic manifolds
**4. Balancing Valves**
- Fine-tune flow to each zone
- Work in conjunction with flow meters
- Typically lockshield type (prevents accidental adjustment)
- Set during commissioning
- Rarely need adjustment once set
**5. Return Outlet**
- Collects water from all zones
- Returns to blending valve
- Typically cooler than flow (5-10°C drop)
- Usually positioned on right end
- Same size as flow inlet (1" or 3/4" BSP)
### Blending Valve (Mixing Valve)
The blending valve is crucial but often misunderstood. It protects your UFH system from excessive temperatures.

**What this diagram shows:** hot water from the boiler or heat pump (60–80°C, or 35–45°C for a heat pump) enters the blending valve, where a thermostatic head mixes it with cooler water returning from the manifold. The blended output, set between 35–50°C, feeds the manifold's flow bar, while the manifold's own return feeds back into the valve's cool inlet, completing the loop.
Why Blending Valves Are Essential:
- Boilers heat to 60-80°C (too hot for UFH)
- UFH requires only 35-50°C
- Floor coverings damaged above 50°C
- Mixing valve blends hot boiler water with cooler return water
- Achieves safe, optimal temperature
Blending Valve Operation:
**1. Thermostatic Head**
- Senses water temperature
- Automatically adjusts mixing ratio
- Maintains set point (e.g., 40°C)
- Mechanical operation (no electricity)
**2. Three-Way Valve Body**
- Hot water input (from boiler)
- Return water input (from manifold)
- Mixed water output (to manifold)
- Proportional mixing
**3. Flow Temperature Setting**
- Adjustable dial (typically 20-80°C range)
- Set to 35-50°C for UFH
- Lower for heat pumps (35-40°C)
- Higher for design heat load days
Typical Settings:
- Heat pump systems: 35-40°C
- Gas boiler, good insulation: 40-45°C
- Gas boiler, poor insulation: 45-50°C
- Never exceed: 55°C (floor covering protection)
### Pump and Wiring Centre
These components complete the manifold assembly.
Circulation Pump:
- Typically 40-80W low-energy pump
- Adjustable speed settings (I, II, III)
- Overcomes pipe resistance
- Maintains circulation through loops
- Quiet operation essential
Wiring Centre (Control Box):
- Houses electrical connections
- Links thermostats to actuators
- Powers circulation pump
- Boiler/heat pump call signal
- Typically 24V or 230V system
Manifold Cabinet:
- Protective enclosure for all components
- Wall-mounted or recessed
- Lockable door for safety
- Ventilation for heat dissipation
- Cable entry points

*Refer back to the labelled diagram above: the flow bar (with ball valve, flow gauges and thermal actuators) sits opposite the return bar (isolation and drain points).*
For complete system operation details, see our [How Does Underfloor Heating Work](/how-does-underfloor-heating-work/) guide.
## How Manifolds Control Multiple Zones
Once you understand the sequence, troubleshooting and improving performance become much easier.
### The Control Sequence
**Step 1: Thermostat Calls for Heat**
- Room temperature drops below set point
- Zone thermostat closes relay
- Signal sent to wiring centre
- Wiring centre activates corresponding actuator
**Step 2: Actuator Opens**
- Motor in actuator engages
- Pushes pin down on valve
- Valve gradually opens (2-3 minutes)
- Visual indicator rises (shows valve open)
- Water can now flow to that zone
**Step 3: Pump Activates**
- Wiring centre detects open zone
- Sends signal to circulation pump
- Pump begins running
- Creates pressure to circulate water
- Indicator light shows pump operation
**Step 4: Boiler/Heat Pump Fires**
- Wiring centre sends call for heat to heat source
- Boiler/heat pump begins heating water
- Water temperature rises to set point
- Blending valve regulates temperature
**Step 5: Water Circulates**
- Hot water enters manifold flow bar
- Passes through flow meter (reading shows)
- Enters pipe loop for that zone
- Travels through floor, giving up heat
- Returns via return bar, cooler
**Step 6: Heat Transfer**
- Pipe transfers heat to screed
- Screed warms floor surface
- Floor radiates heat to room
- Room temperature rises
**Step 7: Thermostat Satisfied**
- Room reaches target temperature
- Thermostat opens relay
- Signal to wiring centre stops
- Actuator begins closing
**Step 8: Actuator Closes**
- Motor reverses or spring returns
- Pin releases, valve closes
- Visual indicator lowers (shows valve closed)
- Flow stops to that zone
- Flow meter reading drops to zero
**Step 9: Other Zones May Continue**
- Different zones operate independently
- Some may still be heating
- Pump continues while any zone open
- Boiler continues firing if demand exists
**Step 10: All Zones Satisfied**
- All actuators closed
- No zones demanding heat
- Pump stops after short delay (typically 3-5 minutes)
- Boiler/heat pump stops firing
- System enters standby
### Zoning Benefits
Independent zone control via manifolds provides:
- Energy savings: Only heat occupied rooms (15-30% typical savings)
- Comfort: Different temperatures suit different rooms
- Flexibility: Schedules vary by room (bedrooms heat later, living areas earlier)
- Efficiency: No wasted heat in unoccupied spaces
For detailed zoning strategies, see our [Underfloor Heating Zoning Guide](/underfloor-heating-zoning-complete-guide/).
## Types of Manifolds
Manifolds come in various configurations to suit different system sizes and budgets.
### By Number of Ports
**2-Port Manifolds**
- Smallest configuration
- Two independent zones
- Compact size
- Limited expansion
- Budget option
Typical use: Small flat, bathroom + kitchen
**4-Port Manifolds**
- Most common for small homes
- Four independent zones
- Good balance of price and functionality
- Suitable expandability
Typical use: 2-3 bedroom house (living room, kitchen/dining, 2x bedrooms grouped)
**6-Port Manifolds**
- Popular for larger homes
- Six independent zones
- Comprehensive control
- Professional standard
Typical use: 3-4 bedroom house (living room, kitchen, dining room, master bedroom, other bedrooms, bathrooms)
**8-Port & 10-Port Manifolds**
- Large properties
- Maximum flexibility
- Can combine multiple manifolds if needed
- Professional specification
Typical use: Large houses, multi-zone open plan areas
**12-Port Manifolds**
- Very large or complex systems
- Multiple floors
- High-end installations
- Maximum control
### By Features
Basic Manifolds
- Flow meters
- Manual valves
- Simple design
- Budget-friendly
Standard Manifolds
- Flow meters with adjustment
- Automatic air vents
- Drain/fill points
- Actuator-ready
Premium Manifolds
- Temperature gauges (flow and return)
- Ball valves for easy isolation
- Pre-assembled with pump
- Integrated blending valve
- Wiring centre included
- Complete "plug and play" solution
Smart Manifolds
- Electronic flow control
- Digital display
- Remote monitoring
- App integration
- Advanced diagnostics
- Weather compensation
### By Pipe Connection Type
Compression Fittings
- Traditional connection method
- Reliable and proven
- Requires wrench for installation
- Easy to identify pipe runs
Push-Fit Connections
- Quick installation
- No tools required
- Popular in modern systems
- Secure and reliable
Euro Cone Connections
- Professional standard
- Very secure
- Requires special tool
- Clean, professional appearance
## Manifold Sizing and Selection
Get the manifold size wrong and the whole system will struggle. Here's how to choose it properly.
### How Many Ports Do You Need?
Count your zones:
- Each separately controlled room = 1 port
- Large rooms may need 2 ports (>20m²)
- Small adjoining rooms can share 1 port
Add contingency:
- Always specify 1-2 spare ports
- Allows future expansion
- Provides redundancy
- Minimal cost difference
Example Calculation:
```
3-bedroom house:
- Living room: 1 port
- Kitchen/dining: 1 port
- Master bedroom: 1 port
- Bedroom 2: 1 port
- Bedroom 3: 1 port
- Bathroom/en-suite: 1 port (can share)
Total: 6 ports
Recommendation: 8-port manifold (2 spare)
```
### Flow Rate Requirements
Calculate total flow rate:
Each zone requires specific flow based on:
- Pipe spacing (closer spacing = more flow)
- Loop length
- Heat output required
Typical flow rates:
- 100mm pipe spacing: 2.0-2.5 L/min per loop
- 150mm pipe spacing: 1.5-2.0 L/min per loop
- 200mm pipe spacing: 1.0-1.5 L/min per loop
- 300mm pipe spacing: 0.5-1.0 L/min per loop
Total flow = Sum of all loops
Example:
- 6 zones @ 1.5 L/min each = 9 L/min total
- Choose manifold and pump rated for ≥9 L/min
### Pump Sizing
Head (Pressure) Calculation:
- 0.5-1.0m head per 100m of pipe
- Add 2-3m for manifold and fittings
- Add heat source and blending valve resistance
Flow Rate:
- Must meet total flow requirement
- Adjustable speed pumps provide flexibility
- Typically class A energy rated (low consumption)
Example:
- Total pipe: 400m
- Head required: 4m (pipe) + 3m (components) = 7m
- Flow required: 9 L/min
- Select: Pump rated 10 L/min @ 7m head
For complete system design guidance, see our [UFH Design & Planning Guide](/underfloor-heating-design-planning/).
### Material and Quality
Manifold Bar Material:
Brass:
- Traditional choice
- Corrosion resistant
- Heavy duty
- Premium option
Stainless Steel:
- Modern standard
- Superior corrosion resistance
- Lighter weight
- Contemporary appearance
Coated Steel:
- Budget option
- Adequate for most applications
- Check coating quality
- May not last as long as brass/stainless
Actuator Quality:
Budget Actuators:
- Basic on/off operation
- 230V typically
- 2-3 minute actuation
- 5-10 year lifespan
Quality Actuators:
- Smooth, quiet operation
- 24V (safer)
- 2-3 minute actuation
- 10-15 year lifespan
- Replaceable without draining system
Premium Actuators:
- Modulating (proportional) control
- Very quiet operation
- Position feedback
- 15+ year lifespan
- Advanced control compatibility
## Manifold Installation and Positioning
Correct installation ensures optimal performance and easy maintenance.
### Location Requirements
Accessibility:
- Must be easily accessible for maintenance
- Annual bleeding required
- Actuator replacement accessibility
- Flow meter adjustment access
Typical Locations:
- Utility room
- Understairs cupboard
- Plant room
- Dedicated manifold cupboard
- Airing cupboard (if temperature suitable)
Avoid:
- Difficult-to-reach lofts
- Areas prone to freezing
- Extremely hot locations (near boiler)
- Damp areas
### Height and Positioning
Optimal Height:
- 500-1000mm above floor level
- Easy viewing of flow meters
- Comfortable working height
- Above expected water level (flooding protection)
Orientation:
- Flow bar at top, return bar below
- Clearly label which is which
- Inlet/outlet on same side for neat pipework
- Allow space for actuator installation
Clearances:
- 300mm above manifold (actuator installation)
- 150mm below manifold (pipe bending radius)
- 200mm either side (access for maintenance)
- 500mm in front (comfortable working space)
This applies just as much to a retrofit as a new build, including [milled screed (in-cut) retrofits](/milled-screed-underfloor-heating/) that cut pipe channels directly into an existing concrete or screed floor. The manifold itself doesn't change: it still needs a wall-mounted cabinet meeting the clearances above, regardless of how the pipe below reaches it.
### Pipework Connections
Best Practices:
**1. Support Manifold Securely**
- Use proper brackets (included with quality manifolds)
- Fix to solid wall or dedicated frame
- Multiple fixing points
- Support weight when full of water
**2. Label All Pipes**
- Mark each zone clearly
- Use adhesive labels or tags
- Include room name
- Update if system modified
**3. Insulate Pipework**
- Insulate feed and return pipes to manifold
- Reduces heat loss
- Prevents condensation
- Maintains temperature
**4. Install Isolation Valves**
- Before and after manifold assembly
- Allows manifold removal without draining entire system
- Essential for maintenance
- Ball valves preferred for full-bore flow
**5. Pressure Testing**
- Test before covering pipes
- 2x operating pressure for 24 hours
- Check all connections for leaks
- Document test results
### Electrical Connections
Wiring Centre Position:
- Adjacent to manifold
- Protected from water
- Clear cable routes
- Adequate ventilation
Safety Requirements:
- Qualified electrician must install
- Correct cable sizing
- RCD protection
- Earth bonding
- Cable glands for neat entry
For complete installation guidance, see our [DIY UFH Installation Guide](/underfloor-heating-installation-guide/).
## How to Connect an Underfloor Heating Manifold to a Boiler
The manifold never connects directly to a boiler's flow and return, the temperatures involved are too different, and doing so would overheat the floor. The connection always runs through a blending valve (see [Blending Valve](#blending-valve-mixing-valve) above), which sits between the boiler and the manifold.
The typical sequence is:
1. **Boiler flow and return** connect to the blending valve's hot and return inlets.
2. **The blending valve** mixes boiler-hot water (60–80°C) with cooler water returning from the manifold to produce a safe UFH flow temperature (35–50°C).
3. **The blended output** feeds the manifold's flow bar inlet.
4. **The manifold's return outlet** feeds back to the blending valve's return input, completing the loop back to the boiler.
5. **Isolation valves** are fitted on both sides of this connection so the manifold assembly can be isolated and removed without draining the whole heating system.
6. **A circulation pump**, either integrated into a premium manifold or fitted separately, provides the flow to overcome the resistance of the UFH loops, since the boiler's own pump is usually sized for radiator circuits, not the smaller-bore, higher-resistance pipework of UFH.
If the manifold is feeding a system that also has radiators (a common setup in retrofits. UFH downstairs, radiators upstairs), the blending valve and manifold sit on their own branch off the boiler, independent of the radiator circuit, so each can run at its own temperature. Always have this connection made or checked by a qualified heating engineer, it involves both plumbing and, for the pump and wiring centre, electrical work covered by Part P (see our [UK building regulations guide](/uk-building-regulations-underfloor-heating/)).
### Underfloor heating manifold wiring diagram
The diagram below shows the full picture: room thermostats wired back to a central wiring centre, which switches the actuators on the manifold and calls for heat from a zone valve on the boiler, the same sequence described in [How Manifolds Control Multiple Zones](#how-manifolds-control-multiple-zones) above, laid out as a single wiring schematic.

**What's shown:** three room thermostats (top) wire back to the wiring centre, which distributes power and switching signals to each zone's actuator on the manifold. The wiring centre also sends a call-for-heat signal to a zone valve on the boiler ("Heating Source"), which opens to supply the blending valve and pump assembly feeding the manifold's flow bar. Wire colours and terminal layout vary by manufacturer, always follow the wiring diagram supplied with your specific wiring centre and thermostats rather than this one alone.
**[Download this wiring diagram as a PDF](/downloads/underfloor-heating-manifold-wiring-diagram-2026.pdf)**, useful to keep on site during installation or to hand to your electrician.
For electric UFH wiring, thermostat terminal layouts, RCD requirements and common wiring faults across both system types, see our dedicated [underfloor heating wiring diagrams guide](/underfloor-heating-wiring-diagrams/).
## How to Hide an Underfloor Heating Manifold
A manifold cabinet doesn't have to be visible. The clearances covered earlier in this guide (300mm above, 150mm below, 200mm either side, 500mm in front) apply regardless of how it's concealed, the goal is to hide the cabinet, not remove the access it needs.
**Common concealment options:**
- **Recessed cabinet:** the manifold sits inside a stud wall with only a flush-fitting access door visible, the neatest option, but needs planning before the wall is built.
- **Cupboard integration:** mounted inside an existing understairs cupboard, airing cupboard, or utility room unit, behind a normal door. The cheapest retrofit option if you already have suitable cupboard space nearby.
- **Purpose-built surface cabinet:** a lockable enclosure fixed to the wall and boxed in or painted to match the room, straightforward to retrofit, though it does protrude from the wall.
- **False wall or stud partition:** a shallow false wall built in front of the manifold with an access hatch, used where there's no existing cupboard and a recessed cabinet isn't practical.
- **Behind a picture or mirror on a magnetic/hinged panel:** a decorative option for a manifold in a hallway or living space, provided the hinge mechanism still allows full access.
Whichever option you choose, keep the location on your list of "don't forget" items when redecorating, a manifold that's been fully boxed in without a properly sized, easily removable access panel is a common cause of expensive call-outs when a heating engineer can't reach it for the annual bleed.
## Underfloor Heating Manifold Pump: Sizing and Settings
The circulation pump is what actually moves water through the loops, sizing it correctly matters as much as sizing the manifold itself. Undersized, and distant zones will never reach their target flow rate no matter how the flow gauges are adjusted; oversized, and the system runs noisy and wastes energy.
**Sizing basics** (see the full worked examples in [Manifold Sizing and Selection](#manifold-sizing-and-selection) above):
- **Flow rate:** the pump must deliver at least the sum of every zone's target flow rate, for a typical 6-zone home this is usually in the 8–15 L/min range.
- **Head (pressure):** allow roughly 0.5–1.0m of head per 100m of pipe, plus 2–3m for the manifold and blending valve, plus the resistance of the heat source itself.
- **Energy rating:** modern manifold pumps are typically 40–80W, Class A energy rated, with adjustable speed settings (commonly labelled I, II, III, or shown as a percentage on electronic models).
**Setting the pump speed:**
1. Commission and balance the system on the pump's highest speed setting first (see [Balancing and Commissioning](#balancing-and-commissioning) above).
2. Once every zone reaches its target flow rate, step the pump down one speed setting at a time.
3. Recheck flow gauges at each new setting, if any zone drops below target flow, go back up one step.
4. Settle on the lowest speed setting that still holds every zone at its target flow. This is almost always quieter and more energy-efficient than leaving the pump on maximum.
A pump that's noisy at every speed setting, or that can't maintain flow even at maximum, usually means it's undersized for the system, see [Common Manifold Problems](#common-manifold-problems-and-solutions) below for diagnosis, or [Upgrading and Replacing Manifolds](#upgrading-and-replacing-manifolds) for replacement guidance.
## Manifold Valves Explained
A manifold typically has three distinct types of valve, each doing a different job, worth knowing apart when discussing a system with an installer or diagnosing a problem.
- **Isolation valves (ball valves):** manual on/off valves at the ends of the flow and return bars, and often either side of the whole manifold assembly. Used to shut off the entire manifold, or a section of it, for maintenance. Ball valves are preferred for these because they give full-bore flow when open.
- **Actuator valves:** the motorised valves on each zone connection, opened and closed automatically by the wiring centre in response to each zone's thermostat. These are what actually turns an individual room's heating on and off, see [Actuators](#return-bar-return-side) above for how they operate.
- **Balancing valves (lockshield or flow gauge caps):** fine-adjustment valves, usually the adjustable cap on each zone's flow gauge, used to set and hold each loop's target flow rate during commissioning. Unlike isolation valves, these aren't meant for daily on/off use; they're set once during balancing and rarely touched again. Full process in our [balancing and bleeding guide](/how-to-balance-underfloor-heating-manifold/).
## Popular Underfloor Heating Manifold Brands in the UK
Most UK manifolds share the same basic layout covered in this guide, but component quality, connection type, and included features vary by manufacturer. A few names come up repeatedly:
- **Wunda:** one of the UK's best-known UFH brands, offering manifolds from basic flow-gauge models through to premium pre-assembled units with integrated pumps and blending valves. See our [Wunda underfloor heating review](/wunda-underfloor-heating-review/) for a full breakdown of their range and pricing.
- **Polypipe:** a major UK pipe and plumbing manufacturer with its own UFH manifold range, widely stocked by builders' merchants and commonly specified in new-build projects.
- **Uponor:** a Scandinavian brand with a strong reputation for precision-engineered manifolds and controls, often specified on larger or higher-spec residential and commercial installations.
- **Wavin:** another major European pipe systems manufacturer offering manifolds as part of a wider UFH product range, common in new-build and commercial specification.
- **JG Speedfit:** known primarily for its push-fit pipe connection system (see [Push-Fit Connections](#types-of-manifolds) above), a popular choice where fast, tool-free installation matters.
Connection type is often the practical differentiator between brands day-to-day, compression, push-fit, and Euro cone systems aren't interchangeable, so it's worth confirming which type your installer works with before specifying a manifold brand.
## Balancing and Commissioning
Don't treat commissioning as a box-ticking exercise. An unbalanced system gives you uneven rooms, cold spots in distant zones, wasted energy and a pump working harder than it should. To balance it, adjust each zone's flow gauge to its calculated target flow rate. Start with the longest, highest-resistance loop, then recheck every zone after each adjustment because they all affect one another. If a zone won't hold its target flow, or the manifold clicks or hums, trapped air often causes the problem rather than poor balancing.
Both processes are quick enough to do yourself if you have the target flow rates from your system design, but they deserve a proper step-by-step walkthrough rather than a summary. We've written the full process, including exact balancing steps, how to bleed each zone, adjusting flow after a flooring change, and a symptom table for diagnosing which one you need, in our dedicated **[How to Balance & Bleed an Underfloor Heating Manifold guide](/how-to-balance-underfloor-heating-manifold/)**.
## Common Manifold Problems and Solutions
Most manifold faults leave clear clues. Match the symptom below and work through the likely causes.
### Problem: One or More Zones Not Heating
Symptoms:
- Flow meter shows zero or minimal flow
- Floor remains cold in affected zone
- Other zones working correctly
Possible Causes & Solutions:
**1. Actuator Not Opening**
- Check visual indicator on actuator (should be raised)
- Listen for actuator motor (quiet hum)
- Remove actuator and manually test valve pin (should move freely)
- Replace actuator if faulty
**2. Closed Isolation Valve**
- Check valve position on affected zone
- Lever should be in line with pipe (open)
- Turn to aligned position if closed
**3. Airlock in Loop**
- Bleed air from system
- Close all zones except affected one
- Open flow meter fully on affected zone
- Bleed air vent on flow bar
- May need to repeat several times
**4. Blockage in Pipe Loop**
- Rare but possible (especially if not flushed after installation)
- May need professional power-flushing
- Check filter on return bar
**5. Thermostat Issue**
- Verify thermostat calling for heat
- Check wiring between thermostat and actuator
- Test with known-working thermostat
For comprehensive troubleshooting, see our [UFH Problems & Troubleshooting Guide](/underfloor-heating-problems/).
### Problem: Noisy Manifold
Symptoms:
- Clicking, humming, or whooshing sounds
- Vibration felt at manifold
- Noise travels through pipes
Possible Causes & Solutions:
**1. Air in System**
- Most common cause
- Bleed air from automatic/manual vents
- May need to bleed multiple times
- Run system for a few hours, then re-bleed
**2. Pump Speed Too High**
- Creates turbulent flow
- Reduce pump speed setting
- Should still maintain adequate flow rates
- Verify with flow meters
**3. Flow Rate Too High**
- Adjust flow meter caps to reduce flow
- Excessive velocity causes noise
- Rebalance if necessary
**4. Loose Mounting**
- Check manifold bracket fixings
- Tighten securely to wall
- Add rubber isolation washers to reduce vibration transmission
**5. Water Hammer**
- Caused by valves closing too quickly
- Install water hammer arrestors
- Adjust actuator closing speed (if adjustable)
### Problem: Uneven Heating Across Zones
Symptoms:
- Some rooms consistently warmer/cooler than target
- Despite thermostat settings being correct
- Flow meters show different readings than targets
Possible Causes & Solutions:
**1. System Needs Rebalancing**
- Flows have drifted from commissioned settings
- Follow balancing procedure
- Record new settings
**2. Thermostat Placement Issues**
- Thermostat in poor location (sunny spot, draught, etc.)
- Relocate or calibrate thermostat
- Use offset function if available
**3. Floor Covering Changes**
- New carpet/rug added (increases insulation)
- Thicker underlay reduces heat output
- Increase flow rate or water temperature slightly
**4. Pump Insufficient**
- Cannot deliver required flow to all zones
- Upgrade pump to higher capacity
- Or reduce number of simultaneous zones
### Problem: Leaks at Manifold
Symptoms:
- Visible water around connections
- Drips from actuators or valves
- Pressure loss requiring frequent top-up
Possible Causes & Solutions:
**1. Loose Connections**
- Tighten compression fittings
- Check push-fit connections fully engaged
- Don't over-tighten (can damage)
**2. Failed O-Ring/Seal**
- Common on older manifolds
- Replace O-rings on connections
- Use correct size and material (EPDM or silicone)
**3. Actuator Leaking**
- Rare but possible
- Replace actuator
- No repair possible on sealed units
**4. Cracked Manifold Body**
- Usually from over-tightening or physical damage
- Requires manifold replacement
- Isolate affected section if multi-piece manifold
### Problem: Actuators Not Responding
Symptoms:
- Actuator motor not running
- Visual indicator not moving
- Zone doesn't heat despite thermostat calling
Possible Causes & Solutions:
**1. No Power**
- Check circuit breaker
- Verify wiring centre powered
- Test voltage at actuator terminals
**2. Wiring Fault**
- Loose connection at wiring centre
- Damaged cable
- Incorrect terminal connections
- Check with multimeter
**3. Failed Actuator**
- Replace with new actuator (£30-60)
- Most are plug-and-play replacement
- No system drain required
**4. Stuck Valve Pin**
- Remove actuator
- Manually move valve pin up and down
- Apply silicone spray if sticky
- Clean any debris
For professional guidance, see our [When to Call a Professional](/when-to-call-professional-underfloor-heating/) guide.
## Manifold Maintenance
A little regular maintenance keeps a manifold reliable for the long term.
### Annual Maintenance Tasks
Every Heating Season Start (September/October):
**1. Visual Inspection**
- ☐ Check for any leaks around connections
- ☐ Inspect actuators for damage
- ☐ Verify all zone labels still legible
- ☐ Check cabinet door closes properly
**2. Air Bleeding**
- ☐ Bleed all automatic air vents
- ☐ Check for trapped air in system
- ☐ Run each zone individually while bleeding
- ☐ Top up system pressure after bleeding
**3. Flow Meter Check**
- ☐ Verify all flow meters read correctly
- ☐ Check readings match commissioned settings
- ☐ Clean flow meter cylinders if dirty
- ☐ Rebalance if readings have drifted
**4. Actuator Testing**
- ☐ Test each zone from its thermostat
- ☐ Verify actuator responds within 2-3 minutes
- ☐ Check visual indicators move
- ☐ Listen for motor operation (should be nearly silent)
**5. Pressure Check**
- ☐ Note system pressure (should be 1.0-1.5 bar cold)
- ☐ Top up if below 1.0 bar
- ☐ Investigate if frequently losing pressure
**6. Temperature Verification**
- ☐ Check flow temperature at manifold
- ☐ Should match blending valve setting
- ☐ Verify return temperature lower (5-10°C drop)
- ☐ Adjust if outside expected range
**7. Cleanliness**
- ☐ Clean dust from manifold and components
- ☐ Wipe flow meters for clear reading
- ☐ Ensure adequate ventilation in cabinet
- ☐ Check no obstructions
For complete maintenance schedules, see our [Annual UFH Maintenance Checklist](/annual-underfloor-heating-maintenance-checklist/).
### Professional Service (Every 1-2 Years)
Heating Engineer Should Perform:
- Water quality testing (inhibitor concentration)
- Detailed leak inspection
- Actuator operation verification
- Pump performance check
- Pressure vessel integrity test
- Complete system balancing verification
- Wiring and electrical connections check
Typical cost: £120-£200
### Manifold Lifespan
Expected Service Life:
- Brass/stainless manifold bars: 25-30+ years
- Actuators: 10-15 years
- Pump: 10-15 years
- Flow meters: 15-20 years
- Blending valve: 15-20 years
Components requiring replacement:
- Actuators (most common, every 10-15 years)
- Pump (noisy or failed bearings)
- Blending valve thermostatic head
- O-rings and seals (as needed)
## Upgrading and Replacing Manifolds
Situations requiring manifold upgrades or replacement.
### When to Consider Upgrading
**1. Adding Zones**
- Home extension requires additional heating
- Want to split large zone into smaller zones
- Add manifold ports or install second manifold
**2. Smart Controls**
- Upgrading to smart thermostats
- Want app-based control
- Remote monitoring capability
- May need compatible actuators
**3. Improved Efficiency**
- Old manifold lacks flow meters
- Want better balancing capability
- Temperature sensing for optimization
- Weather compensation compatibility
**4. Heat Pump Installation**
- Existing manifold not compatible
- Need lower temperature operation
- Better mixing valve required
- Improved control integration
**5. Poor Performance**
- Uneven heating cannot be resolved
- Multiple component failures
- Outdated technology
- Inefficient operation
### Manifold Replacement Process
Planning:
1. Measure existing manifold dimensions
2. Note number of ports required (+ spares)
3. Check pipe connection types
4. Verify cabinet size compatibility
5. Plan access for installation
**Costs (2026 UK):**
- 4-port basic manifold: £150-250
- 6-port standard manifold: £250-400
- 8-port premium manifold: £400-600
- 10-port premium manifold: £500-800
- Installation labour: £300-600
- Total typical cost: £600-1,400
Installation Steps:
1. Drain system (if complete replacement)
2. Isolate and disconnect old manifold
3. Mount new manifold assembly
4. Connect pipework (note zone labels)
5. Wire actuators to control system
6. Fill and pressurise system
7. Bleed air thoroughly
8. Commission and balance
9. Test all zones
10. Document settings
### Partial Upgrades
Often more practical than full replacement:
Upgrade Actuators:
- Replace with modern quiet models
- Smart-enabled actuators
- £30-60 per actuator
- No system drain required
- DIY-friendly
Add Smart Controls:
- Replace wiring centre
- Install smart thermostats
- Keep existing manifold
- Modernize without major work
Improve Blending Valve:
- More accurate temperature control
- Weather compensation capability
- Heat pump compatibility
- £150-300 + installation
## Advanced Features and Technologies
Modern manifolds offer advanced capabilities for enhanced comfort and efficiency.
### Electronic Flow Control
Replaces mechanical flow meters with electronic valves:
- Automatic flow balancing
- No manual adjustment needed
- Adapts to system changes
- Remote monitoring and control
- Premium feature (adds £200-400 per manifold)
### Integrated Sensors
Advanced manifolds include:
- Flow and return temperature sensors (each zone)
- Flow rate sensors (electronic monitoring)
- Pressure sensors
- Leak detection
- Data logging capability
### Smart Manifold Systems
Complete integrated solutions:
- App-based monitoring and control
- Energy consumption tracking
- Predictive maintenance alerts
- Weather compensation
- Learning algorithms
- Integration with home automation
Benefits:
- Optimize efficiency automatically
- Early problem detection
- Remote diagnostics
- Energy usage insights
Cost Premium: £500-1,500 over standard manifolds
### Weather Compensation
Adjusts flow temperature based on outside temperature:
- Colder outside = higher flow temperature
- Warmer outside = lower flow temperature
- Maintains comfort while minimizing energy
- 10-15% additional savings possible
- Requires compatible blending valve and controller
## Manifold Sizing Examples
Practical examples for common UK homes.
### Example 1: 2-Bedroom Flat (60m²)
Zones Required:
- Living room/kitchen (30m²): 1 zone
- Bedroom 1 (12m²): 1 zone
- Bedroom 2 (10m²): 1 zone
- Bathroom (8m²): 1 zone
Manifold Specification:
- 4-port manifold (all ports used)
- No spare capacity
- Better: 6-port manifold (2 spare ports)
Total Flow: 5-7 L/min
Pump Required: 6m head @ 8 L/min
Estimated Cost: £300-500 (manifold + pump)
### Example 2: 3-Bedroom House (120m²)
Zones Required:
- Living room (25m²): 2 zones (large room)
- Kitchen/dining (20m²): 1 zone
- Master bedroom (15m²): 1 zone
- Bedroom 2 (12m²): 1 zone
- Bedroom 3 (10m²): 1 zone
- Bathroom/en-suite (8m²): 1 zone (shared)
- Hall/landing (10m²): 1 zone
Manifold Specification:
- 8-port manifold (all required)
- Better: 10-port manifold (2 spare ports)
Total Flow: 10-14 L/min
Pump Required: 6-7m head @ 15 L/min
Estimated Cost: £500-800 (manifold + pump)
### Example 3: 4-Bedroom House (180m²)
Zones Required:
- Living room (30m²): 2 zones
- Kitchen (15m²): 1 zone
- Dining room (15m²): 1 zone
- Study (10m²): 1 zone
- Master bedroom + en-suite (20m²): 2 zones
- Bedroom 2 (12m²): 1 zone
- Bedroom 3 (12m²): 1 zone
- Bedroom 4 (10m²): 1 zone
- Family bathroom (6m²): 1 zone
- Hall/landing (12m²): 1 zone
Manifold Specification:
- 12-port manifold (all ports used)
- Or: Two 6-port manifolds (one per floor)
Total Flow: 15-20 L/min
Pump Required: 7-8m head @ 20 L/min
Estimated Cost: £700-1,200 (manifold + pump)
Two-Manifold Option:
- Ground floor: 6-port (living, kitchen, dining, study, hall, spare)
- First floor: 6-port (4 bedrooms, bathroom, landing)
- Separate pumps (smaller, quieter)
- Located on respective floors
- Total cost similar, better performance
## Frequently Asked Questions (FAQs)
### What does an underfloor heating manifold diagram show?
A typical diagram identifies the flow bar (hot water in, with flow gauges and thermal actuators) and the return bar (cooler water out, with isolation valves, an air vent, and fill/drain points). See the labelled diagram at the top of this guide for each part identified on a real manifold.
### How do I read the flow gauges on a manifold?
Each flow gauge (rotameter) has a small float inside a clear cylinder. Read the flow rate in litres/minute from the centre of the float, not the top. A zero reading means that zone's valve is closed or there's no demand; a wildly jumping reading usually means trapped air.
### How do I balance an underfloor heating manifold?
Open all zone valves fully, then adjust each flow gauge cap to match the target flow rate calculated for that loop (based on pipe spacing and length), balancing the longest, highest-resistance loops first. Recheck all zones after each adjustment, since changing one affects the others; most systems need two or three passes. Full step-by-step process, plus how to bleed trapped air, in our [dedicated balancing and bleeding guide](/how-to-balance-underfloor-heating-manifold/).
### What is the difference between the flow bar and return bar?
The flow bar is the supply side, hot water enters here from the boiler or heat pump and is split between zones via the flow gauges. The return bar collects the cooler water leaving each zone, via the actuators, and sends it back to be reheated. Physical top/bottom position varies by manifold model and how it's mounted, always check the labelling or manufacturer's manual for your specific unit rather than assuming a fixed layout.
### How do I turn off an underfloor heating manifold?
For a single zone, close its isolation valve on the flow or return bar, or set that zone's thermostat off, the actuator will close and stop flow to that loop. To shut down the whole manifold (for maintenance or an extended absence), close the isolation valves either side of the entire assembly; this stops flow to the manifold without draining the rest of the heating system. Turning off the boiler or heat pump entirely will also stop the manifold, but leaves other circuits (like radiators on a shared system) without heat too.
### What temperature should an underfloor heating manifold be set at?
The blending valve's flow temperature is normally set between 35–50°C, depending on the heat source: 35–40°C for a heat pump, 40–45°C for a gas boiler with good insulation, and 45–50°C for a gas boiler in a less insulated property. Never exceed 55°C, as this risks damaging most floor coverings, see our [best flooring for underfloor heating guide](/best-flooring-underfloor-heating/) for material-specific temperature limits.
### Can you use an underfloor heating manifold for radiators?
Not directly, a standard UFH manifold and its blending valve are designed for the low flow temperatures (35–50°C) that underfloor heating needs, while radiators typically require 60–80°C to heat a room effectively at the lower flow rates and larger pipe sizes radiators use. Some manifolds are designed to run mixed UFH-and-radiator systems, but this requires two separate circuits from the boiler, a direct high-temperature one for radiators and a blended low-temperature one for the UFH manifold, not a single shared manifold. See our [underfloor heating vs radiators guide](/underfloor-heating-vs-radiators/) for how the two systems compare and combine.
### Do I need a manifold for underfloor heating?
For wet (hydronic) underfloor heating, yes, a manifold is what allows a single heat source to serve multiple independently controlled zones, and it's a standard part of every wet UFH installation regardless of size. Electric underfloor heating doesn't use a manifold at all; each zone connects to its own thermostat and the mains electricity supply instead. See our [electric vs water UFH comparison](/electric-vs-water-underfloor-heating-2026/) for how the two system types differ.
The manifold isn't just a row of valves and gauges. It controls the water, zoning and balance that make wet underfloor heating work. Learn those three jobs and you'll understand most of the system.
What I'd remember:
1. Manifolds enable zoning - Independent room control for comfort and efficiency
2. Balancing is critical - Proper commissioning ensures even heating and optimal performance
3. Regular maintenance - Annual bleeding and checking prevents problems
4. Size correctly - Always specify 1-2 spare ports for future flexibility
5. Quality matters - Premium manifolds last longer and perform better
6. Professional installation - Proper positioning and commissioning essential
7. Smart upgrades possible - Modern controls compatible with existing manifolds
8. Problems are diagnosable - Most issues have simple solutions
Manifold Selection Checklist:
- ☐ Count required zones + 2 spare ports
- ☐ Calculate total flow requirements
- ☐ Choose appropriate pump size
- ☐ Select quality materials (brass/stainless steel)
- ☐ Ensure flow meters included
- ☐ Verify actuator compatibility
- ☐ Check cabinet dimensions
- ☐ Consider future smart control integration
- ☐ Budget for professional installation and commissioning
Further Reading:
- [Complete Wet UFH System Guide](/wet-underfloor-heating-ultimate-guide/)
- [How Does Underfloor Heating Work](/how-does-underfloor-heating-work/)
- [UFH Design & Planning Guide](/underfloor-heating-design-planning/)
- [UFH Zoning Complete Guide](/underfloor-heating-zoning-complete-guide/)
- [Annual Maintenance Checklist](/annual-underfloor-heating-maintenance-checklist/)
- [UFH Problems & Troubleshooting](/underfloor-heating-problems/)
Specifying a new manifold, maintaining an old one or chasing a fault? Start with the right port count, good access and proper balancing. Get those basics right and your wet UFH has the best chance of delivering comfortable, efficient heat for decades.
**Take the next step?** Compare free quotes from professional UFH installers via the [Underfloor Heating Directory](https://underfloorheating.directory/installers).
---
--- title: When to Call a Professional for Underfloor Heating Repairs: UK Guide 2026 description: Learn when underfloor heating repairs need a professional, typical UK costs, required qualifications and how to choose the right expert with confidence. url: https://underfloorheating.info/when-to-call-professional-underfloor-heating/ published: 2025-11-21 updated: 2026-08-21 tags: ['underfloor heating repair', 'professional ufh service', 'heating engineer', 'electrician', 'ufh specialist', 'repair costs'] ---
# When to Call a Professional for Underfloor Heating Repairs: UK Guide 2026
## When to Call a Professional for Underfloor Heating Repairs
Knowing when to tackle underfloor heating issues yourself and when to call a professional can save you time and money while preventing serious damage to your system. This guide focuses on that decision rather than step-by-step troubleshooting or routine servicing, so you know exactly when to stop DIYing and pick up the phone. Read more repair guidance at [underfloorheating.info](https://underfloorheating.info/) and find qualified professionals through the [Underfloor Heating Directory](https://underfloorheating.directory/).
While underfloor heating systems are remarkably reliable, occasional issues require expert diagnosis and repair. Understanding the difference between a simple DIY fix and a job requiring professional expertise is crucial for system longevity and safety.

Already know it's broken and want the fix steps? Start with our [Complete Underfloor Heating Problems & Troubleshooting Guide](/underfloor-heating-problems/) instead. Due your annual check-up rather than a fault? See the [Annual Maintenance Checklist](/annual-underfloor-heating-maintenance-checklist/). This guide picks up once you've decided a professional is needed, covering who to call, what it costs, and how to vet them.
If you are not sure what credentials to ask for, read our guide to [underfloor heating installer qualifications in the UK](/underfloor-heating-installer-qualifications-uk/) before booking a visit.
## Quick Decision Matrix: DIY vs Professional
Use this quick reference to determine whether you can handle the issue yourself or need professional help.
### ✅ Safe for DIY (After Reading Guides)
**All Systems:**
- Adjusting thermostat settings
- Replacing thermostat batteries
- Resetting system after power outage
- Checking and resetting tripped circuit breakers
- Basic cleaning around manifold area
- Updating heating schedules
**Wet Systems:**
- Topping up system pressure using filling loop
- Basic visual inspection of manifold
- Checking isolation valve positions
- Monitoring pressure gauge readings
- Bleeding a single zone (if confident and following guide)
**Electric Systems:**
- Removing thermal blocks (rugs, furniture) from heated areas
- Checking fused spur is switched on
- Basic thermostat troubleshooting
### ⚠️ Call a Professional
**Electric Systems (Qualified Electrician Required):**
- Any electrical testing or wiring work
- RCD/circuit breaker repeatedly trips
- No heat despite troubleshooting
- Burning smell from any component
- Floor sensor replacement
- Heating cable repairs or testing
- Thermostat installation or replacement
- Error codes that persist after basic troubleshooting
**Wet Systems (Qualified Heating Engineer Required):**
- Persistent pressure drops suggesting leaks
- Damp patches on floors or walls
- Multiple zones not heating
- Pump replacement or repair
- Manifold actuator replacement
- Blending valve repairs
- System flushing or water quality issues
- Boiler integration problems
- Expansion vessel replacement
- Any suspected leaks in pipework
**Both Systems (Immediate Professional Required):**
- Any smell of burning
- Visible sparking or electrical arcing
- Active water leaks
- Complete system failure with no obvious cause
- Suspected damage to in-floor components
- Carbon monoxide alarm activation (if gas boiler involved)

## Emergency Situations: Call Immediately
Some situations require immediate professional attention to prevent property damage, safety hazards, or system destruction.
### Critical Emergency Situations
**Call a Professional Within Hours:**
**1. Active Water Leaks (Wet Systems)**
- **Symptoms:** Visible water pooling, damp patches spreading, dripping from manifold
- **Why critical:** Can cause extensive structural damage, mould growth, floor covering damage
- **Who to call:** Emergency heating engineer or plumber
- **Immediate action:** Turn off system, isolate affected area, place towels/containers
- **Typical cost:** £150-£300 call-out + repair costs
**2. Repeated RCD Trips (Electric Systems)**
- **Symptoms:** RCD trips immediately when UFH switched on, or trips intermittently
- **Why critical:** Indicates current leaking to earth through damaged cable insulation
- **Who to call:** Qualified electrician immediately
- **Immediate action:** Do not reset repeatedly, keep system switched off
- **Typical cost:** £100-£200 call-out + diagnostic testing + repair
- **Danger:** Electric shock risk, fire risk if ignored
**3. Burning Smell from Electrical Components**
- **Symptoms:** Distinct electrical burning smell from thermostat, fused spur, or wiring
- **Why critical:** Indicates overheating components, fire risk
- **Who to call:** Qualified electrician immediately
- **Immediate action:** Switch off at consumer unit, do not use system
- **Typical cost:** £100-£250 emergency call-out + component replacement
**4. Complete System Failure (All Zones)**
- **Symptoms:** No zones heating, boiler won't fire for UFH, pump not running
- **Why critical:** In winter, can lead to frozen pipes and property damage
- **Who to call:** Heating engineer (wet systems) or electrician (electric systems)
- **Immediate action:** Check basic power supply, note any error codes
- **Typical cost:** £120-£250 call-out + repairs
**5. Pressure Drop to Zero (Wet Systems)**
- **Symptoms:** Pressure gauge reads zero or near-zero despite top-ups
- **Why critical:** Indicates major leak, system cannot operate
- **Who to call:** Emergency heating engineer
- **Immediate action:** Do not repeatedly top up, check for obvious leak locations
- **Typical cost:** £150-£300 emergency call-out + leak detection + repair
**6. Excessively Hot Floor Surface**
- **Symptoms:** Floor surface too hot to touch comfortably (>40°C)
- **Why critical:** Floor covering damage, potential cable damage (electric), scalding risk
- **Who to call:** Heating engineer (wet) or electrician (electric)
- **Immediate action:** Turn system off immediately, check thermostat settings
- **Typical cost:** £100-£200 diagnostic visit
### Emergency Contact Checklist
When calling for emergency service, have this information ready:
- ☐ System type (electric or wet/hydronic)
- ☐ Exact symptoms and when they started
- ☐ Any error codes displayed
- ☐ Whether system is currently switched off
- ☐ Installation date and installer details (if known)
- ☐ Warranty information
- ☐ Photos of issue (leaks, error displays, etc.)
- ☐ Make and model of key components (thermostat, boiler, manifold)
## Scheduled Professional Service: When to Book
Not all professional visits are emergencies. Regular scheduled maintenance prevents issues and extends system life.
### Annual Service Requirements
**Wet (Hydronic) Systems:**
Professional service is **essential annually**, ideally in September/October before heating season.
**What's included in annual service:**
- System pressure check and adjustment
- Water quality testing and inhibitor top-up
- Manifold actuator testing
- Blending valve inspection
- Pump operation verification
- Flow rate adjustment
- Comprehensive leak inspection
- Expansion vessel pressure check
- Thermostat calibration
- Full system performance test
**Cost:** £120-£200 per visit
**Duration:** 1-2 hours
**Frequency:** Annually (mandatory for warranty)
**Professional:** Gas Safe registered heating engineer
**Book service if:**
- ☐ 12 months since last professional service
- ☐ Before start of heating season (September/October)
- ☐ Manufacturer warranty requires annual servicing
- ☐ System performance has degraded
- ☐ Preparing property for sale
For detailed maintenance schedules, see our [Annual Underfloor Heating Maintenance Checklist](/annual-underfloor-heating-maintenance-checklist/).
**Electric Systems:**
Professional service is **recommended every 2-3 years** unless problems develop.
**What's included in electrical service:**
- Insulation resistance testing (megger test)
- RCD operation verification
- Heating element continuity check
- Floor sensor resistance measurement
- Connection inspection and tightness
- Thermostat calibration
- Heat distribution assessment
**Cost:** £80-£150 per visit
**Duration:** 45-90 minutes
**Frequency:** Every 2-3 years (or as needed)
**Professional:** Qualified electrician (Part P certified)
**Book service if:**
- ☐ 2-3 years since installation or last check
- ☐ Intermittent heating issues
- ☐ Uneven heat distribution developing
- ☐ Higher energy bills without obvious cause
- ☐ Thermostat showing occasional error codes
- ☐ System older than 10 years
## System-Specific Professional Requirements
Different system types require different specialists. Understanding who to call is crucial.
### Electric Underfloor Heating: Qualified Electrician
**Required Qualifications:**
- Level 3 Electrical Installation qualification
- Part P Building Regulations certification
- 18th Edition Wiring Regulations
- Relevant insurance and public liability cover
- Preferably: Manufacturer-specific training
**When to Call Electrician:**
- Any work involving electrical connections
- Testing heating cable insulation
- Diagnosing RCD trips
- Thermostat installation or replacement
- Floor sensor replacement
- Error code diagnosis requiring electrical testing
- Annual electrical safety checks
**What They'll Do:**
1. Visual inspection of all electrical components
2. Insulation resistance testing with megohmmeter
3. Continuity testing of heating elements
4. RCD operation verification
5. Thermostat calibration and testing
6. Connection tightness inspection
7. Safety certification if required
**Typical Costs:**
- Diagnostic visit: £80-£120
- Annual electrical testing: £80-£150
- Thermostat replacement: £150-£350 (inc. labour + part)
- Floor sensor replacement: £100-£200 (inc. labour + part)
- Cable repair (if possible): £200-£400
- Full system replacement: £60-£85 per m² (last resort)
For complete electric system information, see our [Electric Underfloor Heating Guide](/electric-underfloor-heating-systems/).
### Wet Underfloor Heating: Heating Engineer
**Required Qualifications:**
- Gas Safe registered (if working on gas boiler)
- OFTEC registered (if working on oil boiler)
- Level 3 Plumbing and Heating qualification
- Unvented hot water systems certification (if applicable)
- Relevant insurance and public liability cover
- Preferably: Underfloor heating manufacturer training
**When to Call Heating Engineer:**
- Annual service and maintenance
- Pressure issues and leak detection
- Pump replacement or repairs
- Manifold component replacement (actuators, valves)
- System balancing and flow rate adjustment
- Water quality testing and system flushing
- Integration with boiler or heat pump
- Zone control issues
- Expansion vessel replacement
**What They'll Do:**
1. System pressure testing
2. Water quality analysis
3. Manifold component inspection and testing
4. Pump operation and speed verification
5. Blending valve calibration
6. Flow rate measurement and adjustment
7. Leak detection using pressure testing
8. Inhibitor dosing
9. System balancing across all zones
**Typical Costs:**
- Annual service: £120-£200
- Diagnostic visit: £80-£150
- Actuator replacement: £80-£150 per actuator
- Pump replacement: £200-£400 (inc. labour + part)
- System flush: £300-£600 (depending on size)
- Leak detection: £150-£300 (basic) or £300-£800 (specialist equipment)
- Manifold repairs: £150-£400 depending on components
- Expansion vessel replacement: £150-£300
For complete wet system details, see our [Wet Underfloor Heating Ultimate Guide](/wet-underfloor-heating-ultimate-guide/).
### Specialist UFH Companies
For complex issues or older systems, specialist underfloor heating companies offer expertise beyond standard electricians or heating engineers.
**When to Use Specialist:**
- Complete system redesign or upgrade
- Multiple simultaneous failures across zones
- Integration with complex heat pump systems
- Thermal imaging leak detection
- Historic or unusual system types
- Manufacturer-specific repairs requiring specialist tools
- System not performing despite professional attention
- Converting system type (electric to wet, or vice versa)
**Additional Services Offered:**
- Thermal imaging cameras for leak detection
- Time Domain Reflectometry (TDR) for cable damage location
- Flow and return temperature optimisation
- Advanced system commissioning
- Heat loss calculations and system sizing verification
- Manufacturer warranty repairs
- System upgrades and modernisation
**Typical Costs:**
- Specialist diagnostic: £150-£300
- Thermal imaging survey: £200-£500
- TDR cable fault finding: £250-£600
- Full system commissioning: £300-£800
- Hourly rate: £60-£100 per hour

## Finding Qualified Professionals in the UK
Finding a trustworthy, qualified professional is crucial for safe, effective repairs. **Ready to get expert help?** Find qualified UFH repair professionals via the [Underfloor Heating Directory](https://underfloorheating.directory/installers).
### Verification Checklist
Before hiring any professional, verify these credentials:
**For Electricians:**
- ☐ NICEIC, ELECSA, or NAPIT registered
- ☐ Part P Building Regulations certification
- ☐ Public liability insurance (minimum £2 million)
- ☐ Electrical Installation Certificate provided after work
- ☐ References from previous UFH work
**For Heating Engineers:**
- ☐ Gas Safe registered (mandatory for gas work)
- ☐ OFTEC registered (for oil boiler work)
- ☐ Public liability insurance (minimum £2 million)
- ☐ References and reviews available
- ☐ Membership in professional body (CIPHE, APHC)
**For All Professionals:**
- ☐ Established business with physical address
- ☐ Clear written quotation before work starts
- ☐ Warranty on work performed (typically 12 months)
- ☐ Manufacturer-specific training (if relevant)
- ☐ VAT registered (for larger companies)
### Where to Find Qualified Professionals
**Official Registration Schemes:**
1. **Gas Safe Register** (https://www.gassaferegister.co.uk)
- Mandatory for any gas boiler work
- Search by postcode for registered engineers
- Verify registration card before work starts
2. **NICEIC** (https://niceic.com)
- Leading electrician registration body
- Contractor search by postcode
- Regular competency assessments
3. **ELECSA/NAPIT** (https://niceic.com/ / https://www.napit.org.uk)
- Alternative electrician registration schemes
- Same standards as NICEIC
- Find local qualified electricians
**Manufacturer Recommendations:**
4. **UFH Manufacturer Approved Installers**
- Warmup: Approved installer network
- Nu-Heat: Trained installer database
- [Wunda Group](/wunda-underfloor-heating-review/): Accredited installers
- ProWarm: Approved installer list
**Local Directories and Reviews:**
5. **Underfloor Heating Directory** (https://underfloorheating.directory)
- Verified reviews from real customers
- Check ratings and detailed feedback
- Request quotes from multiple tradespeople
6. **TrustATrader** (https://www.trustatrader.com)
- Government-endorsed scheme
- Verified credentials and insurance
- Customer reviews and ratings
7. **Which? Trusted Traders** (https://trustedtraders.which.co.uk/)
- Vetted by Which? consumer group
- High standards required
- Comprehensive background checks
### Questions to Ask Before Hiring
**Essential Questions:**
1. **"Are you qualified and registered for this type of work?"**
- Request registration number and verify online
- Check certification is current
2. **"Do you have experience with my system type?"**
- Ask for examples of similar jobs
- Check they understand your specific system (electric mat vs wet pipe)
3. **"Can you provide a written quotation?"**
- Should itemise labour and materials
- Include estimated time to complete
- Specify any exclusions
4. **"What warranty do you offer on your work?"**
- Typically 12 months on labour
- Parts may have separate manufacturer warranty
- Get warranty terms in writing
5. **"Do you carry public liability insurance?"**
- Minimum £2 million coverage
- Request proof if hiring for major work
6. **"Can you provide references from recent UFH work?"**
- Request 2-3 contactable references
- Check reviews on independent platforms
7. **"Will you provide certification after the work?"**
- Electrical Installation Certificate (electric systems)
- Gas Safety Certificate (if boiler work)
- Benchmark commissioning certificate (boiler/heat pump)
8. **"What are your call-out charges and hourly rates?"**
- Clarify day rate vs emergency rate
- Understand minimum charge policies
- Get breakdown of diagnostic vs repair costs
## Cost Expectations: 2026 UK Prices
Understanding typical costs helps you budget and identify unreasonable quotes.
### Diagnostic and Call-Out Costs
**Standard Call-Out (Weekday, Daytime):**
- Heating engineer: £80-£150 (first hour)
- Electrician: £80-£120 (first hour)
- Specialist UFH company: £100-£200 (first hour)
**Emergency Call-Out (Evenings, Weekends):**
- Heating engineer: £150-£300 (first hour)
- Electrician: £120-£200 (first hour)
- Typically 1.5-2x normal rate
**Note:** Many professionals deduct call-out fee if you proceed with repair.
### Common Repair Costs
**Electric System Repairs:**
| Repair Type | Typical Cost | Duration |
|-------------|--------------|----------|
| Thermostat replacement | £150-£350 | 1-2 hours |
| Floor sensor replacement | £100-£200 | 1-2 hours |
| Fused spur replacement | £60-£120 | 30-60 min |
| Electrical safety testing | £80-£150 | 45-90 min |
| Cable repair (if possible) | £200-£400 | 2-4 hours |
| Cable fault finding (TDR) | £250-£600 | 2-3 hours |
**Wet System Repairs:**
| Repair Type | Typical Cost | Duration |
|-------------|--------------|----------|
| Annual service | £120-£200 | 1-2 hours |
| Actuator replacement | £80-£150 | 30-60 min per actuator |
| Pump replacement | £200-£400 | 2-3 hours |
| Blending valve replacement | £150-£300 | 1-2 hours |
| Expansion vessel replacement | £150-£300 | 1-2 hours |
| System flush | £300-£600 | Half day |
| Leak detection (basic) | £150-£300 | 2-3 hours |
| Leak detection (thermal imaging) | £300-£800 | Half day |
| Manifold replacement | £400-£800 | Half-full day |
**Both Systems:**
| Service Type | Typical Cost | Duration |
|-------------|--------------|----------|
| Smart thermostat installation | £150-£300 | 1-2 hours |
| Zone expansion/addition | £200-£500 | 2-4 hours |
| Control system upgrade | £300-£800 | Half day |
| System commissioning | £200-£400 | Half day |
### Money-Saving Tips
**1. Bundle Work:**
- Schedule annual service with other needed repairs
- Have multiple zones serviced simultaneously
- Combine UFH service with boiler service
**2. Book in Advance:**
- Non-emergency bookings are cheaper
- Pre-heating season (September) often has availability
- Avoid emergency call-outs by addressing issues early
**3. Get Multiple Quotes:**
- Request 2-3 quotes for non-emergency work
- Compare itemised quotations
- Don't automatically choose cheapest - check qualifications
**4. Consider Service Plans:**
- Some companies offer annual service contracts
- Often includes discounted call-outs
- Priority scheduling during busy periods
**5. Maintain Regularly:**
- DIY monthly checks prevent expensive failures
- Annual professional service avoids major repairs
- Preventive maintenance costs 10-15% of emergency repairs
For detailed cost breakdowns and ROI analysis, see our [Complete Underfloor Heating Costs Guide](/underfloor-heating-costs/).
## What to Expect from a Professional Visit
Understanding the typical process helps you prepare and know what's normal.
### Initial Diagnostic Visit
**Typical Process:**
**1. Initial Discussion (10-15 minutes)**
- Professional asks about symptoms
- Reviews when problem started
- Checks system history and age
- Reviews any DIY troubleshooting attempts
- Examines installation documentation if available
**2. Visual Inspection (10-20 minutes)**
- Thermostat examination
- Manifold inspection (wet systems)
- Wiring and connections check
- Physical condition of accessible components
- Check for obvious damage or wear
**3. Testing and Diagnosis (20-45 minutes)**
**Electric Systems:**
- Insulation resistance testing
- Continuity testing
- Floor sensor resistance measurement
- Thermostat function testing
- RCD operation verification
- Power supply verification
**Wet Systems:**
- Pressure testing
- Actuator operation testing
- Pump function check
- Flow rate measurement
- Temperature differential testing
- Water quality assessment (if applicable)
**4. Diagnosis and Quotation (10-15 minutes)**
- Explain findings in plain English
- Provide repair options
- Written quotation for work
- Estimated time to complete
- Parts ordering if needed
**5. Immediate Repair or Scheduling**
- Minor repairs may be completed same visit
- Major work scheduled for later date
- Parts ordered if not carried in van
- Emergency temporary fixes if needed
### What Professionals Should Do
**Good practices indicating a quality professional:**
- ☐ Arrives on time or calls if delayed
- ☐ Wears identifiable uniform or carries ID
- ☐ Shows registration card without being asked
- ☐ Protects floors with dust sheets
- ☐ Explains what they're doing and why
- ☐ Takes photos of any issues found
- ☐ Provides clear written quotation
- ☐ Answers questions patiently
- ☐ Cleans up after work
- ☐ Provides certification where required
- ☐ Gives advice on preventing future issues
- ☐ Provides receipt and warranty documentation
### What to Provide the Professional
**Make the visit efficient by having ready:**
**System Documentation:**
- ☐ Installation manual and commissioning sheet
- ☐ System layout plans (pipe/cable layout)
- ☐ Previous service records
- ☐ Warranty information
- ☐ Manufacturer contact details
- ☐ Photos of any visible issues
**System Information:**
- ☐ Age of system
- ☐ Original installer details
- ☐ System type and components
- ☐ Recent changes or modifications
- ☐ Maintenance history
**Access:**
- ☐ Clear access to manifold/wiring centre
- ☐ Access to consumer unit (fuse box)
- ☐ Access to boiler/heat pump
- ☐ Keys for any locked cupboards
- ☐ Parking availability if needed
## Red Flags: When to Be Cautious
Protect yourself from unqualified or dishonest traders by recognising warning signs.
### Serious Red Flags
**Immediate Concerns - Consider Different Professional:**
❌ **Cannot show registration card or credentials**
- All electricians should be Part P registered
- All gas engineers must be Gas Safe registered
- Legitimate professionals carry ID cards
❌ **Unwilling to provide written quotation**
- Professional quotes should be itemised
- Should include parts, labour, and timescales
- Verbal-only quotes lead to disputes
❌ **Demands full payment upfront**
- Standard practice is deposit (typically 10-30%)
- Full payment only after work completed and tested
- Be wary of cash-only demands
❌ **Diagnosis without any testing**
- Proper diagnosis requires testing equipment
- Instant diagnosis without testing is guesswork
- Professional should explain their testing process
❌ **Recommends full replacement without proper diagnosis**
- Complete system replacement is last resort
- Most issues can be repaired
- Should explain exactly what's failed and why
❌ **Cannot provide references or insurance proof**
- Established professionals have references
- Public liability insurance is essential
- Reluctance to provide suggests unprofessionalism
❌ **High-pressure sales tactics**
- "Must decide today" pressure
- Excessive discounts for immediate payment
- Claims your system is "dangerous" without evidence
### Moderate Concerns - Ask Questions
⚠️ **Very cheap quote compared to others**
- May indicate unqualified person
- Could suggest corners will be cut
- Verify qualifications carefully
⚠️ **Vague about qualifications or experience**
- Should clearly state their credentials
- Should happily explain their experience
- Evasiveness suggests lack of proper training
⚠️ **No business address or landline**
- Mobile-only contact can be warning sign
- Proper businesses have physical address
- Check company exists on Companies House
⚠️ **Suggests work outside their expertise**
- Electricians shouldn't do gas work
- Unqualified people shouldn't touch either
- Specialists should stick to their field
⚠️ **Poor communication or unprofessional behaviour**
- Late without calling
- Unprepared or lacks proper tools
- Dismissive of your questions
## Preparing for a Professional Visit
Proper preparation makes visits more efficient and potentially less expensive.
### Before the Visit
**1 Week Before:**
- ☐ Locate and gather all system documentation
- ☐ Create list of all symptoms and when they occur
- ☐ Take photos of any visible issues
- ☐ Note any error codes displayed
- ☐ Check you'll be home for appointment
- ☐ Confirm appointment 2-3 days before
**24 Hours Before:**
- ☐ Clear access to manifold, consumer unit, boiler
- ☐ Remove items stored near key components
- ☐ Notify family members/tenants of visit
- ☐ Arrange parking if needed
- ☐ Locate keys for any locked areas
**On the Day:**
- ☐ Have documentation ready
- ☐ Be available to answer questions
- ☐ Show professional key components
- ☐ Explain symptoms and history
- ☐ Be present during diagnosis
### Questions to Ask During Visit
**About the Problem:**
1. "What exactly is wrong with the system?"
2. "What caused this problem?"
3. "How serious is it?"
4. "What happens if I delay the repair?"
**About the Repair:**
5. "What are my repair options?"
6. "How long will the repair take?"
7. "Will you need to return to complete the work?"
8. "What parts need replacing?"
**About Future Prevention:**
9. "How can I prevent this happening again?"
10. "Are there any other issues I should address?"
11. "What maintenance should I be doing?"
12. "When should I book next service?"
**About Costs:**
13. "What's the total cost including VAT?"
14. "Is this covered by any warranty?"
15. "What warranty do you provide on the repair?"
16. "When is payment due?"
## After the Repair: Follow-Up
Proper follow-up ensures lasting results and builds relationship with professional for future needs.
### Immediately After Work
**Check Before Professional Leaves:**
- ☐ System operates correctly
- ☐ All zones heating properly (wet systems)
- ☐ Floor warming evenly (electric systems)
- ☐ No error codes displaying
- ☐ Work area cleaned up
- ☐ All components replaced correctly
**Obtain Documentation:**
- ☐ Written invoice with VAT breakdown
- ☐ Warranty certificate for work performed
- ☐ Electrical Installation Certificate (if electrical work)
- ☐ Gas Safety Certificate (if gas work)
- ☐ Benchmark commissioning certificate (if boiler work)
- ☐ Parts receipts or old parts returned
- ☐ Contact details for follow-up
**Make Payment:**
- ☐ Verify amount matches quotation
- ☐ Request receipt for payment
- ☐ Keep all documentation together
- ☐ Photograph certificates for digital backup
### First 24-48 Hours
**Monitor System Performance:**
- ☐ Check all zones heat correctly
- ☐ Verify thermostat responds properly
- ☐ Monitor for any error codes
- ☐ Check no new leaks developed (wet systems)
- ☐ Verify no electrical issues (electric systems)
- ☐ Confirm heating cycles normally
**Report Issues Promptly:**
- Contact professional within 24 hours if:
- Original problem persists
- New issues developed
- Work appears incomplete
- System not operating as described
### Long-Term Follow-Up
**Maintain Records:**
- ☐ File all documentation safely
- ☐ Add repair to maintenance log
- ☐ Note date for next service
- ☐ Keep professional's contact details
- ☐ Update system history file
**Schedule Next Service:**
- ☐ Book annual service before heating season
- ☐ Add reminder to calendar
- ☐ Consider using same professional if satisfied
- ☐ Request service plan information
**Leave Reviews:**
- ☐ Leave honest review on booking platform
- ☐ Report to registration scheme if issues
- ☐ Recommend to others if satisfied
- ☐ Provide feedback to company
## When DIY is Costing You More
Sometimes attempting DIY repairs actually costs more than calling a professional from the start.
### Signs DIY is Making Things Worse
**Stop and Call Professional If:**
❌ **You've spent 3+ hours without progress**
- Your time has value
- Professional could diagnose in 30 minutes
- Frustration leads to mistakes
❌ **You've bought parts that didn't fix it**
- Non-returnable parts add up
- Professional diagnosis identifies exact part needed
- Guesswork is expensive
❌ **The problem is getting worse**
- Water leak spreading
- More zones affected
- Error codes multiplying
❌ **You're not confident about safety**
- Electricity can kill
- Gas leaks are deadly
- Water damage is expensive
❌ **You lack proper tools**
- Insulation resistance testing requires megohmmeter (£200-£500)
- Proper pressure testing needs equipment
- Renting or buying tools costs add up
❌ **Manufacturer warranty at risk**
- DIY repairs often void warranties
- Professional repair maintains coverage
- Potential £1,000s in warranty value
### The True Cost of DIY Mistakes
**Electric System Example:**
- DIY attempt replaces wrong thermostat: £150 (non-returnable)
- Still doesn't work, tries new floor sensor: £80
- Eventually calls electrician: £120 call-out
- Electrician finds actual issue: faulty RCD: £60 fix
- **Total cost: £410 vs £180 if called professional first**
**Wet System Example:**
- DIY tries bleeding all zones: 4 hours of time
- Buys replacement actuator: £85
- Still has cold zones, calls engineer: £150
- Engineer finds main issue: pump failed: £250 repair
- **Total cost: £485 + 4 hours vs £400 if called immediately**
Knowing when to call a professional protects your investment, ensures safety, and often saves money in the long run.
**Key Takeaways:**
1. **Safety First:** Never DIY electrical or gas work
2. **Know Your Limits:** Basic checks are fine, diagnosis needs professionals
3. **Act Early:** Small problems become expensive if ignored
4. **Verify Qualifications:** Always check registration and credentials
5. **Get Multiple Quotes:** For non-emergency work, compare options
6. **Maintain Relationships:** Build trust with quality professionals
7. **Keep Records:** Documentation helps with future issues and warranty claims
**Quick Decision Guide:**
- **Safe DIY:** Thermostat batteries, pressure top-up, checking settings
- **Needs Electrician:** Any electrical testing, wiring, cable issues
- **Needs Heating Engineer:** Wet system repairs, annual service, pump/manifold issues [Check out our Underfloor Heating Manifold Guide](/underfloor-heating-manifold-guide/)
- **Emergency:** Active leaks, burning smell, repeated trips, complete failure
By understanding when to call for help and how to find qualified professionals, you'll keep your underfloor heating system running efficiently for decades.
**Further Reading:**
- [Complete UFH Problems & Troubleshooting Guide](/underfloor-heating-problems/)
- [Annual Maintenance Checklist](/annual-underfloor-heating-maintenance-checklist/)
- [UFH Maintenance Guide](/underfloor-heating-maintenance-guide/)
- [Complete UFH Costs & ROI Analysis](/underfloor-heating-costs/)
Remember: A well-maintained system serviced by qualified professionals is an investment in decades of comfortable, efficient heating.
**Need a service?** Compare trusted UFH technicians through the [Underfloor Heating Directory](https://underfloorheating.directory/installers).
---
--- title: Best Underfloor Heating Brands UK (2026) description: Compare the best underfloor heating brands in the UK. Expert reviews of Warmup, ProWarm, Uponor, John Guest and more to find the perfect system for your home. url: https://underfloorheating.info/underfloor-heating-brands/ published: 2025-11-18 updated: 2026-08-21 tags: ['underfloor heating brands', 'best underfloor heating UK', 'UFH brands', 'underfloor heating companies', 'heating system brands'] ---
# Best Underfloor Heating Brands UK (2026)
Here's the honest truth about underfloor heating brands: there's no single "best" brand. I've worked with Warmup, ProWarm, John Guest, Uponor, and others across different projects, and they each excel in different situations. Use [underfloorheating.info](https://underfloorheating.info/) for independent guidance and the [Underfloor Heating Directory](https://underfloorheating.directory/) to plan the next stage of your project.
Warmup dominates if you're obsessed with smart home integration-their 6iE WiFi thermostat is genuinely impressive. ProWarm wins on value and DIY installation (lifetime warranties, no shortcuts). Professional installers swear by John Guest because their push-fit connections are genuinely faster on site. If you're building something that needs to last 50 years, Uponor's your brand.
The real issue most people face isn't the brand-it's choosing electric vs. water UFH. Get that decision wrong, and the brand doesn't matter. I've seen homeowners get Warmup's premium system installed in a kitchen and watch their heating bills spiral because they chose electric when water would've cost 60% less to run.
**Choosing the right brand?** Find underfloor heating manufacturers and suppliers on the [Underfloor Heating Directory](https://underfloorheating.directory/manufacturers).
This guide breaks down the UK's leading manufacturers so you can match the right brand to your actual situation. [For water systems, dive deep into the specs in our Best Water Underfloor Heating System guide](/wet-underfloor-heating-ultimate-guide/).
## Understanding the Essentials of Underfloor Heating
Before selecting a brand, it's essential to understand the core technology and what makes a quality underfloor heating system. This knowledge will help you evaluate brands effectively and choose the system that best fits your home and budget.
### Electric vs. Water (Hydronic) Systems: A Head-to-Head Comparison
Underfloor heating falls into two main categories: electric and water-based (hydronic). Each has distinct advantages depending on your project type, room size, and heating requirements.
#### Electric UFH Systems (Dry Systems)
**How They Work**: Electric systems use a network of heated cables or prefabricated mats installed directly beneath your floor covering. When switched on, electricity flows through the heating elements, generating radiant heat that warms the floor surface and the room above.
**Best For**: Electric UFH excels in **small, intermittently-used spaces** like bathrooms, en-suites, and cloakrooms. Its slim profile (typically 3-6mm) means minimal impact on floor height, making it ideal for retrofitting without major structural changes.
**Installation**: The installation process is considerably simpler, faster, and less expensive than water systems. Electric mats can be laid directly onto existing floors with minimal disruption, making them popular for DIY-friendly projects.
**⚠️ Running Costs Reality Check**:
**Before installing electric UFH, you must understand the true running costs.** Based on real user experiences from UK homeowners:
- **Small bathroom (8-10m2)**: £100-150/month when used as primary heating
- **Kitchen (10m2)**: £150/month for regular daily use
- **Whole ground floor**: £700/month just to "take the edge off" (not even primary heating)
- **Living room (17m2) with ProWarm 200W**: £4/day = £120/month = £1,460/year
**Professional installer consensus**: "Don't go electric for whole-house heating - bills are insane. Every customer I know with electric UFH moans about the running cost." - UK Electricians Forum
**The verdict**: Electric UFH is economical **ONLY for bathrooms and small, intermittently-used spaces**. For kitchens, living rooms, or whole-house heating, water systems are 60-75% cheaper to run despite higher installation costs.
For a complete comparison of system types and their costs, see our [electric vs water underfloor heating guide](/electric-vs-water-underfloor-heating-2026/).
#### Water UFH Systems (Wet Systems)
**How They Work**: Water-based systems circulate warm water (typically 35-45°C) through a network of pipes laid beneath the floor. These pipes connect to a central heat source such as a boiler, heat pump, or renewable energy system via a manifold distribution hub.
**Best For**: Wet systems are the preferred choice for new builds and major renovations where they can be designed into the floor construction from the outset. They're ideal for heating entire properties efficiently and work particularly well with modern heat pumps.
**Installation**: Installation is more complex and has higher upfront costs (typically £80-120 per m2 for materials). It requires specialist installation to lay pipework, install manifolds, and integrate with your primary heating system. Floor build-up is typically 65-100mm.
**Running Costs**: Water systems are significantly cheaper to run long-term, with costs as low as £8-12 per m2 annually with gas heating. When paired with heat pumps, running costs can be 40-60% less than electric UFH, making wet systems excellent long-term investments for larger areas.
For comprehensive information on wet systems, explore our [complete wet underfloor heating guide](/wet-underfloor-heating-ultimate-guide/).
### Key Factors That Influence Your Choice
Several critical factors should guide your brand and system selection. Considering these early ensures you achieve the performance and efficiency you expect:
**Project Type**: New builds favour water systems for optimal integration and efficiency. Retrofits and renovations often benefit from electric systems due to simpler installation and lower floor height impact.
**Room Size & Usage**: Small rooms under 20m2 (bathrooms, cloakrooms) benefit from electric systems with fast 20-30 minute warm-up times. Larger areas over 30m2 become more economical with water systems, with lower running costs offsetting higher installation within 5-7 years.
**Existing Heating System**: Water UFH must integrate with your boiler or heat pump, so compatibility is crucial. This integration can also present an opportunity to upgrade to more efficient heat sources like condensing boilers or heat pumps.
**Floor Finish**: Your planned flooring directly impacts system performance. Tile and stone provide optimal heat transfer, whilst carpet and solid wood require careful specification to ensure compatibility and efficiency.
**Insulation Levels**: High-quality insulation is non-negotiable for UFH efficiency. Without proper floor, wall, and roof insulation, significant heat loss will occur, increasing energy bills regardless of which system you choose.
For detailed planning guidance, see our [underfloor heating design and planning guide](/underfloor-heating-design-planning/).

## The Hallmarks of a Top-Tier Underfloor Heating Brand
Understanding what separates premium brands from budget options helps ensure you invest in a reliable, efficient, and long-lasting system. These quality indicators should guide your evaluation.
### System Quality and Core Components
The physical components of an underfloor heating system form its foundation. High-quality brands use superior materials and engineering to ensure durability and performance.
**Manifold Excellence** (Water Systems): The manifold acts as the central control hub in hydronic systems. Top-tier manufacturers like Wavin and Uponor construct manifolds from durable materials such as stainless steel or nickel-plated brass, chosen for excellent thermal conductivity and superior corrosion resistance. Essential features include:
- Flow meters on each port for precise balancing
- Thermostatic actuators for zone control
- Drain and fill points for maintenance
- Isolation valves for individual circuit servicing
[Check out our Underfloor Heating Manifold Guide](/underfloor-heating-manifold-guide/)
**Heating Element Durability** (Electric Systems): Quality electric systems feature robust construction in their heating cables, mats, or foils. Look for multi-strand cores, tough insulation layers, and continuous earth braids for safety and longevity. The system's 25-50 year lifespan depends directly on these core components.
**Thermostat and Controls**: A heating system is only as effective as its controller. Leading brands offer advanced thermostats with precise temperature management, including:
- Wi-Fi connectivity for smartphone app control
- Zone management for individual room control
- Programmable schedules to optimise comfort
- Energy monitoring to track consumption
- Integration with smart home systems (Alexa, Google Home)
For detailed information on thermostats and controls, see our [underfloor heating thermostat guide](/smart-thermostats-underfloor-heating/).
### Innovation, Efficiency, and Smart Technology
Leading underfloor heating companies invest heavily in research and development, resulting in systems that are more efficient, intelligent, and easier to install.
**Energy Efficiency**: Top brands design systems that minimise energy waste and reduce running costs. This is achieved through:
- Advanced floor sensor technology for precise temperature control
- Adaptive learning algorithms that optimise heating patterns
- Weather compensation to adjust output based on outdoor conditions
- Superior insulation materials and installation methods
**Ease of Installation**: Systems that are difficult to install cost more in labour and are prone to errors. High-quality brands simplify installation with:
- Pre-spaced electric mats for quick laying
- Push-fit manifold connections requiring no special tools
- Comprehensive installation kits with all necessary components
- Clear installation guides and video tutorials
- Technical support hotlines for professional installers
**Smart Home Integration**: Modern systems increasingly feature connectivity and automation:
- Voice control compatibility (Amazon Alexa, Google Assistant)
- Geofencing to detect when you're home
- Integration with IFTTT for custom automation
- Remote monitoring and control via smartphone apps
Learn more about advanced heating control in our [smart thermostats and underfloor heating guide](/smart-thermostats-underfloor-heating/).
### Warranty, Reliability, and Customer Support
A brand's commitment doesn't end after purchase. The best underfloor heating systems in the UK are backed by comprehensive guarantees and responsive support.
**Comprehensive Warranties**: Long warranty periods reflect manufacturer confidence in product reliability:
- **Lifetime warranties** on core components (pipes, cables) from premium brands
- **25-year warranties** on heating elements and manifolds
- **10-15 year warranties** on thermostats and controls
- **Manufacturer guarantees** covering material defects and workmanship
ProWarm, for example, offers lifetime warranties on many systems, demonstrating confidence in long-term performance and providing complete peace of mind.
**Brand Reputation**: Reliable manufacturers have extensive track records:
- Positive reviews from homeowners and professional installers
- Industry certifications and compliance standards
- Years of operation and market presence
- Case studies and completed project portfolios
**Technical Support**: Quality support ensures issues are resolved quickly:
- Pre-sales consultation for system design
- Installation guidance via phone and email
- Troubleshooting assistance for operational issues
- Spare parts availability for maintenance and repairs
- Training programmes for professional installers
### Professional Installer Insights: What the Experts Recommend
Based on feedback from UK heating engineers and installers on professional forums, here are the critical components and specifications that separate quality installations from problematic ones:
**Pump Quality is Non-Negotiable**:
"Always use **Grundfos pumps**-they're the industry standard for water UFH systems. Cheap pumps fail within 2-3 years, and you'll be ripping up floors to replace them. Grundfos will run for 15+ years without issues." - Professional installer, BuildHub Forum
**Insulation Requirements**:
- **Minimum 75mm** insulation below UFH (100mm+ preferred for ground floors)
- Without adequate insulation, you're "heating the ground instead of the room"
- Poor insulation can increase running costs by 40-60%
- Use high-density insulation boards designed for UFH (NOT general-purpose insulation)
**Critical Installation Factors**:
- **Floor sensor placement**: Must be between heating cables/pipes, not directly on them
- **Thermostat quality**: Budget thermostats with poor sensors waste 20-30% more energy
- **Proper commissioning**: Water systems must be pressure-tested and air-purged
- **Zone design**: Larger rooms (>20m2) should have separate zones for efficiency
**Installer Red Flags to Avoid**:
- ❌ Installers who skip manifold balancing (water systems)
- ❌ Using cheap unbranded pumps instead of Grundfos/Wilo
- ❌ Insufficient insulation to "save money"
- ❌ No heat loss calculations before system sizing
- ❌ Promising electric UFH for whole-house heating without warning about running costs
## Brand Comparison: Top UK Underfloor Heating Manufacturers
Before diving into detailed reviews, here's a quick comparison of the leading brands to help you identify the best option for your needs:
| Brand | Best For | Price | Warranty | Smart Features | Trustpilot | Systems |
|-------|----------|-------|----------|----------------|------------|---------|
| **Warmup** | Smart homes, premium projects | £££ | Lifetime | ⭐⭐⭐⭐⭐ (6iE WiFi) | 4.7/5 (635) | Electric, Water |
| **ProWarm** | DIY, value for money | ££ | Lifetime | ⭐⭐⭐ (Good) | 4.8/5 (1,008) | Electric, Water |
| **Fastwarm** | Online value, fast delivery | ££ | 50 years | ⭐⭐⭐ (Good) | 4.9/5 (2,689) | Electric, Water |
| **uHeat** | Bespoke DIY solutions | ££ | Varies | ⭐⭐⭐ (Good) | 5.0/5 (375) | Electric, Water |
| **Continal** | Trade, self-build | ££ | Varies | ⭐⭐⭐ (Good) | 4.9/5 (342) | Water only |
| **Wunda** | Retrofit, rapid response | ££ | - | ⭐⭐ (Basic) | 4.8/5 | Water only |
| **John Guest** | Professional installers | ££ | 25 years | ⭐⭐ (Basic) | Limited | Water only |
| **Uponor** | High-end, long-term reliability | £££ | 50 years | ⭐⭐⭐⭐ (Smart) | Limited | Water only |
| **Polypipe** | Comprehensive range | ££ | 50 years | ⭐⭐ (Basic) | 3.7/5* | Water only |
*Polypipe UFH division has limited reviews (3.7/5), while main company has mixed feedback (2.0/5, 24 reviews).
**Price Legend**: £ = Budget-friendly (£40-60/m2) | ££ = Mid-range (£60-90/m2) | £££ = Premium (£90-150/m2)

## When to Choose Electric vs Water: Evidence-Based Decision Framework
**The single most important decision** before selecting a brand is choosing the right system type. Here's the honest truth based on real user experiences and professional installer consensus:
### Choose Electric UFH ONLY If:
✅ **Bathroom or en-suite** (under 10m2) used intermittently
✅ **Cloakroom** or small utility room
✅ **Single room** where running 2-3 hours daily maximum
✅ **Retrofit** where floor height is severely constrained (existing floor height + 3-6mm)
✅ You accept running costs of **£100-150/month** for a small bathroom
### Choose Water UFH For:
✅ **Kitchen** (any size) - saves £50-100/month vs electric
✅ **Living room, dining room, or lounge** - electric costs are prohibitive
✅ **Whole-house heating** - electric will cost £300-700/month
✅ **Any room >10m2** used as primary heated space
✅ **New build or major renovation** - install water from the start
✅ **Heat pump integration** - water systems are 60-75% cheaper to run
### The Running Cost Reality:
Based on actual user data from 2024-2026:
| Room Type | Size | Electric Cost/Month | Water Cost/Month | Annual Saving (Water) |
|-----------|------|---------------------|------------------|----------------------|
| Small bathroom | 8m2 | £100-150 | £25-40 | £900-1,320 |
| Kitchen | 10m2 | £150 | £35-50 | £1,200-1,380 |
| Living room | 17m2 | £120 | £30-45 | £1,020-1,080 |
| Whole ground floor | 50m2 | £700 | £175-250 | £5,400-6,300 |
**Professional Consensus**: "I tell every customer: if it's anything more than a bathroom, install water UFH. The installation costs more upfront, but you'll save thousands over the system's lifetime. Electric UFH for kitchens or living rooms is financial madness." - Heating engineer, UK Electricians Forum
## Which Underfloor Heating Brand Should You Choose?

Use this decision framework to quickly identify the brand that best matches your project requirements:
### Warmup: Premium, tech-first choice
I'd recommend Warmup if you actually care about smart integration. Their 6iE WiFi thermostat is the only one I've seen that truly learns your patterns and adjusts automatically without being fiddly. You'll pay more-expect £90-150/m2-but the system includes cutting-edge controls, and their 24/7 technical support is genuinely useful if something goes wrong. Best for high-end builds or if you're obsessed with having everything on your phone.
### ProWarm: The sensible middle ground
ProWarm is where most DIY installers go, and for good reason. Lifetime warranty, competitive pricing (£60-90/m2), and their support team actually bothers to respond to emails within 24 hours. They're not fancy, but they work reliably. If you're installing it yourself or want value without sacrificing quality, this is the obvious choice.
### John Guest Speedfit: The installers' preference
Professional installers prefer John Guest because push-fit connectors genuinely do save time on large jobs. No special tools, no soldering, no messing about. The downside? They're usually available through trade channels, so you'll need a contact in the industry. Not really suitable for DIY unless you know what you're doing.
### Uponor: The long-game choice
Uponor's brilliant if you're thinking 50 years ahead (new build, major retrofit with proper insulation). 50-year warranty on pipes, exceptional reliability, and their integration with renewable systems is seamless. You'll pay premium prices (£90-150/m2), but you're buying peace of mind. They also work beautifully with heat pumps running at low temperatures.
### Polypipe: The versatile option
If your project involves multiple floor types or you need to work around existing systems, Polypipe's range is comprehensive. Their systems are designed to work at ultra-low temperatures (35-45°C), which is ideal for heat pump integration. Wide availability through merchants means you don't need special trade connections.
### Wunda: Fast retrofit option
Wunda's rapid heat-up system (15-30 minutes instead of 2-4 hours) is clever if you're retrofitting into an existing property or you own a holiday home you heat intermittently. Cost's roughly half of premium brands. The trade-off? You're not getting the long-term efficiencies of traditional UFH, so it's really only suitable for specific situations.
Read our full [Wunda underfloor heating review](/wunda-underfloor-heating-review/) for detailed pricing, customer feedback, and comparisons.
### Choose Fastwarm if you:
- ✅ You're buying online and want fast UK delivery
- ✅ You need excellent customer reviews and support (4.9/5 Trustpilot rating)
- ✅ You want a 50-year warranty on electric heating cables
- ✅ You're looking for ultra-thin electric systems (2mm cables)
- ✅ You want a free bespoke design service with CAD drawings
Read our full [Fastwarm underfloor heating review](/fastwarm-underfloor-heating-review/) for detailed product specs, thermostat setup guide (including the WiFi 2.4GHz fix), and running cost calculations.
## The Best Underfloor Heating Brands in the UK: Detailed Reviews
Now that you understand which brands excel in different areas, let's explore each manufacturer in detail to help you make an informed decision.
### Warmup
**Best For**: Smart home integration and premium, energy-efficient solutions
**Trustpilot Rating**: 4.7/5 stars (635 reviews) - Excellent customer satisfaction
**Overview**: Warmup is a global leader in heating technology, known for innovative, high-quality products specified by architects and developers for high-end projects. The brand excels in creating intelligent, energy-efficient heating solutions backed by extensive research and development.
**Key Products**:
- **DCM-PRO** electric decoupling system for tiled floors
- **StickyMat** electric mats for quick installation
- **Foil Heater** ultra-thin system for laminate and wood
- **6iE Smart WiFi Thermostat** flagship control unit
- **Hydronic systems** for whole-house water-based heating
**Pros**:
- **Industry-leading 24/7/365 technical support** highly praised by customers
- Tech support team (particularly Anton Ruddock) frequently commended for patient, expert guidance
- Cutting-edge smart controls with advanced features
- Excellent energy efficiency reducing long-term costs
- Strong brand reputation in premium market segment
- Comprehensive product range for all applications
- Industry-leading warranties and guarantees
**Cons**:
- Premium pricing compared to budget alternatives
- May be over-specified for basic applications
**Customer Feedback Highlights**:
- "Outstanding support team available 24/7"
- "Anton from technical support was incredibly patient and knowledgeable"
- "6iE thermostat is intuitive and saves money on heating bills"
**Typical Applications**: High-end residential, commercial developments, smart homes, renovation projects prioritising design and technology
**Where to Buy**: Available through authorised retailers, online stores, and directly from [warmup.co.uk](https://www.warmup.co.uk). Check multiple suppliers for the best pricing on your specific requirements.
### ProWarm
**Best For**: DIY-friendly kits, value for money, and lifetime warranties
**Trustpilot Rating**: 4.8/5 stars (1,008 reviews via The Underfloor Heating Store) - Excellent customer satisfaction
**Overview**: ProWarm dominates the UK's online market with a reputation for reliable, easy-to-install systems backed by exceptional warranties. The company focuses on user-friendly installation, making professional-quality heating accessible to DIY enthusiasts and trade installers alike.
**Key Products**:
- **Electric UFH mats** in various wattages for different applications
- **Loose-wire kits** for irregular room shapes
- **Water UFH kits** designed for various floor constructions
- **ProWarm thermostats** offering excellent value
- **Complete system packages** with all installation accessories
**Pros**:
- Excellent value making quality UFH accessible
- Lifetime warranties on many core components
- Top online seller in the UK market
- Reliable performance in residential and commercial projects
- Comprehensive installation guides and support
**Cons**:
- Less advanced smart technology than premium brands
- Fewer physical showrooms for product demonstration
**Typical Applications**: DIY renovations, bathrooms, kitchens, whole-house retrofits, budget-conscious projects, rental properties
**Where to Buy**: Primarily sold online through major retailers and direct from manufacturers. ProWarm's systems are widely available and ship quickly to UK addresses.
### John Guest (Speedfit)
**Best For**: Professional installers valuing speed and reliability
**Trustpilot Rating**: Limited reviews available
**Overview**: John Guest, part of the RWC family of brands, revolutionised plumbing and heating installation with its **Speedfit** push-fit technology. This innovation makes connections faster, easier, and more reliable than traditional compression or soldered fittings.
**Key Products**:
- **JG LowFit** systems for low-profile installations
- **Speedfit** pipe in various diameters
- **Manifolds and controls** for professional use
- **Complete system packages** for trade installers
- **Push-fit fittings** for quick, reliable connections
**Pros**:
- Push-fit technology allows incredibly fast installation
- Wide availability through plumbing merchants
- Excellent technical support for installers
- Proven reliability in many applications
**Cons**:
- Primarily geared towards professionals, not DIYers
- Limited direct-to-consumer presence
- Fewer smart control options than dedicated UFH brands
- **Mixed installer feedback**: Some professionals avoid Speedfit for heating applications, citing concerns about frost resistance (O-rings can fail below 1°C) and larger fitting sizes
- Fittings described by some installers as "the size of a small country"
**Important Considerations**:
- **Frost resistance**: O-ring seals may not be suitable for installations where temperatures drop below 1°C
- **Professional opinions vary**: While many installers trust Speedfit, some prefer traditional compression or soldered fittings for heating systems
- **Application-specific**: Best suited for warm, frost-free environments
**Installer Feedback**:
- "I don't use Speedfit for heating - compression or soldered only" - UK heating engineer
- "O-rings below 1°C are a concern in unheated spaces"
- "Fittings are reliable but bulky compared to alternatives"
**Typical Applications**: New build developments, commercial projects, large-scale installations, professional renovations, social housing in frost-free areas
### Uponor
**Best For**: Premium professional-grade systems and long-term reliability
**Overview**: Uponor is a premium European manufacturer renowned for high-quality PEX piping systems and professional-grade hydronic solutions. With decades of engineering excellence, Uponor supplies complete underfloor heating packs alongside individual components, offering flexibility for both packaged installations and custom projects.
**Key Products**:
- **Screed packs** for traditional ground floor installations with up to 100W/m2 outputs
- **Timber packs** for joisted floors (400mm centres) with up to 70W/m2 outputs
- **Low-profile packs** for existing floor renovations
- **Minitec system** with just 15mm installation height
- **Smart home controls** with Alexa voice activation and app connectivity
**Pros**:
- Exceptional build quality and 50+ year system lifespan
- Complete packs covering 14-56m2 with manifolds, pipes, controls, and accessories
- Industry-leading technical support and documentation
- Proven reliability in high-end developments and commercial projects
- Compatible with all major heat sources including heat pumps
**Cons**:
- Premium pricing compared to mid-range alternatives
- Primarily distributed through professional installers and merchants
- May be over-specified for simple DIY projects
**Typical Applications**: High-end residential developments, commercial buildings, large-scale installations, projects requiring maximum reliability and longevity
### Polypipe
**Best For**: Comprehensive system range and professional installations
**Trustpilot Rating**: Mixed - UFH division has 3.7/5 (1 review), while Polypipe Building Products has 2.0/5 (24 reviews)
**Overview**: Polypipe manufactures the UK's most comprehensive range of underfloor heating systems, offering solutions for every conceivable floor type and residential heating project. As a leading manufacturer of plastic pipe systems, Polypipe brings decades of materials expertise to UFH applications.
**Key Products**:
- **Standard screeded floor systems** for new build solid floors
- **Overlay Plus** low-profile system sitting on existing floors
- **Floating floor systems** for quick installation without screed
- **Suspended floor systems** for battened or joisted constructions
- **UFH pipe** with 50-year guarantee
**Pros**:
- Widest available system range covering all floor types
- 50-year guarantee on underfloor heating pipe
- Compatible with gas, electricity, and renewable energy sources (heat pumps)
- Run at lower temperatures (35-45°C) for exceptional efficiency
- Extensive availability through UK plumbing and building merchants
**Cons**:
- Less focus on smart controls compared to Warmup
- Primarily professional installer-focused distribution
- **Customer service concerns**: The main Polypipe Building Products company has poor customer service reputation (2.0/5, 24 reviews, with complaints about being "totally inept")
- Limited specific feedback on UFH division performance
**Important Note**: The Polypipe UFH (underfloor heating) division operates separately from the main building products company. While the main company has received customer service complaints, the UFH division has limited independent reviews. Research the specific UFH products and installer experiences before purchasing.
**Typical Applications**: New build developments, whole-house renovations, commercial projects, flexible multi-floor-type installations
### Continal
**Best For**: Trade and self-build projects requiring specialist expertise
**Trustpilot Rating**: 4.9/5 stars (342 reviews) - Outstanding customer satisfaction
**Overview**: Continal (formerly Continental Underfloor) is the UK's largest specialist direct supplier of warm water underfloor heating systems to the trade. Based in Cornwall with over 25 years' expertise, Continal serves plumbers, builders, and heating engineers throughout the UK, Europe, and worldwide.
**Key Products**:
- **Complete UFH systems** for all floor constructions
- **ENGO and Heatmiser controls** integration
- **Bespoke system design** service
- **Trade-focused packages** with everything needed delivered direct to site
**Pros**:
- **Exceptional trade reputation** with team members (David Wormell, Casey Urquhart, Troy Wyse) frequently praised for expertise
- Over 80% repeat customer rate demonstrating satisfaction
- Over 95% customer recommendation rate
- Specialist design service for complex projects
- Direct supply model offering excellent value
- Compatible with all heat sources and floor coverings
**Cons**:
- Trade-focused model less suited to retail/DIY customers
- Limited physical showroom presence outside Cornwall
**Customer Feedback Highlights**:
- "David was incredibly helpful with our self-build system design"
- "Casey provided excellent technical support throughout installation"
- "Best trade supplier we've worked with - knowledge and service outstanding"
**Typical Applications**: Self-build projects, trade installations, new builds, major renovations, professional heating engineer projects
### Fastwarm
**Best For**: Fast-growing value brand with strong customer satisfaction
**Trustpilot Rating**: 4.9/5 stars (2,689 reviews) - Outstanding customer satisfaction
**Overview**: Fastwarm is the UK's fastest-growing online retailer of underfloor heating systems, with over 20 years of experience. The company offers both electric and water-based solutions with exceptional customer reviews and comprehensive support services.
**Key Products**:
- **Electric heating mats** with 2mm Teflon-coated dual-core cables
- **Loose-wire electric kits** for irregular room shapes
- **Water underfloor heating systems** for whole-house heating
- **Free bespoke design service** with CAD drawings and quotes
**Pros**:
- Outstanding 4.9/5 Trustpilot rating with 2,689+ reviews
- 50-year warranty on electric heating cables
- Thinnest heating cables on the UK market (2mm)
- Free design service simplifies system specification
- Products available through fastwarm.com, B&Q, and Amazon
**Cons**:
- Newer brand with less heritage than established manufacturers
- More limited product range than comprehensive brands
- **WiFi thermostat setup issues**: Some customers report the WiFi thermostat requires 2.4GHz network (won't work with 5GHz), and setup instructions don't always match the app interface
**Customer Feedback**:
- Generally excellent service and product quality
- "Great heating system, but WiFi thermostat setup was frustrating - needs 2.4GHz network"
- "Instructions didn't match the app, took trial and error to get it working"
- Overall product performance highly rated once installed
**Typical Applications**: DIY installations, bathrooms, kitchens, conservatories, online purchases, budget-conscious quality projects
Read our full [Fastwarm underfloor heating review](/fastwarm-underfloor-heating-review/) for a deep dive into their product range, Smart Life thermostat setup, tile installation guide, and honest pros and cons.
### uHeat
**Best For**: Bespoke DIY-friendly solutions with excellent customer service
**Trustpilot Rating**: 5.0/5 stars (375 reviews) - Perfect rating, exceptional customer satisfaction
**Overview**: uHeat (Pedarson Ltd) is a family-owned specialist established in 2003, delivering high-quality bespoke underfloor heating solutions across the UK. With over 20 years of experience and a UK-based support team, uHeat tailors systems to individual project requirements.
**Key Products**:
- **Electric underfloor heating** for all floor coverings (tiles, laminate, wood, vinyl, carpet)
- **Water underfloor heating** with manifold-connected pipe systems
- **Bespoke system design** tailored to specific spaces
- **Complete kits** with all components included
**Pros**:
- **Perfect 5.0/5 Trustpilot rating** with 375 reviews - exceptional customer satisfaction
- **Excellent after-sales service** with Andy Bayford frequently praised for design support
- Bespoke tailored kits for individual project requirements
- Premium quality components at competitive pricing
- Comprehensive UK-based technical support
- Solutions for all floor covering types
**Cons**:
- Installation costs higher than some budget alternatives (£60-90/m2 electric, £110-140/m2 water)
- More limited brand recognition than major manufacturers
**Customer Feedback Highlights**:
- "Andy Bayford's design support was invaluable - really knows his stuff"
- "Perfect system for our awkward room shape, bespoke service was excellent"
- "After-sales support is exceptional - they really care about getting it right"
**Typical Applications**: DIY renovations, bespoke room configurations, retrofit installations, projects requiring tailored specifications
### Wunda
**Best For**: Retrofit installations and rapid-response heating at half the cost of premium brands
**Trustpilot Rating**: 4.8/5 stars - Good customer satisfaction overall
**Overview**: Wunda is a British heating company founded in 2006, specializing in rapid response underfloor heating systems. Unlike traditional UFH that takes hours to heat up, Wunda's innovative design locates pipes in channels right under the floor surface, providing heat in minutes like a radiator-making it ideal for retrofits and properties used intermittently.
**Key Innovation**: **Rapid Response Technology**
Traditional UFH heats the entire floor slab, taking 2-4 hours to warm up. Wunda's pipes sit in grooved boards directly beneath the floor finish, heating the surface in 15-30 minutes. This makes it practical for properties that aren't heated 24/7.
**Key Products**:
- **Wunda Rapid Response UFH** for retrofit installations
- **Low-profile systems** (15mm build-up) for existing floors
- **Complete kits** with manifolds, pipes, and controls
- **Heat pump compatible** systems running at 35-45°C
**Pros**:
- **50% cheaper than Nu-Heat** for comparable systems (real user feedback from BuildHub forum)
- **Rapid heat-up** (15-30 minutes vs 2-4 hours for traditional UFH)
- Ideal for retrofit without major floor height changes
- Lower operating temperatures (35-45°C) for exceptional energy efficiency
- Perfect for properties used intermittently (holiday homes, weekend cottages)
**Cons**:
- Less well-known than established premium brands
- Primarily focused on water systems (limited electric options)
- May require professional assessment for complex retrofits
- **Quality concerns reported**: One critical review mentioned "poor quality" blending valve unable to blend flow temperature properly, boards lacking foil under pipes for heat transfer, and pipes not giving out heat well
**Important Considerations**:
- **Component quality**: While most customers are satisfied, there have been specific complaints about blending valve quality and board construction (lacking foil backing for heat distribution)
- **Professional installation**: Expert installation and commissioning may be critical to optimal performance
- **Verify specifications**: Check that boards include proper foil backing and that manifold/blending components meet your requirements
**Real User Feedback**:
- Positive: "Wunda quoted half the price of Nu-Heat for my retrofit project. The rapid response is brilliant-heats up in 20 minutes, not hours. Perfect for our cottage that we don't heat all week."
- Critical: "Blending valve couldn't blend flow temperature properly. Boards had no foil under pipes for heat transfer. Pipes not giving out heat well. Poor quality overall."
**Typical Applications**: Retrofit installations, period properties, holiday homes, properties with intermittent heating needs, budget-conscious whole-house heating, heat pump integration
**Where to Buy**: Direct from Wunda or through approved installers. Professional installation and quality component verification recommended for optimal system design and warranty coverage.
**Note**: When purchasing underfloor heating systems, always verify that products come with valid UK warranties and certification for use in British homes. Buy from authorised retailers to ensure genuine products and full manufacturer support.
For detailed thermostat information and control options, see our [underfloor heating thermostat guide](/smart-thermostats-underfloor-heating/).
### Other Notable Brands to Consider
**Wavin**: Leading manufacturer of plastic pipe systems offering robust water UFH solutions trusted by professional installers. Known for durable manifolds, reliable pipe systems, and comprehensive technical documentation. Excellent choice for large-scale projects and commercial installations.
**Nu-Heat**: Premium UK-based specialist focusing exclusively on renewable energy-compatible underfloor heating. Founded in 1998, Nu-Heat has particular expertise in heat pump integration and low-temperature systems.
**Trustpilot Rating**: 4.7/5 (905 reviews) - Good overall satisfaction
**Pricing & Service**: Nu-Heat is positioned at the premium end of the market-expect to pay approximately **double the cost of Wunda** for comparable systems, though you get comprehensive design service, premium components, and excellent customer support throughout the project lifecycle.
**Important Service Considerations**:
- **Engineer callouts are expensive**: £275+VAT per visit
- **Wait times can be extended**: 2-3 weeks for engineer availability reported by some customers
- **System reliability**: Some complaints about system reliability issues requiring engineer callouts
- However, many customers report excellent service and reliable systems
Best suited for high-end projects where maximum reliability and expert support justify the premium pricing. Factor in potential service costs when budgeting.
**Ambiente**: UK manufacturer since 2006, designing and supplying wet underfloor heating systems including screeded, overlay/floating floor, timber joisted, and low-profile systems. Offers complete CAD design service, 5-year warranty, and next-day delivery. Based in Hatfield with comprehensive range of manifolds, panels, and accessories.
**Gaia**: Over 30 years' experience specializing in both wet (hydronic) and electric underfloor heating systems. Supplies systems from top brands including Polypipe, Emmeti, Omnie, and Myson. Offers 20-year warranty on cables/mats and 12-year warranty on Gaia Electric systems. Trusted by architects, contractors, and developers across UK and Ireland.
**Hetta**: European manufacturer and distributor based in Warrington, specializing in wet underfloor heating for solid/screeded, suspended, and floating floor constructions. Complete single-zone packs include everything required for installation. Products widely available through UK plumbing and heating merchants.
**WMS**: Specialist in hydronic underfloor heating for UK housebuilders since 2003. Offers screeded floor, low-profile, floating floor, suspended floor, and bespoke systems for unique project requirements. Partners with housebuilders to design, install, and commission systems for new build developments.
**Underfloor Heating 1 (UFH1)**: Established 2007, leading provider of both wet and electric underfloor heating. Offers complete system kits, low-profile retrofit solutions, and single-room packages. Full installation service available alongside DIY supply. Popular with trade professionals and DIY customers.
**Jupiter**: Specialist in dry-installed panel-based underfloor heating systems using recycled wood waste and renewable straw panels rather than traditional polystyrene. MCS registered installer offering heat pump integration. Particular expertise in historic buildings and eco-conscious projects requiring minimal floor build-up.

## Practical Guide: Installation, Costs, and Flooring
**Important**: Prices and product availability can vary significantly between suppliers. Always compare quotes from multiple sources and verify that warranties and certifications are valid in the UK before purchasing.
### A Realistic Look at Your Budget: Upfront vs. Long-Term Costs
Understanding costs is crucial for planning your UFH project. Expenses break down into initial purchase and installation, plus ongoing running costs over the system's 25-50 year lifespan.
#### Installation Costs (2026 UK Prices)
**Electric Systems**:
- **Materials**: £40-60 per m2 for heating mats or cables
- **Installation labour**: £20-40 per m2 for professional fitting
- **Electrical connection**: £150-300 for Part P certified electrician
- **Thermostat**: £150-400 depending on sophistication
- **Total (typical bathroom, 8m2)**: £800-1,500 installed
**Water Systems**:
- **Materials**: £80-120 per m2 for pipes, manifold, insulation
- **Installation labour**: £40-70 per m2 for professional fitting
- **Integration with heating system**: £500-1,200
- **Screed**: £15-30 per m2 additional if required
- **Controls**: £200-600 per zone
- **Total (typical kitchen/dining, 25m2)**: £4,500-8,000 installed
For comprehensive cost breakdowns and calculators, see our [complete underfloor heating costs guide](/underfloor-heating-costs/).
#### Running Cost Examples (2026 Energy Prices)
**Electric UFH (15m2 Bathroom, Occasional Use)**:
- Usage: 2 hours daily, 210 days/year
- Annual consumption: ~630 kWh
- Cost at 24p/kWh: ~£150/year
- Cost per m2: £10/year
**Water UFH (15m2 Living Room, Regular Use)**:
- Usage: 8 hours daily, 210 days/year
- Annual consumption: ~1,260 kWh (gas equivalent)
- Cost at 7p/kWh (gas): ~£88/year
- Cost per m2: £5.87/year
**Cost Comparison Over 10 Years** (15m2 room):
- Electric UFH: £800 installation + £1,500 running = **£2,300 total**
- Water UFH: £2,400 installation + £880 running = **£3,280 total**
- Water UFH savings become significant at larger scales and longer timeframes
### The Critical Role of Flooring Compatibility
Your floor covering choice directly impacts UFH performance. Heat must transfer efficiently from the system into the room without damaging the flooring material.
**Excellent Compatibility** (Optimal Heat Transfer):
- **Tile and stone** (porcelain, ceramic, natural stone): Ideal thermal conductivity, fast heat-up, excellent heat retention
- **LVT (Luxury Vinyl Tile)**: Designed for UFH, good conductivity, durable
- **Engineered wood**: Stable construction suitable for UFH when properly specified
- **Polished concrete**: Exceptional thermal mass and modern aesthetic
**Good Compatibility** (With Considerations):
- **Laminate**: Check manufacturer's maximum temperature rating (typically 27°C)
- **Carpet and underlay**: Combined tog rating must not exceed 2.5 (preferably under 2.0)
- **Vinyl sheet**: Ensure UFH-compatible specification from manufacturer
**Use with Caution** (Specialist Advice Required):
- **Solid wood**: Can expand, contract, and warp with temperature changes. Only thin (14-18mm), well-acclimatised boards specifically approved for UFH. Maximum surface temperature typically 27°C.
**My tip**: Choosing the wrong flooring can reduce heating efficiency by up to 30% and void your warranty. For comprehensive flooring guidance and compatibility charts, see our [underfloor heating and flooring compatibility guide](/best-flooring-underfloor-heating/).
### DIY vs. Professional Installation: A Key Decision
Your installation approach depends almost entirely on system type, your competence level, and local building regulations.
**DIY-Suitable (Electric Systems)**:
- **Skill level required**: Competent DIY with basic electrical knowledge
- **Typical tasks**: Laying mats/cables, floor sensor installation, basic preparation
- **Professional requirement**: Part P certified electrician MUST complete electrical connections and issue certification
- **Time investment**: 1-2 days for typical bathroom (8-10m2)
- **Cost savings**: £200-400 on installation labour
- **Risks**: Warranty may be void if incorrectly installed; electrical safety concerns
**Professional Installation Required (Water Systems)**:
- **Why necessary**: Complex pipe layouts, manifold installation, pressure testing, integration with heating system, building regulations compliance
- **Qualified installer**: Gas Safe registered heating engineer for gas systems; competent person for heat pump integration
- **Typical timeline**: 3-5 days for typical kitchen/dining area (25m2)
- **Value provided**: System design, heat loss calculations, optimised efficiency, warranty protection, building regulations compliance
- **Long-term benefits**: Correct installation ensures reliability and efficiency over 50+ year lifespan
For step-by-step installation guidance, see our [comprehensive installation guide](/underfloor-heating-installation-guide/).
Choosing the best underfloor heating brand depends on your project's unique requirements. The ideal system balances performance, cost, and ease of installation for your specific needs.
**For tech-savvy homeowners** seeking intelligent, efficient systems for new builds or high-end renovations, **Warmup** leads the market with cutting-edge smart controls and energy-saving technology.
**For renovators and DIYers** looking for cost-effective, reliable solutions backed by exceptional warranties, **ProWarm** offers outstanding value and user-friendly installation, making it the UK's best-selling online brand.
**For professional installers** working on large-scale projects where speed and reliability are paramount, **John Guest Speedfit** provides industry-leading push-fit technology trusted by tradespeople nationwide.
**For sophisticated multi-zone systems** requiring advanced control, **Heatmiser** thermostats offer unmatched programming capabilities and integration flexibility with any UFH system.
**For heat pump integration** and renewable energy compatibility, **Nu-Heat** and **Uponor** specialise in low-temperature systems optimised for sustainable heating.
### Your Pre-Purchase Checklist
Before making your final decision, ensure you've addressed these essential questions:
1. **System Type**: Have you decided between electric and water based on room size, usage, and budget? Review our [electric vs water underfloor heating comparison](/electric-vs-water-underfloor-heating-2026/) if uncertain.
2. **Measurements**: Do you have accurate room dimensions and professional heat loss calculations? Our [design and planning guide](/underfloor-heating-design-planning/) explains this process.
3. **Flooring**: Is your chosen floor covering compatible with UFH systems? Check our [flooring compatibility guide](/best-flooring-underfloor-heating/) for specific recommendations.
4. **Installer**: Have you obtained quotes from qualified electricians or heating engineers? See our [installation guide](/underfloor-heating-installation-guide/) for what to expect, and use our [quotation guide](/underfloor-heating-quotation/) to understand what to look for when comparing quotes.
5. **Brand & Warranty**: Have you compared warranties and support options from shortlisted brands using the comparison table above?
6. **Integration**: Does the system integrate properly with your existing heating and smart home setup? Review [smart thermostat options](/smart-thermostats-underfloor-heating/) for compatibility.
7. **Running Costs**: Have you calculated long-term energy costs for your usage patterns using our [cost calculator](/underfloor-heating-cost-calculator/)?
8. **Building Regulations**: Do you understand compliance requirements for your installation?
**Ready to move forward?** Start with our [beginner's guide to underfloor heating](/underfloor-heating-beginners-guide/) for comprehensive step-by-step guidance on planning and installing your system.
**Ready to choose your brand?** Find the best underfloor heating manufacturers and suppliers via the [Underfloor Heating Directory](https://underfloorheating.directory/manufacturers).
## Related Guides
- [Underfloor Heating Beginner's Guide](/underfloor-heating-beginners-guide/) - Start with the basics
- [Electric vs Water Underfloor Heating](/electric-vs-water-underfloor-heating-2026/) - Complete system comparison
- [Complete Underfloor Heating Costs Guide](/underfloor-heating-costs/) - Detailed cost analysis and calculators
- [Wet Underfloor Heating Guide](/wet-underfloor-heating-ultimate-guide/) - Comprehensive hydronic system information
- [Underfloor Heating Thermostats](/smart-thermostats-underfloor-heating/) - Control system guide
- [Installation Guide](/underfloor-heating-installation-guide/) - Step-by-step installation procedures
- [Design and Planning](/underfloor-heating-design-planning/) - Technical design guidance
- [Flooring Compatibility](/best-flooring-underfloor-heating/) - Choose the right floor covering
---
--- title: DIY Underfloor Heating: UK Installation Guide for Homeowners description: Learn which DIY underfloor heating jobs you can safely tackle, when electricians or plumbers are required, and how to plan a successful UK installation. url: https://underfloorheating.info/diy-underfloor-heating/ published: 2025-11-01 updated: 2026-08-21 tags: ['diy underfloor heating', 'install underfloor heating yourself', 'diy electric underfloor heating', 'diy wet underfloor heating', 'underfloor heating installation uk'] ---
# DIY Underfloor Heating: UK Installation Guide for Homeowners

> **Quick Answer**: You can lay electric UFH mats yourself (saving £200-£400 per room), but the final electrical connection **must** be completed by a Part P qualified electrician. Wet UFH pipework is DIY-possible for experienced hands, but manifold connection and pressure testing require a Gas Safe engineer or qualified plumber. Realistic labour savings: **30-40%** of total installation cost. See our [wiring diagrams guide](/underfloor-heating-wiring-diagrams/) for exactly what the electrical connection involves, use [underfloorheating.info](https://underfloorheating.info/) for wider project guidance, and visit the [Underfloor Heating Directory](https://underfloorheating.directory/) when you need a qualified professional.
**Looking for professional installation?** Find qualified UFH installers on the [Underfloor Heating Directory](https://underfloorheating.directory/installers). Or [download our free installation guide PDF](/underfloor-heating-installation-guide-pdf/) to keep on hand while you plan.
## What Can You Actually DIY?
Let's be brutally honest: not all underfloor heating (UFH) work is suitable for DIY. Some tasks are genuinely DIY-friendly and safe; others are either legally restricted or carry significant risk of expensive mistakes. Here's the breakdown.
### The Honest DIY Breakdown
| Task | Electric UFH | Wet UFH | DIY-Friendly? |
| :--- | :--- | :--- | :--- |
| **1. Surface Preparation** | ✅ Yes | ✅ Yes | **Fully DIY-friendly.** Clean, level, and prepare the subfloor. Use self-levelling compound if needed. This is essential but straightforward. |
| **2. Insulation Laying** | ✅ Yes | ✅ Yes | **Fully DIY-friendly.** Lay rigid insulation boards (PIR, EPS, or XPS) across the floor. Tape joints to prevent screed seepage. |
| **3. Electric Mat Positioning** | ✅ Yes | N/A | **Fully DIY-friendly.** Unroll mats, plan layout, cut the mesh (never the wire), position floor sensor probe. This is where most DIY labour savings come from. |
| **4. Wet Pipe Laying** | N/A | ✅ Yes (with care) | **DIY-possible for experienced hands.** Layout the pipe loops, clip or staple to insulation boards. Requires careful planning and patience. Mistakes are costly. |
| **5. Final Electrical Connections** | ❌ No | N/A | **Legally restricted.** Must be completed by a Part P qualified electrician. No exceptions. Connecting heating cables and thermostats to the mains supply is notifiable work. |
| **6. Boiler/Manifold Connection** | N/A | ❌ No | **Legally restricted if gas boiler.** Must be completed by a Gas Safe registered engineer. If connecting to a heat pump or electric boiler, a qualified heating engineer is required. |
| **7. Pressure Testing (Wet)** | N/A | ⚠️ Borderline | **DIY-possible but risky.** You can pressure test the pipes yourself using a test pump, but interpreting results and identifying leaks requires experience. A professional should sign off before screed is poured. |
| **8. Screed/Tile Over (Final Finish)** | ✅ Yes | ✅ Yes | **Fully DIY-friendly if you have tiling/screeding experience.** Use flexible tile adhesive for electric mats. Screed laying for wet systems is heavy work but doable. |
One retrofit method that's restricted at every stage, not just the electrical or manifold connection: [milled screed (in-cut) underfloor heating](/milled-screed-underfloor-heating/). The milling equipment and channel design are proprietary to each specialist provider, and a mistake cuts into a structural slab rather than being a fixable-later problem the way a bad pipe clip is.
### Where the Real Labour Savings Come From
**Electric UFH:** The largest cost saving is in laying the mat and preparing the floor. A professional installer charges £30-£50/hour and might spend 4-6 hours on a typical 12 m² bathroom. If you do this yourself, you save **£120-£300** in labour, plus materials markup (10-20%).
**Wet UFH:** Pipe laying is labour-intensive. A professional might charge £400-£800 per room for pipe installation and screed prep. If you lay the pipes yourself and have a professional complete the manifold connection and pressure test, you save **£300-£600** per room.
**Overall savings:** Expect to save **30-40%** of the total installation cost by doing what you can yourself. For a whole-house wet UFH system costing £6,000 professionally installed, DIY could bring the cost down to **£3,600-£4,200**.
## DIY Electric UFH: Step-by-Step
[Electric underfloor heating](/electric-underfloor-heating-systems/) is the most DIY-friendly option. The mats are pre-spaced, lightweight, and relatively forgiving. Here's how to install one yourself, safely and correctly.
### Tools and Materials You'll Need
**Essential tools:**
- **Tape measure and pencil** (for planning layout)
- **Craft knife or mat-cutting scissors** (for cutting the mesh backing, not the wire)
- **Spirit level** (to check subfloor is flat)
- **Notched trowel** (for spreading tile adhesive)
- **Multimeter** (to test electrical resistance before and after installation)
- **Mixing paddle and bucket** (if using self-levelling compound)
- **Dust sheets and vacuum** (surface must be spotlessly clean)
**Materials:**
- Electric UFH mat (sized to cover the open floor area - don't guess; measure accurately)
- Insulation boards (6-10 mm XPS or cork for electric, 50-100 mm PIR for wet systems)
- Floor temperature sensor probe (usually included with the mat)
- Conduit or protective sheath for sensor cable (PVC conduit, 20 mm diameter)
- Primer (if required for your subfloor type)
- Flexible tile adhesive or self-levelling compound (depending on final floor finish)
- Thermostat (usually included with the mat, but check compatibility)
For a detailed overview of the full installation process, see our [installation guide](/underfloor-heating-installation-guide/).
### Step 1: Measure and Plan the Layout
**Why this matters:** Electric mats come in fixed sizes. If you order a 10 m² mat for a room with only 8 m² of open floor (after excluding fixed units), you've wasted money. If you order an 8 m² mat for a 10 m² room, you won't have full coverage.
**How to measure:**
1. Draw a scale floor plan of the room.
2. Mark the footprint of all fixed units (toilets, vanities, baths, kitchen cabinets, appliances).
3. Measure only the open, walkable floor area - this is the area you'll heat.
4. Subtract 100-150 mm around the perimeter (edges don't need heating; waste of energy).
**Example:** A 12 m² bathroom might have 9 m² of heated floor area once you subtract the bath, toilet, and vanity. Order a 9 m² mat.
**Mat layout:** Electric mats are flexible but cannot be overlapped. Plan the layout so the mat covers the maximum area without doubling back on itself. The mat can be cut (the mesh backing), but **never cut the heating wire** - this destroys the mat.
### Step 2: Prepare the Subfloor
**Why this matters:** The subfloor must be clean, dry, and level. Any irregularities will telegraph through the mat and into the final floor finish, causing tiles to crack or LVT to buckle.
**How to prepare:**
1. **Clean thoroughly.** Sweep and vacuum the floor. Remove all dust, debris, loose material, and old adhesive residue.
2. **Check for level.** Use a long spirit level or straight edge. If the floor has dips or high spots greater than 3 mm over 1 m, it needs levelling.
3. **Apply self-levelling compound if needed.** Mix according to manufacturer's instructions, pour, and spread with a trowel. Allow to cure (usually 24-48 hours).
4. **Prime the surface.** Some subfloors (particularly dusty concrete or anhydrite screed) require a primer to improve adhesion. Check the mat manufacturer's guidance.

### Step 3: Lay Insulation Boards
**Why this matters:** Without insulation, 30-40% of the heat escapes downwards into the subfloor rather than radiating up into the room. Insulation is not optional - it's essential for efficiency.
**Which insulation to use:**
- **6-10 mm XPS (extruded polystyrene):** Common for electric UFH under tiles. High compressive strength, moisture-resistant.
- **10 mm cork boards:** Eco-friendly alternative, good for timber subfloors.
- **50-100 mm PIR (polyisocyanurate):** For suspended floors or ground floors with high heat loss.
**How to install:**
1. Lay insulation boards tightly across the entire floor, including the areas where the mat won't be placed (under fixed units, etc.).
2. Stagger the joints (like brickwork) for stability.
3. Tape all joints with aluminium foil tape or similar to prevent tile adhesive or screed from seeping through.
4. Check the surface is flat and flush. If boards are uneven, sand or shim as needed.
### Step 4: Unroll and Position the Electric Mat
**This is the core DIY task.** Take your time. Mistakes here are expensive.
**How to lay the mat:**
1. **Start from the power supply location.** The mat's supply cable must reach the point where it will connect to the thermostat (usually near a wall, 1.5 m above floor level).
2. **Unroll the mat across the floor.** Most mats are self-adhesive on the underside or use double-sided tape. Press firmly to secure to the insulation.
3. **Navigate around obstacles.** When you reach an obstacle (toilet, vanity), cut the mesh backing (not the wire) and fold the mat 90° or 180° to continue in a different direction. The heating wire must remain intact.
4. **Avoid overlaps.** The mat must never overlap itself. Overlapping causes hotspots and can damage the wire.
5. **Leave a 100-150 mm gap around the perimeter.** This reduces heat loss through external walls and is more efficient.
**Check spacing:** The heating wires should be evenly spaced (typically 100-150 mm apart). If the mat has bunched up or stretched unevenly, adjust before proceeding.
### Step 5: Install the Floor Temperature Sensor Probe
**Why this matters:** The sensor probe measures the floor surface temperature and prevents overheating. This is critical for LVT, engineered wood, and carpets, which all have maximum temperature limits (usually 27°C).
**How to install:**
1. **Position the sensor between two runs of heating wire.** It should be approximately 15-20 cm from the wall, roughly in the centre of the heated area (avoid placing near external walls or cold spots).
2. **Run the sensor cable in a protective conduit.** Use a 20 mm PVC conduit laid in a shallow groove cut into the insulation or subfloor. This allows you to replace the sensor later if it fails.
3. **Run the cable up the wall to the thermostat location.** The conduit should terminate flush with the wall surface, leaving the sensor cable accessible.
**Test the sensor:** Use a multimeter to measure the resistance of the sensor probe. Compare it to the manufacturer's specification (typically 10-15 kΩ at 25°C). If the reading is wildly different or open-circuit, the sensor is faulty - replace it before proceeding.
### Step 6: Test the Mat (Pre-Installation Check)
**Why this matters:** Once you've covered the mat with tile adhesive or screed, you can't repair it easily. Testing before installation is essential.
**How to test:**
1. **Measure the electrical resistance** of the mat using a multimeter set to the ohms (Ω) range.
2. **Compare to the manufacturer's specification.** This is printed on the mat label or in the installation manual. Typical values are 50-200 Ω depending on mat size.
3. **Acceptable tolerance:** ±10% of the stated value. If the resistance is within this range, the mat is intact and undamaged.
4. **If the reading is wrong:** Open circuit (infinite resistance) = broken wire. Short circuit (very low resistance) = damaged insulation. Do not proceed - return the mat for replacement.
**Record the reading:** Write it down and keep it with the installation manual. You'll need to test again after tiling to confirm the mat wasn't damaged during the final finish.
### Step 7: Rough-In the Thermostat Cables
**What you can do yourself:** Run the mat's supply cable and sensor cable up the wall to the thermostat location. Secure them in place using cable clips or by chasing into the plaster.
**What you cannot do:** Connect the cables to the mains supply or install the thermostat backplate. This is notifiable electrical work under Part P of the Building Regulations and **must** be completed by a certified electrician.
**Prepare for the electrician:**
1. Mark the thermostat location clearly (usually 1.5 m above floor level, near a light switch or existing socket).
2. Leave at least 300 mm of slack cable for the electrician to work with.
3. Provide the mat's installation manual and electrical specifications.
For guidance on thermostat types and wiring, see our [smart thermostats guide](/smart-thermostats-underfloor-heating/).
### Step 8: Cover the Mat (Tile or Self-Levelling Compound)
**Option A: Direct tile over mat (most common for bathrooms and kitchens):**
1. Use a flexible, rapid-set tile adhesive. Apply with a notched trowel (6-10 mm notch).
2. Spread adhesive carefully to avoid damaging the heating wire. Work in small sections.
3. Lay tiles directly onto the adhesive. Use spacers for even joints.
4. Allow adhesive to cure (24-48 hours) before walking on the floor or grouting.
**Option B: Self-levelling compound (for LVT or engineered wood):**
1. Mix self-levelling compound according to manufacturer's instructions.
2. Pour over the mat to a depth of 10-15 mm, ensuring the mat is fully covered.
3. Use a spiked roller to remove air bubbles.
4. Allow to cure (minimum 7 days before turning on UFH).
**Post-installation test:** Once the adhesive or compound has cured, test the mat's resistance again. It should match the pre-installation reading (±5%). If it's changed significantly, the mat may have been damaged during installation - call a professional to investigate before turning on the system.
### Step 9: Call the Electrician for Final Connection
The electrician will:
1. Install the thermostat backplate and mount the thermostat.
2. Connect the mat's supply cable to a dedicated circuit on the consumer unit (usually a 16A radial circuit with RCD protection).
3. Connect the sensor probe to the thermostat.
4. Test the circuit and issue a certificate of compliance.
**Cost:** Expect to pay £80-£150 for the final electrical connection, depending on the complexity and distance from the consumer unit.

## DIY Wet UFH: Step-by-Step
Wet (hydronic) underfloor heating is more complex than electric. The pipework itself is DIY-possible if you're methodical and have basic plumbing skills, but the manifold connection, pressure testing, and commissioning require professional input.
### Tools and Materials You'll Need
**Essential tools:**
- **Pipe cutter or sharp knife** (for cutting UFH pipe cleanly)
- **Pipe bender or bending spring** (to create smooth bends without kinking)
- **Staple gun or clip tool** (to secure pipes to insulation boards)
- **Tape measure, pencil, spirit level**
- **Pressure test pump** (to pressurise the system before screed is poured - can be hired)
- **Mixing paddle, trowel, and bucket** (for screed)
**Materials:**
- UFH pipe (typically 16 mm PEX-a or PE-RT, supplied in coils)
- Insulation boards (50-100 mm PIR or EPS for ground floors)
- Pipe clips or staples (to secure pipe to insulation at 300 mm intervals)
- Edge insulation strip (10-20 mm foam strip around the perimeter)
- Manifold (flow and return ports, blending valve, pump)
- Pipe fittings and connectors (push-fit or compression fittings for manifold connection)
- Sand and cement or liquid anhydrite screed (to cover the pipes)
For detailed guidance on manifold selection and configuration, see our [manifold guide](/underfloor-heating-manifold-guide/).
### Step 1: Plan the Pipe Layout
**Two main patterns:**
1. **Snail (spiral):** The pipe starts at the perimeter and spirals inwards towards the centre, then returns in the gaps between the outward loops. This provides the most even heat distribution and is the preferred pattern for most rooms.
2. **Serpentine (snake):** The pipe runs back and forth across the room in a series of parallel runs. Simpler to lay but creates temperature gradients (one end of the room is slightly warmer than the other).
**Pipe spacing:** [Typical spacing](/how-much-underfloor-heating-pipe-per-m2/) is 150-250 mm depending on heat output requirements. Closer spacing (150 mm) is used in high-heat-loss areas (external walls, large glazed areas); wider spacing (200-250 mm) is used in well-insulated rooms.
**Loop length:** Each pipe loop should not exceed 80-100 metres. Longer loops increase resistance and reduce flow rate. For large rooms, divide the area into multiple loops.
**Draw a detailed plan:** Sketch the room to scale, mark the pipe route, and calculate the total pipe length needed. Add 10-15% extra for bends and connections.
### Step 2: Prepare the Subfloor and Lay Insulation
**Same as electric UFH:** The subfloor must be clean, dry, and level. Lay rigid insulation boards (50-100 mm PIR or EPS) across the entire floor, taping joints to prevent screed seepage.
**Install edge insulation:** Around the perimeter of the room, install a foam edge strip (10-20 mm thick, 100-150 mm high). This prevents thermal bridging at the walls and allows the screed to expand without cracking.
### Step 3: Lay the Pipe
**This is the main DIY task for wet UFH.**
1. **Start at the manifold location.** The manifold should be centrally located to minimise pipe run lengths. Common locations: utility room, hallway cupboard, or under stairs.
2. **Uncoil the pipe carefully.** PEX-a and PE-RT pipe have "memory" and will try to return to their coiled shape. Uncoil slowly and weight down the pipe as you work.
3. **Follow your planned pattern (snail or serpentine).** Secure the pipe to the insulation using staples or clips every 300 mm. The pipe should lie flat and smooth - no kinks or tight bends.
4. **Maintain even spacing.** Use a measuring tape or spacer tool to ensure the pipe is evenly spaced. Bunching or wide gaps create hot/cold spots.
5. **Leave pipe tails at the manifold end.** Each loop needs a flow and return tail, long enough to reach the manifold (typically 1-2 metres).
**Common mistake:** Kinking the pipe. A kinked pipe restricts flow and creates a weak point. If you kink the pipe badly, cut out the kinked section and use a coupler to rejoin (avoid couplers in the floor if possible - make the repair outside the screed area).
### Step 4: Connect Pipes to the Manifold (Professional Required)
**What you cannot do yourself:** Connecting the pipe loops to the manifold is plumbing work. If the manifold is connected to a gas boiler, this work **must** be completed by a Gas Safe registered engineer. If connected to an electric heat pump or system boiler, a qualified heating engineer is required.
**What you can prepare:** Label each pipe loop clearly (e.g., "Kitchen Loop 1," "Living Room Loop 2"). This makes the professional's job faster and reduces labour costs.
**Cost:** Expect to pay £200-£400 for a plumber to connect 4-6 loops to a manifold, depending on complexity.
### Step 5: Pressure Test the System
**Why this matters:** You must confirm the pipe network is leak-free before pouring screed. Once screed is poured, a leak is catastrophic. You'd have to break up the screed to access the pipe, costing thousands.
**How to pressure test:**
1. **Close all manifold valves** except the loop you're testing.
2. **Fill the loop with water** (using a hose connected to the manifold filling point).
3. **Attach a pressure test pump** to the manifold.
4. **Pressurise the system to 6 bar.** Pump until the gauge reads 6 bar (or the manufacturer's recommended test pressure).
5. **Wait 24 hours.** If the pressure holds at 6 bar, the loop is leak-free. If pressure drops, there's a leak - find and fix it before proceeding.
6. **Repeat for all loops.**
**DIY or professional?** You can hire a pressure test pump and do this yourself, but interpreting the results requires experience. A pressure drop of 0.1-0.2 bar over 24 hours might be normal (temperature fluctuations), or it might indicate a slow leak. Have a professional sign off the pressure test before screed is poured.
### Step 6: Pour the Screed
**Sand and cement screed:**
1. Mix sand and cement at a 4:1 or 3.5:1 ratio (4 parts sharp sand, 1 part cement).
2. Add water to create a workable consistency (not too wet).
3. Pour screed over the pipes to a depth of 65-75 mm above the top of the pipe.
4. Level with a screed board or laser level.
5. Allow to cure for **6-8 weeks** before turning on the UFH system. For complete details on screed types, depths, and curing protocols, see our [screed guide](/underfloor-heating-screed/).
**Liquid anhydrite screed:**
1. Hire a specialist screeding contractor with a pump (not a DIY job).
2. Screed depth: 45-65 mm over pipes.
3. Can be force-dried after 7 days using the UFH system, reducing total curing time to 2-3 weeks.
**Keep the pipes pressurised during screeding:** Maintain 3-4 bar pressure in the pipes while the screed is poured. This prevents pipes from being crushed or deformed by the weight of the screed.
### Step 7: Commission the System (Professional Recommended)
**What commissioning involves:**
1. **Gradual warm-up.** Start at 25°C flow temperature, increase by 5°C per day until the design temperature (typically 40-45°C) is reached. This hardens the screed and prevents cracking.
2. **Balance the system.** Adjust flow rates at the manifold so all loops deliver even heat. This requires measuring temperature and flow for each loop - best left to a professional.
3. **Test thermostats and zone controls.**
**Cost:** £150-£300 for professional commissioning of a whole-house wet UFH system.
## Cost Savings from DIY Labour
Here's a realistic breakdown of potential savings.
### Electric UFH: Single Bathroom (12 m²)
**Professional installation cost:** £900-£1,500
- Mat and materials: £400-£600
- Labour (preparation, laying, tiling): £400-£700
- Electrician (final connection): £100-£200
**DIY cost:** £550-£850
- Mat and materials: £400-£600
- Electrician (final connection): £100-£200
- Your labour: £0
**Saving:** £350-£650 (39-43%)
### Wet UFH: Living Room (25 m²)
**Professional installation cost:** £2,500-£4,000
- Pipe, manifold, materials: £800-£1,200
- Labour (pipe laying, screed): £1,200-£2,200
- Plumber (manifold connection): £300-£400
- Commissioning: £200-£300
**DIY cost:** £1,500-£2,100
- Pipe, manifold, materials: £800-£1,200
- Plumber (manifold connection): £300-£400
- Commissioning: £200-£300
- Screed (if you do it yourself): £150-£200 (materials only)
- Your labour: £0
**Saving:** £1,000-£1,900 (40-48%)
### Whole-House Wet UFH (60 m² ground floor)
**Professional installation cost:** £5,400-£11,400
**DIY cost (doing pipe laying and screed yourself):** £3,500-£7,000
**Saving:** £1,900-£4,400 (35-39%)
## What Can Go Wrong: Common DIY Mistakes
Even experienced DIYers can make costly mistakes with UFH. Here are the most common pitfalls.
### 1. Cutting the Heating Wire (Electric)
**The mistake:** Cutting through the heating cable when trimming the mat to fit around obstacles.
**The consequence:** The entire mat is destroyed. There is no way to repair a cut heating wire in an electric mat. You'll need to buy a new mat.
**How to avoid it:** Only cut the mesh backing, never the wire. Use sharp scissors and work slowly. When navigating obstacles, fold the mat 90° or 180° rather than cutting.
### 2. Wrong Pipe Spacing (Wet)
**The mistake:** Uneven pipe spacing - bunching pipes together in some areas and leaving wide gaps in others.
**The consequence:** Hot and cold spots. Areas with tight pipe spacing will be too hot; areas with wide gaps will be cold.
**How to avoid it:** Measure and mark pipe spacing on the insulation boards before laying pipe. Use a spacer tool or tape measure to maintain consistent spacing.
### 3. Forgetting Perimeter Insulation (Electric and Wet)
**The mistake:** Not installing edge insulation strips around the perimeter before laying the system.
**The consequence:** Heat loss through the walls. The floor edges will be noticeably cooler than the centre. Energy waste of 15-20%.
**How to avoid it:** Always install 10-20 mm foam edge strips around the entire perimeter of the room before laying insulation boards.
### 4. Poor Thermostat Placement (Electric and Wet)
**The mistake:** Placing the thermostat in direct sunlight, near a radiator, or in a draft. Placing the floor sensor probe too close to a cold external wall or over a heating cable.
**The consequence:** Inaccurate temperature readings. The system will overheat or underheat the room.
**How to avoid it:** Place the room thermostat on an internal wall, away from direct sunlight and heat sources, at a height of 1.5 m. Place the floor sensor probe in the centre of the heated area, between two heating wires, away from cold spots.
For detailed guidance on thermostat placement and setup, see our [smart thermostats guide](/smart-thermostats-underfloor-heating/).
### 5. Not Pressure Testing Wet Systems
**The mistake:** Pouring screed over wet UFH pipes without pressure testing the system first.
**The consequence:** If there's a leak, you won't discover it until you turn on the system weeks later. The screed will need to be broken up to access the leak - a repair costing £1,000-£3,000.
**How to avoid it:** Always pressure test the system to 6 bar for 24 hours before pouring screed. Do not skip this step.
### 6. Turning on UFH Too Early (Wet)
**The mistake:** Turning on the wet UFH system before the screed has fully cured.
**The consequence:** The screed will crack. Cracks allow heat to escape, reduce system efficiency, and can telegraph through to the final floor finish (cracked tiles, buckling LVT).
**How to avoid it:** Wait the full curing period - 6-8 weeks for sand/cement screed, 3 weeks for liquid anhydrite (with force drying). Follow the manufacturer's commissioning protocol for gradual warm-up.
## Tools and Materials: Complete Lists
### Electric UFH DIY Kit
**Tools:**
- Tape measure
- Craft knife or mat-cutting scissors
- Spirit level
- Multimeter (essential for testing)
- Notched trowel (6-10 mm)
- Mixing paddle and bucket
- Dust sheets and vacuum
- Tile spacers (if tiling)
**Materials:**
- Electric UFH mat (sized to heated area)
- Insulation boards (6-10 mm XPS or cork)
- Floor sensor probe and conduit
- Primer (if required)
- Flexible tile adhesive or self-levelling compound
- Tiles or LVT (final finish)
- Thermostat (usually included with mat)
**Total DIY cost (12 m² bathroom):** £400-£600 (materials only)
### Wet UFH DIY Kit
**Tools:**
- Tape measure and pencil
- Pipe cutter
- Pipe bender or bending spring
- Staple gun or clip tool
- Spirit level
- Pressure test pump (hire: £30-£50/day)
- Mixing paddle, trowel, screed board
- Wheelbarrow (for screed mixing)
**Materials:**
- UFH pipe (16 mm PEX-a or PE-RT, 100-150 m for typical room)
- Insulation boards (50-100 mm PIR or EPS)
- Pipe clips or staples
- Edge insulation strip
- Manifold (flow, return, valves, pump)
- Pipe fittings (push-fit or compression)
- Sand and cement (for screed) or hire liquid anhydrite contractor
- Thermostat and zone valves
**Total DIY cost (25 m² living room):** £1,200-£1,800 (materials only, excluding final floor finish)
## Regulations You Must Comply With
Even if you're doing most of the work yourself, you must comply with UK Building Regulations. Ignorance is not a defence - non-compliant work can void insurance, affect property sales, and create safety hazards.
### Part P: Electrical Safety (Electric UFH)
**What it covers:** All electrical work in dwellings, including fixed wiring, new circuits, and connections to the mains supply.
**What you can do:** Lay the mat, install the sensor probe, and run cables to the thermostat location.
**What you cannot do:** Connect the mat or thermostat to the mains supply. This is notifiable work and **must** be completed by a Part P qualified electrician registered with a competent person scheme (e.g., NICEIC, NAPIT, ELECSA).
**Compliance:** The electrician will self-certify the work and issue a certificate of compliance. You must keep this certificate - you'll need it when selling the property.
**Penalty for non-compliance:** Fines up to £5,000. More seriously, non-compliant electrical work can void your home insurance and create a hazard.
For full details on electrical compliance, see our [UK building regulations guide](/uk-building-regulations-underfloor-heating/).
### Gas Safe (Wet UFH Connected to Gas Boiler)
**What it covers:** Any work involving gas appliances, pipework, or connections.
**What you cannot do:** Connect the UFH manifold to a gas boiler. This work **must** be completed by a Gas Safe registered engineer. Only Gas Safe engineers are legally permitted to work on gas systems.
**Compliance:** The engineer will issue a Gas Safe certificate upon completion.
**Penalty for non-compliance:** Fines up to £5,000 and possible imprisonment. Gas work is heavily regulated for safety reasons - never attempt DIY gas work.
### Building Control Notification (If Part of Larger Project)
**When it applies:** If the UFH installation is part of a larger project (extension, loft conversion, major renovation), you may need to notify Building Control in advance.
**What you must do:**
1. Submit plans and pay the Building Control fee (typically £300-£800 depending on project size).
2. Allow inspections at key stages (foundations, floor slab, final completion).
**When it doesn't apply:** Standalone UFH installation in an existing room (e.g., retrofitting a bathroom) does not usually require Building Control notification, provided the electrical and gas work is certified.
## When to Just Hire a Professional
DIY isn't always the right choice. Here are the scenarios where professional installation is worth the cost.
### 1. Whole-House Wet UFH Systems
**Why hire a pro:** Designing, installing, and commissioning a whole-house wet UFH system is complex. It involves:
- Heat loss calculations for each room
- Manifold sizing and location
- Pipe layout for multiple loops
- Integration with boiler or heat pump
- Balancing and commissioning
**Typical cost:** £5,400-£11,400 for a 60 m² ground floor.
**DIY risk:** High. Mistakes in system design, pipe sizing, or balancing can result in rooms that never reach the target temperature, high energy bills, or premature system failure. For guidance on planning a whole-house system, see our [design and planning guide](/underfloor-heating-design-planning/).
### 2. Complex Layouts (Irregular Rooms, Multiple Zones)
**Why hire a pro:** Rooms with alcoves, bay windows, multiple obstacles, or complex zoning requirements need expert planning. A professional can optimise the layout for even heat distribution.
**Typical cost:** £800-£2,000 for a single complex room (wet UFH).
**DIY risk:** Medium-high. You can lay the system, but planning the layout incorrectly results in cold spots or wasted energy.
### 3. Heat Pump Integration
**Why hire a pro:** Integrating wet UFH with a heat pump is specialist work. The system must be designed for low flow temperatures (35-45°C), and the heat pump must be sized correctly. Poor integration results in high running costs and reduced comfort. For detailed guidance on UFH and heat pump pairing, see our [heat pumps guide](/underfloor-heating-heat-pumps-guide-2026/).
**Typical cost:** £8,000-£16,000 for a heat pump + wet UFH installation (whole house).
**DIY risk:** Very high. Heat pump design and installation requires certification and specialist knowledge.
### 4. Any Doubt
**If you're not confident, hire a professional.** The cost of a botched DIY installation (ruined screed, damaged mats, leaks) far exceeds the labour savings. A professional installation comes with a warranty and guarantees the system will work as intended.
For guidance on when professional help is essential and what to expect, see our [when to call a professional guide](/when-to-call-professional-underfloor-heating/).
**Ready to hire a professional?** Browse qualified underfloor heating installers on the [Underfloor Heating Directory](https://underfloorheating.directory/installers) to find the right expert for your project.
## Frequently Asked Questions
### Can I install underfloor heating myself?
Yes, you can install electric UFH mats yourself (surface prep, insulation, and mat laying), but the final electrical connection must be completed by a Part P qualified electrician. Wet UFH pipe laying is DIY-possible for experienced hands, but manifold connection requires a Gas Safe engineer (if connected to a gas boiler) or qualified plumber. Expect to save **30-40%** of total installation cost.
### How much can I save by installing UFH myself?
Electric UFH: Save **£350-£650 per room** (39-43% of total cost) by doing the mat laying and preparation yourself. Wet UFH: Save **£1,000-£1,900 per room** (40-48%) by laying pipes and pouring screed yourself. Whole-house wet UFH: Save **£1,900-£4,400** (35-39%) by doing pipe laying and screed work.
### Do I need an electrician for electric underfloor heating?
Yes. While you can lay the mat and run cables, the final connection to the mains supply **must** be completed by a Part P qualified electrician. This is a legal requirement under UK Building Regulations. Expect to pay **£80-£150** for the final electrical connection.
### Can I lay wet underfloor heating pipes myself?
Yes, if you have basic plumbing skills and follow the manufacturer's instructions carefully. However, manifold connection, pressure testing, and commissioning should be done by a professional. A Gas Safe engineer is required if connecting to a gas boiler.
### What tools do I need to install electric UFH?
Essential tools: tape measure, craft knife, spirit level, multimeter (for testing mat resistance), notched trowel, and mixing paddle. Materials: mat, insulation boards, sensor probe, adhesive or self-levelling compound. See the full list in the [DIY Electric UFH section](#diy-electric-ufh-step-by-step) above.
### What are the most common DIY UFH mistakes?
**Electric:** Cutting the heating wire (destroys the mat), forgetting floor insulation, poor thermostat placement. **Wet:** Uneven pipe spacing (hot/cold spots), not pressure testing before screed (leaks discovered too late), turning on UFH before screed cures (cracking). See the [Common Mistakes section](#what-can-go-wrong-common-diy-mistakes) for full details.
### Do I need Building Control approval for DIY UFH?
Standalone UFH installation in an existing room does not usually require Building Control approval, provided electrical and gas work is certified by qualified professionals. If UFH is part of a larger project (extension, renovation), Building Control approval is required. See our [building regulations guide](/uk-building-regulations-underfloor-heating/) for full details.
---
*Ready to start your DIY UFH project? Check our [installation guide](/underfloor-heating-installation-guide/) for detailed step-by-step instructions, or use our [cost calculator](/underfloor-heating-cost-calculator/) to estimate professional vs DIY costs for your specific room.*
---
--- title: Kitchen Underfloor Heating: UK Costs, Systems & Installation description: Explore kitchen underfloor heating costs, electric versus wet systems, suitable flooring and installation tips to choose the best option for your UK home. url: https://underfloorheating.info/kitchen-underfloor-heating/ published: 2025-11-01 updated: 2026-08-21 tags: ['kitchen underfloor heating', 'kitchen heating', 'electric underfloor heating kitchen', 'wet underfloor heating kitchen', 'kitchen flooring UFH'] ---
# Kitchen Underfloor Heating: UK Costs, Systems & Installation

> **Quick Answer**: A typical 12 m² kitchen costs **£400-£800** for electric underfloor heating (mat + installation) or **£900-£1,800** for a wet system. Electric systems suit most kitchens under 15 m². Wet systems are better for large open-plan kitchens over 20 m². Tile and stone floors provide the best heat output. Avoid placing heating elements under fixed appliances. Plan with the guides at [underfloorheating.info](https://underfloorheating.info/) and compare local specialists through the [Underfloor Heating Directory](https://underfloorheating.directory/).
**Ready to get quotes for your kitchen?** Compare free quotes from trusted installers via the [Underfloor Heating Directory](https://underfloorheating.directory/get-quotes).
## Is Underfloor Heating Good for Kitchens?
Kitchens are one of the best rooms in the house for underfloor heating (UFH). The combination of hard flooring, high foot traffic, and modern open-plan layouts makes kitchen UFH both practical and comfortable. Unlike carpeted living rooms where heat transfer is restricted, kitchen floors-typically tiled, stone, or vinyl-allow radiant heat to warm the space efficiently.
### Why Kitchens Are Ideal for UFH
The modern UK kitchen has evolved significantly over the last twenty years. What was once a small, closed-off room is now frequently the social hub of the home, often connected to a dining area or family room. This shift towards open-plan living means kitchens are larger, more visible, and used for longer periods throughout the day.
**Hard flooring is standard.** Almost every kitchen uses tile, porcelain, natural stone, or luxury vinyl tile (LVT). These materials have excellent thermal conductivity, transferring heat quickly and evenly into the room. A tiled kitchen floor can deliver up to **71 W/m2** of heat output-significantly better than the 48 W/m2 you'd get from carpet.
**High traffic areas benefit from radiant warmth.** Standing at a sink or worktop for long periods is far more comfortable when the floor beneath you is gently warm. Unlike radiators that heat the air (which rises to the ceiling), UFH warms your feet first-exactly where you need it when cooking, washing up, or preparing meals.
**No wall space is wasted.** Kitchens already compete for wall space with cabinets, appliances, and windows. Removing radiators frees up valuable room for extra storage, larger worktops, or better furniture placement in adjoining dining areas.
### The Challenges to Be Aware Of
While kitchens are well-suited to UFH, there are practical limitations you need to plan for.
**Appliances block heat zones.** Fixed units like fridges, dishwashers, cookers, and washing machines should not have heating elements installed beneath them. This is partly for safety (some appliances generate their own heat) and partly to avoid wasting energy heating spaces where it won't be felt. You only heat the open floor area-the zones where people walk and stand.
**Kitchen extensions often have high glazing.** Many UK kitchen projects involve rear extensions with large bi-fold or sliding doors. While this creates a beautiful, light-filled space, it also increases heat loss. UFH alone may not be sufficient if your extension has poor insulation or a high proportion of glazing. In such cases, UFH should be paired with good insulation and possibly supplementary heating.
**Frequent foot traffic during installation.** If you're retrofitting UFH into an existing kitchen, the disruption can be significant. The floor must be lifted, the system installed, and a new floor finish applied. Expect the kitchen to be out of action for at least a week, sometimes longer for wet systems that require screed curing time.
## Electric vs Wet UFH for Kitchens: Which Should You Choose?
The fundamental choice is between an [electric mat system](/electric-underfloor-heating-systems/) and a wet (water-based) hydronic system. Both can work well in kitchens, but the right choice depends on your kitchen size, existing heating setup, and budget.
### Side-by-Side Comparison
| Feature | Electric UFH | Wet UFH |
| :--- | :--- | :--- |
| **Best for** | Single kitchens, retrofits, rooms under 15 m2 | Large open-plan kitchens, new builds, 20 m2+ |
| **Installation Cost (12 m2 kitchen)** | £400-£800 | £900-£1,800 |
| **Running Cost (4 hrs/day, Oct 2026 rates)** | ~£0.76/day (~£23/month) | ~£0.55/day (~£16.50/month) |
| **Heat-Up Time** | 20-40 minutes | 60-120 minutes |
| **Floor Height Increase** | 3-10 mm (mats under tiles) | 65-100 mm (screed + insulation) |
| **Installation Speed** | 1-2 days | 3-7 days (+ screed drying) |
| **Requires Boiler/Heat Pump?** | No-works independently | Yes |
| **Best Flooring** | Tile, porcelain, stone, LVT | Tile, porcelain, stone, LVT |
### When Electric UFH Makes Sense
[Electric underfloor heating systems](/electric-underfloor-heating-systems/) work using thin heating cables woven into mats or supplied as loose wire. These are laid directly onto the subfloor (often with a decoupling membrane or insulation board beneath), then tiled over or covered with a self-levelling compound before LVT or engineered wood.
**Ideal for standalone kitchens under 15 m2.** If you're heating just the kitchen-not an adjoining open-plan dining or family room-electric is usually the better choice. The lower upfront cost, faster installation, and rapid heat-up time make it a practical option.
**Perfect for retrofits.** Electric mats add minimal height to the floor, typically only 3-6 mm under tiles. This makes them far easier to retrofit into existing properties where raising the floor level would cause issues with doorways, appliances, or step transitions to adjoining rooms.
**No boiler connection needed.** Electric systems run entirely off your mains electricity supply. They don't require connection to a central heating boiler, making them ideal for properties without wet central heating or for kitchens far from the boiler location.
**Higher running costs over time.** The trade-off is electricity pricing. At 27p/kWh (October 2026 Ofgem price cap), running an electric mat in a 12 m2 kitchen for 4 hours daily costs approximately **£0.76 per day** or **£23 per month** during regular use.
### When Wet UFH Makes Sense
[Wet underfloor heating systems](/wet-underfloor-heating-ultimate-guide/) circulate warm water through plastic pipes embedded in the floor screed. The water is heated by your boiler or, increasingly, by an air source heat pump. A manifold controls the flow to different zones.
**Best for large open-plan spaces over 20 m2.** If your kitchen opens into a dining area or living space, creating one continuous floor area of 25-40 m2 or more, wet UFH becomes the more economical choice. The higher upfront cost is offset by significantly lower running costs over the system's lifetime.
**Ideal for new builds and major renovations.** If you're building an extension, converting a garage, or undertaking a full ground-floor renovation where the existing floor is already being removed, wet UFH is easier to integrate. The pipes are laid before the screed is poured, creating a seamless, permanent installation.
**Works brilliantly with heat pumps.** Wet UFH operates at low flow temperatures of 35-45°C, which is the sweet spot for [heat pump efficiency](/underfloor-heating-heat-pumps-guide-2026/). If you're installing an air source heat pump to meet the Future Homes Standard or to qualify for the Boiler Upgrade Scheme, wet UFH is the natural pairing.
**Much lower running costs.** A wet system running on mains gas at 6.9p/kWh costs approximately **£0.55 per day** for the same 12 m2 kitchen used for 4 hours daily, saving around **30% compared to electric**. Over a year, that difference compounds. For full worked examples and up-to-date tariff calculations, see our [underfloor heating running costs guide](/underfloor-heating-running-costs-2026/).
**Slower to heat and more invasive to install.** Wet systems have higher thermal mass and take 1-2 hours to warm up fully. Installation is more complex: the floor level increases by 65-100 mm (insulation + pipes + screed), and screed must cure for several weeks before the final floor finish can be applied.

## Best Flooring for Kitchen UFH
Your choice of floor finish has a direct impact on how well the UFH system performs. Some materials conduct heat efficiently, while others act as insulators and restrict heat flow into the room.
### Tile and Porcelain (Ideal)
**Why it's best:** Ceramic and porcelain tiles have the highest thermal conductivity of any common flooring material. They transfer heat rapidly from the UFH system into the room, providing the best heat output and efficiency. Thermal resistance for tiles is typically **0.5-1.0 m2K/W**, well within the recommended range for UFH.
**Performance:** A tiled floor over electric or wet UFH can deliver up to **71 W/m2** of heat output, the maximum you can expect from any floor covering. Tiles also retain heat well, so even after the system turns off, the floor stays warm for a period.
**Cost:** Tile installation over UFH is straightforward. Use a flexible tile adhesive suitable for heated floors, and consider a decoupling membrane beneath the tiles to prevent cracking from thermal expansion.
### Natural Stone (Ideal)
**Why it's great:** Limestone, slate, travertine, and granite all have excellent thermal properties similar to tiles. Stone floors provide a luxurious finish and pair beautifully with the even warmth of UFH.
**Performance:** Heat output is comparable to porcelain, typically around **68-71 W/m2**. Stone is dense and has high thermal mass, meaning it takes slightly longer to warm up but holds heat for longer once it does.
**Cost:** Stone is more expensive than ceramic tiles, both for the material itself and for installation (requires skilled tilers). The thermal performance, however, is outstanding.
### LVT and Vinyl (Compatible)
**Why it works:** Luxury vinyl tile (LVT) and sheet vinyl are popular in modern kitchens for their durability, water resistance, and ease of cleaning. Most LVT products are compatible with UFH, but you must check the manufacturer's maximum temperature rating.
**Performance:** Vinyl has a higher thermal resistance than tiles-typically around **0.10-0.15 m2K/W** for the vinyl itself-but still allows good heat transfer when installed correctly. Heat output is slightly lower than tiles, closer to **60-65 W/m2**.
**Temperature limits:** Most LVT manufacturers specify a maximum floor surface temperature of **27°C**. This is critical. Your UFH thermostat must include a floor temperature probe, and the limit should be set to 27°C to prevent damage to the vinyl. For detailed guidance on thermostat setup and temperature limiting, see our [smart thermostats guide](/smart-thermostats-underfloor-heating/).
**Installation tip:** Use a smooth, self-levelling screed or overlay board beneath LVT. Any imperfections in the subfloor will telegraph through the vinyl.
### Engineered Wood (Compatible, With Caution)
**Why it's less common:** Engineered wood can work with UFH, but it's less popular in kitchens due to water exposure risks. Solid wood is not recommended for kitchens at all-it's prone to warping and has poor dimensional stability when exposed to heat and moisture.
**Performance:** Engineered wood has a thermal resistance of around **0.10-0.15 m2K/W** per layer, depending on thickness. A 14 mm engineered oak floor will deliver approximately **55-60 W/m2** of heat output.
**Temperature limits:** Like LVT, engineered wood must not exceed **27°C** floor surface temperature. Excessive heat will cause the wood to dry out, leading to gaps, cupping, or cracking. Always use a floor probe thermostat.
**Installation tip:** Allow the wood to acclimatise in the room for at least 48 hours before installation. Use a flexible adhesive or click-lock floating system designed for UFH.
### Why Carpet Is Not Suitable in Kitchens
**Thermal resistance is too high.** Carpet and underlay combined typically have a thermal resistance (tog rating) well above 2.5 m2K/W-far too high for efficient UFH operation. Heat output drops to around **48 W/m2** or lower, wasting energy and reducing comfort.
**Hygiene and practicality.** Kitchens are high-spill, high-traffic areas. Carpet is impractical for kitchen use regardless of the heating system. Stick to hard, washable surfaces.
For a comprehensive breakdown of all flooring types, thermal resistance values, and compatibility charts, see our [best flooring for underfloor heating guide](/best-flooring-underfloor-heating/).
## Layout Considerations for Kitchen UFH
Unlike heating a simple rectangular bedroom, kitchens have unique layout challenges. Fixed appliances, cabinetry, and islands all affect where you can-and should-place heating elements.
### Avoid Placing Heating Under Fixed Appliances
**Do not install UFH beneath:**
- **Fridges and freezers** (insulated bases block heat; wasted energy)
- **Dishwashers** (generate their own heat; potential for overheating)
- **Washing machines** (same as dishwashers)
- **Ovens and cookers** (obvious fire safety and efficiency concern)
- **Fixed kitchen units and cabinets** (no benefit; heat cannot escape)
**Why?** Heating beneath these appliances wastes energy. The heat cannot reach the room-it's trapped beneath an insulated box. Worse, some appliances may overheat or become less efficient if their base is warmed.
**How to plan around appliances:** During the design stage, mark out the exact footprint of all fixed units and appliances on a floor plan. Heating elements (whether electric mats or wet UFH pipes) should only be installed in the open, walkable floor areas.
### Measure Only the Heated Floor Area
When calculating system size and costs, measure only the actual heated area-not the total floor area of the kitchen.
**Example:** A 15 m2 kitchen might only have 10-12 m2 of heated floor once you subtract the footprint of all fixed units, appliances, and islands.
**Why this matters:** If you order a 15 m2 electric mat for a kitchen with only 10 m2 of open floor, you'll either waste money or have to cut the mat to fit (and cutting electric heating wire destroys the mat). Always measure carefully and order the correct size.
### Perimeter Insulation Is Critical
Heat loss occurs around the edges of a room, particularly where the floor slab meets external walls. Without proper insulation, a significant proportion of the heat from your UFH will escape through the edges rather than radiating upwards into the room.
**What to use:** Install **perimeter insulation strips** around the edge of the floor before laying the heating system. These are typically 10-20 mm thick strips of closed-cell foam that sit between the floor screed and the wall, preventing thermal bridging.
**Where it's most important:** External walls, particularly in rear extensions or kitchens on external corners of the property. Internal walls are less critical, but perimeter insulation is still good practice.

## Kitchen UFH Installation Process
The installation sequence depends on whether you're using electric or wet UFH. Both require careful preparation, but the timescales and complexity differ significantly.
### Electric UFH Installation (Step-by-Step)
**1. Subfloor preparation.** The existing subfloor must be clean, dry, and level. If you're working on a concrete slab, use a self-levelling compound to smooth any irregularities. For timber subfloors, install a layer of tile backer board to provide a stable, flat surface.
**2. Install insulation boards.** Lay insulation boards (typically 6-10 mm XPS or PIR foam) across the entire floor area to prevent heat loss downwards. Tape the joints between boards to prevent the tile adhesive or screed from seeping through.
**3. Lay the electric heating mat.** Unroll the mat across the open floor areas, avoiding the footprints of fixed appliances and units. The mat can be cut (the mesh backing, not the wire) to navigate around obstacles. **Never cut the heating wire itself**-this will destroy the entire mat.
**4. Install the floor temperature sensor.** The sensor probe is a small thermistor on a wire that sits within the floor, measuring surface temperature. Run the probe wire in a conduit between two runs of heating cable, approximately 15-20 cm from the wall. This prevents the floor from overheating and is essential for LVT or engineered wood installations.
**5. Connect to the thermostat.** The mat's power supply cable and sensor wire are run up the wall to the thermostat location (usually 1.5 m above floor level). **This final electrical connection must be completed by a Part P qualified electrician** to comply with UK building regulations. For detailed guidance on thermostat types and installation, see our [smart thermostats guide](/smart-thermostats-underfloor-heating/).
**6. Test the system.** Before covering the mat, measure the electrical resistance of the heating circuit with a multimeter. Compare the reading to the manufacturer's specification (printed on the mat label). This confirms the mat is undamaged.
**7. Apply tile adhesive or screed.** For tiled floors, use a flexible tile adhesive to cover the mat, then lay tiles directly on top. For LVT or engineered wood, pour a thin self-levelling compound (10-15 mm) over the mat to create a smooth surface.
**8. Commission and test.** Once the adhesive or screed has cured (24-48 hours for adhesive; 7 days minimum for screed), turn on the system gradually. Start at a low temperature (20°C) and increase by 2-3°C per day until you reach the desired operating temperature. This prevents thermal shock.
**Total installation time:** 1-2 days for the mat installation and tiling. Add another 1-2 days for the electrician to complete wiring and final connection.
### Wet UFH Installation (Step-by-Step)
**1. Subfloor preparation.** As with electric, the subfloor must be clean, level, and structurally sound. For new builds, the insulation is often integrated into the floor slab design. For retrofits, a layer of rigid insulation board (typically 50-100 mm PIR or EPS) is laid first.
**2. Install the manifold.** The manifold is the control centre for the wet UFH system, distributing warm water to different zones. It's usually installed in a utility room, hallway cupboard, or under the kitchen sink. Position it centrally to minimise pipe run lengths. For complete guidance on manifold selection and installation, see our [manifold guide](/underfloor-heating-manifold-guide/).
**3. Lay the pipe.** UFH pipes (typically 16 mm diameter PEX or PE-RT) are laid in loops across the floor, spaced at 150-250 mm intervals depending on the heat output required. The pipes are clipped to the insulation board or held in place with staples. A typical kitchen might use a **snail (spiral) pattern**, which provides even heat distribution.
**4. Connect pipes to the manifold.** Each loop of pipe is connected to the flow and return ports on the manifold. This is plumbing work and should be completed by a qualified heating engineer or plumber.
**5. Pressure test the system.** Before any screed is poured, the entire pipe network must be pressure tested. The system is filled with water and pressurised to 6 bar, then left for 24 hours. If the pressure holds, the system is leak-free and ready for screed. **Never skip this step.**
**6. Pour the screed.** A sand and cement screed (typically 65-75 mm thick) or liquid anhydrite screed (45-65 mm thick) is poured over the pipes, fully encasing them. The screed provides thermal mass and protects the pipes. For detailed guidance on screed types, curing times, and common problems, see our [underfloor heating screed guide](/underfloor-heating-screed/).
**7. Cure the screed.** Sand and cement screed requires at least **6-8 weeks** to cure fully before the UFH system can be turned on. Liquid anhydrite screed can be force-dried after 7 days using the UFH system itself, but this must be done gradually. **Do not turn on UFH too early-it will crack the screed.**
**8. Commission the system.** Once cured, the system is gradually warmed up, starting at 25°C and increasing by 5°C per day until the design flow temperature (typically 40-45°C) is reached. This hardens the screed and ensures even heat distribution.
**9. Lay the final floor finish.** Tiles, stone, LVT, or engineered wood can now be installed over the cured screed.
**Total installation time:** 3-7 days for pipe laying and screed pouring. Add 6-8 weeks for screed curing (sand/cement) or 2-3 weeks for liquid anhydrite with force drying.
## Running Costs for Kitchen UFH
How much it costs to run your kitchen UFH depends on the system type, how often you use it, and the current energy tariff. Here's a realistic worked example for a typical UK kitchen.
### Electric UFH Running Costs
**Scenario:** 12 m2 kitchen, electric mat rated at 150 W/m2, used for 4 hours per day.
**Power consumption:** 12 m2 × 150 W/m2 = 1,800 W = **1.8 kW**
**Daily usage:** 1.8 kW × 4 hours = **7.2 kWh per day**
**Daily cost (at 27p/kWh):** 7.2 kWh × £0.27 = **£1.94 per day**
**Monthly cost (30 days):** £1.94 × 30 = **£58.32 per month**
However, this assumes continuous use for 4 hours. In practice, a smart thermostat will cycle the heating on and off to maintain the target temperature, reducing actual consumption by around 40-60%. **Realistic monthly cost: £23-£35.**
For a detailed breakdown of how thermostats reduce running costs and comparisons across different room sizes, see our [running costs guide](/underfloor-heating-running-costs-2026/).
### Wet UFH Running Costs (Gas Boiler)
**Scenario:** Same 12 m2 kitchen, wet UFH system, gas boiler at 90% efficiency, gas price 6.9p/kWh.
**Heat output required:** Approximately 1.5 kW (slightly lower than electric due to better heat distribution from screed thermal mass).
**Daily usage:** 1.5 kW × 4 hours = **6.0 kWh per day** (heat delivered to the room)
**Gas consumption (accounting for 90% boiler efficiency):** 6.0 kWh ÷ 0.90 = **6.67 kWh of gas**
**Daily cost (at 6.9p/kWh):** 6.67 kWh × £0.069 = **£0.46 per day**
**Monthly cost (30 days):** £0.46 × 30 = **£13.80 per month**
Again, thermostat cycling reduces this further. **Realistic monthly cost: £8-£14.**
### Annual Cost Comparison
Over a full heating season (October-April, approximately 7 months), the cost difference compounds:
- **Electric UFH:** £161-£245 per season
- **Wet UFH (gas):** £56-£98 per season
**Saving with wet UFH:** £105-£147 per year for a typical 12 m2 kitchen.
For a larger open-plan kitchen-diner (25-30 m2), this annual saving could reach **£250-£350**, which helps offset the higher installation cost of a wet system over 5-10 years.
## Kitchen UFH and Kitchen Extensions
Kitchen extensions are one of the most common home improvement projects in the UK. Extending rearwards into the garden to create a larger, open-plan kitchen-dining space is a popular way to add value and living space.
### Why Extensions Are Ideal for UFH
**Floor is already being constructed.** Whether you're building on a new concrete slab or using a suspended beam-and-block floor, the opportunity to integrate UFH is already there. There's no need to lift existing flooring or disrupt the rest of the house.
**Open-plan layouts suit zoned heating.** A large kitchen-diner extension (20-40 m2) benefits from UFH's even heat distribution. Unlike radiators, which create hot spots near the units, UFH warms the entire floor area uniformly-perfect for open-plan spaces where people move around freely.
**Glazing is often extensive.** Many extensions feature bi-fold or sliding doors along the rear wall, creating a bright, airy space. However, this glazing increases heat loss. UFH, combined with good insulation and double or triple glazing, can compensate for this. For guidance on insulation requirements and heat loss calculations, see our [design and planning guide](/underfloor-heating-design-planning/).
### Heat Loss Considerations for Glazed Extensions
**The challenge:** A glazed extension can lose 3-4 times more heat per square metre than a well-insulated solid wall. If your extension has 6-8 m2 of glazing (a typical bi-fold door), you must account for this in your heat loss calculation.
**The solution:**
1. **Maximise insulation.** Use 100-150 mm of rigid PIR or EPS insulation beneath the floor slab. Insulate the walls to current Building Regulations standards (Part L requires a U-value of 0.18 W/m2K or better for walls).
2. **Specify low-emissivity (Low-E) double or triple glazing.** Modern glazing with argon or krypton gas fills significantly reduces heat loss. A triple-glazed door has a U-value around 0.8 W/m2K compared to 1.4 W/m2K for standard double glazing-nearly 50% better.
3. **Increase UFH pipe density or mat wattage.** In high-heat-loss areas, reduce pipe spacing to 150 mm (instead of 200 mm) or use a higher-wattage electric mat (200 W/m2 instead of 150 W/m2). This compensates for the additional heat loss.
4. **Consider supplementary heating.** If the glazing ratio is very high (more than 50% of the external wall area), UFH alone may struggle to maintain comfort on the coldest days. A wall-mounted panel heater or contemporary vertical radiator can provide backup heat when needed.
### Open-Plan Kitchen-Diner Sizing
**Typical sizes for UK extensions:**
- **Small extension:** 12-18 m2 (single-storey rear extension, 3-4 m deep)
- **Medium extension:** 20-30 m2 (full-width rear extension, 4-5 m deep)
- **Large extension:** 35-50 m2 (full-width, 6+ m deep, often incorporating side return)
**Which system to choose:**
- **Under 18 m2:** Electric UFH is viable if the extension is well-insulated and glazing is limited. Cost: £720-£2,160 installed.
- **20-30 m2:** Wet UFH becomes more economical. Cost: £1,800-£5,700 installed. Annual running cost saving over electric: £200-£350.
- **Over 35 m2:** Wet UFH is the clear choice, especially if you're installing a new boiler or heat pump for the whole house. Cost: £3,150-£9,500 installed.
## Do You Need Planning Permission for Kitchen UFH?
The short answer: **No, you do not need planning permission to install underfloor heating alone.** UFH is an internal alteration and does not affect the external appearance of the property. However, there are some building regulations and permissions you must comply with, particularly if the UFH is part of a larger kitchen renovation or extension.
### Building Regulations Part P (Electrical Work)
**What it covers:** Part P of the UK Building Regulations governs electrical safety in dwellings. Any new electrical circuit or connection must comply.
**How it applies to UFH:** If you're installing electric UFH, a qualified electrician registered with a competent person scheme (e.g., NICEIC, NAPIT, or ELECSA) must complete the final electrical connection: wiring the mat to the consumer unit and connecting the thermostat.
**Do you need to notify Building Control?** If your electrician is registered, they will self-certify the work and issue a certificate of compliance. You do not need to notify Building Control separately. If the electrician is not registered, you must notify Building Control in advance and pay a fee for inspection. For full details on electrical compliance, see our [UK building regulations guide](/uk-building-regulations-underfloor-heating/).
### Building Regulations for Kitchen Extensions
**When it applies:** If your kitchen UFH is part of a new extension, the entire extension must comply with Building Regulations, including:
- **Part A (Structure):** Foundations, walls, and roof must be structurally sound.
- **Part L (Energy Efficiency):** The extension must meet minimum insulation standards and energy performance targets. UFH can actually help you meet Part L requirements, as it operates at lower flow temperatures than radiators.
- **Part F (Ventilation):** Adequate ventilation must be provided.
- **Part M (Access):** Level thresholds and step-free access may be required.
**Do you need Building Control approval?** Yes, for any extension or structural alteration. You must submit plans and pay Building Control fees. Inspections will be carried out at key stages (foundation, drainage, floor slab, completion).
**Do you need planning permission for the extension?** Most single-storey rear extensions up to 4 m deep (or 8 m for detached houses) are permitted development and do not require planning permission. However, if your property is listed, in a conservation area, or the extension exceeds permitted development limits, planning permission is required.
### No Planning Permission for UFH Alone
**Internal alterations are exempt.** Installing UFH in an existing kitchen, bathroom, or any other room is an internal alteration. It does not require planning permission, even if you're lifting the floor, increasing the floor height, or making significant changes to the heating system.
**Exception:** If you live in a listed building or a flat, you may need listed building consent or freeholder approval respectively. Check with your local authority or freeholder before starting work.
## Frequently Asked Questions
### How much does underfloor heating cost for a kitchen?
A typical 12 m2 kitchen costs **£400-£800** for electric UFH (supply and installation) or **£900-£1,800** for a wet system. Larger open-plan kitchens (20-30 m2) cost £1,200-£3,600 for electric or £1,800-£5,700 for wet UFH. Use our [underfloor heating cost guide](/underfloor-heating-costs/) for benchmark prices or the [cost calculator](/underfloor-heating-cost-calculator/) for a personalised estimate.
### Can you put underfloor heating under kitchen units?
No, you should not install UFH beneath fixed kitchen units, appliances, or islands. The heat cannot escape and is wasted. Only heat the open, walkable floor areas where people stand and move around. This also applies to any area under cabinets (sometimes searched as "under cabinet" heating).
### What is the best flooring for kitchen underfloor heating?
Tile and porcelain are the best choices, delivering up to 71 W/m2 of heat output. Natural stone is equally good. LVT and engineered wood are compatible but require a floor temperature limit of 27°C. Avoid carpet in kitchens-it's impractical and has poor thermal performance. See our [flooring guide](/best-flooring-underfloor-heating/) for full details.
### How long does it take to install underfloor heating in a kitchen?
Electric UFH takes 1-2 days to install and can be used within 24-48 hours once the tile adhesive or screed has cured. Wet UFH takes 3-7 days to install but requires 6-8 weeks for screed curing before it can be turned on. Factor in this timeline if you're planning a kitchen renovation.
### Is underfloor heating expensive to run in a kitchen?
Electric UFH costs approximately **£23-£35 per month** for a 12 m2 kitchen used 4 hours daily (October 2026 tariffs). Wet UFH costs **£8-£14 per month** on gas for the same usage. Wet systems are more economical for larger kitchens and continuous use. If you are asking whether [underfloor heating is expensive to run](/is-underfloor-heating-expensive-to-run/), our full running cost guide compares electric and wet systems in detail.
### Can I install kitchen UFH myself?
You can lay electric mats yourself if you're a competent DIYer, but the final electrical connection must be completed by a Part P registered electrician. Wet UFH pipe laying is more complex and usually requires a professional heating engineer, particularly for manifold connection and pressure testing. Labour savings from DIY are typically 30-40% of the total cost.
### Does underfloor heating work with kitchen islands?
Yes, but do not install heating elements beneath the island itself. Heat the open, walkable floor around the island. If your island houses appliances (dishwasher, wine fridge), these areas should also be excluded from the heated zone.
---
*Ready to plan your kitchen UFH project? Use our [cost calculator](/underfloor-heating-cost-calculator/) for a personalised quote, or explore our [complete installation guide](/underfloor-heating-installation-guide/) for step-by-step guidance.*
**Ready to get your kitchen quotes?** Compare prices from professional UFH installers via the [Underfloor Heating Directory](https://underfloorheating.directory/get-quotes). Already have a quote? [Check if it's competitive →](https://underfloorheating.directory/analyse-quote)
---
--- title: Underfloor Heating in New Builds: Complete UK Self-Build Guide description: Plan underfloor heating in a new build with UK costs, system choices, heat pump guidance and installation advice to create an efficient, comfortable home. url: https://underfloorheating.info/underfloor-heating-new-builds/ published: 2025-11-01 updated: 2026-08-21 tags: ['underfloor heating new build', 'new build underfloor heating', 'self build underfloor heating', 'underfloor heating developer', 'new build heating system'] ---
# Underfloor Heating in New Builds: Complete UK Self-Build Guide

> **Quick Answer**: A new build is the cheapest and easiest time to install underfloor heating. Wet systems cost £40–£80/m² in a new build versus £90–£190/m² for retrofit, nearly 50% less. Electric costs £60–£120/m² either way. Heat pump + wet UFH is now the go-to combination for Future Homes Standard compliance (2025). Specify it at foundation stage so it fits properly into the build. Use [underfloorheating.info](https://underfloorheating.info/) for further planning guidance and the [Underfloor Heating Directory](https://underfloorheating.directory/) when you're ready to compare project options.
**Ready to get quotes?** Compare free estimates from trusted installers via the [Underfloor Heating Directory](https://underfloorheating.directory/installers).
## Why UFH Makes Sense in a New Build
Building a new house or commissioning a development? Put underfloor heating near the top of your specification list. The construction process already gives you the right conditions, and you'll save a lot compared with retrofitting it later.
### No Existing Flooring to Lift
**The retrofit problem:** Adding UFH to an existing property means lifting floors, removing tiles or carpet and often raising floor levels. Every part adds cost, disruption and complexity.
**The new build advantage:** You design the floor slab around the UFH system. The installer lays pipes or electric mats on the insulation before the screed goes down. There's nothing to lift, no floor height mismatch to solve and nobody living through the disruption.
**Cost impact:** Labour costs for wet UFH installation in a new build are 40–50% lower than retrofit because there is no demolition, disposal, or floor-level matching required.
### Concrete Slab Poured Around Pipes
**How it works:** In a new build, the wet UFH pipes are laid directly on the insulation layer that sits on top of the ground-bearing concrete slab or suspended floor structure. The screed is then poured over the pipes, fully encasing them and creating perfect thermal contact.
**Thermal mass benefits:** The screed absorbs heat and releases it slowly, giving you steady, even warmth. In effect, the whole floor becomes a large thermal store, reducing temperature swings and improving comfort.
**Structural integrity:** Because the pipes are integrated into the floor structure from the start, there is no risk of damaging existing floors, cracking tiles, or creating weak points. The floor is built to accommodate the system.

### Insulation Easy to Integrate
**Building Regulations requirement:** New builds must meet strict insulation standards under Part L (Conservation of Fuel and Power). For ground floors, this typically means 100–150 mm of rigid insulation (PIR or EPS) beneath the slab or screed.
**Why it helps UFH:** This insulation is essential for efficiency. A new build already includes it in the floor build-up, so you avoid extra cost and complexity. In a retrofit, you'd have to add it separately and often raise the floor, which creates problems at doorways and steps.
**Perimeter insulation:** Edge insulation strips around the perimeter of the floor (to prevent thermal bridging at the walls) are also easily integrated during construction. In a retrofit, adding perimeter insulation often means cutting into finished plaster or skirting boards.
### Manifolds Planned Into the Design
**The manifold challenge in retrofits:** Finding a sensible manifold location in an existing house can be difficult. You need a central spot with room for the cabinet and access to the pipework. That often means losing a cupboard or fitting an unsightly external box.
**New build advantage:** The manifold location is designed into the floor plan from the start. Common locations:
- **Utility room** (ideal, centrally located, plenty of space, existing pipework)
- **Under-stairs cupboard** (compact, central)
- **Hallway cupboard** (purpose-built)
- **Plant room** (if the property has one)
The manifold is installed before the screed is poured, with pipes running to each zone beneath the floor. Everything is hidden, tidy, and accessible for servicing. For detailed guidance on manifold selection and positioning, see our [manifold guide](/underfloor-heating-manifold-guide/).
### Electricians On-Site for Thermostats
**Electric final connections:** Even if you are installing electric UFH, the final electrical connections (thermostat wiring, connection to the consumer unit) must be completed by a Part P qualified electrician.
**New build advantage:** Electricians are already on-site throughout the build, first-fixing and second-fixing electrics. Adding UFH thermostat wiring to their scope of work is straightforward and adds minimal cost. In a retrofit, you would need to book an electrician specifically for the UFH work, adding call-out fees and scheduling delays.
## New Build vs Retrofit Costs
New build UFH often costs 40–50% less than a retrofit because you cut the labour and avoid demolition work.
### Side-by-Side Cost Comparison
| System Type | New Build Cost (per m²) | Retrofit Cost (per m²) | Saving in New Build |
| :--- | :--- | :--- | :--- |
| **Wet (Hydronic) UFH** | £40–£80 | £90–£190 | **£50–£110/m² (44–58% cheaper)** |
| **Electric UFH** | £60–£120 | £60–£120 | **Minimal saving** (electric is similar cost either way) |
### Why Wet UFH Is So Much Cheaper in New Builds
**No floor lifting:** Labour to remove existing flooring, dispose of waste, and prepare the subfloor can cost £15–£30/m². This is eliminated in a new build.
**Integrated screed pour:** The screed is poured once, over the UFH pipes, as part of the floor construction. In a retrofit, you might need two screed pours (one to level the floor, another over the UFH) or use more expensive low-profile systems to avoid raising floor levels.
**No floor height matching:** Retrofitting often requires raising the new floor to match adjacent rooms, which means building up the subfloor, adjusting door frames, and dealing with thresholds. In a new build, all floors are at the same level from the start.
**Efficient pipe routing:** In a new build, pipes can run directly beneath the floor to the manifold. In a retrofit, pipes often need to be routed around existing structures, increasing pipe length and complexity.
**Example (60 m² ground floor):**
- **New build wet UFH:** £2,400–£4,800 (at £40–£80/m²)
- **Retrofit wet UFH:** £5,400–£11,400 (at £90–£190/m²)
- **Saving:** £3,000–£6,600 (50–58% cheaper in new build)
### Why Electric UFH Doesn't Save Much in New Builds
Electric mats are thin (3–10 mm) and quick to install, whether in a new build or retrofit. The main cost is the mat itself, which does not change. Labour to lay the mat is minimal (1–2 hours per room), so the new build advantage is small.
**When electric still makes sense in new builds:**
- Small or single-room installations (bathrooms, utility rooms)
- Supplementary heating (e.g., bedroom over a [garage conversion](/underfloor-heating-garage-garden-room/))
- Where running wet UFH pipework would be impractical
**When wet UFH is better in new builds:**
- Whole-house or ground-floor installations
- Where a heat pump is being installed
- For compliance with Future Homes Standard (see below)
For full cost breakdowns and comparisons, see our [underfloor heating costs guide](/underfloor-heating-costs/).

## UFH and the Future Homes Standard
From June 2025, the **Future Homes Standard (FHS)** comes into effect in England, fundamentally changing how new homes are heated. UFH, particularly wet systems paired with heat pumps, is at the heart of this new standard.
### What the Future Homes Standard Means
**Key requirements:**
1. **No new gas boilers in new builds.** From 2025, new homes cannot be connected to the gas grid. All heating must be low-carbon.
2. **75–80% reduction in carbon emissions** compared to current Building Regulations (Part L 2021).
3. **All-electric heating systems** are the default, typically using air source heat pumps (ASHPs) or ground source heat pumps (GSHPs).
4. **Fabric-first approach:** New homes must have excellent insulation, airtightness, and thermal performance to minimise heating demand.
**Why this matters:** Heat pumps operate most efficiently when delivering heat at low temperatures (35–45°C). [Wet underfloor heating](/wet-underfloor-heating-ultimate-guide/) is designed for exactly this temperature range, making it the ideal emitter for heat pump systems. Radiators, by contrast, typically require 60–75°C flow temperatures, forcing the heat pump to work harder and consume more electricity.
### Why UFH + Heat Pump Is the Compliant Combination
**Heat pump efficiency (COP):** A heat pump's **coefficient of performance (COP)** measures how much heat it delivers for each unit of electricity consumed. At low flow temperatures (35–40°C), a modern ASHP can achieve a COP of **3.0–3.5**, meaning it delivers 3–3.5 kW of heat for every 1 kW of electricity. At higher temperatures (60°C for radiators), the COP drops to **2.0–2.5**, a 30–40% efficiency loss.
**UFH enables low flow temperatures:** Wet UFH can comfortably heat a well-insulated new build at flow temperatures of 35–40°C. This keeps the heat pump operating in its most efficient zone, reducing electricity consumption and running costs.
**Part L compliance:** Building Regulations Part L 2021 (and the upcoming Future Homes Standard) set a maximum flow temperature of **55°C** for wet central heating systems. UFH easily meets this requirement; radiators struggle unless they are significantly oversized.
**Carbon emissions:** By pairing UFH with a heat pump, a new build can achieve the 75–80% carbon reduction required by FHS without needing to rely on expensive technologies like solar thermal or battery storage (though these can help further reduce emissions).
For detailed guidance on pairing UFH with heat pumps, including flow temperature optimisation and system sizing, see our [heat pumps guide](/underfloor-heating-heat-pumps-guide-2026/).
### Flow Temperature Requirements (Max 55°C Part L)
**Part L 2021 requirement:** The maximum flow temperature for wet heating systems in new builds is **55°C**. This is a carbon-reduction measure designed to encourage the use of heat pumps and low-temperature emitters.
**UFH compliance:** Wet UFH typically operates at **35–45°C** flow temperature, well within the limit. Even in the coldest weather, UFH rarely needs to exceed 45°C.
**Radiator challenge:** Traditional radiators sized for 70–75°C flow temperatures are undersized for 55°C operation. To meet Part L, radiators must be significantly oversized (sometimes 2–3× larger), which is expensive, impractical, and aesthetically unappealing.
**Why UFH is the logical choice:** UFH naturally complies with Part L flow temperature limits without any oversizing or compromise. It is the simplest, most cost-effective way to meet the regulations.
### What Developers Need to Spec
If you are a developer building to the Future Homes Standard, here is what to specify for compliant UFH:
1. **Air source heat pump** (3–8 kW for typical new build, depending on floor area and heat loss)
2. **Wet UFH across all heated floors** (ground floor minimum; consider first floor for best performance)
3. **High-efficiency insulation** (U-values: walls ≤ 0.18 W/m²K, floors ≤ 0.13 W/m²K, roof ≤ 0.11 W/m²K)
4. **Airtightness target** ≤ 3 m³/hr/m² at 50 Pa (preferably ≤ 1.5 m³/hr/m²)
5. **Smart thermostats and zoning** for each room or zone (required for compliance)
6. **Mechanical ventilation with heat recovery (MVHR)** (not UFH-specific, but required for FHS)
**Cost impact:** A heat pump + UFH installation for a typical 80 m² new build costs **£8,000–£14,000**, including the heat pump, UFH pipework, manifolds, thermostats, and installation. This is comparable to a high-efficiency gas boiler + radiator system, but with far lower running costs and full FHS compliance.

## Planning Your UFH in a New Build
Timing matters. Specify UFH early so the architect and installer can build it into the floor structure and heating design.
### At What Stage to Specify UFH (Foundation Stage Is Ideal)
**Optimal timing: Foundation/subfloor design stage** (before slab is poured)
**Why this stage matters:** The floor build-up must be designed to accommodate the UFH system. This includes:
- **Insulation thickness** (typically 100–150 mm PIR or EPS)
- **Screed depth** (65–75 mm for wet UFH)
- **Floor level** (must match door thresholds and adjacent rooms)
- **Perimeter insulation** (edge strips around the slab perimeter)
If you specify UFH after the slab is poured, you will need to use low-profile overlay systems or raise the floor level, both of which are more expensive and compromise the design.
**What to confirm with your architect/builder at this stage:**
1. Floor build-up specification (insulation type and thickness, screed type and depth)
2. Manifold location (mark on floor plans)
3. Thermostat locations (mark on electrical layout)
4. Pipe entry points (where pipes will penetrate walls to reach manifold)
### Working with Architect and M&E Engineer
**Architect's role:**
- Design the floor plan to accommodate manifold location
- Ensure floor levels work with UFH screed depth
- Coordinate with structural engineer on floor loading (screed adds weight, typically 130–150 kg/m² for 65–75 mm screed)
**M&E (Mechanical & Electrical) Engineer's role:**
- Calculate heat loss for each room (essential for pipe spacing and heat pump sizing)
- Design the UFH layout (pipe spacing, loop lengths, zoning)
- Specify the heat pump (size, location, connection to UFH manifold)
- Design the electrical system (thermostat wiring, power supply for heat pump and pumps)
**Self-builders:** If you are self-building without a full design team, you can hire a specialist UFH designer or heating engineer to produce the heat loss calculations and UFH layout. Cost: **£300–£800** for a typical house.
### Heat Loss Calculations Before Slab Pour
**Why they are essential:** Heat loss calculations determine how much heat each room needs to maintain a comfortable temperature (typically 20–21°C). This drives:
- **Pipe spacing** (150 mm for high heat loss, 200–250 mm for low heat loss)
- **Heat pump size** (undersized = cold house; oversized = inefficient, expensive)
- **Screed depth** (must provide sufficient thermal mass for even heat distribution)
**When to do them:** Before the floor slab is poured, so the UFH design can be finalised and integrated into the floor structure. Use our [free heat loss calculator](/heat-loss-calculator/) for a room-by-room figure, this matters especially for [extensions](/underfloor-heating-extensions/), which typically lose more heat per m² than the rest of the house.
**What is involved:** The calculation considers:
- External wall U-values and area
- Window/door U-values and area
- Roof and floor U-values and area
- Air infiltration (based on airtightness target)
- Internal heat gains (occupants, appliances, lighting)
- Design external temperature (typically -3°C for UK)
**Output:** A room-by-room heat loss report specifying the heat output required (in watts) for each room. This feeds directly into the UFH design.
**Who can do it:** A qualified heating engineer, M&E consultant, or specialist UFH designer. Many UFH suppliers offer free heat loss calculations if you are purchasing their system.
For detailed guidance on heat loss calculations and UFH design, see our [design and planning guide](/underfloor-heating-design-planning/).
### Manifold Room Planning (Utility Room Is Ideal)
**Why manifold location matters:** The manifold is the distribution hub for the UFH system. Pipe runs from the manifold to each zone beneath the floor. Longer pipe runs increase resistance, reduce flow rate, and waste energy. A central manifold location minimises pipe lengths and improves system efficiency.
**Best locations:**
1. **Utility room** (ideal: central, spacious, existing plumbing and electrics, hidden from living areas)
2. **Under-stairs cupboard** (compact, usually central, accessible)
3. **Hallway cupboard** (purpose-built, central)
4. **Plant room** (if the house has one, common in larger self-builds)
**Worst locations:**
- External walls (long pipe runs to internal rooms, heat loss through external wall)
- Upstairs (if heating ground floor only, long vertical pipe runs)
- Garage or outbuilding (too far from heated areas)
**Space required:** Allow at least **600 mm (width) × 400 mm (depth) × 800 mm (height)** for the manifold cabinet. Larger houses with multiple zones need more space.
**Access:** The manifold needs to be accessible for servicing, balancing, and troubleshooting. Do not bury it behind built-in furniture or in a location that requires dismantling other fixtures to reach.
## Whole-House Wet UFH Design for New Builds
Designing a whole-house wet UFH system requires careful planning to ensure even heat distribution, efficient operation, and compliance with Building Regulations.
### Zoning Across Floors
**What is zoning?** Zoning divides the house into separate heating areas, each with its own thermostat and control valve. Different zones can be heated to different temperatures or turned off independently, improving comfort and reducing energy waste.
**Typical zoning for a new build:**
- **Ground floor:** 2–4 zones (living room, kitchen/diner, hallway, WC/utility)
- **First floor:** 2–4 zones (master bedroom, other bedrooms, bathroom, landing)
**Why zone?** Different rooms have different heating needs:
- Bedrooms are typically heated to 18–19°C
- Living areas to 20–21°C
- Bathrooms to 22–23°C
Zoning allows you to set different temperatures for each area, avoiding overheating bedrooms or underheating living rooms.
**Zone size:** Each zone should ideally be **10–40 m²**. Zones smaller than 10 m² can be difficult to balance; zones larger than 40 m² may need multiple pipe loops.
For detailed guidance on zoning strategies and control options, see our [zoning guide](/underfloor-heating-zoning-complete-guide/).
### Manifold Locations (Utility Room, Hallway Cupboard)
**Single manifold or multiple?**
- **Small to medium houses (up to 100 m²):** One manifold can serve the entire house if centrally located.
- **Large houses (100–200 m²):** Two manifolds (one per floor) reduce pipe run lengths and improve efficiency.
- **Very large houses (200+ m²):** Multiple manifolds (e.g., one per wing) may be needed.
**Manifold per floor (ideal for two-storey new builds):**
- **Ground floor manifold:** Located in utility room or under-stairs cupboard, serving ground floor zones.
- **First floor manifold:** Located in airing cupboard or landing cupboard, serving first floor zones.
**Why this works well:** Shorter pipe runs, easier balancing, and each floor can be controlled independently (e.g., turn off first floor heating during the day when bedrooms are unoccupied).
### Pipe Spacing for New Build Insulation Levels (200–250 mm Typical)
**Why pipe spacing matters:** The closer the pipes are spaced, the higher the heat output per square metre. However, closer spacing requires more pipe (higher cost) and creates higher resistance (lower flow rate).
**Typical spacing for well-insulated new builds:**
- **High heat loss areas (external walls, large glazing):** 150 mm spacing
- **Standard areas (internal rooms, normal glazing):** 200 mm spacing
- **Low heat loss areas (internal bathrooms, small rooms):** 250 mm spacing
**Why wider spacing works in new builds:** Modern new builds have excellent insulation (U-values ≤ 0.18 W/m²K for walls, ≤ 0.13 W/m²K for floors). Heat loss per square metre is low, typically **40–60 W/m²** compared to 80–120 W/m² in older properties. This means you can use wider pipe spacing and still deliver sufficient heat.
**Example heat output (wet UFH at 40°C flow, 30°C return):**
- **150 mm spacing:** ~80 W/m²
- **200 mm spacing:** ~60 W/m²
- **250 mm spacing:** ~45 W/m²
For a well-insulated new build requiring 50 W/m², 200 mm spacing is perfect.
### Flow Temperature Targets (35–40°C)
**Why low flow temperatures?** Heat pumps achieve maximum efficiency at low flow temperatures. The lower the temperature, the less electricity the heat pump consumes.
**Recommended flow temperatures for new build UFH:**
- **Mild weather (10–15°C outside):** 30–35°C flow
- **Cold weather (0–5°C outside):** 35–40°C flow
- **Very cold weather (below 0°C):** 40–45°C flow (rarely needed in well-insulated new builds)
**How to achieve this:** Good insulation + adequate pipe spacing + sufficient screed depth (65–75 mm). The screed provides thermal mass, allowing the UFH to deliver steady heat at low temperatures.
**Compare to radiators:** Radiators typically require 60–75°C flow temperatures to deliver the same heat output. At these temperatures, heat pump COP drops from 3.5 to 2.0–2.5, increasing running costs by 30–40%.
## Heat Pump Selection for New Build UFH
Pairing your wet UFH with the right heat pump is critical for efficiency, comfort, and compliance with the Future Homes Standard.
### ASHP Sizing for New Build (Smaller Unit Needed Due to Low Heat Loss)
**Why new builds need smaller heat pumps:** Modern new builds have such low heat loss (thanks to insulation, airtightness, and high-performance glazing) that the required heat pump is much smaller than for older properties.
**Typical heat pump sizes for new builds:**
- **Small house (60–80 m²):** 3–5 kW ASHP
- **Medium house (80–120 m²):** 5–7 kW ASHP
- **Large house (120–180 m²):** 7–10 kW ASHP
**Compare to retrofit:** A poorly insulated 1930s semi (100 m²) might need a 10–12 kW heat pump due to higher heat loss. A modern new build of the same size needs only 5–7 kW.
**Why sizing matters:** An oversized heat pump cycles on and off frequently (short-cycling), which reduces efficiency, increases wear, and creates temperature fluctuations. An undersized heat pump runs continuously but cannot maintain the target temperature on the coldest days. Correct sizing (based on accurate heat loss calculations) is essential.
**Rule of thumb for new builds:** ~50–60 W/m² heat loss is typical for a well-insulated new build. For a 100 m² house, this equates to **5–6 kW** heat pump.
### Boiler Upgrade Scheme Grant
**What it is:** The UK government's **Boiler Upgrade Scheme (BUS)** provides grants of up to **£7,500** towards the cost of installing an air source heat pump or ground source heat pump in England and Wales (as of 2026).
**Who qualifies:** Homeowners, landlords, and self-builders installing a heat pump in an existing property or new build (subject to eligibility criteria).
**How it works:**
1. Find an MCS-certified installer (see below).
2. Get a quote for the heat pump + UFH installation.
3. The installer applies for the BUS grant on your behalf.
4. The grant is deducted from your final invoice (you do not pay upfront and claim back).
**Cost impact:** A 6 kW ASHP + wet UFH installation for an 80 m² new build might cost £10,000–£14,000. With the £7,500 BUS grant, your net cost is **£2,500–£6,500**, comparable to a gas boiler + radiator system.
**Important:** The grant is only available for **MCS-certified installations** (see below). Check current eligibility at [gov.uk/boiler-upgrade-scheme](https://www.find-government-grants.service.gov.uk/grants/boiler-upgrade-scheme-1).
### MCS Certification Requirement
**What is MCS?** The **Microgeneration Certification Scheme (MCS)** is the UK's quality assurance standard for renewable energy installations, including heat pumps. MCS certification is required to:
- Qualify for the Boiler Upgrade Scheme grant
- Comply with Building Regulations Part L (for new builds)
- Access certain green energy tariffs and incentives
**What it involves:** The installer must:
1. Be MCS-certified (registered with MCS and trained on heat pump installation)
2. Conduct a heat loss calculation (MCS standard)
3. Design the system to meet MCS performance standards
4. Commission the system and provide a performance certificate
5. Provide a warranty (typically 2–5 years for the heat pump, 1–2 years for installation)
**Cost:** MCS-certified installations are not significantly more expensive than non-certified work, the MCS process is standard practice for professional heat pump installers.
**Finding an MCS installer:** Search the MCS database at [mcscertified.com](https://mcscertified.com).
**Self-builders:** If you are self-building and want to DIY the UFH installation, you will still need an MCS-certified installer for the heat pump connection and commissioning to qualify for BUS grant.
## Building Regulations for New Builds
New build properties must comply with Building Regulations, which cover structural integrity, energy efficiency, electrical safety, and more. UFH affects several parts of the regulations.
### Part L (Energy Efficiency)
**What it covers:** Conservation of fuel and power. Part L sets minimum standards for insulation, airtightness, heating system efficiency, and carbon emissions.
**UFH compliance:**
- **Flow temperature:** Must not exceed 55°C. Wet UFH at 35–45°C easily complies.
- **Heating system efficiency:** Heat pump + UFH systems achieve high efficiency (COP 3.0–3.5), helping meet Part L carbon reduction targets.
- **Thermal bridging:** Edge insulation around the floor perimeter reduces thermal bridging, improving Part L compliance.
**SAP calculations:** Part L compliance is demonstrated using **Standard Assessment Procedure (SAP)** calculations, which model the property's energy performance. UFH + heat pump scores highly in SAP due to low flow temperatures and high efficiency.
**Part L 2021 vs Future Homes Standard 2025:** Part L 2021 requires a 30% carbon reduction vs 2013 regulations. Future Homes Standard (from June 2025) requires a 75–80% reduction, effectively mandating heat pumps and UFH for most new builds.
For full details on Part L compliance and how UFH contributes to energy performance, see our [building regulations guide](/uk-building-regulations-underfloor-heating/).
### Part P (Electrical)
**What it covers:** Electrical safety in dwellings. All electrical work must be completed by a qualified electrician and comply with BS 7671 (the IEC Wiring Regulations).
**UFH electrical work:**
- Electric UFH mats: Final connection to consumer unit must be completed by a Part P registered electrician.
- Wet UFH thermostats: Wiring from thermostats to zone valves and manifold pump.
- Heat pump power supply: Dedicated circuit (typically 16–32A) must be installed by a qualified electrician.
**Compliance:** The electrician will self-certify the work and issue an Electrical Installation Certificate. This is required for Building Control sign-off.
### SAP Calculations and How UFH Affects Them
**What is SAP?** The Standard Assessment Procedure is a government-approved methodology for calculating a dwelling's energy performance. SAP produces an **Energy Performance Certificate (EPC)** rating (A–G scale) and demonstrates compliance with Part L.
**How UFH improves SAP scores:**
1. **Low flow temperature heating:** UFH at 35–45°C scores higher than radiators at 60–75°C.
2. **Heat pump compatibility:** Heat pumps achieve higher COP with UFH, reducing primary energy consumption.
3. **Even heat distribution:** Reduced heat loss through better thermal comfort (lower thermostat settings).
4. **Zoning and controls:** Smart thermostats and room-by-room zoning improve SAP scores by reducing wasted heat.
**Typical EPC improvement:** A new build with heat pump + UFH might achieve an **EPC rating of A (92–100)**, compared to B (81–91) for a gas boiler + radiator system.
**SAP assessor:** You will need a qualified SAP assessor to run the calculations and produce the EPC. Cost: **£300–£600** for a new build.
### Air Pressure Testing Requirements
**What it is:** Building Regulations require new builds to achieve a minimum airtightness standard, measured by a **blower door test** (also called air pressure testing). The result is expressed as **air changes per hour at 50 pascals pressure (m³/hr/m² @ 50 Pa)**.
**Current requirement (Part L 2021):** Maximum 8 m³/hr/m² (in practice, aim for ≤ 3 m³/hr/m² for good energy performance).
**Future Homes Standard (2025):** Target ≤ 1.5 m³/hr/m² for best practice.
**Why it matters for UFH:** Poor airtightness = high heat loss = UFH struggles to maintain temperature = higher running costs. A leaky new build might need a larger heat pump and more aggressive UFH (closer pipe spacing), both of which increase cost.
**When tested:** Twice, once at completion of the build (before final sign-off), and often once during construction (after plastering, before final finishes) to identify issues early.
**Cost:** £300–£500 per test.
## Common Mistakes Developers Make
Even experienced developers can make mistakes that compromise UFH performance, increase costs, or create problems post-completion.
### 1. Under-Speccing Insulation (Saves Money Now, Costs Later)
**The mistake:** Specifying the minimum insulation required by Building Regulations, rather than going beyond compliance.
**Why it is tempting:** Insulation is expensive. Reducing floor insulation from 150 mm to 100 mm saves £5–£10/m² on materials.
**The consequence:**
- Higher heat loss = larger heat pump required = higher capital cost
- Higher running costs for homeowners (poor EPC rating, higher bills)
- UFH struggles to maintain temperature on coldest days
- Poor SAP score = lower property value
**The fix:** Specify **150 mm PIR or EPS** insulation beneath ground floors, even if regulations only require 100 mm. The additional cost is £300–£600 for a typical 80 m² ground floor, but it future-proofs the property and improves marketability.
### 2. Forgetting Perimeter Insulation at Slab Edge
**The mistake:** Not installing edge insulation strips around the perimeter of the floor slab.
**The consequence:** Thermal bridging at the slab edge, heat escapes through the junction between the floor and external wall. This creates cold spots around the room perimeter and wastes 10–15% of heat output.
**The fix:** Install **10–20 mm closed-cell foam edge strips** around the entire perimeter of the slab before the screed is poured. Cost: £50–£150 per house (trivial compared to the energy loss).
### 3. Wrong Manifold Location (Too Far from Zones)
**The mistake:** Installing the manifold in a convenient location for the plumber (e.g., external wall, garage) rather than a central location that minimises pipe runs.
**The consequence:**
- Long pipe runs = higher resistance = lower flow rate = reduced heat output
- Wasted energy pumping water through long pipes
- Higher installation cost (more pipe required)
**The fix:** Plan the manifold location at the design stage. Aim for a central location within 10–15 metres of all zones. If the house has two floors, use two manifolds (one per floor).
### 4. No Commissioning Handover Pack
**The mistake:** Completing the UFH installation without providing the homeowner with:
- Heat loss calculations
- UFH layout drawings (showing pipe routes)
- Manifold balancing settings
- Thermostat programming instructions
- Warranty and maintenance guidance
**The consequence:** Homeowners do not know how to operate the system efficiently. Service engineers called to fix "faults" have no documentation to work from. Warranty claims are delayed or rejected due to missing paperwork.
**The fix:** Provide a comprehensive handover pack in a folder or digitally. Include:
- As-built drawings (showing exact pipe routes and sensor locations)
- Commissioning report (flow temperatures, flow rates, balancing settings)
- Thermostat user manuals and quick-start guides
- Warranty certificates (heat pump, UFH system, installation)
- Maintenance schedule (when to service, what to check)
**Cost:** Minimal (documentation should be produced as part of the installation anyway).
## Questions to Ask Your Builder
If you are a self-builder or commissioning a developer, use this checklist to ensure UFH is specified and installed correctly.
### UFH System Design
1. **Have heat loss calculations been completed for every room?** (Essential for correct pipe spacing and heat pump sizing.)
2. **What pipe spacing will be used, and why?** (Should vary by room based on heat loss, not a one-size-fits-all approach.)
3. **Where will the manifold(s) be located, and how far are the longest pipe runs?** (Aim for ≤ 80–100 m per loop.)
4. **What flow temperature is the system designed for?** (Should be 35–45°C for heat pump systems.)
5. **How many zones will there be, and which rooms are in each zone?** (Minimum 2–4 zones for a house; more for larger properties.)
### Insulation and Floor Build-Up
6. **What thickness of floor insulation is specified?** (Minimum 100 mm; 150 mm is better.)
7. **Is perimeter edge insulation included?** (Must be yes, this is essential for efficiency.)
8. **What screed depth will be used?** (Should be 65–75 mm over pipes for wet UFH.)
9. **What screed type?** (Sand/cement or liquid anhydrite? Anhydrite is faster but more expensive.)
### Heat Pump and Controls
10. **What size heat pump has been specified, and how was it sized?** (Should be based on heat loss calculations, not guesswork.)
11. **Is the heat pump MCS-certified, and will installation be MCS-compliant?** (Essential for Boiler Upgrade Scheme grant.)
12. **What thermostats and controls will be used?** (Smart thermostats recommended; ensure each zone has independent control.)
13. **Will the system be commissioned and balanced before handover?** (Essential and non-negotiable.)
### Documentation and Warranty
14. **Will I receive as-built drawings showing pipe routes?** (Yes, you will need these for future servicing or renovations.)
15. **What warranty is provided for the UFH system and heat pump?** (Minimum 2 years installation warranty; 5–10 years for heat pump.)
16. **Will a commissioning report be provided showing flow rates and temperatures?** (Yes, this proves the system has been installed correctly.)
If the builder or installer cannot answer these questions clearly, find someone who can.
## Frequently Asked Questions
### How much does underfloor heating cost in a new build?
Wet UFH costs **£40–£80/m²** in a new build (supply and installation), compared to £90–£190/m² for retrofit, nearly 50% cheaper. Electric UFH costs **£60–£120/m²** (similar to retrofit). A typical 60 m² ground floor costs £2,400–£4,800 for wet UFH or £3,600–£7,200 for electric. See our [costs guide](/underfloor-heating-costs/) for full breakdowns.
### [Is underfloor heating worth it](/is-underfloor-heating-worth-it/) in a new build?
Yes. A new build is the cheapest and easiest time to install UFH. Wet UFH costs 40–50% less than retrofit, fits neatly into the floor structure and works best with heat pump systems (required by the Future Homes Standard from 2025). Running costs are 15–40% lower than radiators.
### Do new builds have to have underfloor heating?
No, but from June 2025, the Future Homes Standard requires all new builds to have low-carbon heating (typically heat pumps). Heat pumps work best with low-temperature emitters like UFH. While radiators can be used, they must be significantly oversized to work at the 55°C maximum flow temperature, making UFH the more practical choice.
### When should UFH be installed in a new build?
Specify UFH at the **foundation/subfloor design stage** before the slab is poured. Wet UFH pipes are laid on the insulation layer before screed is poured, creating seamless integration. Specifying UFH later means costly retrofitting or raised floor levels.
### Can you have underfloor heating upstairs in a new build?
Yes. Wet UFH can be installed on suspended floors (timber joists or beam-and-block) using low-profile overlay systems or by integrating pipes into a screed on top of the floor deck. Electric UFH is also suitable for upstairs rooms. Cost is similar to ground floor installation.
### How long does underfloor heating last in a new build?
A well-installed wet UFH system lasts **25–30 years** (pipes are encased in screed and have no moving parts). Electric UFH lasts **20–25 years**. Heat pumps typically last **15–20 years** before requiring replacement. All should outlast the first mortgage term.
### What heating system is best for a new build house?
**Air source heat pump + wet UFH** is the best combination for new builds from 2025 onwards. It meets Future Homes Standard requirements, achieves the lowest running costs, qualifies for the £7,500 Boiler Upgrade Scheme grant, and provides superior comfort. Total cost: £8,000–£14,000 for an 80 m² house (net £500–£6,500 after grant).
---
*Planning a new build with UFH? Use our [cost calculator](/underfloor-heating-cost-calculator/) for a personalised quote, or explore our [design and planning guide](/underfloor-heating-design-planning/) for step-by-step guidance on system design and specification.*
**Take the next step?** Compare free quotes from professional UFH installers via the [Underfloor Heating Directory](https://underfloorheating.directory/installers).
---
--- title: Underfloor Heating Screed: Types, Depth and Drying Times UK Guide description: Learn the best underfloor heating screed types, correct depths, drying times and common problems for a reliable, efficient UK installation. Get it right. url: https://underfloorheating.info/underfloor-heating-screed/ published: 2025-11-01 updated: 2026-08-21 tags: ['underfloor heating screed', 'UFH screed depth', 'liquid screed underfloor heating', 'anhydrite screed UFH', 'screed drying time underfloor heating'] ---
# Underfloor Heating Screed: Types, Depth and Drying Times UK Guide

> **Quick Answer**: Screed for wet UFH should be **65–75 mm thick** over pipes for sand/cement screed or **45–65 mm** for liquid anhydrite screed. Anhydrite dries faster (walkable in 24–48 hours vs 7 days), conducts heat better (2.0 W/mK vs 1.4 W/mK), and is self-levelling, making it the preferred choice for UFH. Sand/cement is cheaper but takes 6–8 weeks to cure fully. Read more UK guidance at [underfloorheating.info](https://underfloorheating.info/) and find help with your project through the [Underfloor Heating Directory](https://underfloorheating.directory/).
**Planning UFH screed?** Connect with professional installers via the [Underfloor Heating Directory](https://underfloorheating.directory/installers) for expert guidance.
## Why Screed Matters for UFH
Screed is the layer of material poured over underfloor heating pipes to encase them, protect them, and transfer heat efficiently into the room. For wet (hydronic) UFH systems, the screed isn't just a surface finish; it's a critical component of the heating system itself.
If floor height is the deciding factor on a concrete or screed subfloor, there's also a screed-free retrofit route worth knowing about: [milled screed (in-cut) underfloor heating](/milled-screed-underfloor-heating/) mills the pipe directly into the existing slab instead of pouring a new screed layer over it, trading the thermal-mass benefits covered in this guide for zero added floor height.
### Thermal Mass and Heat Storage
**What is thermal mass?** Thermal mass is the ability of a material to absorb, store, and release heat. High thermal mass materials (like concrete and screed) heat up slowly but retain heat for long periods. Low thermal mass materials (like timber) heat and cool rapidly.
**Why it matters for UFH:** A screed floor with high thermal mass acts as a giant thermal store. When the UFH is on, the screed absorbs heat from the pipes and stores it. When the UFH turns off, the screed continues to release heat into the room for hours, maintaining a stable temperature.
**Example:** A 75 mm sand/cement screed floor can store enough heat to keep a room warm for 2–3 hours after the UFH switches off. This reduces temperature fluctuations, improves comfort, and allows you to use cheaper off-peak electricity tariffs by heating the screed overnight.
### Heat Conductivity: Anhydrite vs Sand/Cement
**Thermal conductivity** measures how quickly heat passes through a material. Higher conductivity = faster heat transfer = quicker warm-up times and better efficiency.
**Sand and cement screed:**
- Thermal conductivity: **1.4 W/mK**
- Dense, heavy, widely available
- Good thermal mass, moderate conductivity
**Liquid anhydrite (calcium sulphate) screed:**
- Thermal conductivity: **2.0 W/mK** (43% better than sand/cement)
- Self-levelling, smooth finish
- Excellent thermal mass, superior conductivity
**What this means in practice:** An anhydrite screed floor will warm up 15–20% faster than sand/cement for the same pipe spacing and flow temperature. Heat output is higher, and the system responds more quickly to thermostat changes.
**Why anhydrite is preferred for UFH:** The combination of high conductivity, self-levelling properties (perfect for even pipe coverage), and faster drying times makes anhydrite the gold standard for UFH installations, despite being 15–30% more expensive than sand/cement.
### Impact on System Response Time
**Response time** is how long it takes for the UFH to heat the room from cold to the target temperature.
**Sand/cement screed (65–75 mm):** Typical response time is **60–90 minutes** from cold. The thick, dense screed takes time to absorb heat from the pipes and transfer it to the surface.
**Liquid anhydrite screed (45–65 mm):** Response time is **45–60 minutes** due to thinner screed and better conductivity.
**Low-profile overlay systems (no screed):** Response time is **20–40 minutes**, much faster because there's minimal thermal mass. However, these systems don't store heat, so they cool down quickly when the UFH turns off.
**Why response time matters:** If you use a room intermittently (e.g., a home office heated only during work hours), a slow response time means you'll wait over an hour for the room to warm up. For continuous heating (whole-house systems), response time is less critical.
### Minimum Cover Over Pipes
**Why minimum cover is critical:** If the screed is too thin, it won't fully encase the pipes. This creates:
- **Hot spots** (directly over pipes) and **cold spots** (between pipes)
- **Risk of pipe damage** during installation of the floor finish
- **Cracking** due to inadequate structural strength
**Minimum screed depth over the top of the pipes:**
- **Sand/cement screed:** 65–75 mm total depth (pipe diameter is typically 16 mm, so 49–59 mm cover over the top of the pipe)
- **Liquid anhydrite screed:** 45–65 mm total depth (29–49 mm cover over pipe)
**What happens if screed is too thin:**
- Pipes may be visible through the floor finish (tiles, LVT)
- Cracking along pipe routes due to differential expansion
- Reduced heat transfer (air pockets around pipes)
**What happens if screed is too thick:**
- Slower response time (heat takes longer to reach the surface)
- Higher thermal mass (less responsive to thermostat changes)
- Additional weight (may exceed structural load capacity for suspended floors)
- Higher cost (more screed required)
**Optimal depth:** 65–75 mm for sand/cement, 50–60 mm for anhydrite, enough to fully encase pipes with good cover, without excessive thermal mass.
## Sand and Cement Screed for UFH
Traditional sand and cement screed is the most common choice for UFH in the UK. It's widely available, relatively cheap, and familiar to most builders and screeding contractors.
### Traditional Choice: 65–75 mm Minimum Depth
**Composition:** A mix of sharp sand and cement, typically in a ratio of **3.5:1 or 4:1** (3.5–4 parts sand to 1 part cement). Water is added to create a workable consistency.
**Why 65–75 mm?** This depth provides:
- Adequate cover over 16 mm diameter pipes (at least 49 mm above the top of the pipe)
- Sufficient strength to support foot traffic and floor finishes
- Good thermal mass for heat storage
- Minimal risk of cracking
**Thickness variation:** For particularly high-traffic areas (commercial, industrial), screed depth may increase to 75–100 mm for added strength. For domestic UFH, 65–75 mm is standard.
### Mix Ratio: 1:3.5 or 1:4 (Cement to Sand)
**Why the mix matters:** The cement is the binder; the sand provides bulk and strength. Too much cement = expensive, prone to shrinkage cracking. Too little cement = weak, dusty, prone to delamination.
**Standard mixes:**
- **1:3** (1 part cement, 3 parts sand): Stronger, used for heavy-duty applications. Rarely needed for domestic UFH.
- **1:3.5**: Common for UFH. Good balance of strength, workability, and cost.
- **1:4**: Standard for most domestic screeds. Adequate strength, lower cost, less shrinkage.
**Additives:** Fibres (polypropylene or glass) are often added to reduce shrinkage cracking. Cost: £2–£5/m² extra.
**Water content:** Critical. Too much water weakens the screed and extends drying time. Too little water makes the screed difficult to work and prone to cracking. Aim for a "damp earth" consistency: the screed should hold its shape when squeezed but not drip water.
### Manual or Pump-Applied
**Manual screeding (hand-mixed and laid):**
- **Process:** Sand and cement are mixed on-site using a mixer, then barrows and shovelled onto the floor. The screed is levelled using a screed board or laser level.
- **Pros:** Lower cost (no pump hire). Suitable for small areas (single rooms).
- **Cons:** Inconsistent mix quality. Slower (1–2 rooms per day). Hard physical work. Difficult to achieve a perfectly level surface.
- **Cost:** £15–£20/m² (materials + labour) for domestic UFH.
**Pump-applied (ready-mixed and pumped):**
- **Process:** Pre-mixed screed is delivered by truck and pumped through a hose onto the floor. Much faster and more consistent than hand-mixing.
- **Pros:** Faster (entire house can be screeded in a day). Consistent mix quality. Better level and finish.
- **Cons:** Higher cost (pump hire £200–£400/day). Only viable for larger areas (minimum ~30–40 m²).
- **Cost:** £18–£25/m² for pump-applied sand/cement screed.
**When to use each:**
- **Manual:** Single room (bathroom, kitchen), small extension (< 20 m²), tight access (pump can't reach).
- **Pump:** Whole house, large extension (> 30 m²), where speed and quality matter.
### Drying Time: 1 mm per Day (6–8 Weeks Minimum Before Flooring)
**The drying rule:** Sand and cement screed dries at approximately **1 mm per day** under ideal conditions (20°C ambient temperature, 50–60% relative humidity, good ventilation).
**For 65–75 mm screed:**
- **65 mm screed:** 65 days (9 weeks) to dry fully
- **75 mm screed:** 75 days (10–11 weeks)
**However:** In practice, the top 40–50 mm dries faster than the bottom. For most floor finishes (tiles, LVT), you can proceed once the screed reaches **75% dryness** (measured with a moisture meter).
**Realistic drying times before laying floor finish:**
- **Tiles:** 6–7 weeks (tiles are breathable; some moisture can escape through grout joints)
- **LVT or vinyl:** 8–10 weeks (these are impermeable and trap moisture)
- **Engineered wood:** 8–10 weeks (wood is sensitive to moisture)
**Speeding up drying:** You can improve drying by:
1. **Increasing ventilation** (open windows, use fans)
2. **Heating the room** (not with UFH, use temporary heaters)
3. **Using dehumidifiers** (removes moisture from the air, accelerating evaporation)
**Do NOT turn on UFH early.** Heating the screed before it's fully cured will cause cracking (see [Commissioning Process](#the-ufh-commissioning-process) below).
### Advantages: Cheap, Widely Available
**Cost:** Sand/cement screed is the cheapest option. Materials cost £5–£8/m² for a 65 mm depth; labour adds £10–£17/m².
**Availability:** Every builder, screeding contractor, and merchant stocks sand and cement. You can get it anywhere in the UK, often delivered the same day.
**Familiarity:** Most contractors have decades of experience with sand/cement screed. It's a known quantity, no surprises, no special training required.
**Reliability:** When mixed and laid correctly, sand/cement screed is durable and lasts 25–30 years without issues.
**Why it's still popular:** For budget-conscious projects, retrofit installations where time isn't critical, or areas where liquid screed contractors aren't available, sand/cement remains the default choice.

## Liquid Anhydrite (Calcium Sulphate) Screed for UFH
Anhydrite screed, also called calcium sulphate or flowing screed, is a liquid screed pumped onto the floor. It's become the preferred choice for UFH in new builds and high-quality renovations due to its superior performance.
### 45–65 mm Minimum Depth
**Why anhydrite can be thinner:** Anhydrite has higher compressive strength than sand/cement screed. A 50 mm anhydrite screed is as strong as 65 mm sand/cement.
**Standard depths for UFH:**
- **45 mm:** Minimum for light domestic use (bedrooms, living rooms)
- **50–60 mm:** Standard for most domestic UFH installations
- **65 mm:** High-traffic areas (hallways, kitchens) or commercial use
**Pipe cover:** For 16 mm diameter pipes, 45 mm total depth gives 29 mm cover over the top of the pipe, adequate for domestic use.
**Why thinner is better:**
- Less thermal mass = faster response time
- Lower floor height = easier to match adjacent rooms
- Less weight = suitable for suspended floors with lower load capacity
### Pump-Applied (Fast, Even Spread)
**How it's applied:** Anhydrite screed is delivered ready-mixed in a truck with an integrated pump. A hose is run from the truck into the property, and the screed is pumped directly onto the floor.
**Speed:** A typical 80 m² ground floor can be screeded in **2–3 hours**, far faster than hand-laying sand/cement (which would take 1–2 days).
**Self-levelling:** Anhydrite is a fluid, pumpable mixture. It flows across the floor, filling all gaps and creating a perfectly level surface with minimal manual intervention. A screeder uses a dappling bar to release trapped air, but the screed essentially levels itself.
**Consistency:** Because the screed is factory-mixed, the quality is consistent, with no variation from batch to batch or between different areas of the floor.
**Minimum area:** Most anhydrite suppliers have a minimum order of 10–15 m³ (approximately 25–35 m² at 50 mm depth). For small single-room installations, sand/cement may be more cost-effective simply due to minimum order requirements.
### Drying Time: 1 mm per Day, Can Be Force-Dried After 7 Days
**Initial drying:** Like sand/cement, anhydrite dries at approximately **1 mm per day** under ideal conditions.
**For 50 mm screed:** 50 days (7 weeks) to dry fully.
**However, force drying is possible:** After **7 days** of initial curing, anhydrite screed can be **force-dried** using the UFH system itself or temporary heaters. This dramatically reduces total drying time.
**Force-drying protocol:**
1. **Wait 7 days** after screed is laid (initial cure).
2. **Turn on UFH gradually:** Start at 25°C flow temperature. Increase by 5°C per day until maximum design temperature (typically 45°C) is reached.
3. **Run at maximum temperature for 3 days.**
4. **Turn off and allow to cool naturally.**
5. **Test moisture content** with a moisture meter. If below 0.5% (for tiles) or 0.3% (for LVT), the floor finish can be laid.
**Total time with force drying:** 2–3 weeks from screed pour to floor finish, compared to 6–8 weeks for sand/cement.
**Why this works with anhydrite:** The chemical composition of anhydrite allows controlled drying without cracking, provided the warm-up is gradual. Sand/cement screed cannot be force-dried safely; it will crack. Anhydrite's thinner profile and faster response time also make it the preferred choice when pairing UFH with a [heat pump](/underfloor-heating-heat-pumps-guide-2026/).
### Advantages: Better Thermal Conductivity, Self-Levelling, Lower Shrinkage
**Thermal conductivity (2.0 W/mK):** Heat transfer is 43% better than sand/cement (1.4 W/mK). This means:
- Faster warm-up times (the room reaches target temperature 15–20% quicker)
- Higher heat output for the same flow temperature
- Lower UFH running costs (less energy wasted)
**Self-levelling:** Creates a perfectly flat surface with minimal manual levelling. This is ideal for UFH because:
- Pipes are fully encased with no air gaps (air pockets reduce heat transfer)
- Final floor finishes (especially LVT and tiles) require a flat substrate, anhydrite delivers this naturally
**Lower shrinkage:** Anhydrite shrinks less as it cures than sand/cement, reducing the risk of cracking. Shrinkage cracks are a common problem with sand/cement screed, especially when laid too thick or dried too quickly.
**Smooth finish:** Anhydrite cures to a smooth, dense surface, ideal for LVT or tiles. Sand/cement often requires sanding or additional levelling compound to achieve the same finish.
**Perfect for UFH:** The combination of high conductivity, self-levelling properties, and compatibility with force drying makes anhydrite the best choice for UFH when budget allows.
### Disadvantages: Can't Get Wet, Needs Sanding Before Tiling
**Moisture sensitivity:** Anhydrite screed is hygroscopic; it absorbs moisture from the air. If it gets wet after installation (e.g., from a leak or condensation), it swells and can delaminate from the subfloor.
**Protection required:** Cover the screed with plastic sheeting for the first 7 days to prevent moisture ingress. After force drying, seal the floor with a primer before laying tiles or LVT.
**Incompatibility with cement-based adhesives (unless primed):** Anhydrite is calcium sulphate; tile adhesive is typically cement-based. These react chemically, creating a weak bond and potential delamination. **You must use a primer** before tiling over anhydrite.
**Surface laitance:** As anhydrite cures, a thin layer of weak material (laitance) forms on the surface. This must be removed by **sanding or light shot-blasting** before laying tiles or LVT. Sand/cement screed doesn't require this.
**Cost:** Anhydrite is 15–30% more expensive than sand/cement, typically **£20–£35/m²** (supply + pump + labour) vs **£15–£25/m²** for sand/cement. For how screed costs fit into your total UFH budget, see our [Underfloor Heating Costs Guide](/underfloor-heating-costs/).
**When NOT to use anhydrite:**
- Very small areas (< 15 m²) where minimum order costs make it uneconomical
- Properties with high moisture risk (e.g., cellars, ground floors with no DPM)
- Where the additional cost isn't justified (budget retrofits)
## Screed Depth Guide
Getting the screed depth right is critical for UFH performance and longevity. Too thin = cracking and poor heat distribution. Too thick = slow response and wasted thermal mass.
### What Happens If Screed Is Too Thin
**Structural weakness:** Screed thinner than the minimum specification (65 mm for sand/cement, 45 mm for anhydrite) won't have sufficient compressive strength. It will crack under foot traffic or when heavy furniture is placed on it.
**Inadequate pipe cover:** If the screed barely covers the pipes, you risk:
- **Visible pipes:** The outline of the pipes may be visible through the floor finish (especially with tiles or LVT).
- **Hot/cold stripes:** Heat concentrates directly over the pipes, with cooler areas between them, creating an uneven, uncomfortable floor temperature.
- **Pipe damage:** During installation of the floor finish, there's a risk of accidentally hitting or penetrating the pipes with screws, nails, or tile cutters.
**Cracking:** Thin screed is more prone to shrinkage cracking, particularly along pipe routes where differential thermal expansion occurs.
**Example:** A 40 mm screed over 16 mm pipes leaves only 24 mm of cover, far too thin. The screed will likely crack within weeks of use.
### What Happens If Screed Is Too Thick
**Slow response time:** Excessive thermal mass means the UFH takes much longer to warm up. An 100 mm screed could take 2–3 hours to reach operating temperature, impractical for most domestic use.
**Reduced responsiveness:** Thick screed doesn't respond well to thermostat changes. If you turn the heating down or off, the floor stays warm for hours (good for heat retention, bad for control).
**Increased floor height:** Thick screed raises the floor level significantly, creating problems with:
- Door clearance (doors may need trimming)
- Thresholds and step changes between rooms
- Reduced ceiling height (a problem in period properties with low ceilings)
**Additional weight:** Screed is heavy, approximately 2,000–2,200 kg/m³. A 100 mm screed layer weighs 200–220 kg/m² (compared to 130–150 kg/m² for 65 mm). This can exceed the load capacity of suspended timber floors or lightweight beam-and-block floors.
**Higher cost:** More screed = more materials and labour. A 100 mm screed costs 50% more than 65 mm screed.
**Example:** A 100 mm sand/cement screed over UFH pipes would cost ~£23–£35/m² (vs £15–£25/m² for 65 mm) and take 100 days to dry (vs 65 days), with little benefit and significant downsides.
### Optimal Depth by Screed Type
| Screed Type | Optimal Depth | Minimum Depth | Maximum Recommended Depth |
| :--- | :--- | :--- | :--- |
| **Sand/Cement** | 65–75 mm | 65 mm | 85 mm |
| **Liquid Anhydrite** | 50–60 mm | 45 mm | 70 mm |
**Special cases:**
- **Commercial/high-traffic:** Increase depth by 10–15 mm for added strength.
- **Suspended floors:** Use minimum depth to reduce weight (45 mm anhydrite preferred).
- **Retrofit with low ceiling height:** Use anhydrite at 45–50 mm to minimise floor height increase.
For detailed guidance on floor structure and insulation layers beneath the screed, see our [installation guide](/underfloor-heating-installation-guide/) and [design & planning guide](/underfloor-heating-design-planning/).

## The UFH Commissioning Process
Commissioning is the controlled warm-up of the UFH system after screed has been laid. This process is **essential**, skipping it or rushing it will crack the screed and ruin the installation.
### When to Turn On UFH After Screed
**Critical rule: Do NOT turn on UFH before screed is fully cured.**
**Sand/cement screed:**
- **Minimum wait: 21 days** after screed is laid (initial cure).
- **Better: 28–42 days** (4–6 weeks) to ensure most moisture has evaporated.
- Turn on UFH only after commissioning protocol (see below).
**Liquid anhydrite screed:**
- **Minimum wait: 7 days** after screed is laid.
- After 7 days, UFH can be used for force drying (gradual warm-up).
- Full cure takes 2–3 weeks with force drying.
**Why waiting matters:** Wet screed contains a large amount of water that must evaporate. If you turn on UFH too early, the screed will heat unevenly: the surface dries and hardens while the core is still wet. This creates internal stresses, leading to cracking.
### Gradual Warm-Up Protocol
**The protocol (applies to both sand/cement and anhydrite):**
1. **Start at 25°C flow temperature.** Turn on the UFH with the flow temperature set to 25°C. This is just warm enough to gently heat the screed without creating thermal shock.
2. **Run for 24 hours at 25°C.** Allow the screed to stabilise at this temperature.
3. **Increase by 5°C per day.** Each day, increase the flow temperature by 5°C:
- Day 1: 25°C
- Day 2: 30°C
- Day 3: 35°C
- Day 4: 40°C
- Day 5: 45°C (typical maximum for UFH)
4. **Run at maximum temperature for 3 days.** Hold the flow temperature at 45°C for 72 hours. This "bakes" the screed, completing the curing process and driving out residual moisture.
5. **Turn off and allow to cool naturally.** Switch off the UFH and allow the screed to cool to room temperature over 24–48 hours.
6. **Test moisture content.** Use a moisture meter to check the screed is dry enough for the final floor finish:
- **For tiles:** ≤ 0.5% moisture content
- **For LVT/vinyl:** ≤ 0.3% moisture content
- **For engineered wood:** ≤ 0.3% moisture content
**Total commissioning time:**
- Sand/cement: Start after 28 days; commissioning takes 7–10 days; total ~5–6 weeks before floor finish.
- Anhydrite (force-dried): Start after 7 days; commissioning takes 7–10 days; total ~2–3 weeks before floor finish.
### Why Skipping This Cracks the Screed
**Thermal shock:** If you turn on UFH too early or heat it too quickly, the rapid temperature change creates internal stresses in the screed. The surface expands while the core is still cool, causing cracks.
**Moisture-related cracking:** If the screed is still wet (> 1% moisture content) when heated, water turns to steam, creating pressure within the screed. The steam forces its way out, creating cracks, voids, and delamination.
**Differential expansion:** UFH pipes heat unevenly if the flow temperature is too high too soon. This creates hot zones directly over pipes and cooler zones between them. The screed expands at different rates, causing cracks along pipe routes.
**Example of what happens:**
- Day 1: Screed laid (moisture content ~10–15%)
- Day 7: Homeowner turns on UFH at 45°C (too early, too hot)
- Day 8–10: Surface screed dries rapidly and hardens; core is still wet
- Day 14: Visible cracks appear along pipe routes
- Day 21: Cracks widen; sections of screed start to "pop" or delaminate
- Result: Screed must be broken up and re-laid. Cost: £20–£40/m² (materials + labour). Time: 6–8 weeks lost.
**Lesson:** Never rush commissioning. Follow the protocol exactly. The week or two you save is not worth the risk of ruining £2,000–£6,000 worth of screed.
## Screed Drying Times
Understanding drying times is essential for project planning. Wet screed delays the final floor finish, which delays occupation or handover.
### Sand/Cement Screed at Various Thicknesses
| Screed Thickness | Drying Time (Ideal Conditions) | Realistic Drying Time (Before Floor Finish) |
| :--- | :--- | :--- |
| **50 mm** | 50 days | 5–6 weeks |
| **65 mm** | 65 days | 7–8 weeks |
| **75 mm** | 75 days | 9–10 weeks |
| **100 mm** | 100 days | 12–14 weeks |
**Ideal conditions:** 20°C ambient temperature, 50–60% relative humidity, good ventilation, no heat applied.
**Realistic conditions:** UK weather is rarely ideal. Expect drying to take 10–20% longer in winter (cold, damp) or poorly ventilated rooms.
### Anhydrite Screed at Various Thicknesses
| Screed Thickness | Drying Time (Natural) | Drying Time (Force-Dried After 7 Days) |
| :--- | :--- | :--- |
| **45 mm** | 45 days (6–7 weeks) | 2–3 weeks |
| **50 mm** | 50 days (7 weeks) | 2–3 weeks |
| **60 mm** | 60 days (8–9 weeks) | 3–4 weeks |
| **75 mm** | 75 days (10–11 weeks) | 4–5 weeks |
**Force drying:** Reduces total time by 50–70%, making anhydrite much faster than sand/cement for project timelines.
### Effect of Force-Drying (Dehumidifiers)
**What is force drying?** Using heat and dehumidification to accelerate moisture evaporation from the screed.
**Methods:**
1. **UFH system warm-up (anhydrite only):** Follow the gradual warm-up protocol after 7 days. This is the standard method for anhydrite.
2. **Temporary heaters + dehumidifiers (sand/cement or anhydrite):** Use electric heaters or warm-air blowers to raise the room temperature to 20–25°C. Run industrial dehumidifiers to remove moisture from the air. This speeds drying by 20–30% but doesn't reduce total time as much as UFH warm-up.
**Cost of dehumidifier hire:**
- Small domestic dehumidifier: £5–£10/day
- Industrial dehumidifier (40–60 litres/day): £15–£25/day
For a 60 m² floor, run a dehumidifier for 2–3 weeks = £200–£500 hire cost. This may be worthwhile to reduce project delays, especially in winter.
### Ambient Temperature Effects
**Why temperature matters:** Higher temperatures increase evaporation rate. Lower temperatures slow it down.
**Drying rate vs temperature:**
- **At 20°C:** 1 mm/day (baseline)
- **At 15°C:** 0.7 mm/day (30% slower)
- **At 10°C:** 0.5 mm/day (50% slower)
**Winter drying:** Laying screed in November–February can double drying time if the property is unheated. Always plan for extended drying in winter or use temporary heating.
**Summer drying:** Laying screed in June–August with good ventilation and warm weather can reduce drying time by 10–20%.
## Common Screed Problems with UFH
Even with careful installation, screed problems can occur. Here are the most common issues and how to fix them.
### Cracking: Causes and Prevention
**Cause 1: Shrinkage (natural drying)**
All screed shrinks as it dries. Sand/cement screed shrinks more than anhydrite. Fine hairline cracks (< 0.3 mm width) are normal and cosmetic; they don't affect performance.
**Prevention:**
- Use fibre reinforcement (polypropylene or glass fibres) in the screed mix.
- Avoid screed thicker than necessary (more screed = more shrinkage).
- Allow adequate curing time (don't rush drying).
**Cause 2: Too thin screed**
Screed less than the minimum depth (65 mm for sand/cement, 45 mm for anhydrite) lacks structural strength and cracks under load.
**Prevention:** Always meet minimum depth requirements.
**Cause 3: Early heat-up (thermal shock)**
Turning on UFH too early or heating too quickly causes differential expansion and cracking.
**Prevention:** Follow the commissioning protocol exactly (gradual warm-up starting after full cure).
**Cause 4: Poor mix or application**
Too much water, inadequate compaction, or uneven laying creates weak points that crack.
**Prevention:** Use professional screeding contractors, especially for large areas. Ensure correct mix ratios and compaction.
**When to worry:**
- Cracks > 0.5 mm wide
- Cracks that widen over time
- Cracks accompanied by "hollow" sounds when tapped (indicating delamination)
**Fix:** Small cracks can be filled with flexible filler. Large cracks or delaminated sections require screed repair or replacement (cut out and re-lay affected area).
### Debonding (Screed Separating from Subfloor)
**What it is:** The screed lifts or separates from the subfloor beneath, creating a void. When walked on, the screed "drums" or sounds hollow.
**Causes:**
- Poor subfloor preparation (dust, oil, or contaminants preventing adhesion)
- Inadequate priming (some subfloors need a bonding agent)
- Screed laid too wet (excessive water weakens the bond)
- Movement in the subfloor (expansion/contraction due to temperature or moisture changes)
**Prevention:**
- Clean and prime the subfloor thoroughly before laying screed.
- Use a bonding agent if required (especially on smooth concrete or anhydrite overlays).
- Ensure the subfloor is stable and dry before screeding.
**Fix:** Delaminated screed must be removed and re-laid. There's no effective repair for debonding because the screed has lost structural integrity.
### Surface Dusting (Anhydrite)
**What it is:** A fine layer of loose, powdery material (laitance) forms on the surface of anhydrite screed as it cures. If not removed, it prevents adhesion of floor finishes.
**Prevention:** Sand or shot-blast the anhydrite surface before priming and laying tiles or LVT.
**Fix:** Vacuum thoroughly, then sand with a floor sander (80–120 grit). Prime with a suitable primer (PVA or acrylic-based) before laying floor finish.
### Incompatibility with Adhesives
**The problem:** Cement-based tile adhesives react chemically with anhydrite (calcium sulphate), creating a weak bond. Tiles may lift or "pop" weeks or months after installation.
**Prevention:** Always prime anhydrite screed before tiling. Use a primer recommended by the screed manufacturer (typically an acrylic or epoxy primer).
**Adhesive choice:** Use a flexible, polymer-modified tile adhesive. Avoid cheap, non-flexible adhesives.
**Fix:** If tiles are lifting, remove them, clean off the old adhesive, re-prime the screed, and re-lay with proper adhesive.
For comprehensive troubleshooting of UFH system problems beyond screed issues, see our [problems guide](/underfloor-heating-problems/).
## Screed vs Board Systems (No Screed)
Not all UFH installations use screed. Low-profile overlay board systems offer an alternative, particularly for retrofits where floor height is critical.
### Overlay Panel Systems (15–25 mm, No Screed Needed)
**What they are:** Overlay boards are pre-formed panels (typically made from timber, chipboard, or insulation board) with channels or grooves to hold UFH pipes. The panels are laid directly over the existing floor, pipes are clipped into the grooves, and a floor finish is laid on top, no screed required.
**Thickness:** 15–25 mm total (board + pipe + final finish), compared to 80–100 mm for traditional screed-based UFH.
**How they work:** Aluminium heat diffusion plates sit in the grooves beneath the pipes, spreading heat evenly across the panel surface. The floor finish (usually engineered wood or LVT) is laid directly on top.
**Popular systems:**
- **LoPro Max** (15 mm + 18 mm engineered wood = 33 mm total)
- **Uponor Minitec** (15 mm board + 12 mm pipe + 15 mm finish = 42 mm total)
- **Floating floor systems** (18–22 mm chipboard panels with UFH integrated)
### When to Use Overlay Instead of Screed
**Retrofit installations with limited floor height:** If raising the floor level by 80–100 mm (screed + insulation) would create problems with door clearance, steps, or ceiling height, overlay systems are the solution.
**Suspended timber floors:** Overlay panels distribute load evenly and add minimal weight (20–30 kg/m² vs 130–220 kg/m² for screed), making them suitable for timber joists that can't support heavy screed.
**Fast installation:** Overlay panels can be laid and floor finish installed within 2–3 days, no curing time required. Ideal for occupied properties where minimising disruption is critical.
**Rooms with existing finished ceilings below:** If you can't raise the floor (because the ceiling below is finished), overlay systems work over the existing floor with minimal height increase.
**Faster response time needed:** Overlay systems have low thermal mass and warm up in 20–40 minutes, ideal for intermittently used rooms (home offices, spare bedrooms).
### Cost Difference: Overlay vs Screed
**Overlay systems:**
- **Materials:** £40–£70/m² (panels + diffusion plates + pipes + manifold)
- **Installation:** £20–£40/m² (labour)
- **Total:** £60–£110/m² (excluding final floor finish)
**Screed-based UFH:**
- **Materials:** £25–£50/m² (pipes + insulation + screed + manifold)
- **Installation:** £15–£30/m² (labour)
- **Total:** £40–£80/m² (excluding final floor finish)
**Verdict:** Overlay systems are 30–50% more expensive than screed-based UFH but essential where floor height is restricted.
For detailed guidance on overlay systems and when to use them, see our [retrofitting guide](/retrofitting-underfloor-heating/).
## Who Lays UFH Screed?
Screeding is heavy, skilled work. While it's possible to DIY small areas, professional screeding contractors are recommended for most UFH installations.
### Can It Be DIY?
**Yes, for small areas (< 15 m²) if you have experience.** Laying sand/cement screed is physically demanding but not technically complex. If you're confident mixing concrete and have done similar work, you can screed a small bathroom or utility room.
**What you'll need:**
- Cement mixer or ready-mixed screed
- Wheelbarrow, shovel, screed board
- Spirit level or laser level
- Screed rails or battens (to guide the screed board)
- Protective clothing (screed is caustic)
**Realistic time:** 4–6 hours for a 10 m² room (including mix time, laying, levelling).
**Cost saving:** £150–£250 in labour for a small room.
**When NOT to DIY:**
- Large areas (> 20 m²), too physically demanding and time-consuming
- Liquid anhydrite screed (requires specialist pump equipment)
- If you've never done screeding before (high risk of poor finish, cracking, or debonding)
### When to Use Specialist Screed Contractors
**Recommended for:**
- **Large areas** (whole house, extensions over 30 m²)
- **Liquid anhydrite screed** (always use a specialist, you can't DIY pump-applied screed)
- **Where quality and speed matter** (new builds, commercial projects)
- **Suspended floors** (requires careful weight calculation and installation technique)
**What they provide:**
- Professional equipment (mixers, pumps, laser levels)
- Consistent mix quality (factory-mixed for anhydrite, correctly proportioned for sand/cement)
- Fast installation (whole house in 1–2 days)
- Warranty (typically 1–2 years for workmanship)
**Cost:**
- **Sand/cement screed (manual):** £15–£20/m²
- **Sand/cement screed (pumped):** £18–£25/m²
- **Liquid anhydrite screed (pumped):** £20–£35/m²
**Finding a contractor:** Ask your UFH installer for recommendations, or search for MCS-certified screeding contractors via [mcscertified.com](https://mcscertified.com).
## Frequently Asked Questions
### How thick should screed be over underfloor heating pipes?
Screed should be **65–75 mm thick** for sand/cement screed or **45–65 mm thick** for liquid anhydrite screed, measured from the subfloor to the screed surface. This provides adequate cover over 16 mm diameter pipes (minimum 29–49 mm above the pipe) for strength, even heat distribution, and protection.
### How long does screed take to dry for underfloor heating?
Sand/cement screed takes **6–8 weeks** to dry sufficiently for tiles or LVT (drying at ~1 mm/day). Liquid anhydrite screed can be **force-dried in 2–3 weeks** after an initial 7-day cure, using the UFH system for gradual warm-up. Do not lay floor finishes until moisture content is ≤ 0.5% (tiles) or ≤ 0.3% (LVT/wood).
### Can you use liquid screed for underfloor heating?
Yes. Liquid anhydrite screed is the preferred choice for UFH due to superior thermal conductivity (2.0 W/mK vs 1.4 W/mK for sand/cement), self-levelling properties, faster drying (force-dried in 2–3 weeks), and lower shrinkage. It costs 15–30% more but delivers better performance. See the [Liquid Anhydrite section](#liquid-anhydrite-calcium-sulphate-screed-for-ufh) above.
### What happens if you turn on underfloor heating before screed is dry?
Turning on UFH too early causes **thermal shock and cracking**. The screed surface dries rapidly while the core is still wet, creating internal stresses. Steam from trapped moisture can cause voids and delamination. Always wait the full curing period (21–28 days for sand/cement, 7 days for anhydrite) and follow the gradual warm-up protocol.
### How do you know when screed is dry enough for underfloor heating?
Use a **moisture meter** (hygrometer or carbide bomb test) to measure moisture content. Screed is dry enough when:
- **For tiles:** ≤ 0.5% moisture content
- **For LVT/vinyl:** ≤ 0.3% moisture content
- **For engineered wood:** ≤ 0.3% moisture content
Visual inspection is unreliable; the surface may appear dry while the core is still wet.
### Can screed be too thick for underfloor heating?
Yes. Screed thicker than 75–85 mm increases thermal mass excessively, slowing response time (can take 2–3 hours to warm up), reducing responsiveness to thermostat changes, and adding unnecessary weight and cost. Optimal depth is 65–75 mm for sand/cement, 50–60 mm for anhydrite.
### What is the difference between sand/cement and anhydrite screed for UFH?
**Sand/cement:** Cheaper (£15–£25/m²), widely available, 65–75 mm thick, dries in 6–8 weeks, thermal conductivity 1.4 W/mK. **Anhydrite:** More expensive (£20–£35/m²), faster drying (2–3 weeks with force drying), thinner (45–65 mm), better thermal conductivity (2.0 W/mK), self-levelling. Anhydrite is superior for UFH but costs more.
### Do you need to prime screed before laying underfloor heating?
No. Priming is done **after** screed is laid and dried, before laying the final floor finish (tiles, LVT). Anhydrite screed **must** be primed before tiling to prevent chemical reaction with cement-based adhesives. Sand/cement screed may need priming depending on the floor finish manufacturer's requirements.
---
*Planning your UFH screed installation? Explore our [wet underfloor heating guide](/wet-underfloor-heating-ultimate-guide/) for complete system design, compare [top UFH brands](/underfloor-heating-brands/) to find the right kit, or see our [installation guide](/underfloor-heating-installation-guide/) for step-by-step screed laying instructions.*
**Ready to start your project?** Find qualified wet UFH installers through the [Underfloor Heating Directory](https://underfloorheating.directory/installers) and ensure a professional installation.
---
--- title: Underfloor Heating Problems - Troubleshooting Guide description: Diagnose common underfloor heating problems in wet and electric systems with practical UK troubleshooting, safety advice and guidance on when to get help. url: https://underfloorheating.info/underfloor-heating-problems/ published: 2025-10-20 updated: 2026-08-21 tags: ['troubleshooting, problems, repair, diagnostics, maintenance, cold spots, pressure issues, thermostat problems, actuator faults, bleeding system, error codes, RCD trips, cable damage, flow rates, manifold issues, pump problems, leak detection, system not heating'] ---
# Underfloor Heating Problems - Troubleshooting Guide
## Start Here: Why Your Underfloor Heating Isn't Working
Cold spots, strange noises or no heat at all? Underfloor heating faults are frustrating, but the symptom usually gives you somewhere sensible to start. I'll take you through the checks in order so you can find the likely cause without guessing. You'll find more practical guidance at [underfloorheating.info](https://underfloorheating.info/) and qualified help through the [Underfloor Heating Directory](https://underfloorheating.directory/).
With the right maintenance, the core pipework of a UFH system can last for more than 50 years. [Underfloor Heating & Heat Pumps: Complete 2026 Guide](/underfloor-heating-heat-pumps-guide-2026/). First, work out which type of system you have and what each component does. Many faults, including actuators not responding, thermostat errors and RCD trips, trace back to the wiring. Our [wiring diagrams guide](/underfloor-heating-wiring-diagrams/) shows how the electrics should connect.
### Differentiating Wet vs. Electric Systems

Most faults belong to one of the two main system types. Identify yours before you start testing anything.
* **Wet (Hydronic) Systems:** These systems circulate warm water through a continuous network of pipes installed beneath the floor. A boiler or heat pump heats the water, which is then distributed via a manifold that controls the flow to different "zones" or rooms. Key components include the heat source, circulation pump, and manifold. The spacing between pipes affects heat distribution and efficiency. For a comprehensive guide to wet systems, see our [Ultimate Guide to Wet Underfloor Heating](/wet-underfloor-heating-ultimate-guide/).
* **Electric Systems:** These systems use electrical resistance to generate heat. They consist of heating cables or pre-formed mats of wires installed directly under the floor finish. A dedicated thermostat, often with a floor sensor, controls each zone. They are simpler in design but operate differently from wet systems. Learn more in our [Complete Electric Underfloor Heating Guide](/electric-underfloor-heating-systems/).
### Safety First: When to DIY and When to Call
You can handle some checks yourself. Others need a qualified professional, and it's important to know where that line sits.

You may be able to handle simple diagnostic tasks yourself. This includes checking thermostat settings, ensuring the system has power, and resetting the controls. For wet systems, bleeding a single zone to remove trapped air can sometimes resolve isolated cold spots.

Call a certified professional for anything more involved.
* **For electric systems,** any work involving wiring, testing circuits, or replacing components must be done by a qualified electrician.
* **For wet systems,** contact a heating engineer for issues related to the boiler, circulation pump, or manifold valves. Persistent pressure drops or damp patches on the floor are signs of a leak that require immediate professional attention. [Underfloor Heating Leaks - What Happens and What to Do](https://www.underfloorheatingtradesupplies.co.uk/blog/underfloor-heating-leak/)
## Quick Reference: Diagnosing Your Problem
Use this decision tree to match the symptom to the most likely cause.

### Step 1: What Type of System Do You Have?
- **Wet (Hydronic)** → Go to Step 2A
- **Electric** → Go to Step 2B
**Not sure which system type you have?** See our [Electric vs Water UFH Comparison](/electric-vs-water-underfloor-heating-2026/) to identify your system.
### Step 2A: Wet System - What's the Symptom?
- **No heat at all (entire system)** → Check: Power supply, boiler firing, circulation pump running, system pressure. [See: All Zones Not Heating](#all-zones-are-not-heating-up)
- **One room/zone not heating** → Check: Zone thermostat, actuator function, airlock in that loop. [See: Single Zone Not Working](#problem-a-single-zone-not-working)
- **Multiple zones not heating** → Check: Manifold components, multiple thermostats, common airlock. [See: Multiple Zones Not Heating](#problem-multiple-zones-not-heating-up)
- **System losing pressure** → Check: For leaks at manifold, pipework, pressure relief valve. [See: Pressure Drop](#problem-system-losing-pressure-or-total-heat-loss)
- **System pressure too high** → Check: Filling loop, expansion vessel integrity. [See: High Pressure Issues](#problem-high-system-pressure)
- **Pump won't stop running** → Check: Stuck relay, faulty actuator, thermostat fault. [See: Continuous Pump Operation](#problem-circulation-pump-wont-turn-off)
- **Uneven heating/cold spots** → Check: Airlocks, flow gauge settings, manifold valves. [See: Uneven Heating](#problem-uneven-heating-and-cold-spots)
- **Strange noises (gurgling)** → Check: Airlock, pump speed, circulation issues. [See: No Circulation](#problem-no-circulation-or-gurgling-noises)
### Step 2B: Electric System - What's the Symptom?
- **No heat at all** → Check: Fused spur, consumer unit, thermostat power, wiring. [See: Not Heating](#problem-system-not-heating-at-all)
- **System trips electrics** → Check: RCD (cable damage) vs MCB (overcurrent) trip type. [See: Power Trips](#problem-system-trips-the-power)
- **Floor too hot or too cold** → Check: Floor sensor position, temperature limits, thermostat mode. [See: Temperature Issues](#problem-floor-overheats-or-doesnt-reach-temperature)
- **Error codes on thermostat** → Check: Error code meaning (E1, E2, E4), battery, sensor connection. [See: Error Codes](#electric-system-error-codes)
- **High running costs** → Check: Thermostat programming, insulation, system sizing. [See: Running Costs](#problem-unexpectedly-high-running-costs)
### Step 3: Quick Wins to Try First
**Before detailed diagnostics, try these simple fixes:**
⚠️ **Common Mistake**: Turning the thermostat higher than needed does not make the room heat faster - it just makes the system run longer.
1. **Check the power supply** - Consumer unit (fuse box), fused spur switched on
2. **Check thermostat settings** - Calling for heat, correct mode, batteries fresh
3. **Check system pressure** (wet systems) - Should read 1.0-1.5 bar when cold
4. **Reset the system** - Turn thermostat off/on or perform factory reset
5. **Remove thermal blocks** - Check for rugs, dog beds, or furniture over floor sensor
Still no luck? Move on to the detailed checks below.
## Part 1: Initial Diagnostics - The 5-Minute Triage
Do these quick checks before you dig into anything complex. They solve plenty of common UFH problems and don't need specialist tools.
### Check the Power Source
A loss of power is a frequent cause of a non-working system. Take a moment to verify the basics.
* **For all systems:** Go to your consumer unit (fuse box) and check that the circuit breaker for your underfloor heating hasn't tripped. If it has, reset it. If it trips again, there may be an electrical fault that requires a qualified electrician.
* **For wet systems:** Ensure your boiler is switched on and displaying power. Also, check that the circulation pump, which is often located near the boiler or manifold, is powered and running.
### Review Your Thermostat Settings
Incorrect thermostat settings can easily make it seem like your heating has failed. Confirm that it is correctly configured to call for heat.
* **Is it calling for heat?** The set temperature on your thermostat must be higher than the current room temperature for the heating to activate.
* **Check for dead batteries.** Many digital thermostats are battery-powered. If the screen is blank or showing a low battery icon, replace the batteries.
* **Ensure it's in the right mode.** Check that the thermostat is not in a "standby," "holiday," or "off" mode which would override your normal schedule.
A common mistake is turning the thermostat far higher than required, believing it will heat the room faster. It will not; the system simply stays on for a longer period to reach that higher temperature.
### Check Boiler and System Pressure (Wet Systems)
For hydronic (wet) systems, the water pressure within the closed central heating circuit is critical for correct operation.
You can inspect the system pressure on a gauge, which is usually found on the front of your boiler or on the underfloor heating manifold.
[Check out our Underfloor Heating Manifold Guide](/underfloor-heating-manifold-guide/)
#### Optimal Pressure Range
When the heating system is cold, the pressure gauge should ideally read between **1.0 and 1.5 bar**. This range ensures there is enough pressure to circulate water effectively through the pipework. When the system heats up, the water expands, and the pressure will naturally rise slightly.
#### Low-Pressure Issues
If the gauge reads below 1.0 bar, the pressure is too low. This can lead to poor circulation, causing cold spots or preventing the system from heating up at all. Many modern boilers have a safety feature that will lock out and prevent the boiler from firing if the pressure drops too low, protecting the pump from damage. A pressure that drops frequently may indicate a leak somewhere in the system. [Underfloor Heating Leaks - What Happens and What to Do](https://renewableunderfloorheatinglondon.co.uk/faqs/what-happens-if-my-water-underfloor-heating-develops-a-leak/).
#### How to Re-pressurise Your System
You can usually re-pressurise the system yourself using the filling loop. This is a braided hose that connects your mains water supply to the central heating circuit.
1. Locate the filling loop, typically underneath your boiler.
2. Ensure the heating is switched off and the system is cold.
3. Open the valve on the filling loop slowly, allowing mains water to enter the heating circuit. You should hear the water flowing.
4. Watch the pressure gauge closely. As the pressure rises, close the valve once it reaches the 1.5 bar mark.
5. If your filling loop is detachable, you must disconnect it after use to comply with water regulations.
⚠️ **Common Mistake**: Always disconnect your filling loop after re-pressurising. A filling loop left connected or slowly leaking can cause continuous pressure increases.
## Part 2: Diagnostic Procedures for Professionals
This is how qualified professionals test the more complex faults. You shouldn't copy electrical tests you're not trained to do, but knowing the process will help you explain the fault and understand the work involved.
### Three-Tier Troubleshooting Approach
A good diagnosis works through three levels. Each one needs more technical knowledge and specialist equipment than the last.
#### Level 1: Basic User Checks (No Specialist Tools Required)
These are diagnostic steps you can perform safely without technical training:
**For All Systems:**
- Check the fused spur is switched on (usually located on the wall below the thermostat)
- Verify the circuit breaker in your consumer unit hasn't tripped
- Ensure the thermostat is powered on and displays no error codes
- Confirm thermostat batteries are not flat (wireless models)
- Check that the thermostat is calling for heat (set temperature > current temperature)
- Verify system is not in holiday/standby mode
**For Wet Systems:**
- Check boiler pressure gauge reading (should be 1.0-1.5 bar when cold)
- Listen for circulation pump operation (low hum or slight vibration)
- Visually inspect manifold for leaks or weeping joints
- Check isolation valve positions (lever in line with pipe = open, 90° = closed)
**For Electric Systems:**
- Check the dedicated fused spur beneath the thermostat is switched on
- Remove any thermal blocks (rugs, dog beds, furniture) from over the floor sensor
- Verify floor temperature limit isn't set too low (set to 35°C for testing)
#### Level 2: Qualified Electrician/Plumber Checks
These tests require a qualified professional with appropriate testing equipment:
**Wet System Checks (Heating Engineer):**
1. **Actuator Pin Valve Testing**
- Remove actuator head from suspected faulty zone
- Check the pin valve underneath moves freely
- Use long-nose pliers to gently free stuck pins
- Apply silicone spray if pin is seized
- Look for visual indicator showing valve position (up = open, down = closed)

2. **Blending Valve Inspection**
- Remove thermostatic valve head from blending valve
- Check pin valve isn't stuck down
- Free with silicone spray or long-nose pliers if required
3. **Flow Gauge Adjustment**
- Verify flow rates are correctly set for each zone
- Adjust according to manifold manufacturer's specifications
- Ensure adequate flow reaches each loop
4. **Expansion Vessel Integrity Test**
- Locate the Schrader valve on the expansion vessel (similar to car tyre valve)
- Depress the needle with a small screwdriver
- If water escapes, the internal diaphragm has ruptured and vessel needs replacement
- If no water (just air), check pressure is around 2 bar
5. **Leak Location Using Isolation**
- Re-pressurise the system to normal operating pressure
- Close isolation valves to separate boiler side from manifold side
- Monitor pressure gauge on both sides
- Pressure drop on boiler side = leak in boiler circuit
- Pressure drop on manifold side = leak in underfloor pipe network
**Electric System Checks (Qualified Electrician):**
1. **Thermostat Wiring Verification**
- Remove thermostat from wall mounting plate
- Check all connections are secure (no dry joints)
- Verify correct wiring to manufacturer's diagram
- Test for 230V input to thermostat
- Test for 230V output when thermostat calls for heat
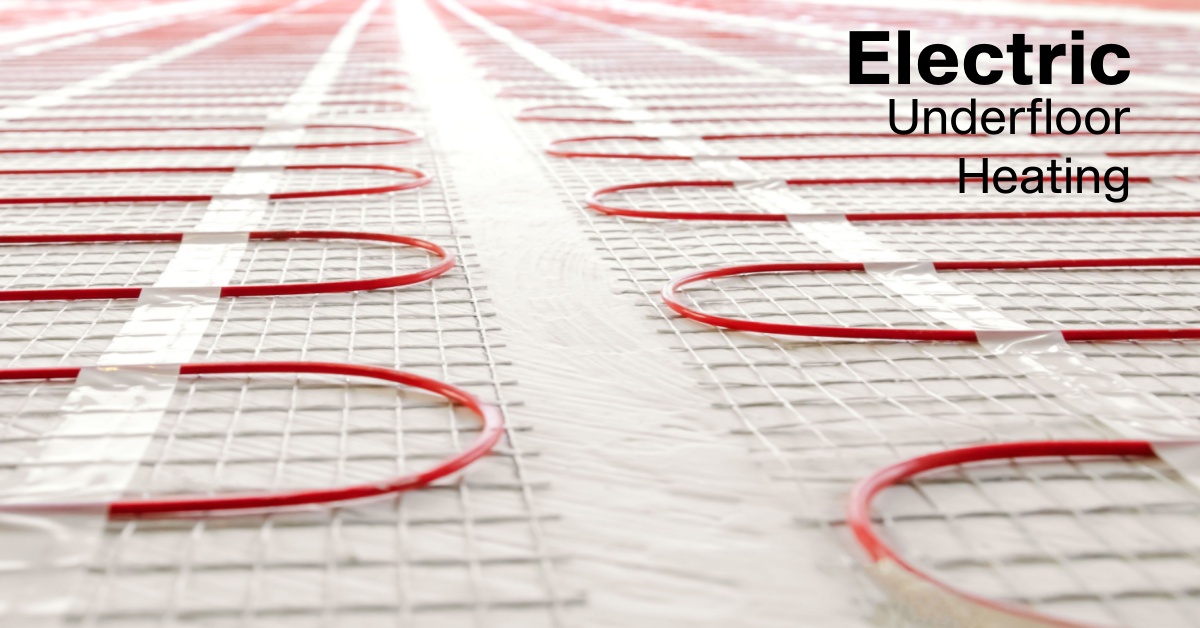
2. **Floor Sensor Probe Testing**
- Disconnect sensor from thermostat
- Use multimeter to measure resistance
- Compare reading to manufacturer's specification (common values: 10kΩ, 12kΩ, 50kΩ, 100kΩ at 25°C)
- Incorrect reading indicates faulty or incompatible sensor
#### Level 3: Specialist Circuit Testing (Qualified Electrician Only)
These advanced tests diagnose faults within the heating cables or system components:
**For Electric Underfloor Heating:**
1. **Resistance Testing**
- Power must be isolated before testing
- Measure resistance between live and neutral cores of each heating mat/cable
- Compare reading to manufacturer's specification label on the cold tail
- Readings should match within ±5%
- Combined resistance of multiple circuits confirms total system loading
- **Example**: A 200W/m² mat covering 5m² should read approximately 264 ohms at 230V
2. **Insulation Resistance Testing**
- Performed using a 500V megohmmeter (megger)
- Tests for current leaking to earth through damaged insulation
- Test between live conductor and earth, then neutral conductor and earth
- **Healthy reading**: Greater than 200 MΩ (megohms)
- **Failed reading**: Less than 2 MΩ indicates damaged cable insulation
- Zero reading confirms serious cable damage causing RCD trips
3. **Continuity Testing**
- Tests for breaks in the heating element
- Multimeter measures resistance between live and neutral
- **Normal**: Matches manufacturer's resistance specification
- **Fault**: Infinite (OL) reading indicates broken heating element
4. **Direct Power Testing** (Last Resort)
- Only performed if all other tests show no fault
- Heating mat/cable powered directly with 30mA RCD protection
- System should warm within 2 hours
- Use thermal block (towel/cushion) on cold floor to concentrate heat for testing
- If no heat develops, heating element has failed despite passing resistance test
**For Wet Systems:**

1. **Pump Speed Setting Verification**
- Many circulation pumps have adjustable speeds (I, II, III)
- Setting too low = inadequate circulation
- Setting too high = excess noise and energy consumption
- Match pump speed to system size per manufacturer's guidance
2. **Zone Isolation Diagnostic Method**
- Isolate system to run on single zone only
- If heat source runs = actuator or airlock issue in that zone
- If heat source doesn't run = thermostat or wiring issue
- Repeat for each zone systematically to map all faults
### When to Escalate to a Professional
**Immediate professional callout required for:**
- Persistent pressure drops suggesting active leak
- Damp patches appearing on floors or walls
- Repeated RCD/MCB trips after reset
- Burning smell from any components
- Error codes that persist after battery replacement and reset
- Total system failure after basic checks
**Can wait for scheduled service:**
- Single zone not heating (after confirming thermostat/batteries OK)
- Minor pressure loss requiring top-up every few months
- Intermittent heating in some zones
- Slightly uneven heating across large floor areas
For complete guidance on when to call professionals, finding qualified experts, cost expectations, and what to expect from professional visits, see our [When to Call a Professional for UFH Repairs Guide](/when-to-call-professional-underfloor-heating/).
## Troubleshooting Wet (Hydronic) Underfloor Heating Systems

A wet underfloor heating system circulates warm water through pipes beneath the floor. The main parts are the boiler (the heat source), the manifold (which distributes water to different zones), actuators (which open and close individual pipe loops), the pump (which circulates the water) and the pipework itself. Find which part has stopped doing its job and you'll usually find the fault.
### Problem: Uneven Heating and Cold Spots
- **Symptom:** Some rooms or floor areas are warm while others remain stubbornly cold.
- **Likely Cause:** The most common cause is trapped air within the system's pipe loops. Air prevents the free circulation of hot water, leading to cold patches.
- **Solution: Bleeding the System**
- Bleeding removes trapped air, allowing water to flow correctly through every loop. For cold spots in a wet system, bleeding the system to remove trapped air might resolve the issue.
- **Step-by-Step Bleeding Guide:**
1. First, gather your tools. You will need a bucket or container, old towels, and a bleed key or a suitable screwdriver.
2. Isolate the heating zones. On the manifold, turn off the water flow to all zones except for the single one you intend to bleed.
3. Locate the bleed valve for that specific loop on the manifold. Place your bucket underneath it and slowly open the valve. You will hear a hissing sound as air escapes.
4. Keep the valve open until water begins to flow out in a steady stream with no air bubbles. Promptly close the valve.
5. Repeat this process for every zone in your system, one at a time.
6. After bleeding all loops, check your boiler's pressure gauge. It is likely to have dropped. You must re-pressurise the system according to your boiler manufacturer’s instructions.
### Problem: System Losing Pressure or Total Heat Loss
- **Symptom:** The pressure gauge on your boiler consistently drops, forcing you to top it up frequently. In some cases, you may discover unexplained damp patches on or around the floor.
- **Likely Cause:** These symptoms strongly suggest a leak, either in the sub-floor pipework or at the manifold connections.
- **Diagnosis:**
- Frequent drops in system pressure or damp floor patches are key signs of a potentially damaging underfloor heating leak. [Source](https://completeleakdetection.co.uk/underfloor-heating-leaks-what-happens-and-what-to-do/#:~:text=Primary%20Warning%20Signs:,paint%20bubbling%20near%20floor%20level)
- Start with a careful visual inspection of the manifold. Look for any drips, signs of corrosion, or water stains on the surrounding pipes and floor.
- If no leak is visible at the manifold, the issue is likely within the pipework under the floor. Professionals use tools like thermal imaging cameras to locate the exact source of the leak without needing to lift the entire floor.
- **Action:** A leak requires immediate professional attention. Contact a qualified heating engineer to locate and repair the fault to prevent further damage to your property.
### Problem: A Single Zone Not Working
- **Symptom:** One specific room or zone fails to heat up, while the rest of the system works perfectly.
- **Likely Causes & How to Check:**
- **Faulty Actuator:** The actuator is a small motor that opens and closes the valve for a specific zone. When the thermostat for that zone calls for heat, the actuator should open. Check for a visible pin or indicator on the actuator head that moves up or down to show it is operating.
- **Stuck Manifold Valve:** Beneath each actuator is a pin that is part of the manifold valve. Sometimes these pins can seize, especially after a long period of inactivity. You can test this by removing the actuator head and gently trying to press the pin down. It should move freely and spring back up.
- **Airlock in a Single Loop:** The cold zone may have an isolated airlock. Bleed just that specific loop using the step-by-step guide detailed earlier.
- **Wiring Issue:** There could be a faulty connection between the room thermostat, the wiring centre, and the actuator for that zone. Check that all wires are securely connected.
**Diagnostic Tip**: Use the zone isolation method (see Diagnostic Procedures section above). Isolate your system to run only the faulty zone. If the boiler still fires and the pump runs, the issue is with the actuator or an airlock. If the boiler doesn't fire, the problem lies with the thermostat or wiring.
### Problem: Multiple Zones Not Heating Up
- **Symptom:** Two or more zones fail to heat, but not the entire system. Some zones may still work correctly.
- **Likely Causes:**
- **Common Airlock:** Multiple zones can share a section of pipework before the manifold. An airlock in this common section will affect all zones downstream. Bleeding the system, starting with the affected zones, should resolve this.
- **Multiple Thermostat Issues:** If the affected zones are all controlled by battery-powered thermostats, check and replace batteries. Cold weather can cause batteries to drain faster.
- **Manifold Component Failure:** A stuck blending valve or closed isolation valve affecting a section of the manifold can prevent water reaching multiple zones.
- **Wiring Board Issues:** If multiple zones share a wiring board or relay, a fault here can affect all connected zones. This requires an electrician to diagnose.
- **Action:** Check each affected zone's thermostat first. Then inspect the manifold for any isolation valves that may have been accidentally closed. If thermostats and valves appear correct, call a heating engineer to inspect the manifold components and wiring.
### Problem: All Zones Not Heating Up
- **Symptom:** Complete system failure. No zones are producing any heat, despite the thermostats calling for heat.
- **Likely Causes:** This indicates a fault affecting the entire system's operation, not individual zones.
**Diagnostic Steps:**
1. **Check the Boiler**
- Verify the boiler has power and is attempting to fire
- Check the boiler pressure gauge reads 1.0-1.5 bar (low pressure will prevent firing)
- Look for error codes on the boiler's display panel
2. **Check the Power Supply to Wiring Boards**
- Locate the main isolating switch for the underfloor heating system
- Ensure it is in the "on" position
- If switched off, no power reaches the wiring centre and no zones can operate
- Check for tripped breakers in the consumer unit
3. **Listen for the Circulation Pump**
- A working pump produces a low whirring sound or slight vibration
- If silent, the pump may have failed mechanically or lost electrical power
- Check the pump's power connection and any dedicated isolation valve
4. **Check for Boiler Signal Issues**
- The boiler requires a signal from the wiring board to fire for underfloor heating
- A failed relay on the wiring board or loose connection can prevent this signal
- An electrician can test the relay and wiring board connections
5. **Bleed the System for Major Airlock**
- If the boiler fires and pump runs but pipes remain cold, suspect a major airlock
- Bleed each zone systematically as described in the earlier section
- Run an air purge cycle on your boiler/heat source if you know how
**Action:** If boiler pressure is correct and power is confirmed, but the system still doesn't work, contact a heating engineer immediately. The fault likely requires specialist diagnosis of the boiler, pump, or wiring board.
### Problem: High System Pressure
- **Symptom:** The pressure gauge reads significantly above 1.5 bar when the system is cold, or climbs to 2.5-3 bar when heating. The pressure relief valve may discharge water.
- **Likely Causes:**
1. **Filling Loop Left Open or Leaking**
- The most common cause of rising pressure
- Check both ends of the flexible filling loop hose are fully closed
- Even a slowly dripping filling loop can continuously add water
- **Solution:** Close both valves and disconnect the filling loop entirely (if detachable)
2. **Failed Expansion Vessel**
- The expansion vessel contains a flexible diaphragm that allows water to expand as it heats
- If the diaphragm ruptures, water fills the air side and pressure rises excessively
- **Test:** Depress the Schrader valve (like a car tyre valve) on the underside of the expansion vessel. If water escapes instead of air, the diaphragm has failed and the vessel needs replacing.
- **Solution:** A plumber must replace the expansion vessel
3. **Empty Expansion Vessel (No Air Pressure)**
- If the air side of the vessel has lost pressure, there's no room for water to expand
- **Test:** If pressing the Schrader valve releases only a tiny puff of air (or none), the vessel is empty
- **Solution:** A plumber can repressurise the vessel. First, drain some water from the system to reduce pressure. Then use a foot pump to inflate the vessel to 2 bar through the Schrader valve. Finally, refill the water side to normal operating pressure.
4. **Restriction or Blockage in Pipework**
- Less common, but a partial blockage can cause pressure spikes when the pump runs
- **Test:** If pressure varies significantly when changing pump speed, suspect a restriction
- **Note:** Pumps installed close to valves may cause temporary pressure fluctuations on start-up (this is normal)
⚠️ **Warning:** High pressure (above 3 bar) can damage your boiler and system components. If pressure climbs dangerously high, carefully release water via the pressure relief valve or a drain point until it returns to the safe zone (1.0-1.5 bar).
### Problem: Circulation Pump Won't Turn Off
- **Symptom:** The pump runs continuously, even when all thermostats are satisfied and not calling for heat. This wastes electricity and can cause premature pump wear.
- **Likely Causes:**
1. **Stuck Pump Relay on Wiring Board**
- The relay that switches the pump on/off has jammed in the "on" position
- The relay may be faulty or dirty contacts may be welded together
- **Action:** An electrician should inspect and replace the wiring board or relay
2. **Faulty Actuator Keeping System "On"**
- If an actuator fails in the open position, the system thinks that zone still needs heat
- Even if the thermostat is satisfied, the actuator doesn't close
- **Action:** Inspect each actuator. Look for visual indicators showing which valves are open. Manually test each thermostat by turning it to its lowest setting - the corresponding actuator should close. Replace any actuator that stays open.
3. **Thermostat Stuck "Calling for Heat"**
- A faulty thermostat may continuously send a "demand" signal
- **Action:** Turn off each thermostat one by one to identify which zone is causing the issue. Replace the faulty thermostat or check for low batteries.
### Problem: Manifold Component Issues
Beyond actuator and pressure problems, several manifold components can fail and prevent proper operation:
#### Blending Valve Stuck
- **Purpose:** Blending valves mix hot water from the boiler with cooler return water to achieve the correct flow temperature for underfloor heating (typically 35-50°C)
- **Symptom:** Water too hot or too cold, or no flow at all
- **Diagnosis:** Remove the white thermostatic head from the blending valve. Check if the pin underneath is stuck down.
- **Solution:** Use silicone spray or long-nose pliers to free the pin. Replace the thermostatic head. If this doesn't work, the entire valve may need replacing.
#### Flow Gauges Not Opened Correctly
- **Purpose:** Flow gauges (flow meters) on the manifold show and control the flow rate to each zone
- **Symptom:** Weak or no heat in zones despite actuators opening
- **Diagnosis:** Check each flow gauge's indicator. It should show water flowing when the zone is calling for heat
- **Solution:** Adjust flow rates according to your manifold manufacturer's specification. Each loop requires a specific flow rate based on pipe length and spacing. Refer to your system's commissioning sheet or manual for the correct flow rates for your pipe spacing configuration.
⚠️ **Note:** Incorrect flow rates can cause uneven heating. Too little flow = cold spots. Too much flow = reduced efficiency and potential noise.
#### Isolation Valves Accidentally Closed
- **Purpose:** Isolation valves allow you to shut off water to the manifold for maintenance
- **Symptom:** Entire manifold or specific sections have no heat
- **Diagnosis:** Visual inspection of valve lever position
- **Open position:** Lever in line with the direction of the pipe
- **Closed position:** Lever at 90 degrees to the pipe
- **Solution:** Simply turn the lever to align with the pipe. The valve is now open.
### Problem: Boiler Not Firing for Underfloor Heating
- **Symptom:** The boiler works fine for hot water or radiators, but won't fire when the underfloor heating calls for heat.
- **Likely Causes:**
1. **No Signal from Wiring Board to Boiler**
- The wiring centre should send a signal to the boiler when any zone calls for heat
- A wiring fault or failed relay prevents this signal
- **Test:** An electrician can test for voltage at the boiler's UFH input terminals when a stat calls for heat
- **Solution:** Repair faulty wiring or replace wiring board relay
2. **Pump Relay Failure**
- If the pump relay has failed, the pump won't run
- Without water circulation, the boiler won't fire (or will fire then lock out on high temperature)
- **Solution:** Electrician to replace relay or wiring board
3. **Boiler Interlock System**
- Modern boilers use interlock systems that require signals from all zones before firing
- A fault in the control logic can prevent the boiler responding
- **Solution:** Heating engineer to diagnose boiler control board
### Problem: No Circulation or Gurgling Noises
- **Symptom:** The system is switched on and the boiler is running, but the manifold pipes feel cool. You may also hear distinct gurgling or bubbling sounds coming from the pipes.
- **Likely Cause:** This points to either a circulation pump failure or a significant airlock affecting the entire system.
- **Diagnosis:**
- Place your hand on the circulation pump. You should feel a slight vibration or hear a low hum, which indicates that the motor is running. If it is silent and cold, it may have failed.
- Check the speed settings on the pump. Some pumps have adjustable speeds; ensure it is set to an appropriate level (often II or III) for your system size.
- Widespread gurgling is a clear sign of a major airlock. This requires a full system bleed, addressing each loop individually to purge all the trapped air.
## Troubleshooting Electric Underfloor Heating Systems
An electric underfloor heating system has three main parts. The heating mats or cables generate the warmth. The thermostat acts as the control unit. The floor sensor measures the floor's temperature and reports it to the thermostat. When a problem occurs, it usually involves one of these components.
### Problem: System Not Heating at All
**Symptom:** The floor remains completely cold. The system shows no signs of life across the entire heated area.
This is one of the most common electric underfloor heating faults. Before calling a professional, you can perform a few simple checks.
**Step 1: Check the Fused Spur**
The fused spur is typically located on the wall beneath the thermostat. It looks like a standard switch with a removable fuse.
- Ensure the switch is in the "on" position
- If it has a neon indicator light, check if it's illuminated (showing power)
- Check the fuse inside hasn't blown (replace with correct rating if needed - typically 13A)
**Step 2: Check the Consumer Unit**
Go to your consumer unit (fuse box) and look for the circuit labelled for underfloor heating:
- Look for a tripped circuit breaker or RCD - the switch will be in the "off" or middle position
- Try resetting it by switching it fully off, then back on
- **If it trips again immediately**: There is a serious electrical fault (likely damaged cable). Do not keep resetting it. Call an electrician.
- **If it stays on**: The temporary trip may have been a power surge. Proceed to the next check.
**Step 3: Check the Thermostat**
Look at the thermostat's display:
- Is it powered on and showing the current temperature?
- Is it set to a temperature higher than the current floor temperature?
- Does it display any error codes (see Error Codes section below)?
- For wireless thermostats, check the battery level
- A blank screen suggests no power reaching the thermostat
**Step 4: Check for Heating Indicator**
Most thermostats have an indicator showing when they're actively heating:
- Look for a flame symbol, wavy lines, or the display turning red
- If the indicator is on for 2+ hours but the floor remains cold, the issue is with the heating cable or wiring
- If the indicator never comes on, the thermostat may be faulty or incorrectly configured
**Step 5: Remove Thermal Blocks**
Check if anything is blocking heat or affecting the floor sensor:
- Remove rugs, dog beds, or furniture from the heated area
- These can trap heat at the sensor, causing the thermostat to shut off heating prematurely
⚠️ **Common Mistake:** Setting the floor temperature limit too low. Many thermostats have a maximum floor temperature setting (separate from target room temperature). If this is set to 20°C, for example, the system will never heat properly. Set it to 35°C for testing purposes.
**Step 6: Factory Reset**
If the thermostat powers on but doesn't function correctly, try a factory reset:
- Locate the reset procedure in your thermostat's manual
- Common method: Press and hold Mode + i buttons for 10 seconds
- After reset, reconfigure your heating schedule
If none of these steps restore heating, the fault requires electrical testing by a qualified electrician.
### Electric System Error Codes
Modern thermostats display error codes to help diagnose problems. Here are the most common codes and their meanings:
**E1 Error - Floor Sensor Problem**
- **Meaning:** Floor sensor is disconnected, damaged, or reading outside expected range
- **Quick Fix:** Check sensor connection at back of thermostat. Ensure wire is firmly seated.
- **If persists:** Sensor may be damaged. An electrician can test its resistance value to confirm.
**E2 Error - Floor Sensor Short Circuit**
- **Meaning:** Sensor wires are touching (short circuit) or sensor has internal damage
- **Quick Fix:** Check sensor wires aren't pinched or damaged where they exit the floor
- **If persists:** Sensor needs replacement
**E4 Error - Internal Thermostat Fault**
- **Meaning:** Thermostat's internal components have failed
- **Quick Fix:** Try factory reset procedure
- **If persists:** Thermostat needs replacement
**Other Error Codes**
Different manufacturers use different codes. Always check your specific thermostat manual. If an error code persists after:
- Replacing batteries (wireless models)
- Checking all connections
- Performing a factory reset
Then the component displaying the error likely needs replacing.
### Problem: System Trips the Power
**Symptom:** The system causes the RCD or circuit breaker at your consumer unit to trip. This may happen immediately when switched on, after running for a few minutes, or intermittently.
A trip indicates a serious electrical fault that acts as a safety measure. Understanding which type of device has tripped helps identify the problem.
#### Understanding RCD vs MCB Trips
**RCD (Residual Current Device) Trip:**
- **What it protects against:** Current leaking to earth
- **What caused it:** This nearly always means damaged heating cable insulation
- **How damage occurs:**
- Screw or nail piercing the cable during installation or renovations
- Trowel or tile cutter damaging the cable during flooring work
- Compression damage from heavy furniture or dropped tools
- Moisture ingress into damaged cable insulation
- **Identifying RCD trip:** The RCD will be labelled "RCD" or show a "T" test button
- **What to do:** Do not keep resetting. Cable damage requires professional diagnosis and repair.
**MCB (Miniature Circuit Breaker) Trip:**
- **What it protects against:** Overcurrent or short circuit
- **What caused it:**
- Short circuit: Live and neutral wires touching inside the heating cable (severe damage)
- Overcurrent: Total system load exceeds circuit breaker rating
- Incorrectly sized circuit breaker for the heating load
- **Identifying MCB trip:** The MCB will be labelled with an amperage rating (e.g., 16A, 20A)
- **What to do:** Check total system wattage doesn't exceed circuit capacity. If load is correct, suspect cable damage.
#### Calculating System Load
To check if your system overloads the circuit:
1. Add up total wattage of all heating mats/cables (check specification labels)
2. Divide by voltage (230V in UK) to get amperage
3. **Example:** 3,000W ÷ 230V = 13.0 Amps
4. Circuit breaker must be rated higher than this (e.g., 16A minimum for this example)
**Diagnosis by a Qualified Electrician:**
1. **Insulation Resistance Test (for RCD trips)**
- Uses a megohmmeter (megger) set to 500V
- Tests for current leaking to earth
- **Healthy reading:** Greater than 200 MΩ (megohms)
- **Failed reading:** Less than 2 MΩ indicates damaged insulation
- **Zero reading:** Serious cable damage
2. **Continuity Test (for MCB trips)**
- Multimeter measures resistance between live and neutral
- **Normal:** Reading matches manufacturer's specification on cable label
- **Fault:** Infinite (OL) reading indicates broken heating element
- **Short circuit:** Near-zero reading indicates live and neutral touching
3. **Finding the Exact Damage Location**
- Specialist companies use thermal imaging or TDR (Time Domain Reflectometry)
- Pinpoints damage to within a few centimetres
- Allows targeted floor lifting instead of replacing entire system
**Cable Repair Options:**
Modern heating cable repairs are often possible without complete replacement:
- **Repair kits available:** Specialist kits can fix small sections of damaged cable
- **Cost consideration:** Cable repair typically costs 60-80% less than full system replacement
- **Limitations:** Repairs must be carried out by a qualified electrician and may affect warranty
- **When full replacement needed:** Extensive damage, multiple fault points, or very old systems
⚠️ **Safety Warning:** Never attempt DIY repairs on damaged heating cables. Always use a qualified electrician. Improper repairs can cause electric shock, fire, or further system damage.
### Problem: System Overload / Maximum Power Exceeded
**Symptom:** Thermostat feels hot to touch, displays overheat warnings, or cuts out intermittently during heating.
**Cause:** The total wattage of connected heating mats/cables exceeds the thermostat's maximum rating.
Modern thermostats have maximum power ratings, typically:
- Standard thermostats: 3,000W - 3,600W (13-16A)
- High-power thermostats: 3,680W - 3,840W (16A)
**How It Happens:**
- Multiple heating mats connected to a single thermostat
- Larger area heated than thermostat designed for
- Incorrect thermostat specified during installation
**Solution:**
1. Calculate total system wattage (add up all mat/cable ratings)
2. Check thermostat's maximum rating (in manual or on back of unit)
3. If total exceeds maximum:
- Split system across multiple thermostats with separate circuits
- Replace with higher-rated thermostat (if available)
- Install a contactor to switch high loads
⚠️ **Safety Concern:** Operating a thermostat above its rated capacity creates a fire risk. Address this immediately.
### Problem: Unexpectedly High Running Costs
**Symptom:** Electricity bills are much higher than expected, or higher than comparable heating methods.
Electric underfloor heating is more expensive to run than water-based systems. However, if costs seem excessive, several factors might be responsible:
**1. Poor Insulation Underneath System**
- Heat escaping downwards instead of rising into the room
- Especially common in ground floor rooms without insulation boards
- **Impact:** Can increase running costs by 30-50%
- **Solution:** Cannot be added retrospectively. Factor into future installations.
**2. Thermostat Programming Issues**
- System running when property is unoccupied
- Temperature set higher than necessary
- Floor sensor mode vs air sensor mode confusion
- **Solution:** Review and optimise programming. Use schedules and setback temperatures.
**3. System Not Suited to Room**
- Electric UFH used as primary heating in large, poorly insulated rooms
- System oversized for the space
- **Solution:** Electric UFH works best as supplementary heating in small rooms (bathrooms, en-suites). For whole-house heating, wet systems are more economical.
**4. Unrealistic Expectations**
- Comparing to gas central heating costs (electric is typically 3-4x more expensive per kWh)
- Expecting instant heat-up like radiators (UFH takes 1-2 hours to reach temperature)
- **Solution:** Understand typical running costs: 5m² bathroom = £0.15-0.30 per hour at current electric rates
**Reducing Running Costs:**
- Lower target temperature by 1-2°C
- Use timers to heat only when needed
- Ensure floor covering has low thermal resistance (TOG rating <1.5)
- Close doors to retain heat
- Consider switching to Economy 7 tariff and heating overnight
For detailed running cost analysis and ROI calculations, see our [Complete UFH Costs Guide](/underfloor-heating-costs/).
### Problem: Installation Mistakes
**Symptom:** System never worked properly from installation, or problems appeared shortly after commissioning.
Common installation errors that cause problems:
**1. Wrong Sensor for Controller**
- Controllers require specific sensor resistance values (10kΩ, 12kΩ, 50kΩ, or 100kΩ at 25°C)
- Using incompatible sensor gives false temperature readings
- **Solution:** Electrician verifies sensor matches controller specification or adjusts controller settings if sensor type is selectable
**2. Incorrect Sensor Placement**
- Too close to heating cable (reads too hot)
- Under furniture or in cold spot (reads incorrectly)
- In direct sunlight or near radiator
- **Solution:** Sensor should be between two heating runs, in a neutral location. Difficult to fix without lifting floor.
**3. Damaged Cable During Installation**
- Trowel cuts during levelling compound application
- Tile cutter nicks cable
- Furniture dropped on cable before floor protection
- **Solution:** Always perform insulation resistance test before covering cable. Test again before energising system.
**4. Incorrect Cable Spacing**
- Cables too close together (overheating risk)
- Cables too far apart (cold spots, inadequate heat output)
- **Solution:** Follow manufacturer's installation plan exactly. Typical spacing 100-150mm for 150W/m² systems. Proper spacing is critical for even heat distribution and system efficiency.
**5. Thermostat Misconfiguration**
- Floor sensor mode vs air sensor mode incorrect
- Maximum floor temperature set too low
- Wrong floor type selected (carpet vs tile settings)
- **Solution:** Check all advanced settings match your installation. Perform factory reset and reconfigure.
⚠️ **Prevention:** Always use qualified installers who test systems before covering. Many problems are easily fixed during installation but very costly afterwards.
### Problem: Floor Overheats or Doesn't Reach Temperature
**Symptom:** The floor either gets much hotter than the temperature set on the thermostat or never feels warm enough.
This issue is almost always caused by a problem with the floor sensor probe. The thermostat relies on this sensor for accurate readings to control the heat.
**Diagnosis**
The location and condition of the sensor are critical for correct system function.
* **Incorrect Sensor Placement:** The sensor must be placed in a neutral area, midway between two heating runs. If it is placed in direct sunlight, near another heat source like a radiator, or under a thick rug, it will sense a higher temperature than the rest of the floor. This gives a false reading, causing the thermostat to turn the heating off too soon.
* **Faulty Sensor Probe:** The sensor itself can fail over time. An electrician can disconnect the sensor from the thermostat and measure its resistance with a multimeter. This reading can be checked against the manufacturer's data sheet to confirm if it is working correctly.
* **Incorrect Thermostat Settings:** Many thermostats can operate in different modes. It might be set to "air sensor" mode, using its internal sensor to measure the room's air temperature instead of the floor temperature. Ensure the thermostat is set to "floor sensor" mode for correct operation. Using the wrong setting is a common mistake that prevents the system from working efficiently. [Common mistakes made with underfloor heating thermostats](https://www.theunderfloorheatingstore.com/blogs/latest/reasons-underfloor-heating-thermostat-not-working).
## Advanced Thermostat Troubleshooting for All Systems
Modern thermostats offer precise control but can introduce new challenges. Connectivity and configuration issues are common but often have straightforward solutions. This guide addresses advanced troubleshooting for smart and zoned systems.
### Smart Thermostat Connectivity Issues
For guidance on choosing the right smart thermostat for your system, see our [Ultimate Guide to Smart Thermostats](/smart-thermostats-underfloor-heating/).
A smart thermostat that cannot connect to the internet loses its key features. Remote control and scheduling will fail, though it may still function as a basic manual thermostat.
#### Wi-Fi Connection Loss
When your thermostat disconnects from your home network, follow a structured approach. Start with the simplest fixes before moving to more complex steps.
1. **Check Network Status:** First, confirm your home Wi-Fi is working. Use a phone or laptop to see if you can access the internet. If other devices are offline, the problem is with your router or internet service.
2. **Reboot Devices:** The most common fix is a simple power cycle. Turn off the thermostat, your Wi-Fi router, and any smart home hubs. Wait one minute before turning them back on, starting with the router.
3. **Verify Password:** Ensure the correct Wi-Fi password has been entered in the thermostat's settings. A router reset or password change can cause this issue.
If these steps fail, investigate your network's configuration.
* **Check Signal Strength:** A weak signal at the thermostat's location can cause intermittent drops. Obstacles like thick walls or metal appliances can interfere with the signal.
* **Confirm Network Band:** Many smart thermostats only work on a 2.4GHz Wi-Fi network. They are often not compatible with 5GHz-only networks. Check your router settings to ensure a 2.4GHz band is active.
#### App or Hub Unresponsiveness
Sometimes the Wi-Fi connection is stable, but the control app or hub fails to respond. This points to a software or communication glitch.
* **Update the App:** Check your phone’s app store for any updates to the thermostat manufacturer’s application.
* **Clear App Cache:** On your phone, go to the application settings and clear the cache for the thermostat app. This can resolve performance issues.
* **Reinstall the App:** If problems persist, uninstalling and then reinstalling the app can re-establish a clean connection with the system.
#### Zonal Control Errors
Systems like Honeywell Evohome or Tado use multiple components to manage different heating zones. An error in one part can affect the entire system.
If a specific zone is not responding, check the communication link between the main controller, the thermostat for that zone, and the manifold actuator. Rebooting the central hub or bridge often resolves these communication errors. You should also check the battery levels in any wireless thermostats or sensors.
### Optimizing Zonal Control

A well-configured zonal system ensures comfort and efficiency. Smart thermostats can both cause issues and help diagnose them.
#### How Smart Thermostats Can Help Diagnose Problems
Smart systems provide real-time data that helps pinpoint underfloor heating problems. If a room feels cold, the system’s app can offer clues.
For example, if the app shows a zone is actively calling for heat but the floor remains cold, the issue is not the thermostat. The fault likely lies with the manifold actuator for that zone, an air lock in the pipe loop, or a wiring fault. This insight saves time by directing your focus to the physical components of the system. In this situation, bleeding the specific loop may resolve the cold spot.
#### Ensuring Correct Actuator Pairing
Each thermostat in a zoned system controls a specific actuator on the underfloor heating manifold. If the wiring is incorrect, one thermostat will operate the wrong room.
To check this:
1. Turn all zones off at their respective thermostats.
2. Turn one zone on and set it to a high temperature.
3. Go to the manifold and observe which actuator opens. Most actuators have a visual indicator that pops up when the valve is open.
4. Confirm that the actuator that opened corresponds to the correct room.
5. Repeat this process for every zone to ensure each thermostat controls the correct loop.
If you find a mismatch, the wiring between the thermostat and the wiring centre needs to be corrected.
#### Calibrating Thermostats for Accurate Temperature Readings
A thermostat's reading can be skewed by its location. Direct sunlight, draughts, or proximity to other heat sources can cause it to read the temperature inaccurately.
Most quality smart thermostats have a calibration or temperature offset feature in their advanced settings menu.
1. Place a reliable, calibrated thermometer in the centre of the room, away from draughts or heat sources.
2. Leave it for at least 30 minutes to get an accurate reading of the ambient room temperature.
3. Compare this reading to the temperature displayed on the underfloor heating thermostat.
4. If there is a difference, use the thermostat’s offset feature to adjust it. For example, if the room is 20°C but the thermostat reads 21.5°C, you would apply a -1.5°C offset.
Accurate calibration ensures the system runs efficiently and maintains the desired comfort level. It prevents the system from running unnecessarily or shutting off too soon. Remember, setting a thermostat higher than needed does not make the room heat up faster; it simply forces the system to run for longer.
## Proactive Maintenance for Long-Term System Health
Regular checks keep your underfloor heating running efficiently for decades. Catch a small pressure drop, sticky valve or weak actuator early and you can avoid a much more expensive failure.
### Creating a Maintenance Schedule
Combine a professional service with a few simple checks of your own. That covers the critical components without turning maintenance into a constant job.
#### Annual Professional Service (Wet Systems)
Wet UFH systems benefit from a professional service once a year. This inspection should include checking the manifold valves and bleeding any trapped air from the system. [How to Maintain Your Underfloor Heating for Long-Term Performance](https://www.underfloor-heating-company.com/2025/09/30/how-to-maintain-your-underfloor-heating-for-long-term-performance/) A technician can spot early signs of wear on pumps and actuators, preventing unexpected breakdowns.
For a complete maintenance checklist and service schedule, see our [UFH Maintenance Guide](/underfloor-heating-maintenance-guide/).
#### DIY Annual Checks
You can perform several quick checks annually to monitor your system's health:
- **Inspect the manifold:** Visually check the manifold and its connections for any signs of weeping or leaks. Address small drips before they become serious.
- **Check system pressure:** Note the pressure reading on the gauge when the system is cold. A consistent drop may indicate a leak.
- **Test the thermostat:** Ensure the thermostat is communicating correctly with the system. Check and replace the batteries if it is battery-operated.
### The Foundation of Efficiency: Insulation and System Longevity
Don't overlook the insulation. If heat escapes downwards, the system works harder and a perfectly sound UFH installation can look faulty, with high bills and uneven heating.
Get the insulation right from the start and the UFH pipework can last for over 50 years. The pipes last well, but pumps, valves and actuators will still need maintenance or replacement during the system's life. [Underfloor Heating & Heat Pumps: 2026 UK Guide](/underfloor-heating-heat-pumps-guide-2026/)
The best way to troubleshoot UFH is to work in a fixed order. Start with the simple checks and only move on when you've ruled them out.
Focus on these core areas:
* **Power and Thermostat:** First, confirm your system has power by checking the circuit breaker. Then, examine the thermostat to ensure it has power and is correctly set to call for heat. Remember that turning the thermostat higher than needed does not speed up heating.
* **System-Specific Faults:** For wet systems, issues often involve air or pressure. Trapped air can create cold spots and may require bleeding the system to fix. Electric systems, by contrast, are more likely to suffer from electrical faults like a damaged heating cable.
Many faults have simple fixes. If you feel confident, adjust the thermostat settings, check for tripped breakers or bleed an individual loop. You may solve the problem without spending anything.
Know when to stop. Damp patches or constantly falling pressure can signal a water leak, so get expert help straight away to limit property damage. ([Underfloor Heating Leaks - What Happens and What to Do](https://www.youtube.com/watch?v=BgknbW0K2Sw) Any electrical fault needs a certified electrician too. Keep up with regular maintenance, including an annual professional service for wet systems, and you'll prevent many of these faults before they start. ([How to Maintain Your Underfloor Heating for Long-Term Performance](https://www.underfloor-heating-company.com/2025/09/30/how-to-maintain-your-underfloor-heating-for-long-term-performance/)
## Frequently Asked Questions
### How do I reset my underfloor heating system?
The reset procedure depends on your system type:
**For Electric Systems:**
Most thermostats can be factory reset by pressing and holding the **Mode + i buttons** simultaneously for approximately 10 seconds. The display should show "reset" or return to factory defaults. Check your specific thermostat manual, as the procedure varies by manufacturer.
**For Wet Systems:**
There's no single "reset" button for hydronic systems. To reset the system:
1. Turn off all zone thermostats
2. Switch off the boiler and circulation pump at the isolator switch
3. Wait 2-3 minutes for all components to power down completely
4. Turn the boiler and pump back on
5. Gradually turn on each zone thermostat
This power cycle often resolves temporary communication errors or sensor glitches.
### Does underfloor heating often break down?
No, underfloor heating is generally very reliable when properly installed and maintained. The core components have excellent longevity:
- **Wet system pipework:** Can last 50+ years with minimal maintenance
- **Electric heating cables:** Typically last the lifetime of the floor (20-30+ years)
- **Thermostats and controls:** 10-15 years average lifespan
- **Actuators and pumps:** 10-20 years, but may require occasional replacement
Most "breakdowns" are actually:
- Simple thermostat battery failures
- Tripped circuit breakers
- Airlocks that develop over time in wet systems
- Configuration errors rather than component failures
Annual servicing for wet systems and basic checks for electric systems prevent most serious issues.
### How often does underfloor heating need servicing?
**Wet (Hydronic) Systems:**
- **Professional service:** Once per year, ideally before the heating season
- **Service includes:** Manifold inspection, bleeding airlocks, checking actuators, testing pump operation, pressure check
- **DIY checks:** Every 3-6 months (visual manifold inspection, pressure gauge reading)
**Electric Systems:**
- **Professional service:** Not typically required unless problems develop
- **DIY checks:** Annually check thermostat batteries, test system operation, verify no error codes
- **When to call professional:** If error codes appear, heating becomes uneven, or system doesn't respond to controls
**Both Systems:**
- Check and replace thermostat batteries annually (wireless models)
- Test system operation before heating season starts
- Keep area around manifold/controls clear and dust-free
### Can I repair damaged heating cables myself?
**No, you should never attempt DIY repairs on electric heating cables.** This work must always be carried out by a qualified electrician for several critical reasons:
**Safety Risks:**
- Electric shock hazard when working with mains voltage cables
- Fire risk from improper connections or insulation
- Risk of further damage to adjacent cable sections
**Technical Requirements:**
- Requires specialist repair kits designed for specific cable types
- Needs proper insulation resistance testing before and after repair
- Must maintain earth bonding and cable shielding integrity
- Requires knowledge of correct heat-shrink application and sealing
**Warranty and Insurance:**
- DIY repairs will void manufacturer warranties
- May invalidate home insurance if fault causes fire or damage
- Professional repairs maintain certification trail for insurance claims
**When Repair is Possible:**
A qualified electrician can often repair localised cable damage using specialist kits, typically costing 60-80% less than full system replacement. However, extensive damage, multiple fault points, or very old systems may require complete replacement.
### Which type of flooring works best with underfloor heating?
Different floor coverings have varying heat conductivity and compatibility with underfloor heating:
**Best (Most Efficient):**
1. **Ceramic and porcelain tiles** - Excellent heat conductivity, retains warmth well, ideal for UFH
2. **Natural stone (marble, slate, travertine)** - Superior heat transfer, creates thermal mass
3. **Polished concrete** - Modern aesthetic with excellent thermal properties
**Good (Suitable with Precautions):**
4. **Engineered wood** - Must be UFH-rated, keep moisture content 6-9%, max temperature 27°C
5. **Luxury vinyl tiles (LVT)** - Check manufacturer's UFH compatibility, ensure TOG <1.5
6. **Laminate flooring** - Must be specified for UFH use, requires underlay TOG <1.0
**Acceptable (Reduced Efficiency):**
7. **Carpet** - Combined carpet + underlay TOG must be <1.5 (preferably <2.5 for heat pump systems)
- Hessian-backed carpets work better than foam-backed
- Avoid thick underlay
**Not Recommended:**
- Solid wood flooring (prone to movement, cracking, and cupping from heat)
- Very thick carpets or underlay (excessive insulation prevents heat transfer)
- Rubber flooring (can degrade from constant heat exposure)
**Key Consideration - TOG Rating:**
TOG measures thermal resistance. Lower TOG = better heat transfer:
- **TOG 0.0-1.0:** Excellent (tiles, stone, vinyl)
- **TOG 1.0-1.5:** Good (thin laminate, engineered wood)
- **TOG 1.5-2.5:** Acceptable but reduced efficiency (carpet)
- **TOG >2.5:** Poor heat transfer, not recommended
Always verify your chosen flooring is rated for underfloor heating before installation to avoid damage and ensure efficient operation.
For room-specific recommendations and heat output comparisons, see our [Best Flooring for Underfloor Heating Guide](/best-flooring-underfloor-heating/).
### Why is my electric underfloor heating expensive to run?
Electric underfloor heating costs more to operate than wet systems for fundamental reasons:
**1. Energy Source Cost Difference:**
- **Electricity:** Approximately 24-34p per kWh (depending on tariff and supplier)
- **Gas:** Approximately 6-10p per kWh
- This makes electric heating 3-4x more expensive per unit of heat generated
**2. Best-Use Scenarios for Electric UFH:**
Electric systems are most cost-effective when used appropriately:
- **Ideal:** Small rooms (bathrooms, en-suites, cloakrooms) as supplementary heating
- **Acceptable:** Kitchens, utility rooms with good insulation
- **Not ideal:** Primary heating for whole house or large open-plan areas
**3. Factors Increasing Costs:**
- **Poor insulation underneath:** Heat escapes downwards (30-50% cost increase)
- **Inefficient programming:** Running when property empty
- **Thick floor coverings:** High TOG carpet/underlay reduces efficiency
- **Oversized system:** Heating larger area than needed
- **No use of timers:** Continuous operation instead of scheduled heating
**4. Reducing Running Costs:**
- Use timers to heat only occupied hours
- Lower target temperature by 1-2°C
- Consider Economy 7 tariff (cheaper night-time electricity)
- Ensure good insulation under system and in room
- Use floor sensor mode (more efficient than air sensor mode)
- Zone heating - only heat rooms in use
**5. Realistic Cost Expectations:**
- 5m² bathroom: £0.15-0.30 per hour to run
- 10m² bathroom: £0.30-0.60 per hour to run
- Typical usage: 2-3 hours daily = £15-25 per month per room
**Alternative:** For whole-house heating or large areas, water-based underfloor heating powered by a gas boiler or heat pump is significantly more economical to run.
### What's the difference between an RCD trip and an MCB trip?
Understanding which protective device has tripped helps identify the type of electrical fault:
**RCD (Residual Current Device) Trip:**
- **What it detects:** Current leaking to earth (ground)
- **Typical cause in UFH:** Damaged cable insulation allowing current to leak
- **How to identify:**
- Labelled "RCD" on the consumer unit
- Has a "T" test button
- Often protects multiple circuits
- May say "30mA" or similar
- **What it means:** This nearly always indicates damaged heating cable
- **Action required:** Do not reset repeatedly - call qualified electrician
**MCB (Miniature Circuit Breaker) Trip:**
- **What it detects:** Overcurrent or short circuit
- **Typical causes in UFH:**
- Short circuit: Live and neutral wires touching (severe cable damage)
- Overcurrent: System load exceeds circuit rating
- Incorrectly sized circuit breaker
- **How to identify:**
- Labelled with amperage rating (e.g., "16A", "20A", "32A")
- Usually protects single circuit
- No test button
- **What it means:** Either serious cable damage or system overload
- **Action required:** Check system wattage doesn't exceed circuit capacity. If correct, indicates cable fault.
**Visual Identification in Consumer Unit:**
```
RCD: [T] ← Has test button
30mA
Several circuits protected
MCB: 16A ← Amperage rating only
Single circuit
No test button
```
**Why It Matters:**
- **RCD trip = Insulation damage** → Needs insulation resistance testing
- **MCB trip = Overcurrent or short** → Needs load calculation or continuity testing
Both require investigation by a qualified electrician if they trip repeatedly when the UFH system operates. Never bypass safety devices or fit higher-rated breakers without professional assessment.
### How long should underfloor heating take to warm up?
The warm-up time for underfloor heating varies significantly based on several factors:
**Typical Warm-Up Times:**
**Electric Systems:**
- **Tiled floors:** 30-60 minutes to feel warm
- **Laminate/wood floors:** 45-90 minutes
- **Carpeted floors:** 60-120 minutes (due to insulation effect)
**Wet (Hydronic) Systems:**
- **Tiled floors with screed:** 2-3 hours to reach comfortable warmth
- **Tiled floors with liquid screed:** 1.5-2.5 hours (slightly faster)
- **Timber suspended floors:** 1-2 hours (less thermal mass)
- **Thick concrete slab:** 3-4 hours (significant thermal mass)
**Factors Affecting Warm-Up Speed:**
1. **Floor Construction:**
- Thin coverings heat faster (tiles directly on mat)
- Thick screed takes longer (stores more heat, then releases slowly)
- Insulation underneath improves response time
2. **Starting Temperature:**
- Room at 15°C warms faster than room at 10°C
- First use of the season takes longest
3. **Target Temperature:**
- Reaching 20°C is faster than reaching 24°C
- Each additional degree takes progressively longer
4. **System Power Output:**
- 150W/m² systems heat faster than 100W/m² systems
- Correctly sized system reaches temperature quicker
5. **Room Insulation:**
- Well-insulated rooms retain heat and require less recovery time
- Draughty rooms lose heat as fast as it's generated
**Common Mistake:**
Turning the thermostat higher does NOT make the system heat faster - it just makes it run longer to reach a higher final temperature. UFH provides constant, gentle heat rather than rapid temperature changes.
**Optimisation Tips:**
- Use programmable thermostats with advance start function
- Set heating to come on 1-2 hours before you wake up or arrive home
- Maintain constant lower temperature (18-19°C) rather than turning on/off completely
- For wet systems, keep flow temperature consistent rather than frequently adjusting
---
--- title: Best Flooring for Underfloor Heating: Complete UK Guide 2026 description: Best flooring for underfloor heating, ranked by TOG rating and heat output. Includes the 2.5 TOG rule, heat pump limits, BS EN 1264 and a full comparison table. url: https://underfloorheating.info/best-flooring-underfloor-heating/ published: 2025-10-12 updated: 2026-08-21 tags: ['flooring', 'tiles', 'engineered wood', 'vinyl', 'LVT', 'carpet', 'thermal conductivity', 'heat output', 'TOG rating', 'BS EN 1264', 'room selection'] ---
# Best Flooring for Underfloor Heating: Complete UK Guide 2026
> **Quick answer:** Stone and ceramic tile are the best all-round flooring for underfloor heating, with the highest thermal conductivity (0.9–2.5 W/mK) and heat output (up to 150 W/m²). LVT, laminate and engineered wood all work well within a 27°C surface temperature limit. Carpet is fine if the combined TOG of carpet plus underlay stays below 2.5 (1.5 or lower if you have a heat pump). Solid wood is the one finish to approach with real caution. Read on for the science, the full comparison table, and a room-by-room breakdown. Explore more planning guidance at [underfloorheating.info](https://underfloorheating.info/) and find suitable professionals through the [Underfloor Heating Directory](https://underfloorheating.directory/).
>
> 🧮 **[Estimate installation costs for your chosen flooring with our free cost calculator →](/underfloor-heating-cost-calculator/)**
## Introduction: Why Your Flooring Choice Matters
[Underfloor heating (UFH)](/underfloor-heating-beginners-guide/) is no longer a luxury add-on in UK homes, it's fast becoming the standard for comfort and efficiency, especially alongside [heat pumps](/underfloor-heating-heat-pumps-guide-2026/). But the system beneath your feet is only half the story. The flooring you put on top can make or break its performance, directly affecting how quickly a room warms up and how much you pay to heat it.
[](/underfloor-heating-vs-radiators/)
Get the flooring wrong and you can lose 20–30% of your system's heat output before it ever reaches the room. Get it right, and you get a floor that responds quickly, holds its warmth, and stays within its safe operating limits for decades. The ideal choice balances two things that pull in opposite directions: **thermal responsiveness** (how fast a floor warms up) and **heat retention** (how long it stays warm once the heating switches off). This guide works through the science, ranks every major flooring type against hard data, and tells you exactly what's compatible with your system, wet or electric, standard boiler or heat pump. For the cost side of the equation, see our [underfloor heating costs guide](/underfloor-heating-costs/).
**Choosing the right flooring?** Find experienced underfloor heating installers on the [Underfloor Heating Directory](https://underfloorheating.directory/installers) to ensure a professional finish.
## Part 1: The Science of UFH Flooring. Key Metrics
Four numbers determine whether a floor covering will help or hinder your underfloor heating system. Once you understand them, choosing between flooring options becomes a straightforward calculation rather than a guess.
### Thermal conductivity (k)
Thermal conductivity, measured in watts per metre-kelvin (W/mK), measures how efficiently a material transfers heat through itself. The higher the number, the faster heat moves from the pipes or heating elements below into the room above. Stone and porcelain sit at the top of the scale (0.9–2.5 W/mK), which is why tiled floors heat up fastest and deliver the most warmth into a room. Engineered wood, by comparison, conducts at roughly 0.12–0.19 W/mK, still perfectly usable, just slower to respond and lower in maximum output.
### Thermal resistance (R-value / TOG)
Thermal resistance works in the opposite direction to conductivity: it measures how much a material *resists* heat passing through it. For UFH, low is good. This is usually expressed as a TOG rating (common for carpets and underlays) or an R-value in m²K/W (common for rigid materials). A material with a high TOG rating acts like insulation, trapping heat below the surface instead of letting it radiate into the room, which is exactly what you don't want sitting on top of a heating system.

### The 2.5 TOG rule
For a standard wet or electric UFH system running at typical flow or element temperatures, the **combined thermal resistance of the flooring plus any underlay should not exceed 2.5 TOG**. This is the figure most manufacturers, retailers and the Energy Saving Trust cite as the practical ceiling for efficient operation. Above this, the system has to work harder, and run hotter, to push the same amount of heat through the floor, eroding the efficiency gains UFH is meant to deliver.
### Heat pump constraint: the 1.5 TOG rule
If your UFH is fed by an [air or ground source heat pump](/underfloor-heating-heat-pumps-guide-2026/), the 2.5 TOG ceiling is too generous. Heat pumps are most efficient at low flow temperatures (35–45°C), and a heavily insulating floor forces the system to raise the flow temperature to compensate, directly cutting the heat pump's coefficient of performance (CoP). For heat pump-driven systems, **combined resistance should ideally be restricted to 1.5 TOG or below**. This single rule is the reason polished screed, tile and thin LVT are so often paired with heat pumps, while thick carpet rarely is.
### Does the type of UFH system matter? (Wet vs electric)
There are two main types of underfloor heating:
- **[Wet (hydronic) systems](/wet-underfloor-heating-ultimate-guide/)** circulate warm water through pipes laid beneath the floor, typically at 35–65°C flow temperature depending on the heat source.
- **[Electric systems](/electric-underfloor-heating-systems/)** use a network of wires or heating mats to generate warmth directly.
Most modern flooring types are compatible with both. The main practical difference is temperature control: wet systems tend to run at a lower, steadier temperature, which makes it easier to stay within a sensitive floor covering's limits. Electric systems can heat up faster and are more prone to brief hot spots, which is exactly why a floor sensor thermostat (see Part 9) matters more with electric UFH than with wet.
**Best suited for:**
- **Wet systems**, whole-house heating, new builds, and pairing with a heat pump for the lowest long-term running costs.
- **Electric systems**, single-room retrofits such as bathrooms, thanks to minimal floor build-up (5–15mm) and rapid response.
Electric systems are cheaper to install; wet systems are significantly cheaper to run, especially on modern time-of-use electricity tariffs. See our [electric vs water UFH comparison](/electric-vs-water-underfloor-heating-2026/) for a full breakdown.
## Part 2: Complete UFH Flooring Compatibility Table
Use this table as your master reference. It combines thermal conductivity, maximum safe surface temperature, TOG/R-value, underlay requirements and system compatibility for every major flooring type.
| Flooring Type | Thermal Conductivity | Max Surface Temp | TOG / R-value | Underlay & Prep Required | Compatible Systems |
|---|---|---|---|---|---|
| **Ceramic, porcelain & natural stone** | ★★★★★ High (0.9–2.5 W/mK) | 27–30°C (up to 33°C in wetrooms) | Very low (0.00–0.10 TOG) | Uncoupling membrane (e.g. Schluter-Ditra) + flexible C2 S1/S2 adhesive; 6–20mm insulation board | Wet (screeded/overlay) & electric |
| **Polished screed, resin & concrete** | ★★★★★ High / conductive | 27–29°C | Virtually zero (~0.0 TOG) | Thin PU/epoxy sealer only; correct substrate prep for thermal cycling | Wet (screeded) & electric |
| **LVT & vinyl** | ★★★★☆ High (~68 W/m²) | 26–27°C (up to 29.4°C for some products) | Low (0.1–0.5 TOG) | High-density low-TOG underlay (under 0.1 TOG); temperature-rated adhesive; floor probe required | Wet & electric (foil or embedded) |
| **Laminate** | ★★★★☆ Moderate–high | 27–29.4°C | Low–moderate (0.05–0.7 TOG) | Dense, low-resistance radiant-rated underlay; expansion gaps; moisture barrier over concrete | Wet (screed/overlay) & electric (foil) |
| **Engineered wood** | ★★★☆☆ Moderate (0.12–0.19 W/mK) | 27°C | Moderate (≤1.5 TOG) | Fully bonded flexible adhesive; boards ≤18mm; moisture content 6–9% | Wet (hydronic) & electric (low-temp/foil) |
| **Carpet & underlay** | ★★☆☆☆ Low / insulative | 27°C | Combined max 1.5–2.5 TOG | Specialist low-TOG underlay (perforated PU/rubber under 1.0 TOG); avoid felt or thick foam | Wet & electric (must avoid thermal blocking) |
| **Solid wood** | ★★☆☆☆ Low | 27°C | High (1.5+ TOG) | Specialist moisture barrier; kiln-dried timber; floor temperature sensor required | Wet (screeded/low-temp) only |
If you're considering a [milled screed (in-cut) retrofit](/milled-screed-underfloor-heating/), pipe milled directly into an existing concrete or screed floor, the flooring compatibility is identical to the polished screed/concrete row above (27–29°C max surface temperature, virtually zero TOG), since the finished surface is the same slab either way.

**Typical heat output at standard operating conditions** (45°C flow temperature, normal pipe spacing) gives a clearer everyday comparison than conductivity alone:
| Flooring Type | Typical Heat Output (W/m²) | Response Time |
|---|---|---|
| **Stone & porcelain tiles** | 71 W/m² (up to 150 W/m² under high-output design conditions) | Fast (30–60 min) |
| **Ceramic tiles** | 71 W/m² | Fast (30–60 min) |
| **Vinyl & LVT** | 68 W/m² | Fast (30–45 min) |
| **Laminate** | 60 W/m² | Moderate (45–75 min) |
| **Engineered wood** | 56 W/m² | Moderate (45–90 min) |
| **Carpet (2.0 TOG)** | 48 W/m² | Slow (90+ min) |
**Key insight:** the 150 W/m² figure sometimes quoted for tile is a *design ceiling*, the maximum a system can deliver at tight pipe spacing and higher flow temperatures, not what you'll see day-to-day. For realistic comparisons between materials, use the typical output column above. Either way, tile delivers roughly **48% more usable heat than carpet**, making it the natural choice for rooms like [bathrooms](/bathroom-underfloor-heating-guide/) and kitchens where maximum warmth matters most.

## Part 3: The Gold Standard. Stone and Ceramic Tiles
For maximum heat output, tile and stone are the undisputed leaders. Their high thermal conductivity means they heat up fast and retain warmth well, and their virtually negligible TOG rating (0.00–0.10) means almost none of the system's output is wasted as insulation.
**Best-in-class materials:**
- **Porcelain tiles**, dense and durable, porcelain offers some of the best heat transfer of any flooring material and is widely regarded as the optimal UFH choice.
- **Ceramic tiles**, an excellent conductor capable of high, stable surface temperatures with radiant systems.
- **Natural stone** (slate, limestone, marble), also performs very well, though it's often porous and may need sealing to prevent staining. Weight and thickness need to be factored into subfloor design.
**Maximum temperature advantage:** tile and stone can safely run up to 29–30°C in habitable rooms, and up to 33°C in wetrooms and bathroom perimeter zones under BS EN 1264 (see Part 10), roughly 2–4°C higher than wood, laminate or vinyl. That extra headroom gives you more flexibility in system design and a genuinely faster warm-up on cold mornings.
**Critical installation detail:** always use a decoupling membrane (such as Schluter-Ditra) beneath tile over UFH, paired with a flexible C2 S1/S2-rated adhesive. This layer lets the tile and the heated subfloor expand and contract independently, which is what actually prevents cracked grout and lifted tiles, not the tile itself.

**Pros & cons summary:**
- **Pros:** Highest heat output of any flooring (up to 150 W/m² under design conditions); extremely durable, waterproof and easy to clean; highest safe surface temperature.
- **Cons:** Hard and cold underfoot when the system is off; typically the highest installation cost; requires correct decoupling to avoid cracking.
## Part 4: The Responsive Choice. LVT, Vinyl and Laminate
Luxury Vinyl Tile (LVT), standard vinyl and laminate are the practical all-rounders. All three are thin, dense, and conduct heat well enough to make them suitable for almost any room in the home.
### The 27°C ceiling
This is the number to remember for every resilient floor finish in this category: **most LVT, vinyl and laminate products carry a strict 27°C maximum surface temperature**, with a small number of vinyl products rated to 29.4°C. Exceed it consistently and the material risks softening, discolouring, delaminating, or in some cases releasing more volatile organic compounds (VOCs) than it's designed to. A floor sensor thermostat isn't optional here, it's the only reliable way to guarantee the limit is never breached.
**Installation essentials:**
- **Expansion gap (10–15mm):** left around the full perimeter of the room and covered by skirting or beading, to absorb thermal movement without buckling.
- **UFH-specific underlay:** a dense, low-resistance, radiant-rated underlay, never a standard acoustic underlay, which will simply block the heat you're paying for.
- **Floor sensor control:** a probe beneath the flooring, wired to the thermostat, to enforce the temperature cap and protect the manufacturer's warranty.
**Pros & cons summary:**
- **Pros:** Huge range of styles including realistic wood and stone effects; cost-effective, durable and low-maintenance; strong heat output (60–68 W/m²) that rivals natural materials.
- **Cons:** Strict 27°C limit demands precise thermostat control; can feel less premium than natural stone or timber.
For the full picture on vinyl and LVT specifically, including underlay choice and system compatibility, see our [dedicated vinyl & LVT for underfloor heating guide](/vinyl-lvt-underfloor-heating/). For laminate specifically, see our [laminate & engineered wood guide](/laminate-engineered-wood-underfloor-heating/).

## Part 5: The Natural Compromise. Wood Flooring
Wood brings warmth and character that hard finishes can't match, but it's also the flooring type most sensitive to how it's specified and installed.
### Engineered vs solid wood
**Engineered wood is the preferred choice for UFH**, and it isn't close. Its cross-laminated construction, thin layers of timber bonded with the grain running in alternating directions, resists the expansion and contraction that a heated floor puts every timber product through. Solid wood, being a single uniform block, has no such defence: it's simply more likely to gap, cup or warp once the heating is switched on.
### Thickness limits
For efficient heat transfer, engineered boards should ideally be **no thicker than 18mm**, with a **4–6mm wear layer**, thick enough to sand and refinish once or twice over its life, thin enough not to insulate the room from its own heating system. Moisture content should sit at 6–9% before installation.
### Acclimatisation
Timber, engineered or solid, must be allowed to acclimatise to the property before fitting:
1. Store the flooring in the installation room for a minimum of 48–72 hours.
2. Run the UFH system at its normal operating temperature during this period.
3. Allow the boards to fully adjust to the room's temperature and humidity.
4. Only begin installation once the boards have stabilised.
Skipping acclimatisation is the single most common cause of gapping and warping in wood floors laid over underfloor heating, far more common than choosing the wrong wood species.

### Solid wood: proceed with caution
If solid wood is non-negotiable for your project, minimise the risk with narrow, kiln-dried boards from a dimensionally stable species, a specialist moisture barrier, rigorous acclimatisation, and, critically, a floor temperature sensor to enforce the 27°C limit. Even then, solid wood is not recommended for most retrofit projects or for any system designed to deliver high output, and it pairs poorly with the fast response times of electric UFH.
For full detail on thickness limits, acclimatisation and laminate installation essentials, see our [dedicated laminate & engineered wood guide](/laminate-engineered-wood-underfloor-heating/).
**Pros & cons summary:**
- **Pros:** Authentic natural material with genuine long-term character; more comfortable underfoot than tile or stone; engineered versions offer strong dimensional stability.
- **Cons:** Lower heat output than tile (56 W/m²); strict 27°C ceiling; solid wood carries a real risk of gapping, cupping and warping if specified or installed incorrectly.
## Part 6: The Insulating Hurdle. Carpet and Rugs
Carpet is compatible with underfloor heating, but it's the flooring type where getting the specification wrong has the biggest impact on system performance. See our [dedicated carpet for underfloor heating guide](/carpet-underfloor-heating/) for the full breakdown.
### The golden rule of TOG rating
The combined TOG rating of the carpet **and** its underlay together is the single most important number here. Keep the total at **2.5 TOG or below** for a standard system, or **1.5 TOG or below** if you're running a heat pump (see Part 1). For the best real-world performance on any system, aim for 1.5 or lower regardless.
### The "subtract 1 TOG" rule
Lab-rated TOG values are measured under static conditions that don't fully reflect how a carpet behaves on an actively heated floor. The Carpet Foundation notes that real-world heat transmission under active UFH is typically better than the lab figure suggests, and recommends **subtracting around 1.0 TOG from the standard rating** when calculating suitability for underfloor heating specifically. In practice, this means some carpets that look borderline on paper perform acceptably once installed, but it's not a reason to skip checking the manufacturer's UFH-rated figure.
### Best choices for carpet
- **Carpet type:** low-pile carpets with a maximum TOG of 1.0–1.5, ideally with a hessian or woven backing rather than thick felt or rubber, which trap heat.
- **Underlay, the critical choice:** use a specialised low-TOG underlay (typically 0.5–1.0 TOG) explicitly labelled "suitable for underfloor heating." Avoid felt, polyurethane foam, and standard rubber-backed underlays, all of which have far too much thermal resistance for UFH use.
- **Always verify** the combined figure (carpet + underlay) against the 2.5 TOG ceiling, or 1.5 for heat pumps, before buying.

### Health and air quality considerations
Carpets and their backings can release volatile organic compounds (VOCs) when heated, compounds that evaporate more readily as temperature rises. The most recognisable is 4-phenylcyclohexene (4-PC), a byproduct of styrene-butadiene rubber latex backing responsible for the "new carpet smell." Laboratory studies heating carpet samples to typical UFH surface temperatures (25–27°C, against 18–20°C for an unheated floor) detected meaningfully higher concentrations of these compounds than at room temperature.
In poorly ventilated rooms, this can contribute to symptoms associated with sick building syndrome, headaches, respiratory and eye irritation, and fatigue, particularly with newly installed carpet (first 6–12 months), synthetic fibres and backings, foam or rubber underlays, and limited fresh air circulation.
**Healthier carpet choices for UFH:**
- 100% wool carpet with a hessian or jute backing, which emits substantially less VOC than synthetic equivalents.
- Products with recognised low-VOC certification.
- Natural felt, wool or natural rubber underlays instead of synthetic foam.
- Good ventilation, especially in the first few weeks after installation.
- Running the heating for 48–72 hours with windows open before occupying the room, to let initial off-gassing occur.
For anyone with respiratory sensitivities or allergies, a hard finish, tile, engineered wood or LVT, will usually be the more comfortable long-term choice.
**Pros & cons summary:**
- **Pros:** Unmatched softness and comfort underfoot; good sound insulation between floors.
- **Cons:** Meaningfully reduces heat output (48 W/m² vs 71 W/m² for tile); requires careful joint selection of carpet and underlay to avoid insulating the room from its own heating system.
## Part 7: Minimalist Finishes. Polished Screed and Resins
Polished concrete, polished screed and epoxy or polyurethane resin floors are the purist's choice for UFH, and, on paper, close to the ideal one.
### Zero resistance
Because there's no adhesive layer, no underlay and often no additional covering at all beyond a thin sealer, polished screed and resin floors present **virtually zero thermal resistance** (around 0.0 TOG). Heat moves from the pipes or cables straight into the room with essentially nothing standing in the way, which is exactly why this finish pairs so well with the 1.5 TOG heat pump rule from Part 1.
### Thermal storage
The floor itself, often 65–75mm of screed, acts as a large thermal battery. It takes longer to heat initially than a thin tile bed, but once warm it releases that heat slowly and evenly, smoothing out temperature swings through the day. This makes it a strong match for well-insulated, airtight modern homes and new builds where a stable background temperature matters more than rapid response.
### Installation considerations
Only a thin polyurethane or epoxy sealer is applied, no tile adhesive, no underlay, so correct substrate preparation for thermal cycling is essential to avoid surface cracking. Because the finish is directly bonded to a rigid, high-mass base, it demands careful, gradual commissioning (bringing the system up to temperature slowly over several days) to avoid stressing the substrate. It's also worth noting this finish is generally **not compatible with low-profile retrofit overlay systems**, it belongs to new-build and full-screed wet installations, or electric systems embedded directly beneath it.
**Pros & cons summary:**
- **Pros:** Virtually instant heat transfer with no insulating layers; doubles as a large, stable thermal store; minimalist, seamless aesthetic with no grout lines or joints.
- **Cons:** High rigidity means careful, slow commissioning is essential; unsuitable for most low-profile retrofit systems; a specialist trade for both the screed and the resin finish.
## Part 8: Essential Safety and Control Layers
Getting the flooring right is only part of the job, the controls layer determines whether that flooring stays within its safe limits for the life of the system.
### Floor sensors
A floor-mounted temperature probe, wired into the thermostat, is **mandatory in practice for any sensitive covering**, wood, LVT, vinyl or laminate. It enforces the 27°C cap directly at the floor surface rather than relying on air temperature alone, which is what actually protects both the flooring and its manufacturer's warranty. Tile and polished screed can tolerate more flexibility, but a sensor is still good practice.
### Smart thermostats
Modern learning thermostats bring genuine efficiency gains on top of correct flooring choice, typically cutting energy use by **15–25%** by learning exactly how long a given floor takes to reach its target temperature and timing the "optimum start" accordingly, rather than running longer than necessary. See our [smart thermostats for underfloor heating guide](/smart-thermostats-underfloor-heating/) and [UFH zoning guide](/underfloor-heating-zoning-complete-guide/) for full detail on room-by-room control.

### Expansion gaps
Every flooring type in this guide expands when heated. Wood, laminate, LVT and vinyl all need a **10–15mm perimeter expansion gap**, covered by skirting or beading, to absorb that movement without buckling or peaking at the joints. Tile relies on a decoupling membrane and expansion joints within larger areas instead (see Part 3).

## Part 9: Regulatory Compliance in the UK
Underfloor heating installations in the UK sit under three separate compliance frameworks. None of them are flooring-specific, but each one shapes what you can install and how it must be signed off.
- **Part L (Conservation of Fuel and Power)** sets the energy efficiency requirements for new builds and major renovations, covering insulation levels, heat loss calculations, and system and controls efficiency, including the zoning and programmable controls covered in Part 8.
- **Part P (Electrical Safety)** applies to any fixed electrical work, which for UFH means mats, cables, wiring centres, pumps and thermostats. This work must be carried out by a registered electrician or notified to Building Control.
- **BS EN 1264** is the European design standard for water-based surface heating and cooling systems. It isn't law, but it's the recognised technical benchmark manufacturers and installers design to, and it's where the surface temperature limits referenced throughout this guide come from: **29°C in habitable rooms, up to 33°C in bathroom perimeter zones.**
This guide covers the flooring-specific implications; for the full compliance picture, including certification, notifiable work, and system-by-system checklists, see our complete [UK building regulations for underfloor heating guide](/uk-building-regulations-underfloor-heating/).
## Part 10: Installation and System Optimisation
### Subfloor preparation
The subfloor must be level before any heating element goes down, bumps or dips create air gaps that block even heat distribution. It must also be well-insulated: an uninsulated floor can account for up to 20% of a home's total heat loss, sending warmth downwards into the structure instead of up into the room.
### Screed thickness and response time
For wet systems, the [screed](/underfloor-heating-screed/) thickness is a direct trade-off between responsiveness and stability:
- **Thicker screed (65–75mm)** heats up more slowly but retains warmth longer, acting as a thermal store well suited to spaces that need constant, stable temperatures.
- **Thinner screed (40–50mm)** heats up faster, offering a more responsive system, often preferred in modern, well-insulated homes.
The screed must be allowed to dry fully before any floor covering goes down, to prevent moisture damage. See our [DIY UFH installation guide](/underfloor-heating-installation-guide/) for the full process.
### Managing floor height in retrofits
Adding floor height is the biggest practical obstacle in renovation projects, affecting door clearances, ceiling heights and thresholds. Low-profile systems, slim insulation panels and reduced pipe diameters, solve most of this, adding as little as 15mm to the existing floor level.

## Room-by-Room Selection Guide
### Bathrooms: prioritise water resistance and heat
**Best choice: porcelain or ceramic tiles.** Maximum heat output (71 W/m²) for fast morning warm-ups, complete water resistance, and a temperature ceiling up to 33°C in wetroom perimeter zones under BS EN 1264.

**Alternative:** LVT, good water resistance and strong output (68 W/m²) at a lower price point. Full detail in our [bathroom underfloor heating guide](/bathroom-underfloor-heating-guide/).
### Kitchens: durability meets efficiency
**Best choice: porcelain tiles or LVT.**

- **Porcelain:** maximum durability and heat output, though hard underfoot for long periods of standing.
- **LVT:** an excellent compromise, good heat transfer (68 W/m²), water resistance, and a softer feel.
- **Avoid:** solid wood (moisture risk) and carpet (hygiene).
Full detail in our [kitchen underfloor heating guide](/kitchen-underfloor-heating/).
### Living rooms: balancing comfort and aesthetics
**Best choice: engineered wood or LVT.**
- **Engineered wood:** natural aesthetic with solid output (56 W/m²), wider planks for a contemporary look, narrower for traditional.
- **LVT with wood effect:** cost-effective, higher output (68 W/m²), easier upkeep.
- **Optional:** low-TOG carpet (≤2.5 combined) in seating areas, accepting the efficiency trade-off.
See our [dedicated living room underfloor heating guide](/underfloor-heating-living-room/) for zoning advice and typical costs specific to this room.

See our [electric vs water UFH guide](/electric-vs-water-underfloor-heating-2026/) for system-level comparisons.
### Bedrooms: prioritise comfort
**Best choice: engineered wood or low-TOG carpet.** Slightly lower output is an acceptable trade-off in a room that typically needs less intense heating; a combined TOG of 2.0 or below in carpet keeps performance reasonable while staying soft underfoot.
### Hallways and stairs: durability first
**Best choice: laminate or LVT.** Both offer strong output (60–68 W/m²) and stand up to heavy foot traffic. Avoid carpet (wears quickly) and natural stone (cost-prohibitive at this scale).
### Conservatories and extensions: factor in solar gain
**Best choice: tile or engineered wood.** Tile's thermal mass helps moderate solar-driven temperature swings; engineered wood provides warmth on overcast days without overheating in direct sun. Adjustable controls and a floor sensor are essential here. See our [retrofitting UFH guide](/retrofitting-underfloor-heating/) and [conservatory underfloor heating guide](/conservatory-underfloor-heating/) for full detail.
### Quick reference: room-by-room summary
| Room Type | 1st Choice | 2nd Choice | Avoid |
|---|---|---|---|
| **Bathroom** | Porcelain/ceramic tiles | LVT | Carpet, solid wood |
| **Kitchen** | Porcelain tiles | LVT | Solid wood, carpet |
| **Living room** | Engineered wood | LVT wood effect | Thick carpet, solid wood |
| **Bedroom** | Engineered wood | Low-TOG carpet | High-TOG carpet |
| **Hallway** | Laminate | LVT | Carpet, natural stone |
| **[Conservatory](/conservatory-underfloor-heating/)** | Tile | Engineered wood | Solid wood |
## Flooring to Use with Caution or Avoid
- **Solid wood**, highest risk of gapping, cupping and warping; engineered wood is the safer alternative in almost every case (see Part 5).
- **Thick, high-TOG carpets and rugs**, anything pushing the combined TOG above 2.5 (or 1.5 on a heat pump) forces the system to work harder for less warmth. Always confirm the manufacturer's TOG figure before buying.
- **Older or budget rubber and vinyl**, not all vinyl products are UFH-rated; unrated products can degrade, discolour or off-gas under sustained heat. Check the technical data sheet before installing over UFH.
## Frequently Asked Questions (FAQs)
### What is the best flooring for underfloor heating?
Stone and ceramic tile are the best all-round choice, combining the highest thermal conductivity (0.9–2.5 W/mK) with the highest safe surface temperature and heat output (up to 150 W/m² under design conditions). For a warmer-underfoot alternative with only a modest performance trade-off, engineered wood or LVT are the next best options.
### What TOG rating is best for underfloor heating?
As low as possible. For a standard system, keep the combined TOG of any flooring and underlay at or below 2.5. If your system runs on a heat pump, aim for 1.5 TOG or below to protect the heat pump's efficiency. Tile, polished screed and thin LVT sit at the low end (below 0.5 TOG); carpet and underlay combinations need the most careful checking.
### Can you have carpet with underfloor heating?
Yes, as long as the combined TOG of the carpet and underlay stays within the 2.5 TOG limit (1.5 for heat pumps). Choose a low-pile carpet with a hessian or woven backing and a specialist low-TOG underlay explicitly labelled for underfloor heating, standard felt or foam underlays will block too much heat.
### Does laminate work with underfloor heating?
Yes. Laminate rated for UFH use is compatible with both wet and electric systems, delivers solid heat output (around 60 W/m²), and is one of the more budget-friendly options. It carries the same 27°C surface temperature limit as LVT and engineered wood, so a floor sensor thermostat is essential.
### Is solid wood suitable for underfloor heating?
It can be, but it's the highest-risk choice in this guide. Solid wood expands and contracts more than engineered wood, and without narrow kiln-dried boards, a proper moisture barrier, full acclimatisation and a floor temperature sensor, it's prone to gapping, cupping and warping. Engineered wood delivers a near-identical look with far less risk.
### What is the maximum floor temperature for underfloor heating?
Under BS EN 1264, the European design standard for underfloor heating, surface temperatures are limited to 29°C in habitable rooms and up to 33°C in bathroom perimeter/wetroom zones. Individual flooring manufacturers often set a stricter limit, commonly 27°C for wood, LVT, vinyl and laminate, which takes precedence over the regulatory ceiling.
### Do I need a floor sensor with underfloor heating?
In practice, yes, for any flooring other than tile or polished screed. A floor-mounted probe wired to the thermostat directly measures surface temperature and enforces the manufacturer's limit (commonly 27°C), which is what actually protects the flooring and its warranty, air temperature alone isn't a reliable proxy.
Your ideal floor covering balances thermal performance, aesthetic preference, lifestyle needs and budget, there is no single "best" option, only the one that's right for your project and your heat source.
**For maximum efficiency:** tile and stone lead on every metric that matters, with the lowest TOG rating and the highest heat output of any material in this guide.
**For natural aesthetics with low risk:** engineered wood delivers the look of timber with the dimensional stability solid wood can't match.
**For versatility and budget:** LVT and laminate are thin, dense, and close the performance gap with tile at a fraction of the cost.
**For a minimalist, heat pump-friendly finish:** polished screed and resin offer close to zero thermal resistance, at the cost of installation flexibility.
**For softness underfoot:** carpet remains viable, provided the combined TOG rating is checked and kept within limits. 2.5 for a standard system, 1.5 for a heat pump.
Before making a final purchase, consult both your underfloor heating provider and your flooring specialist to confirm compatibility, and check the flooring manufacturer's specific temperature and TOG requirements, they take precedence over the general figures in this guide. Get that right, and your floor becomes an active part of an efficient, comfortable, long-lasting heating system rather than an obstacle to one.
**Ready to upgrade your floors?** Connect with vetted UFH installers via the [Underfloor Heating Directory](https://underfloorheating.directory/installers) for a seamless installation.
---
--- title: Underfloor Heating Zoning Explained - A Practical Guide description: Complete guide to UFH zoning systems, smart controls, and modern design approaches. Save up to 40% on heating bills with intelligent zone control. url: https://underfloorheating.info/underfloor-heating-zoning-complete-guide/ published: 2025-10-09 updated: 2026-08-21 tags: ['zoning', 'smart heating', 'manifolds', 'thermostats', 'heat pumps', 'energy efficiency', 'home automation'] ---
# Underfloor Heating Zoning Explained - A Practical Guide
> **Quick Answer:** UFH zoning means controlling each room or area separately via its own thermostat and manifold actuator. You can save 12–40% on heating bills vs a single‑zone setup and improve comfort by matching temperature to room use. Zoning works with both electric and wet systems, but is most common (and most effective) with wet systems connected to a heat pump or condensing boiler. Read more UFH guidance at [underfloorheating.info](https://underfloorheating.info/) and find specialists through the [Underfloor Heating Directory](https://underfloorheating.directory/).
**Ready to start?** Find UFH zoning experts via the [Underfloor Heating Directory](https://underfloorheating.directory/installers).

## What is UFH Zoning
UFH zoning lets you control rooms or areas separately instead of running the whole property from one thermostat. You can give each zone its own temperature and schedule, so you only heat a space when it needs it.
For a complete overview of how UFH works, start with our [How Does Underfloor Heating Work?](/how-does-underfloor-heating-work/) guide. For system design details, see our [UFH Design & Planning Guide](/underfloor-heating-design-planning/). If you're choosing a thermostat, see [Smart Thermostats for UFH](/smart-thermostats-underfloor-heating/). For room-specific zoning advice, see our [living room underfloor heating guide](/underfloor-heating-living-room/).

> **💡 Quick Example:** Maintain a warm bathroom at 23°C for morning routines, a comfortable living room at 21°C for the evening, and cooler bedrooms at 18°C for sleeping – all automatically controlled.
### The Problem with One Big Zone
A single-zone system creates four common problems:
- **Energy waste** by heating unoccupied spaces
- **Uneven temperatures** that can't adapt to different room needs
- **Inefficient operation** that ignores varying thermal properties
- **Limited comfort control** with no room-by-room customisation

### Key Benefits at a Glance
✅ **Personalised Comfort:** Different temperatures for different rooms and times
✅ **Energy Savings:** Up to 40% more efficient than traditional central heating
✅ **Smart Integration:** Works with modern smart home systems
✅ **Future-Proofing:** Ideal for heat pump installations

---
## Why Zone Your Underfloor Heating
### 1. Better Comfort and Control
Zoning gives you precise control over each part of your home:
**Room-Specific Temperatures:**
- Bathrooms: 23°C for morning comfort
- Living areas: 21°C for socialising
- Bedrooms: 18°C for restful sleep
- Home office: 20°C during work hours
**Adaptive to Room Characteristics:**
- South-facing rooms with solar gain need less heating
- North-facing rooms require more consistent warmth
- Large open spaces can be divided for targeted heating
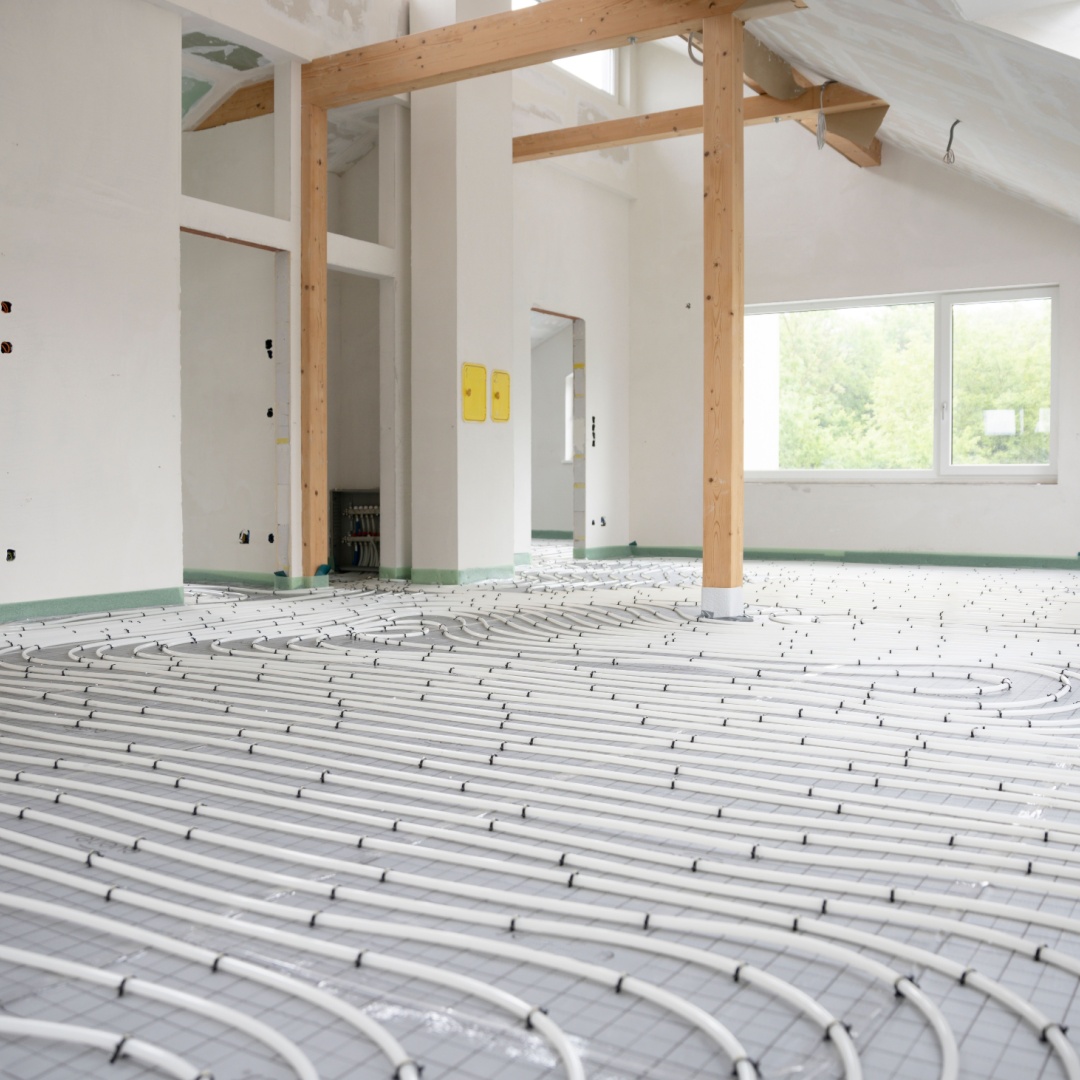
### 2. Lower Energy Use and Costs
The principle is simple: **heat the spaces you're using, not the entire house.**
**Energy Savings Evidence:**
- Industry data: Up to 40% more efficient than central heating according to some industry estimates ([Warmup, 2022](https://www.warmup.co.uk/blog/the-benefits-of-multi-zone-underfloor-heating))
- Academic research: 12% reduction in space heating energy use ([*Energies*, 2023](https://www.mdpi.com/1996-1073/16/22/7608))
**Real-World Impact:**
- Guest bedrooms heated only when occupied
- Home offices warmed during work hours only
- Living areas pre-heated before you arrive home

### 3. Heat Pump Compatibility and Future-Proofing
Zoned UFH works very well with modern heat sources:
**Heat Pump Synergy:**
- Operates efficiently at low temperatures (35-45°C)
- Reduces cycling and improves Coefficient of Performance (CoP)
- Eliminates unnecessary pumping and mixing

**Property Value Benefits:**
- Demonstrates commitment to energy efficiency
- Appeals to environmentally conscious buyers
- Strengthens sustainability credentials
---
## Traditional vs modern zoning systems
UFH design is moving away from traditional high-temperature systems towards simpler, more efficient setups.

### Traditional Zoning Approach
**Characteristics:**
- Fixed blending valves at manifold, [Check out our Underfloor Heating Manifold Guide](/underfloor-heating-manifold-guide/)
- Multiple actuators (one per zone)
- High-temperature operation (60-70°C from boiler)
- Extensive wiring centres and controls
- 10-12mm microbore pipework
**Limitations:**
- Inefficient high-temperature operation
- Over-complicated control systems
- Poor heat pump compatibility
- Higher pressure losses with small pipes

### Modern System Approach
**Key Features:**
- Electronic mixing valves with weather compensation
- Variable temperature control based on outdoor conditions
- Larger bore pipework (16-17mm minimum)
- Simplified control strategies
- Self-regulating low-temperature operation
**Benefits:**
- Higher efficiency with boilers and heat pumps
- Reduced complexity and maintenance
- Better compatibility with renewable energy
- Lower operating costs
> **⚠️ Important:** For a new system, ask your installer for proper heat loss calculations and correctly sized pipework. Don't accept a design based on guesswork.
### Visual Guide: System Operation Flow
{/* Row 1 */}
Outdoor Sensor
→
Weather Compensation Controller
→
Electronic Mixing Valve
{/* Down Arrow */}
↓
{/* Row 2 */}
Manifold with Flow Meters
→
Individual Circuits
→
Room Zones
{/* Down Arrow */}
↓
{/* Row 3 */}
Return to Heat Source
←
Return Manifold
Heated Zones

---
## System components explained
You don't need to become a heating engineer, but understanding how the main parts work together will help you ask better questions.
### The Foundation: Hydronic Circuits
**Circuit Design:**
- Continuous pipe loops within the floor structure
- Each circuit serves one or more rooms as a zone
- Circuit length determines heat output and flow requirements
**Planning Examples:**
- **Large kitchen/dining:** 2-3 circuits controlled as one zone
- **Small bathroom:** Single circuit as individual zone
- **Open plan living:** Multiple circuits with flexible zoning options

### The Command Centre: Manifold Systems
The manifold is the system’s command centre. It connects the heat source to every circuit.
**Essential Components:**
**Flow Meters:**
- Transparent gauges showing litres per minute
- Enable system balancing for even heat distribution
- Prevent hot and cold spots between circuits
**Actuators (Traditional) vs Electronic Valves (Modern):**
- Traditional: Individual actuators per circuit
- Modern: Electronic mixing valve with weather compensation
- Electronic systems reduce complexity and improve efficiency

### Control Systems: What Runs Each Zone
**Thermostat Options:**
1. **Manual Thermostats**
- Basic dial or button control
- Suitable for simple applications
- No scheduling capabilities

2. **Programmable Thermostats**
- Weekly scheduling
- Multiple temperature periods
- Good for regular routines
3. **Smart Thermostats** (Recommended)
- Wi-Fi connectivity and app control
- Learning algorithms
- Geofencing and occupancy detection
- Weather adaptation
- Voice assistant integration

### Temperature Sensing Options
**Air Temperature Sensing:**
- Measures room ambient temperature
- Maximises comfort and energy savings
- 20% more energy flexibility than floor sensing alone
**Floor Temperature Sensing:**
- Protects sensitive floor finishes
- Prevents overheating (max 27°C for wood/vinyl)
- Essential for floor protection
**Dual Sensing (Recommended):**
- Air sensor for primary comfort control
- Floor sensor as safety override
- Combines comfort control with floor protection
---
## Smart control options and integration
### Leading Smart Thermostat Brands for UFH

**1. Nest Learning Thermostat**
- Advanced learning algorithms
- Energy history and savings reports
- Works with Google Assistant
- Excellent app interface
**2. Hive Active Heating**
- British Gas ecosystem
- Reliable UK support
- Geofencing capabilities
- Holiday mode
**3. Tado° Smart Thermostat**
- Weather adaptation
- Open window detection
- Multi-zone support
- Excellent energy reports
**4. Honeywell Evohome**
- Professional-grade multi-zone control
- Up to 12 zones
- Advanced scheduling
- Comprehensive system monitoring

### Smart Features Worth Paying For
**Geofencing:**
- Automatically adjusts when you leave/return
- Prevents heating empty homes
- Can save 10-15% on heating bills
**Learning Algorithms:**
- Adapts to your routine over time
- Optimises heating schedules
- Improves comfort and efficiency
**Weather Compensation:**
- Adjusts output based on outdoor temperature
- Reduces overshooting and cycling
- Maximises system efficiency
**Voice Control:**
- "Alexa, set living room to 21 degrees"
- "Hey Google, turn up the bathroom heating"
- Convenient hands-free control
---
## Planning your zones
Good zoning starts with how you actually use your home. Don't create zones just because the floor plan has separate rooms.

### Step 1: Look at How You Use Each Room
**Room Usage Assessment:**
- **High-use areas:** Living room, kitchen, home office
- **Scheduled use:** Bathrooms, bedrooms
- **Occasional use:** Guest rooms, dining rooms
- **Variable use:** Open plan areas
**Heat Loss Considerations:**
- External walls and window size
- Room orientation (north vs south-facing)
- Insulation levels
- Ceiling height
### Step 2: Draw Your Zone Map
**Grouping Strategy:**
**Option A: Room-by-Room Zoning**
- Individual control for each room
- Maximum flexibility and comfort
- Higher equipment and installation costs
- Best for: Varied schedules, different comfort preferences
**Option B: Area-Based Zoning**
- Group similar-use rooms together
- Balanced cost and control
- Simpler installation and maintenance
- Best for: Regular routines, cost-conscious installations
**Option C: Simplified Zoning (Modern Approach)**
- Minimal zones with self-regulating design
- Lower complexity and cost
- Requires excellent system design
- Best for: Well-insulated homes, heat pump installations

### Zone Planning Examples
**Typical 4-Bedroom House:**
| Approach | Number of Zones | Zone Configuration | Best For |
|----------|-----------------|-------------------|----------|
| Traditional | 7 zones | Living room, Kitchen/dining, Master bedroom, Bedroom 2, Bedroom 3, Main bathroom, Ensuite | Maximum control, varied schedules |
| Modern | 3-4 zones | Living areas, Sleeping areas, Bathrooms, Optional home office | Efficiency, simplified control |
### Step 3: Get the Pipework and Sizing Right
**Critical Considerations:**
**Pipework Sizing:**
- **Minimum 16mm diameter** for most applications
- 17mm for longer circuits or heat pump systems
- Avoid 10-12mm microbore (causes efficiency issues)
**Heat Loss Calculations:**
- Essential for proper system design
- Must account for insulation, windows, orientation
- Determines circuit spacing and flow requirements
- **Warning:** Avoid installers who design without heat loss data
**Flow Temperatures:**
- Traditional systems: 60-70°C
- Modern systems: 35-45°C maximum
- Heat pump compatible: 35°C ideal

---
## Brands and products I’d shortlist
### UK Manifold Manufacturers to Consider

**1. Uponor (Premium Choice)**
- Excellent build quality
- Comprehensive range
- Strong warranty support
- Price: £300-800 for 6-port system
**2. Polypipe (Value for Money)**
- British manufacturer
- Good technical support
- Competitive pricing
- Price: £200-500 for 6-port system
**3. HÖRSTAD (Professional Grade)**
- High-end European quality
- Advanced flow measurement
- Professional installer preference
- Price: £400-900 for 6-port system
### Electronic Mixing Valve Systems
**Recommended Brands:**
- **Siemens VF Series:** Reliable, well-supported
- **Honeywell V5329:** Weather compensation ready
- **Grundfos Alpha Reader:** Pump and valve integration
### Which Smart Thermostat Should You Choose?
| Application | Recommended Product | Price Range | Best Features |
|-------------|-------------------|-------------|---------------|
| Single Zone | Nest Learning Thermostat | £200-250 | Learning algorithms, energy reports |
| Single Zone Budget | Hive Active Heating | £150-200 | UK support, geofencing |
| Multi-Zone | Honeywell Evohome | £400-600 | Up to 8 zones, professional grade |
| Multi-Zone Budget | Drayton Wiser | £300-450 | Good value, reliable performance |

---
## Installation: What to Get Right
### New Build vs Retrofit Considerations
**New Construction:**
- Ideal for comprehensive zoning
- Can accommodate larger pipework easily
- Integrate with modern heat sources
- Design flexibility for future changes
**Retrofit Projects:**
- Low-profile systems available
- Minimal floor height increase (18-25mm)
- May require simplified zoning approach
- Consider existing radiator integration
- For solid concrete or screed floors, [milled screed underfloor heating](/milled-screed-underfloor-heating/) is also worth considering. It adds zero floor height rather than the 18-25mm of a low-profile overlay, which can simplify zoning across rooms with different existing floor levels

### Integration with Heat Sources
**Gas and Oil Boilers:**
- Well-established control integration
- Weather compensation available
- Modern boilers support low-temperature operation
**Heat Pumps:**
- Ideal partnership with UFH
- Requires low-temperature design (35-45°C)
- May enable elimination of manifold pumps
- Consider buffer tank requirements
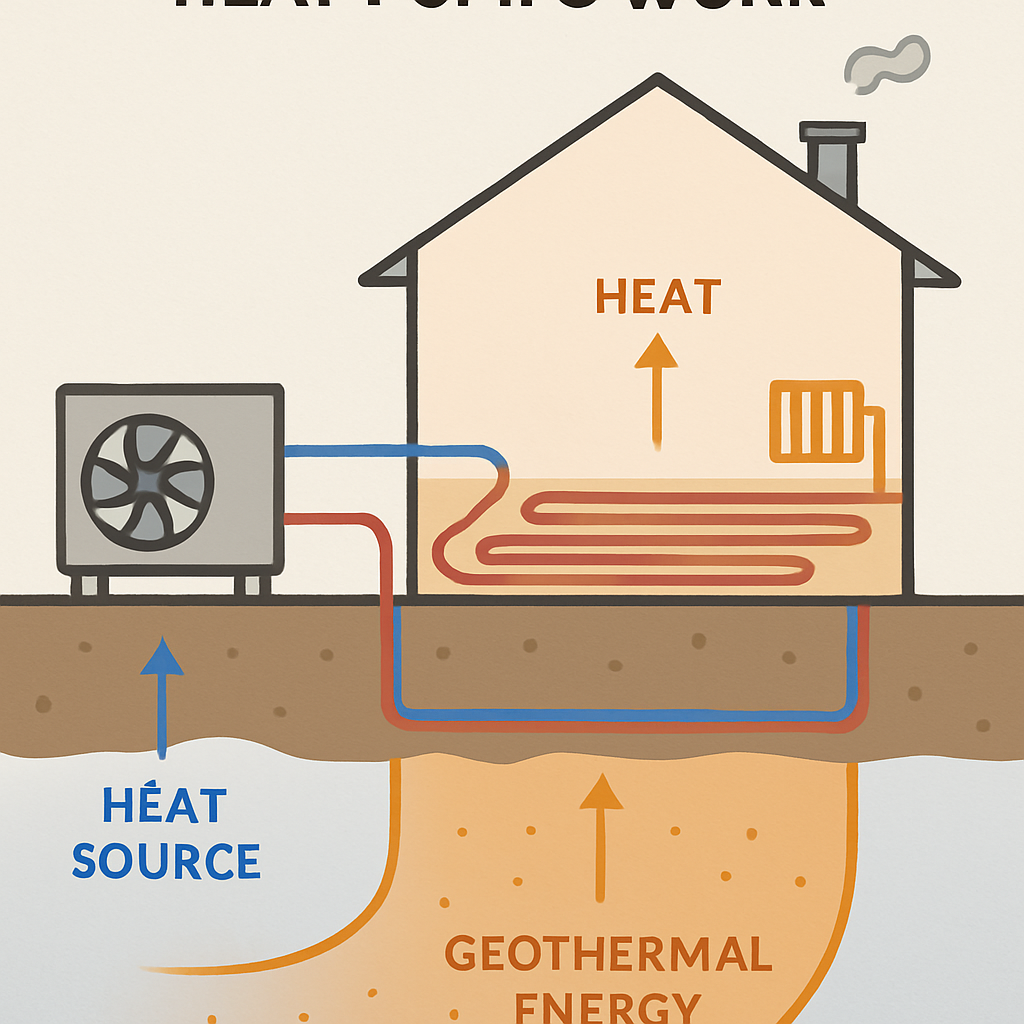
**Hybrid Systems:**
- Heat pump primary, boiler backup
- Sophisticated control requirements
- Professional design essential
### What to Expect from a Good Installer
**Installer Qualifications to Look For:**
- MCS (Microgeneration Certification Scheme) for renewables
- Relevant manufacturer training certificates
- Experience with modern control systems
- Ability to perform heat loss calculations
**Installation Quality Markers:**
- Proper heat loss calculations provided
- System commissioning and balancing
- Comprehensive user training
- Warranty and aftercare support
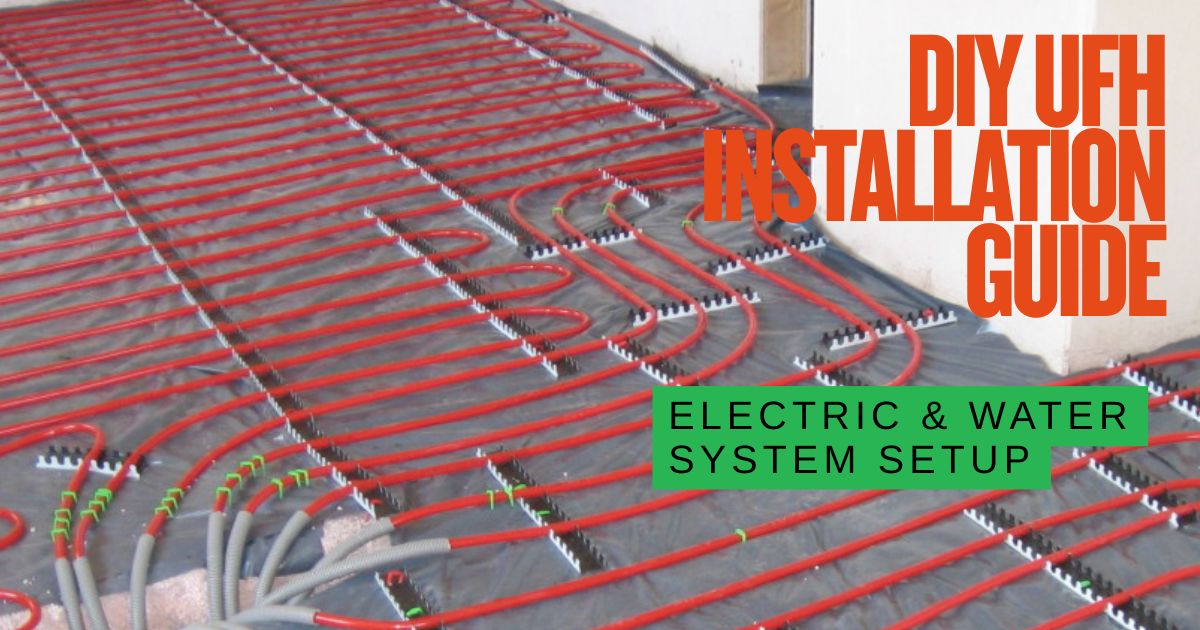
---
## Frequently Asked Questions
### General zoning questions
**Q: How many zones do I need for my home **
A: It depends on how you use the house and what you want to spend. A typical approach is 3-5 zones for a 4-bedroom house: living areas, sleeping areas, bathrooms, and optionally a home office. More zones give you greater control but also add complexity and cost.
**Q: Can I add zones later **
A: Yes, but it’s easier and more cost-effective to plan them from the start. Adding zones later may mean extra manifold ports, wiring and possibly new pipe circuits.
**Q: Do I need a zone for every room **
A: No. A properly designed modern system can provide excellent comfort with fewer zones. I’d group rooms that have similar usage patterns.
### Technical questions
**Q: What's the difference between traditional and modern zoning systems **
A: Traditional systems use fixed blending valves, several actuators and high-temperature operation. Modern systems use electronic mixing valves with weather compensation, lower temperatures and simpler controls.
**Q: Why is pipework size important **
A: Larger pipes (16-17mm minimum) give you better flow, lower pressure losses and improved efficiency. They’re essential for heat pump compatibility and reduce the need for extra pumps.
**Q: Can zoning work with my existing boiler **
A: Most modern boilers can handle zoning, especially with weather compensation controls. You may need to upgrade an older boiler for optimal efficiency.

### Cost and efficiency questions
**Q: How much does a zoned UFH system cost **
A: Property size and system complexity make a big difference:
| System Type | Price Range | Typical Application |
|--------------|-------------|-------------------|
| Simple 3-zone system | £3,000-5,000 | Small to medium homes |
| Complex 7-zone system | £6,000-10,000 | Large homes, maximum control |
| Smart controls upgrade | £500-1,500 | Added to any system |
**Q: What are the running cost savings **
A: A well-designed system can reduce heating costs by 12-40% compared with traditional radiator systems. Your actual saving depends on insulation, usage patterns and design quality.
**Q: Is zoning worth it for a small house **
A: Yes. Even a small home benefits from basic zoning. A simple 2-3 zone system gives you significant comfort and efficiency improvements at a reasonable cost.
### Smart technology questions
**Q: Which smart thermostats work best with UFH **
A: Nest, Hive and Honeywell Evohome are proven options. Choose based on the features you’ll use, the app you prefer and your existing ecosystem (Google, Amazon, etc.).
**Q: Can I control UFH with voice assistants **
A: Yes, most smart thermostats integrate with Alexa, Google Assistant, and Apple HomeKit for voice control.
**Q: Do smart controls really save money **
A: Yes. Studies show they can reduce heating costs by 10-15% through better scheduling, geofencing and adaptive learning.

### Installation and maintenance questions
**Q: How long does installation take **
A: For new construction: 2-3 days for pipework, 1 day for controls. For retrofit: 3-5 days depending on complexity. Allow extra time for commissioning and user training.
**Q: What maintenance does a zoned system need **
A: An annual service should cover flow rates, actuators/valves, filters and control operation. A well-designed system generally needs little maintenance.
**Q: What can go wrong with zoning systems **
A: Common problems include failed actuators, trapped air, poor balancing and control programming errors. Good installation and commissioning prevent most of them.
---
## Getting the Design and Installation Right
### Why the Design Matters
A good UFH zoning design needs someone who understands:
- Heat loss calculations and thermal modelling
- Hydraulic design and pipe sizing
- Control system integration
- Building regulations compliance
- Future-proofing for renewable energy

### What a Professional Service Should Include
**Initial Consultation:**
- Site survey and thermal assessment
- Discussion of lifestyle and comfort needs
- Explanation of zoning options and benefits
- Cost estimates for different approaches
**Design Phase:**
- Detailed heat loss calculations
- Pipe layout and circuit design
- Control system specification
- Integration with existing systems
**Installation:**
- Professional installation team
- Quality materials and components
- System commissioning and testing
- User training and documentation
**Aftercare:**
- Warranty and support
- Annual maintenance services
- System optimisation
- Emergency call-out services
### How to Choose the Right Installer
**Key Questions to Ask:**
1. Can you provide heat loss calculations
2. What pipework size do you recommend and why
3. Are you trained on modern control systems
4. What warranty do you offer
5. Can you provide references from recent projects
**Red Flags to Avoid:**
- Quotes without site visits
- Designs without heat loss calculations
- Insistence on traditional high-temperature systems
- Reluctance to explain technical choices
- Significantly lower quotes (may indicate cutting corners)

### Regional Installer Network
I’d look for an installer with:
- MCS certification for renewable integration
- Manufacturer training certificates
- Professional body membership (CIPHE, APHC)
- Strong local reputation and references
- Experience with modern zoning systems
---
UFH zoning can make your home more comfortable and efficient, but only if the design is right. Here’s the action plan I’d follow:

### The Formula That Works
1. **Start with Professional Heat Loss Calculations**
- Essential foundation for any good system
- Determines pipe spacing and flow requirements
- Enables proper zone sizing
2. **Choose Modern System Components**
- 16-17mm pipework minimum
- Electronic mixing valves where appropriate
- Smart controls for maximum efficiency
3. **Plan Zones Based on Usage, Not Just Room Count**
- Group similar-use areas
- Consider simplified zoning for efficiency
- Balance control with complexity
4. **Future-Proof for Renewable Energy**
- Design for heat pump compatibility
- Choose low-temperature operation
- Consider weather compensation
### Take the Next Step
Ready to plan your system? Here’s what to do:
1. **Calculate your potential savings** with our [UFH cost calculator](/underfloor-heating-cost-calculator/)
2. **Download our zone planning worksheet** to assess your needs
3. **Request quotes from qualified local installers**
4. **Ensure proper heat loss calculations** are included

A well-designed zoning system will give you better comfort and lower energy use for decades. Start with the heat loss calculation, keep the controls as simple as the property allows, and make sure the installer commissions every circuit properly.
---
**About This Guide:** I update this guide to reflect the latest industry developments and best practices. Last updated: March 2026.
**Need Help?** Contact our technical team for personalised advice on your UFH zoning project. We’ll help you make the right decisions for your home.
**Need professional zoning?** Compare vetted installers via the [Underfloor Heating Directory](https://underfloorheating.directory/installers).
---
--- title: European Underfloor Heating Market description: European UFH market projected to reach $12.9B by 2034, driven by heat pump adoption, EU funding, and 35% energy savings. url: https://underfloorheating.info/european-ufh-market-growth-analysis/ published: 2025-10-05 updated: 2026-08-21 tags: ['market-analysis', 'heat-pumps', 'roi', 'installer-opportunity', 'eu-policy', 'energy-savings', 'cost-comparison'] ---
# European Underfloor Heating Market
The European underfloor heating market is experiencing unprecedented growth, and new comprehensive market analysis reveals the sector is set to nearly double in value over the next decade. For UK homeowners considering a heating upgrade and installers looking to expand their services, understanding these market dynamics has never been more important. Find further UK guidance at [underfloorheating.info](https://underfloorheating.info/) and connect with relevant professionals through the [Underfloor Heating Directory](https://underfloorheating.directory/).
## Market Growth: The Numbers Tell a Compelling Story
**Ready to start your project?** Find qualified underfloor heating installers through the [Underfloor Heating Directory](https://underfloorheating.directory/installers).
The European underfloor heating market was valued at USD $7.6 billion in 2024. Industry analysis projects this will grow to $12.9 billion by 2034, representing a compound annual growth rate (CAGR) of 5.3%.
To put this in perspective: that's adding approximately $530 million in market value every year for the next decade.
For those of us in the UK, this isn't just abstract market data. It represents a fundamental shift in how buildings are being heated, with direct implications for property values, installation costs, and long-term energy bills.

## Why the Surge? Three Converging Factors
### 1. The EU Renovation Wave and Policy Support
The European Union has set an ambitious target: renovating 35 million buildings by 2030 as part of its commitment to carbon neutrality by 2050. This isn't aspirational thinking, it's backed by the €86.7 billion EU Social Climate Fund launching in 2026.
**Where the money goes:**
- 45% (€39 billion) → Building renovations
- 30% (€26 billion) → Energy transition including heat pump installations
- 15% (€13 billion) → Training and skills development
- 10% (€8.7 billion) → Administration and implementation
In the UK, we're already seeing a preview of this policy support through the £7,500 Boiler Upgrade Scheme grant for heat pump installations. As we'll explore, underfloor heating has become virtually inseparable from heat pump installations.
### 2. Energy Crisis Response and 35% Savings
With energy costs having surged over the past two years, the 35% energy savings that underfloor heating delivers compared to traditional radiators has moved from "nice to have" to "essential" for many homeowners and property developers.
**Real-world impact:**
A typical UK home spending £1,200 annually on heating could save:
- **£420 per year** with underfloor heating
- **£4,200 over 10 years**
- **£21,000 over 50 years** (the typical lifespan of wet underfloor heating systems)
These aren't marginal savings. At current energy prices, the payback period for underfloor heating installation is typically 6-8 years when combined with a heat pump, after which it's pure savings for decades.
[Learn more about underfloor heating running costs](/underfloor-heating-costs/)
### 3. The Heat Pump Revolution
Here's the physics reality that's reshaping the heating market: heat pumps operate most efficiently at lower temperatures.
**The temperature challenge:**
- Traditional radiators require water at 60-75°C
- Underfloor heating operates at just 30-40°C
- Heat pumps struggle with high-temperature requirements
When you pair a heat pump with radiators, you force the system to work harder, reducing efficiency and increasing running costs. The result is often disappointment: "We thought a heat pump would save us money, but our bills are almost the same."
**The efficiency advantage:**
Heat pump Coefficient of Performance (COP):
- With radiators: 250-300% (2.5-3.0 COP)
- With underfloor heating: 350-450% (3.5-4.5 COP)
Translation: You get 3.5-4.5 units of heat for every unit of electricity consumed when using underfloor heating, compared to just 2.5-3.0 units with radiators.
This 40-45% efficiency advantage means underfloor heating + heat pump systems cost 6-10p per kWh equivalent to run, compared to 20-28p per kWh for radiator-based heat pump systems.
Nearly all heat pump installations in the UK now specify underfloor heating. It's no longer an "either/or" decision, they're a package deal.
[Read our complete guide to heat pumps with underfloor heating](/underfloor-heating-heat-pumps-guide-2026/)
## Market Breakdown: Electric vs Hydronic Systems
The market analysis reveals an interesting split in system types:
**Electric Systems: 62% Market Share**
[Electric underfloor heating](/electric-underfloor-heating-systems/) currently dominates with nearly two-thirds of the market, driven by:
- Lower upfront cost (£50-75/m² vs £75-110/m² for wet systems)
- Faster installation (1-2 days for a typical room)
- Suitability for retrofit applications
- No requirement for boiler or heat source modifications
However, electric systems have higher running costs at 24-34p per kWh on current UK electricity tariffs.
**Hydronic (Wet) Systems: 38% Market Share**
Wet systems are growing rapidly, particularly in [new builds](/underfloor-heating-new-builds/) and major renovations, offering:
- Significantly lower running costs (6-10p per kWh when paired with heat pumps)
- Essential for whole-home heat pump installations
- 50+ year lifespan (vs 20-30 years for electric)
- Superior performance in high-heat-demand applications
**Strategic Implications:**
For homeowners:
- Single room (bathroom/kitchen extension): Electric system often most cost-effective
- Whole home (new build/major renovation): Wet system with heat pump delivers best long-term economics
- Retrofit with existing boiler: Wet system can use existing heat source
For installers:
- Electric systems offer lower barrier to entry and faster installation revenue
- Wet systems command higher project values and integrate with the growing heat pump market
- Many successful installers offer both, recommending based on specific property requirements
[Compare electric vs water underfloor heating systems](/electric-vs-water-underfloor-heating-2026/)

## The Installer Opportunity: A Significant Skills Gap
One of the most striking findings in the market analysis is the growing skills gap in underfloor heating installation. The market is expanding 5.3% annually, but qualified installer capacity isn't keeping pace.
**Real-world pricing data:**
Standard plumber/heating engineer:
- Day rate: £200-300
- Work type: Radiator installations, repairs, general plumbing
- Competition: High (every plumber does radiators)
Underfloor heating specialist:
- Day rate: £400-600
- Work type: UFH installation, heat pump integration
- Competition: Moderate (fewer qualified installers)
That's a 100% premium for the same day's work, driven purely by supply and demand dynamics.
**Typical project values:**
Bathroom installation (5m²):
- Electric UFH materials: £250-375
- Labour (1-2 days): £400-600
- Total customer invoice: £650-975
Whole home installation (80m²):
- Wet UFH materials: £4,000-6,000
- Labour (3-5 days): £2,000-3,000
- Total customer invoice: £6,000-9,000
For installers, the ROI on underfloor heating training is typically covered by the first job. The training investment ranges from £500-1,500 depending on the qualification level and system type.
With government heat pump targets of 600,000 installations per year by 2028 (up from current ~40,000), and nearly every heat pump installation requiring underfloor heating, the demand trajectory is clear.
## Regional Variations: Where the Opportunities Lie
The market analysis identified four distinct regional dynamics within Europe:
### UK & Ireland: Policy-Driven Boom
Current status: The hottest market in Europe right now
Key drivers:
- £7,500 Boiler Upgrade Scheme grants
- Aggressive heat pump targets (600,000/year by 2028)
- High energy costs making efficiency critical
- Strong regulatory pressure on new builds
Opportunity: Everything. Demand is outstripping supply across new builds, retrofits, commercial applications, and training services.
### Northern Europe (Scandinavia, Netherlands): Mature Retrofit Market
Current status: 40-50% of new builds already include underfloor heating
Key drivers:
- Established market with high consumer awareness
- Millions of existing properties upgrading to heat pumps
- Focus on low-profile retrofit systems
Opportunity: Retrofit specialists with heat pump integration expertise will thrive. The installed base of properties needing UFH upgrades is enormous.
### Central Europe (Germany, Austria, Switzerland, Poland): Accelerating Growth
Current status: 6-8% annual growth rate
Key drivers:
- Energy security concerns following recent energy crisis
- Strong construction sector
- Quality and efficiency expectations
Opportunity: New build whole-home systems and premium installations. The energy independence narrative is driving rapid adoption.
### Southern Europe (Spain, Italy, Portugal, Greece): Emerging Market
Current status: 15-20% penetration rate (significant room for growth)
Key drivers:
- Overcoming "we don't need heating" perception
- Growing awareness of year-round comfort benefits
- New construction activity
Opportunity: Early movers in education and entry-level systems. Electric systems with combined heating/cooling capability particularly relevant.
## The ROI Case: Beyond Simple Payback
The most common objection to underfloor heating is "it's too expensive." This objection is based on looking only at upfront cost while ignoring the complete economic picture.
**Complete economic analysis for typical 80m² installation:**
**Year 0 - Initial Investment**
- Radiator system cost: £2,500-4,800
- Underfloor heating cost: £6,000-9,400
- Initial premium: £3,500-4,600
**Years 1-7 - Payback Period**
- Annual energy savings: £400-700 (35% reduction)
- Annual maintenance savings: £100-300 (UFH requires virtually no maintenance)
- Total annual benefit: £500-1,000
- Payback period: 3.5-9.2 years (faster with heat pump grant)
**Years 8-50 - Profit Phase**
- Continued annual savings: £500-1,000
- 43-year profit period (assuming 50-year lifespan)
- Total lifetime savings: £21,500-43,000
**Additional Economic Factors:**
Property value increase:
- Industry data shows 3-5% premium for properties with modern, efficient heating
- £300,000 home → +£9,000-15,000 value
- Often exceeds initial installation premium
Sales velocity:
- Properties with underfloor heating sell 15-20% faster in competitive markets
- Reduced holding costs for developers and sellers
Space value:
- Removing radiators adds ~0.5-1m² usable space per room
- 8 rooms × 0.75m² × £3,000/m² property value = £18,000 space value
**Total Return on Investment: 200-400% over system lifetime**
[Calculate your specific ROI with our cost calculator](/underfloor-heating-cost-calculator/)
## What This Means for Different Stakeholders
### For Homeowners
1. **Specification changes:** Underfloor heating is rapidly becoming standard in new builds, not an upgrade. If building or extensively renovating, consider specifying from the outset.
2. **Heat pump installations:** If you're getting a heat pump (whether for the grant or environmental reasons), underfloor heating isn't optional, it's required for the system to deliver the promised efficiency.
3. **Property value:** Modern, efficient heating systems are increasingly important to buyers. The investment often pays back through higher sale price, not just energy savings.
4. **Installation timing:** With installer demand exceeding supply, booking lead times are extending. Plan ahead if considering installation.
### For Property Developers
1. **Competitive positioning:** Properties with underfloor heating + heat pumps are commanding premiums and selling faster in many markets.
2. **Future-proofing:** Building regulations are tightening. Installing efficient heating now avoids costly retrofits as standards evolve.
3. **Sales tool:** The ROI data from the market analysis is being used effectively in buyer presentations. Energy efficiency is a genuine selling point.
### For Heating Installers
1. **Business positioning:** The skills gap creates a window of opportunity for premium pricing. Training now captures market share before competition increases.
2. **Heat pump integration:** Nearly all heat pump installations require underfloor heating. Offering both positions you for the government's 600,000/year installation target.
3. **Portfolio strategy:** Consider offering both electric (quick retrofit jobs) and wet systems (high-value new build/renovation projects).
### For Architects and Designers
1. **Client expectations:** Buyers and occupiers increasingly expect sustainable, efficient heating. It's moving from "nice to have" to baseline expectation.
2. **Design freedom:** Underfloor heating eliminates radiator placement constraints, providing cleaner walls and more flexible space utilisation.
3. **Performance requirements:** Meeting increasingly stringent building performance standards is simplified with the inherent efficiency of underfloor heating.

## Looking Ahead: Market Forecasts to 2034
The market analysis projects several trends that will shape the next decade:
**Technology Development:**
- Smart controls and AI-driven optimisation becoming standard
- Integration with home energy management systems
- Improved heat pump efficiency making the UFH pairing even more compelling
**Policy Evolution:**
- EU Social Climate Fund deployment from 2026
- Potential tightening of building regulations
- Expansion of grant programmes beyond current schemes
**Market Maturation:**
- Installation costs declining as market scales
- Greater consumer awareness reducing education barriers
- More competitive installer market (though still demand-led through 2030)
**System Innovation:**
- Lower-profile retrofit solutions improving feasibility
- Combined heating/cooling systems growing in southern climates
- Renewable integration (solar thermal, ground source) becoming more common
## Access the Complete Market Study
This article extracts key insights from our comprehensive 8-page European Underfloor Heating Market Case Study 2026. The full report includes:
✓ Detailed regional breakdowns for all European markets
✓ Complete installation cost analysis by system type
✓ ROI calculators with multiple scenarios
✓ Installer opportunity sizing and training pathways
✓ Comprehensive policy landscape analysis
✓ Competitive positioning strategies
✓ 10-year market forecasts with confidence intervals
**Download the free study:** [underfloorheating.info/studies/european-market-2026/](/studies/european-market-2026/)
No email required. No registration. Just data-driven market intelligence to inform your decisions.
The European underfloor heating market isn't just growing, it's fundamentally transforming. What was once a luxury upgrade is becoming standard specification, driven by the physics of heat pump efficiency, the economics of energy costs, and the policy support of the European green transition.
For UK homeowners, this means underfloor heating is increasingly the sensible choice for new builds, major renovations, and heat pump installations. The upfront premium is real, but the lifetime economics are compelling.
For installers, the next 5-7 years represent a unique opportunity to establish expertise in a market where demand significantly exceeds supply. The skills gap won't last forever, but those who position now will capture significant market share.
For the broader construction industry, underfloor heating has shifted from optional to essential in the context of decarbonising building stock and meeting efficiency targets.
The data is clear. The opportunity is real. And the market transformation is already underway.
---
## Related Articles
Looking to dive deeper into specific aspects of underfloor heating? These guides provide detailed information:
- [Underfloor Heating Costs: Complete UK Price Guide 2026](/underfloor-heating-costs/) - Detailed breakdown of installation and running costs
- [Heat Pumps and Underfloor Heating: The Perfect Partnership](/underfloor-heating-heat-pumps-guide-2026/) - Why heat pumps and UFH work together
- [Electric vs Water Underfloor Heating: Which System is Right for You?](/electric-vs-water-underfloor-heating-2026/) - Complete system comparison
- [Underfloor Heating Running Costs: How Much Does It Really Cost?](/underfloor-heating-costs/) - Annual operating cost analysis
- [Underfloor Heating Problems: Troubleshooting Guide](/underfloor-heating-problems/) - Common issues and solutions
For more technical specifications and planning resources, visit our [complete underfloor heating guide](/categories/beginner-guides/).
**Take the next step?** Compare free quotes from professional UFH installers via the [Underfloor Heating Directory](https://underfloorheating.directory/installers).
---
--- title: Retrofitting Underfloor Heating: Complete UK Costs & Systems Guide description: Learn how to retrofit underfloor heating in a UK home, including costs, low-profile systems, floor height and installation options to plan with confidence. url: https://underfloorheating.info/retrofitting-underfloor-heating/ published: 2025-10-05 updated: 2026-08-21 tags: ['retrofit', 'installation', 'electric UFH', 'wet UFH', 'heat pumps', 'costs', 'DIY'] ---
# Retrofitting Underfloor Heating: Complete UK Costs & Systems Guide
> **Quick Answer:** Yes, you can retrofit underfloor heating in an existing home. Electric systems start from just 1.8mm thin, no floor raise needed. Low-profile wet systems add 15–25mm. Whole-house retrofit costs £3,000–£13,000 depending on scope. Single-room electric mat: £240–£480 including installation. Key challenge: floor height, heat source compatibility, and insulation. Read on for a room-by-room difficulty guide and DIY vs professional breakdown. Explore retrofit guidance at [underfloorheating.info](https://underfloorheating.info/) and compare suitable installers through the [Underfloor Heating Directory](https://underfloorheating.directory/).
>
> 🧮 **[Get an instant cost estimate for your retrofit with our free calculator →](/underfloor-heating-cost-calculator/)**
## Is retrofitting underfloor heating in an existing home realistic?
Yes, retrofitting underfloor heating is realistic. You don't need to rip an existing house apart to get warm floors, but you do need to choose the system around your subfloor, available floor height and heat source.
UFH warms a room evenly from the floor up and runs at lower water temperatures than traditional radiators. That makes it a strong partner for modern [heat pumps](/underfloor-heating-heat-pumps-guide-2026/), and you get your wall space back because there are no bulky radiators.
The disruption is what worries most homeowners. I've seen plenty of retrofit ideas stall because people assume the job means a full-scale, messy renovation. Modern low-profile systems have changed that.
Ultra-thin [electric systems](/electric-underfloor-heating-systems/) can be as slim as 1.8mm and fit directly within a layer of tile adhesive. Low-profile [wet underfloor heating](/wet-underfloor-heating-ultimate-guide/) uses slim panels designed for renovations. So whether you've got a modern build or a period home, there's likely to be a workable route.
## Key benefits of upgrading to underfloor heating
**Ready to start your retrofit?** Compare quotes from professional UFH installers via the [Underfloor Heating Directory](https://underfloorheating.directory/installers).
Warm floors are only part of the appeal. A well-designed UFH system can improve comfort, efficiency and the way you use the room. Here's what you'll notice.
### Comfort
Underfloor heating uses radiant heat. It warms the floor, which then sends gentle warmth upwards to the people and objects in the room. Unlike radiators, it doesn't rely on convection currents of hot and cold air.
The result is a more even temperature from wall to wall, without the usual cold spots and draughts. It's a different sort of warmth, and most people notice it straight away.
### Energy efficiency
UFH runs at much lower temperatures than conventional radiators. That can reduce energy use and heating bills when the system is designed and controlled properly.
* Lower Operating Temperatures: [Wet underfloor heating systems](/wet-underfloor-heating-ultimate-guide/) typically run at 35°C–45°C. This is a stark contrast to radiators, which require water temperatures of 60°C–80°C to heat a room effectively.
* Reduced Energy Use: Because the heat source, whether a boiler or a heat pump, does not need to work as hard, energy consumption can be reduced in many homes compared to a radiator system.
* Optimal for Modern Heat Sources: The low-temperature operation makes UFH an ideal partner for renewable technologies. It works particularly well with [air and ground source heat pumps](/underfloor-heating-heat-pumps-guide-2026/), which are most efficient when producing lower-temperature water.
The installation costs money upfront, of course. The payback comes through lower energy use over time. Use our [underfloor heating costs](/underfloor-heating-costs/) guide to plan the budget properly.
### Design freedom
No radiators means free walls. You can put a sofa, bookshelf or sideboard where it suits the room instead of working around a heat source. It's a simple benefit, but it can completely change a small room's layout.
### Air quality
Underfloor heating can contribute to a healthier indoor environment. Radiator systems rely on convection, where hot air rises and circulates around a room. This movement of air can disturb and spread dust, pollen, and other allergens. Radiant heat, on the other hand, does not create these air currents. By warming the room gently from the floor up, it keeps the circulation of dust particles to a minimum. This makes it an excellent choice for individuals with allergies, asthma, or other respiratory sensitivities.
### Property value
Installing underfloor heating is a smart investment that can increase the long-term value of your home. It is often seen as a premium, high-end feature that is highly attractive to prospective buyers. A home equipped with an efficient and luxurious heating system stands out in the property market; [Find out about current European Underfloor Heating Market](/european-ufh-market-growth-analysis/). It signals that the house has been modernised and well-maintained, justifying a higher valuation and making it more appealing to discerning buyers.
## Pre‑installation assessment: is your home ready for retrofit UFH?
Before you buy anything, assess the property properly. The subfloor, insulation, floor finish and available height will decide which retrofit system makes sense. Getting this right now avoids expensive problems later.
### Analysing your existing subfloor
The type and condition of your subfloor will largely determine the most suitable retrofit UFH system. Each subfloor presents unique opportunities and challenges that must be addressed.
#### Underfloor heating on a solid concrete floor
Most concrete subfloors are well-suited for retrofit UFH, and there are several valid routes to choose from: a thin screeded system, a rigid overlay board system, or a [milled screed (in-cut) system](/milled-screed-underfloor-heating/) that cuts the pipe directly into the existing slab for zero floor build-up. Whichever route you take, the primary task is to prepare the surface, it must be clean, dry, and level before installing a low-profile system, with any large cracks or unevenness repaired with a self-levelling compound to create a stable base. See our [dedicated guide to UFH on existing concrete floors](/underfloor-heating-existing-concrete-floor/) for the full comparison of routes, costs and prep work.
#### Suspended timber floors
For homes with suspended timber floors, the goal is to add heating without a large increase in floor height. There are two primary solutions:
* Between joists: Heating pipes are fitted into the void between the floor joists, often supported by aluminium heat spreader plates. This method has a minimal impact on floor height as the system sits within the existing structure. Insulation is fitted below the plates to direct heat upwards.
* Over joists: Slim, pre-grooved panels are laid directly on top of the joists or existing floorboards. The heating pipes are then pressed into the channels within these boards. This provides excellent heat distribution but adds more to the floor height than between-joist methods.
See our [dedicated guide to UFH on suspended timber floors](/underfloor-heating-suspended-timber-floor/) for period-property considerations, ventilation requirements and costs.
#### Addressing challenges in older properties
Retrofitting UFH in period properties requires special attention. Uneven floors, a common feature in older homes, often need to be levelled before installation. A structural engineer should assess any quirks to ensure the floor can support the chosen system. When working with original floorboards or features, careful planning is needed to preserve the building's historical character. It is also vital to maintain subfloor ventilation to prevent moisture build-up and timber decay.
### The role of insulation
Don't treat insulation as an optional extra. Without it, a large share of the heat travels down into the subfloor or void, wasting energy and pushing up your bills. You want that heat moving into the room.
For retrofits, high-density insulation boards made from materials such as extruded polystyrene (XPS) give you high thermal resistance without taking up much height. They're strong enough to support the UFH system and final floor covering. Between joists, installers often use flexible quilt insulation instead.
### Managing floor height build‑up
Typical retrofit build‑up ranges (excl. floor finish):
| Retrofit system | Typical build‑up | Notes |
|---|---|---|
| Electric mat | 3–6mm | Best for tiled floors |
| Electric loose wire | 2–4mm | Most flexible layouts |
| Wet low‑profile overlay | 15–25mm | Good for ground floors |
| Between‑joist wet | 0mm above deck | Works in timber floors |
| [Milled screed / in‑cut wet](/milled-screed-underfloor-heating/) | 0mm | Milled into concrete/screed floors only |
The single biggest challenge in any retrofit project is the increase in floor height. Even a small addition can affect doors, skirting boards, staircases, and thresholds, creating trip hazards and requiring costly adjustments. To combat this, manufacturers have developed a range of slim, low-profile systems. These are engineered for existing homes.
* Electric systems can be incredibly thin. Some loose-wire options are only 1.8mm thick, while mat-based systems add as little as 3mm before the adhesive and floor finish. These offer a quick installation with minimal disruption.
* Wet (hydronic) systems are also available in low-profile designs. These typically consist of pre-grooved boards or panels that can be as slim as 15-22mm, offering the running cost benefits of a wet system without a major floor build-up.
### Compatibility with floor coverings
Your choice of floor covering has a direct impact on the performance of your UFH system. The best materials are those that conduct heat well, allowing for an efficient transfer of warmth into the room.
* Ideal Materials: Stone, ceramic tiles, and polished concrete have excellent thermal conductivity. They heat up quickly and retain warmth effectively, making them a perfect partner for UFH.
* Excellent Options: Engineered wood is highly recommended as it is more stable than solid wood when exposed to temperature changes. Luxury vinyl tile (LVT) and specific UFH-compatible carpets (with a low Tog rating, typically below 2.5) are also great choices.
* Important Considerations: Solid wood flooring can be used, but it must be properly acclimatised, and the UFH system must be operated carefully to prevent the wood from warping or shrinking. Similarly, always check the manufacturer's specifications for laminate flooring to ensure it is rated for use with underfloor heating.
For detailed flooring selection advice including heat output comparisons, temperature limits, and room-specific recommendations, see our [complete flooring guide](/best-flooring-underfloor-heating/).
## Choosing your system: electric vs wet UFH
So which should you choose, electric or wet UFH? It comes down to the size of the project, your upfront budget and how much the system will run. Here's the practical difference.
### Electric underfloor heating systems
[Electric UFH systems](/electric-underfloor-heating-systems/) use a network of wires or heating mats to warm the floor. They are often favoured for their simplicity and speed of installation, making them an excellent choice for smaller projects.
* Best suited for: Bathrooms, kitchens, single rooms, or areas where minimal disruption is key. They are ideal for projects where you cannot raise the floor height largely. See our [bathroom underfloor heating guide](/bathroom-underfloor-heating-guide/) for room-specific advice.
* Advantages:
* Lower upfront installation cost: The initial materials and labour for electric systems are typically less expensive. Retrofit installation costs average around £60-£85 per square metre.
* Rapid heat-up times: Electric systems can heat a room quickly, providing warmth on demand in as little as 20-30 minutes.
* Minimal floor build-up: Modern systems are incredibly thin, preserving existing floor levels and ceiling heights.
* Disadvantages:
* Higher long-term running costs: The primary drawback is the reliance on electricity, which is more expensive per unit than gas. As one industry report notes, electric UFH is quick to fit but more costly long-term, whereas wet systems are more expensive to install but cheaper to run. [(Source: amberufh.co.uk)](https://www.amberufh.co.uk/retrofitting-underfloor-heating-in-an-existing-property/)
#### Common Retrofit Types
* [Heating Mats](/underfloor-heating-mats-guide/) (e.g., StickyMat): These consist of a thin heating wire pre-spaced on a self-adhesive mesh mat. They are simple to roll out, making installation fast and straightforward. They add as little as 3mm to the existing floor height.
* Loose Wire Systems: These systems offer maximum flexibility. The loose wire can be laid to fit around fixtures and in irregular-shaped rooms. With profiles as thin as 1.8mm, they offer the lowest possible floor build-up.
* Foil Systems: These are designed for installation under floating floors like laminate or engineered wood. The heating cable is encased between layers of reinforced aluminium foil, which helps distribute heat evenly.
### Wet (hydronic) underfloor heating systems
[Wet UFH systems](/wet-underfloor-heating-ultimate-guide/) circulate warm water through pipes laid beneath the floor. They are connected to a central heat source, such as a boiler or heat pump. These systems are the benchmark for efficiency and are ideal for larger-scale projects.
* Best suited for: Whole-house renovations, new extensions, and for homeowners who prioritise long-term running costs and energy efficiency.
* Advantages:
* Lower running costs: Water-based systems are efficient, operating at much lower temperatures than radiators. This can make them up to four times cheaper to run than electric alternatives.
* Optimal for renewables: They are the most efficient choice when paired with renewable heat sources like [air or ground source heat pumps](/underfloor-heating-heat-pumps-guide-2026/), which produce hot water at the low temperatures that UFH requires.
* Disadvantages:
* Higher upfront installation cost: The materials and labour are more substantial, with installation averaging £135-£185 per square metre for retrofit projects.
* Slower to heat up and cool down: Due to the thermal mass of the floor and water, these systems take longer to respond to temperature changes.
#### Common Retrofit Types
* Low-Profile Overlay Systems (e.g., Nu-Heat LoPro or [Wunda](/wunda-underfloor-heating-review/)): These consist of slim, pre-grooved panels that are laid directly over the existing subfloor. The pipes are fitted into the grooves, and the system typically adds around 15-22mm to the floor height, making it a popular retrofit choice.
* Slim Screed Systems: In this method, pipes are clipped onto insulation boards laid over the existing floor. A thin layer of self-levelling compound is then poured over the pipes, creating a slim and strong new floor base.
* Between-Joist Systems (e.g., Warmup Econna): For properties with suspended timber floors, this is the ideal solution. Aluminium spreader plates or pre-grooved insulation panels are fitted between the joists, and the heating pipes are slotted into place. This results in zero floor build-up, as the system sits entirely within the existing floor structure.
#### Zero-build-up option for concrete floors: milled screed systems
There's a fourth option worth knowing about if you have a solid concrete or screed floor: **milled screed (also called in-cut or chase-cut) underfloor heating**. Rather than laying pipe on top of the existing floor, a specialist milling machine cuts shallow channels directly into the slab, and a continuous 16mm pipe is pressed flush into them, giving a full wet system **zero floor build-up**, with no screed curing wait before the flooring goes back down. It's only suitable for concrete or screed floors with enough depth to mill safely, not suspended timber, and every provider quotes on a project basis after a site survey rather than a standard rate. See our [full guide to milled screed underfloor heating](/milled-screed-underfloor-heating/) for how it works, where it does and doesn't apply, and who installs it in the UK.
## The retrofit installation process
A good retrofit starts with preparation. Rush the subfloor and you'll risk uneven heat, wasted energy and problems with the finished floor.
### Preparation
Before any heating elements are installed, the subfloor requires careful attention. This is the most critical phase for guaranteeing system efficiency and longevity. First, you must remove all existing floor coverings. This includes any carpet, tiles, laminate, or vinyl. The goal is to expose the original subfloor, whether it is concrete or timber, completely. Next, the subfloor needs thorough cleaning, repairing, and levelling.
* Cleaning: Remove all dust, grease, and construction debris from the surface. A clean base ensures proper adhesion for insulation and levelling compounds.
* Repairing: Inspect the subfloor for damage. For concrete, you must fill any large cracks. For suspended timber floors, secure or replace any loose or warped boards to create a stable base.
* Levelling: The surface must be flat to ensure even heat distribution. Use a self-levelling compound to correct any unevenness, as this prevents strain on the heating elements.
The final preparation step is laying a layer of high-performance insulation board. This is an essential step. Insulation directs heat upwards into the room, preventing it from escaping downwards into the subfloor. This improves the system's efficiency and reduces running costs.
### Laying the system
With the subfloor prepared, you can begin installing the heating system. Always follow the bespoke design plan provided by the manufacturer for optimal layout and performance. For wet systems, this involves laying the heating pipes across the insulated floor. Installers secure them into pre-grooved insulation panels or clip them directly onto the boards. Once the layout is complete, the pipes are connected to the manifold. The manifold is the system's control centre, distributing warm water through the individual pipe circuits.
For electric systems, the process involves rolling out heating mats or spacing loose wires. Electric systems often have a very low profile, which minimises the increase in floor height. Some loose wire systems are only 1.8mm thick, making them ideal for retrofitting. The wires are then connected to the thermostat and the mains power supply. A qualified electrician must complete this final electrical connection.
### Commissioning and finishing
Before laying the final floor, the system must be tested and commissioned. This step verifies that everything is working correctly and safely. For wet systems, the pipework is filled with water and pressure-tested. This test confirms the system is watertight and free from leaks. It is essential to perform this check before covering the pipes with screed. Discovering leaks after the floor is finished would require costly and disruptive work.
Next, a thin layer of screed or self-levelling compound is often applied over the system. This layer encases the pipes or wires, protecting them and helping to conduct heat evenly across the floor surface. The type and thickness of the screed depend on the specific system and final floor covering.
Finally, you can lay your chosen floor covering. It is important to allow the screed or levelling compound to cure completely first. The curing time varies, so always follow the manufacturer's guidance. Laying the floor too early can trap moisture and cause damage to both the heating system and the floor finish.
## Budgeting for your project: understanding the costs
Your budget needs to cover more than the heating kit. System type, property size, labour and project complexity all affect the final figure. For the full breakdown, see our [underfloor heating costs guide](/underfloor-heating-costs/).
### Installation cost breakdown
The primary cost difference lies between electric and hydronic (wet) systems. Installation quotes are typically provided on a per-square-metre basis, which includes the core materials and labour for fitting the system.
* Electric UFH: Installation costs for electric systems average between £60-£85 per m². These systems are generally faster and less disruptive to install, resulting in lower labour expenses.
* Wet UFH: Wet systems require a larger initial investment, averaging between £135-£185 per m². The higher price reflects more complex components like manifolds and pipework, plus the intensive labour needed to connect the system to a boiler or heat pump. ([Retrofit underfloor heating: installation and running costs for both systems](https://www.theunderfloorheatingstore.com/pages/retrofit-underfloor-heating)).
### Total project investment
When budgeting for a whole-house installation, these per-metre costs scale up. Several factors influence the final project price. The system type, the total floor area, and regional labour rates all play a large role. For a full UK home retrofit, the total investment can range from £3,000 to £13,000. ([Top Underfloor Heating Trends in the UK for 2026](https://www.thefloorheatingwarehouse.co.uk/underfloor-heating-guide/)). This broad range covers everything from a small electric system in a single zone to a detailed wet system throughout a larger property.
### Additional costs to consider
The per-square-metre installation quote rarely covers the entire project cost. To create an accurate budget, you must also factor in several other essential expenses.
* Professional Labour: Your project will require a qualified electrician to connect the system and its controls. A wet system also needs a certified plumber for connecting pipework to the manifold and central heating source.
* Subfloor Preparation: The existing subfloor must be clean, level, and stable. This may involve costs for self-levelling compounds or installing insulation boards, which are critical for preventing heat loss downwards.
* New Thermostats and Controls: Every heating zone requires a thermostat. Costs vary from basic dial models to [advanced smart thermostats](/smart-thermostats-underfloor-heating/) that offer remote control, learning algorithms, and energy monitoring to optimise UFH performance and reduce running costs.
* Final Floor Covering: The cost of the underfloor heating system does not include the price of your new flooring. Whether you choose tile, engineered wood, or vinyl, this must be budgeted separately.
## Integrating UFH with your home's heat source
UFH only works efficiently when it matches the home's heat source. Whether you've got a boiler or a heat pump, the temperatures and controls need to work together.
### Connecting to an existing boiler
Most modern boilers are compatible with wet underfloor heating systems. This includes combi, system, and conventional boilers. However, they cannot connect directly. Boilers produce water at high temperatures (typically 60-80°C) for radiators, which is too hot for UFH. A UFH system requires much lower water temperatures, usually between 35°C and 50°C. To achieve this, a thermostatic mixing valve (also called a blending valve) is essential. The valve blends hot water from the boiler with cooler water returning from the UFH pipe loops. This mix creates the precise, lower temperature needed to heat the floor safely and efficiently. The mixing valve performs several critical roles:
* Protects the Floor: It prevents excessively hot water from damaging the floor finish or cracking the screed.
* Ensures Comfort: It delivers a consistent and gentle warmth, avoiding hot spots.
* Improves Efficiency: By only using the necessary heat, it prevents the boiler from working harder than required.
In most setups, the mixing valve is part of the UFH manifold. The manifold also includes a dedicated circulation pump to ensure water flows correctly through the long UFH pipe circuits. [Check out our Underfloor Heating Manifold Guide](/underfloor-heating-manifold-guide/)
### UFH and heat pumps
Underfloor heating is the ideal partner for air source and ground source heat pumps. Heat pumps operate most efficiently when producing water at low temperatures. They consume much less energy to produce water at 40°C than at 60°C. This perfectly matches the requirements of a UFH system.
Pairing the two creates an efficient heating system. Wet UFH suits the low-temperature water output from heat pumps, helping you maximise the Coefficient of Performance (CoP) and reduce energy bills. [Source: homebuilding.co.uk](https://www.homebuilding.co.uk/advice/retrofit-underfloor-heating). Our [heat pump and UFH integration guide](/underfloor-heating-heat-pumps-guide-2026/) explains the setup in more detail.
This combination is an excellent way to future-proof your home. As the UK moves towards more sustainable heating solutions, a heat pump and UFH system will ensure your property remains efficient, comfortable, and environmentally friendly for years to come.
### Smart controls and zoning
To maximise the benefits of your UFH system, advanced controls are vital. Smart thermostats allow you to manage your heating with precision, often from a smartphone app. You can set detailed schedules and adjust temperatures remotely. You only use energy when needed.
Underfloor heating is also perfectly suited for zoning. A UFH manifold distributes water to multiple pipe loops, and each loop can be controlled as an independent zone. This means you can set different temperatures and schedules for different rooms. For detailed guidance on planning your zones, including pipe layouts and manifold configuration, see our [complete zoning guide](/underfloor-heating-zoning-complete-guide/). For example, you could heat the living areas during the day and the bedrooms only in the evening and morning. This level of control prevents energy wastage in unoccupied rooms and improves comfort and running costs. For hybrid systems that use both UFH and radiators, separate zone controls are important due to their different response times.
Retrofitting UFH is realistic in most UK homes, but the system has to suit the building. Get the subfloor, insulation and floor height right, and you'll get even radiant warmth without major structural changes.
My advice is simple: start with a professional heat loss calculation. That tells you what each room actually needs and stops you buying a system based on guesswork. Then [get detailed quotes from certified installers](/underfloor-heating-quotation/) so you can compare the full cost and disruption, not just the kit price.
If you encounter retrofit-specific issues such as cold zones, uneven heating, floor height problems, or integration challenges with existing heating systems, see our [complete troubleshooting guide](/underfloor-heating-problems/) for step-by-step diagnostics and solutions tailored to retrofit installations.
Planning UFH for a specific project type? See our dedicated guides for [loft conversions](/underfloor-heating-loft-conversion/), [basements](/underfloor-heating-basement/), and [garage conversions and garden rooms](/underfloor-heating-garage-garden-room/), each has its own floor-height, insulation or waterproofing considerations beyond this general guide. If you're new to underfloor heating, start with our [beginner's guide to underfloor heating](/underfloor-heating-beginners-guide/) to understand the fundamentals before planning your retrofit project. For an overview of the leading UK suppliers and retrofit-specific systems, see our [Best Underfloor Heating Brands UK Guide](/underfloor-heating-brands/).
**Ready to transform your home?** Find experienced UFH retrofit specialists via the [Underfloor Heating Directory](https://underfloorheating.directory/installers).
---
--- title: Smart Thermostats for Underfloor Heating: 2026 Guide description: Discover how smart thermostats unlock the full potential of underfloor heating with intelligent control, energy savings, and optimal comfort in UK homes url: https://underfloorheating.info/smart-thermostats-underfloor-heating/ published: 2025-10-05 updated: 2026-08-21 tags: ['smart thermostat', 'underfloor heating controls', 'smart home', 'energy efficiency', 'heating automation', 'UFH controls', 'wireless thermostat'] ---
# Smart Thermostats for Underfloor Heating: 2026 Guide
## Choosing a smart thermostat for underfloor heating
**Ready to start your project?** Plan it with the [Underfloor Heating Directory](https://underfloorheating.directory/) and explore more practical guidance at [underfloorheating.info](https://underfloorheating.info/), then find qualified underfloor heating installers through the [installer directory](https://underfloorheating.directory/installers).
Underfloor heating responds slowly, so the thermostat matters more than most people realise. The wrong controls let the floor overshoot and waste energy. The right ones learn how your floor behaves and switch the heat off before the room gets too warm.
I'll explain why UFH needs specialised control, which features are worth paying for and how the main systems compare. You can also [find out about the current European Underfloor Heating Market](/european-ufh-market-growth-analysis/).
## Quick Comparison: Top Smart Thermostats for UFH (2026)
| Feature | **Honeywell Evohome** | **Heatmiser Neo** | **Tado X** | **Drayton Wiser** | **ENGO Controls** |
|---------|---------------------|------------------|-----------|------------------|------------------|
| **Best For** | Complex properties | UK UFH specialists | Modern simplicity | Budget-conscious | Entry-level smart |
| **Max Zones** | 12 | 32 | Unlimited | 16 | 8 |
| **Price Range** | £££ | ££ | ££-£££ | ££ | £ |
| **UFH Compatible** | ✓ Excellent | ✓ Excellent | ✓ Very Good | ✓ Very Good | ✓ Good |
| **Learning Algorithm** | ✓ | ✓ | ✓ | ✓ | ✗ |
| **Geofencing** | ✓ | ✓ | ✓ (subscription) | ✓ | ✓ |
| **Voice Control** | Alexa, Google | Alexa, Google, HomeKit, IFTTT | Alexa, Google, HomeKit | Alexa, Google | Alexa |
| **Open Window Detection** | ✓ | ✓ | ✓ | ✓ | ✓ |
| **Floor Sensor** | ✓ | ✓ | ✓ | ✓ | ✓ |
| **Energy Reports** | ✓ | ✓ | ✓ | ✓ | Basic |
| **UK Support** | Excellent | Excellent (UK-based) | Very Good | Excellent | Growing |
| **Installation** | Professional recommended | DIY or Professional | Easy DIY | Easy DIY | DIY |
| **Subscription Required** | ✗ | ✗ | Optional (Auto-Assist) | ✗ | ✗ |
**Legend:** £ = Under £150 | ££ = £150-£250 | £££ = £250+
*This table provides a snapshot comparison. Read the detailed reviews below to understand which system best matches your specific needs.*
## Why Standard Thermostats Fall Short with Underfloor Heating
Unlike [radiators](/underfloor-heating-vs-radiators/), UFH has high thermal mass. It warms up and cools down slowly. That's why good control isn't a luxury. It's what keeps the room comfortable without wasting heat.
### The Problem with Latency and Overshoot
The slow response of underfloor heating creates significant challenges for basic thermostats, leading to wasted energy and fluctuating room temperatures. An underfloor heating system can take several hours to reach the desired temperature and hours to cool down once turned off because the floor slab itself holds vast amounts of heat.
A simple on/off thermostat causes the system to overheat the space. It calls for heat and keeps the system running until the room air reaches the target temperature. By this point, the floor has stored far too much thermal energy. The thermostat switches off, but the floor continues to radiate heat, pushing the room temperature well past the setpoint. This effect, known as "overshoot," leads to uncomfortable warmth and wastes energy.
**The Smart Solution:** An underfloor heating smart control system solves this problem through learning algorithms that understand your home's specific heat-up and cool-down cycles. The thermostat turns the heating off pre-emptively, well before the target is reached, using the residual heat stored in the floor to coast perfectly to the desired temperature, preventing overshoot and maintaining a stable, comfortable environment.
For more on how different UFH systems work, see our [Ultimate Guide to Underfloor Heating](/underfloor-heating-beginners-guide/).
## The Evolution of Home Heating Controls
Thermostats have moved from simple manual dials to controls that learn how the building behaves. Here's what each level actually gives you.
### Level 1: Manual and Dial Thermostats
Manual thermostats are the most basic form of heating control. These simple devices require you to physically adjust a dial or switch to set the temperature. They operate on a simple "on/off" principle.
This means you must be present to make any changes. If you want the house to be warm when you wake up, you have to get up to turn on the heating. Constant manual adjustment is necessary for any temperature changes throughout the day.
### Level 2: Programmable Thermostats
Programmable thermostats introduced basic automation. They allow users to set a time-based heating schedule. For example, you can program the heating to turn off after you leave for work and turn on again before you return.
While an improvement, these thermostats are inflexible. They cannot react to a change in your daily routine, such as coming home early. They also cannot adapt to the unique thermal properties of your floor, like the slow response time of a screed underfloor heating system. While they offer energy savings, their potential is limited. Programmable thermostats can reduce heating and cooling bills, but smart models can achieve greater savings through advanced optimisation. ([Source: UK Department for Energy Security & Net Zero](https://assets.publishing.service.gov.uk/media/6480a9bcb32b9e0012a963e1/sens-smart-energy-thermostat-sen-st-evaluation.pdf))
### Level 3: Smart Thermostats
Smart thermostats add remote access, learning and automation. Used properly, those features keep the temperature steadier and reduce wasted energy.
Key features include remote control via smartphone app, learning algorithms that automatically create efficient schedules, location-based automation that adjusts heating when you leave or return, and weather adaptation that prevents overheating on sunny days. These features make smart thermostats ideal for underfloor heating by intelligently managing the system's slow warm-up times.
## Core Benefits of a Smart Thermostat for Your UFH System
A smart UFH thermostat does more than let you change the temperature from your phone. It can improve comfort, cut waste and make a slow floor easier to control.
### Superior Energy Efficiency
Traditional thermostats struggle with the high thermal mass of UFH systems. They often overheat the floor, wasting energy and causing uncomfortable temperature swings. A smart UFH thermostat eliminates this inefficiency.
It uses predictive heating algorithms, like Model Predictive Control (MPC), to learn your home's unique thermal properties. The system anticipates how long it takes to heat up and cool down, running the system for the precise amount of time needed. This prevents temperature overshoots and significantly reduces energy consumption.
Research highlights the impact of these advanced controls. A study from Purdue University found that a home using a predictive control system reduced its heating energy consumption by 19% over 40 days. This resulted in an estimated annual saving of £240 for that single household, all while maintaining excellent comfort levels. To understand the full financial picture of running underfloor heating, see our [comprehensive costs breakdown](/underfloor-heating-costs/).
### Unmatched Comfort & Control
A smart thermostat learns the floor's response time and maintains steadier heat without the hot and cold cycles of older controllers. Connect it to Wi-Fi and you can adjust the system from anywhere through the app.
### Intelligent Automation & Location Awareness
Smart thermostats bring powerful automation through geofencing, which uses your smartphone's location to manage your system automatically. The thermostat detects when the last person leaves and lowers the temperature to an energy-saving level. As you begin your journey home, it activates the heating at the perfect moment to ensure the house is warm upon arrival. This removes the need to heat an empty house and can reduce heating bills by an average of 10-12%.
### Data-Driven Insights
An underfloor heating smart control system acts as an energy-monitoring tool. The associated app provides detailed reports on your energy usage, often broken down by day, week, or even specific rooms.
These data-driven insights help you understand your consumption patterns. You can identify which areas are most expensive to heat or see the financial impact of lowering the temperature by a single degree. This feedback empowers you to make informed adjustments to your heating schedule, with some surveys suggesting that 60% of users change their habits to achieve further savings after reviewing their energy data.
For more on reducing heating costs, see our [Underfloor Heating Costs Guide](/underfloor-heating-costs/).
## Must-Have Features for an Underfloor Heating Smart Thermostat
Not every smart thermostat suits UFH. These are the features I'd check before buying.
### Multi-Zone Control: The Essential Foundation
Underfloor heating is almost always installed in distinct zones, such as the kitchen, living room, or bathroom. Effective management of this setup requires a system that can control each zone independently. For a comprehensive guide on planning and implementing zones effectively, see our [complete zoning guide](/underfloor-heating-zoning-complete-guide/). A dedicated smart thermostat for each area is the most effective approach.
You can set unique temperatures and schedules for each room, having the [bathroom](/bathroom-underfloor-heating-guide/) warm for your morning routine while keeping the living room cooler until evening. This granular control maximises both comfort and energy efficiency.
### Advanced Sensor Technology
The most capable smart thermostats for UFH use sophisticated sensors to gather precise data and make smarter heating decisions.
- **Dual Sensing:** Top-tier UFH thermostats utilise both an air sensor and a floor sensor. The air sensor measures the room's ambient temperature to maintain overall comfort. The floor sensor monitors the temperature of the floor surface itself. This dual approach allows you to set a maximum floor temperature, which is essential for protecting sensitive flooring materials like engineered wood or luxury vinyl tile from overheating.
- **Humidity Sensing for Cooling:** If your system runs a reversible heat pump, room humidity sensors also underpin [UFH cooling mode](/heat-pump-underfloor-cooling/), where the controller uses live humidity readings to set a safe minimum flow temperature and prevent condensation forming on the floor.
- **Open-Window Detection:** This clever feature detects a sudden, sharp drop in a room's temperature, such as when a window or door is opened. In response, the thermostat automatically pauses the heating in that specific zone. This prevents the system from wasting energy trying to heat a room that is being cooled by outside air.
### Floor Temperature Limits: Protecting Your Flooring
One of the most critical yet often overlooked features of an underfloor heating thermostat is the ability to set maximum floor temperature limits. This isn't just about comfort, it's about protecting your flooring investment from heat damage.
#### The 27°C Rule
The industry-standard maximum floor temperature for underfloor heating is **27°C (80°F)**. This limit exists because many popular flooring materials can be damaged by sustained exposure to higher temperatures. Wood flooring is particularly vulnerable: excessive heat causes timber to dry out, leading to warping, cracking, gaps between boards, and voiding of manufacturer warranties. Engineered wood, luxury vinyl tile (LVT), laminate, and even some carpets with certain underlay types all have heat sensitivity that makes the 27°C limit essential.
This is precisely why **dual-sensor thermostats** are so important for UFH systems. A thermostat with only an air temperature sensor has no way of knowing how hot your floor actually is. It will continue running the heating until the room air reaches your target temperature, potentially driving the floor surface well above safe limits. By the time you notice damage, it's often too late, and expensive to repair.
#### How Floor Sensors Protect Your Investment
A quality UFH thermostat uses a **floor probe sensor** installed beneath your flooring during installation. This probe continuously monitors the actual floor surface temperature. You can set a maximum floor temperature limit (typically 27°C), and the thermostat will never allow the floor to exceed this threshold, even if the room air temperature hasn't yet reached your target setting.
For optimal control, the best thermostats use **both air and floor sensors simultaneously**. The air sensor ensures room comfort while the floor sensor acts as a safety limit. This dual approach is particularly important in well-insulated rooms where the air might take longer to warm up, tempting a single-sensor system to overheat the floor.
When evaluating thermostats, always confirm they support floor sensor probes and allow you to set maximum floor temperature limits. All the systems recommended in this guide include this essential protection feature, but the sophistication of implementation varies. Professional installation ensures your floor sensor is positioned correctly for accurate readings.
### Learning Algorithms & Predictive Scheduling
Modern thermostats actively learn your home's unique thermal characteristics to optimise heating schedules. An adaptive thermostat calculates how long each room takes to heat up and cool down, then starts the heating at the perfect moment to reach your desired temperature right on schedule, without overshooting and wasting energy. This is especially important for UFH systems where the floor continues radiating heat long after the heating switches off.
### Seamless Smart Home Integration
A truly smart thermostat should integrate flawlessly with the rest of your connected home for convenient, centralised control.
- **Voice Control:** Look for compatibility with major smart home ecosystems. The ability to adjust the temperature with a simple voice command via Amazon Alexa, Google Assistant, or Apple HomeKit adds a significant layer of convenience.
- **Connectivity Protocols:** While most smart thermostats connect to your home network via Wi-Fi, other protocols can create a more robust system. Technologies like Zigbee create a dedicated mesh network for smart devices, which can be more reliable than relying on a busy Wi-Fi network. For future-proofing, look for emerging standards like Matter. The Matter protocol aims to unify smart home devices, making interoperability between brands much simpler for consumers in the future.
## Understanding LOT 20 Compliance for UFH Thermostats
When shopping for an underfloor heating thermostat in the UK, you'll frequently encounter references to "LOT 20 compliance." Understanding what this means is important for making an informed purchase.
### What is LOT 20?
LOT 20 is UK legislation originating from the European Ecodesign Directive (2009/125/EC) that came into effect in January 2018. Despite Brexit, these regulations remain in force in the UK as they align with the government's carbon reduction targets and energy efficiency goals. LOT 20 establishes minimum efficiency standards for electric heating products sold in the UK, including underfloor heating thermostats.
The directive requires all electric heating systems to achieve a minimum efficiency rating based on their built-in energy-saving features. For thermostats, this means they must include specific functionality that actively reduces energy waste. A manual thermostat with just an on/off switch doesn't meet LOT 20 standards, as it lacks the intelligence to optimise energy consumption.
### LOT 20 Compliant Features
To meet LOT 20 requirements, an underfloor heating thermostat must include several energy-saving features. These typically include:
- **Programmable scheduling** with multiple time periods per day
- **Adaptive start functionality** that learns your floor's heat-up time
- **Open window detection** that pauses heating when temperature drops suddenly
- **Temperature limiting** to prevent overheating
- **Presence detection** or manual control override options
All the smart thermostats recommended in this guide (Evohome, Heatmiser Neo, Tado, Drayton Wiser, and ENGO) are LOT 20 compliant. This compliance isn't just a legal checkbox, these features directly translate into lower energy bills and reduced carbon emissions. When purchasing a thermostat, always verify LOT 20 compliance to ensure you're investing in a system that will deliver genuine energy savings and meet current UK building regulations.
## Choosing the Right System: Compatibility and Installation Guide
Technical compatibility is the most important step in selecting a thermostat. Getting this wrong can mean your chosen device simply will not work. This smart thermostat underfloor heating installation guide will help you check the key requirements.
### Step 1: Identify Your Underfloor Heating Type
Your first task is to confirm which type of underfloor heating (UFH) system you have. The thermostat's role is different for each one.
- **Electric (Dry) Systems:** These systems use heating mats or wires directly powered by your home's electricity. They require a thermostat that can handle a higher electrical load, typically 16 Amps. The thermostat acts as a switch, directly controlling the power sent to the floor.
- **Hydronic (Wet) Systems:** These systems circulate hot water through pipes under the floor. The thermostat does not directly control the boiler. Instead, it sends a signal to a central wiring unit, which then manages zone valves on the manifold to direct the hot water.
For more on system types, read our [Electric vs Water Underfloor Heating guide](/electric-vs-water-underfloor-heating-2026/) and [Bathroom Underfloor Heating Guide](/bathroom-underfloor-heating-guide/).
### Step 2: Verify Thermostat Compatibility
Once you know your system type, you must verify the technical specifications. Always consult the manufacturer's documentation for both your UFH system and the new thermostat.
- **Voltage:** Check if your system is Line Voltage (240V in the UK) or Low Voltage (24V). Most UFH-specific thermostats are designed for Line Voltage, but you must ensure the device you choose matches your system's requirements.
- **Wiring:** The thermostat must be able to communicate with your heating system. For wet systems, this means connecting to the UFH wiring centre. Understanding how a wiring centre coordinates signals between thermostats and zone actuators is crucial for a successful hydronic UFH installation. ([Source: Underfloor Heating Manifolds Explained](https://www.underfloorheatingtradesupplies.co.uk/blog/underfloor-heating-manifolds-explained/)) Some modern setups may use a wireless underfloor heating thermostat to communicate with the receiver.
- **Floor Sensor Probe:** If you are replacing an old thermostat, check the resistance of the existing floor sensor. This is measured in Ohms (e.g., 10kΩ). The new thermostat must be compatible with the sensor's Ohm rating to read floor temperatures accurately.
### Step 3: Plan the Installation
Proper installation is essential for safety and performance. The complexity can vary greatly.
- **DIY:** If you are experienced with home electrics, replacing an existing thermostat can be a simple job. Always turn off the power to the circuit at your consumer unit (fuse box) before you start.
- **Professional Help:** For new installations, complex multi-zone setups, or if you have any doubts about wiring, hire a professional. A qualified electrician or heating engineer can ensure the system is installed correctly and safely.
For installation guidance, see our [Retrofitting Underfloor Heating Guide](/retrofitting-underfloor-heating/).
## Top Smart Thermostat Systems for Underfloor Heating: A Comparison
Choosing the right smart control system is crucial for maximising the efficiency of your underfloor heating. The best systems offer granular, room-by-room control, which is essential for managing multiple UFH zones effectively. Here is a comparison of leading smart thermostats well-suited for underfloor heating in the UK.
**Important Note:** The UK smart thermostat market has evolved significantly, with Google discontinuing Nest thermostats in Europe in 2026. This has opened opportunities for UK-focused manufacturers who specialise in underfloor heating control.
### 1. For Ultimate Granular Control: Honeywell Home Evohome
Honeywell Home Evohome is often considered the gold standard for complex heating setups. It excels in homes with numerous zones or a mix of underfloor heating and radiators.
- **Best For:** Large or complex properties that require precise control over many individual heating zones.
- **Pros:** Unparalleled flexibility with individual schedules and temperatures for every room. Robust and reliable platform built on years of heating control expertise. Modern installation is streamlined using tools like the "Resideo Pro" App, which guides installers through configuring UFH controllers and zones.
- **Cons:** Evohome has a higher upfront cost compared to other systems. The initial configuration can also be more complex, often benefiting from professional installation to ensure it is set up correctly.
### 2. For UK-Designed UFH Excellence: Heatmiser Neo
Heatmiser is a UK manufacturer that has specialised in heating controls since 1968. Their Neo series is purpose-built for the UK market and excels at underfloor heating control.
- **Best For:** Homeowners wanting a UK-designed system with dedicated UFH expertise and local support. Perfect for multi-zone installations combining UFH, radiators, and hot water control.
- **Pros:** Comprehensive multi-zone control with self-learning preheat algorithms that optimise UFH's slow response times. Integrates with all major smart home platforms (Alexa, Google Home, HomeKit, IFTTT). Excellent reputation for reliability and build quality, with products designed specifically for UK heating systems. Competitive pricing, typically positioned between Tado and Evohome. Award-winning system (voted best smart thermostat brand 2018-2019).
- **Cons:** The interface may feel less modern than Tado's sleek design. Brand recognition is lower outside the UK heating industry.
### 3. For Modern Design & Simplicity: Tado Wireless Smart Thermostat X
Tado focuses on a clean user experience, minimalist design, and powerful app-based features. It's a great choice for those who want smart, automated heating with minimal fuss. Following Google's exit from the UK market, Google is offering existing Nest users 50% off Tado thermostats.
- **Best For:** Tech-savvy users who appreciate a sleek interface and powerful automation features. Google's recommended Nest replacement.
- **Pros:** Excellent geofencing and open-window detection features. The system is modular, allowing you to start small and easily add more thermostats or radiator valves later. Clean, intuitive app interface with excellent user experience.
- **Cons:** Some of its most effective energy-saving features are part of the optional "Auto-Assist" subscription (additional cost). Without this subscription, you receive notifications to adjust the heating but must do so manually.
### 4. For a Balanced & Accessible System: Drayton Wiser Multi-room Kit
Drayton's Wiser system offers comprehensive multi-zone control without the premium price tag of some competitors. It provides a solid balance of features, reliability, and value.
- **Best For:** Homeowners looking for a powerful and reliable multi-zone system that is more budget-friendly.
- **Pros:** Excellent value for money. Easily creates a unified system by controlling underfloor heating zones and individual radiators with smart TRVs from a single app. For those considering heat pumps, smart controls are essential for optimisation.
- **Cons:** The physical design of the thermostat and the app interface may feel less premium or intuitive when compared to Tado or Evohome.
### 5. For Budget-Conscious Smart Control: ENGO Controls
ENGO Controls offers affordable smart thermostats with strong UFH support and modern connectivity options, making smart heating accessible to more homeowners.
- **Best For:** Budget-conscious homeowners who still want smart features and multi-zone capability. Those building ZigBee-based smart home systems.
- **Pros:** The E-ONE and E20i models offer WiFi and ZigBee 3.0 connectivity at competitive prices. The ECB62-ZB wireless wiring centre supports up to 8 heating zones (6 wireless, 2 wired), making it suitable for whole-house UFH installations. Compatible with Alexa and major smart home apps (Tuya, SmartLife). Growing availability through UK retailers. Good value for money compared to premium brands.
- **Cons:** Newer brand with less established reputation than competitors. User interface and app may lack the polish of premium alternatives. Limited installer training and support network compared to established brands.
### Important: Google Nest Learning Thermostat - Discontinued in UK
**Google has discontinued all Nest thermostats in the UK and Europe as of 2026.** The company cited Europe's diverse heating systems as too challenging to support effectively.
- **Current Status:** No new Nest thermostats are available for purchase in the UK. Existing stock of 3rd generation units may still be available from some retailers while supplies last.
- **Existing Users:** 1st and 2nd generation Nest thermostats lost app support on 25th October 2025. These models can no longer be controlled remotely, though manual control on the device still works. 3rd generation models continue to receive security updates.
- **Migration Offer:** Google is offering affected Nest users 50% off the Tado Smart Thermostat X as a replacement option.
- **UFH Limitations:** Even when available, Nest lacked native support for the complex multi-zone wiring required by most wet underfloor heating manifolds. It was designed for single-zone control and required complex third-party solutions for multi-zone UFH setups.
[Check out our Underfloor Heating Manifold Guide](/underfloor-heating-manifold-guide/)
**Recommendation:** For new UK installations, choose from the actively supported brands listed above (Heatmiser, Tado, Evohome, Wiser, or ENGO). These manufacturers are committed to the UK market and offer superior multi-zone UFH support.
For comparisons with traditional heating, see our [Underfloor Heating vs Radiators guide](/underfloor-heating-vs-radiators/).
## Cost Comparison: Investment and Running Costs
Understanding the full cost picture helps you make an informed decision. Here's a breakdown of typical costs for each system in the UK market.
### Initial Investment Comparison
| Brand | Thermostat Cost | Wiring Centre/Hub | Total Single Zone | Multi-Zone (4 zones) | Installation |
|-------|----------------|-------------------|-------------------|---------------------|--------------|
| **Honeywell Evohome** | £180-£220 per zone | £180-£250 | £360-£470 | £900-£1,200 | £200-£400 (recommended) |
| **Heatmiser Neo** | £130-£180 per zone | £200-£300 | £330-£480 | £720-£1,020 | £150-£300 |
| **Tado X** | £200-£230 per zone | £80 (hub) | £280-£310 | £880-£1,000 | £100-£200 (easy DIY) |
| **Drayton Wiser** | £140-£180 per zone | Included | £140-£180 | £560-£720 | £100-£200 (easy DIY) |
| **ENGO Controls** | £80-£120 per zone | £120-£180 | £200-£300 | £440-£660 | £100-£150 (DIY-friendly) |
*Prices are approximate retail prices as of July 2026. Multi-zone estimates include wiring centre/hub where required.*
### Ongoing Costs
| Brand | Subscription Required? | Annual Cost | Features Behind Paywall |
|-------|----------------------|-------------|------------------------|
| **Honeywell Evohome** | ✗ No | £0 | All features included |
| **Heatmiser Neo** | ✗ No | £0 | All features included |
| **Tado X** | Optional | £0-£35/year | Auto-Assist features (auto adjustments, air quality, energy IQ+) |
| **Drayton Wiser** | ✗ No | £0 | All features included |
| **ENGO Controls** | ✗ No | £0 | All features included |
### Return on Investment
Smart thermostats typically pay for themselves through energy savings. Based on the research cited earlier:
- **Predictive algorithms**: 19% energy reduction (Purdue University study) = **£240/year savings**
- **Geofencing**: 10-12% additional savings = **£100-£120/year**
- **Combined potential savings**: **£340-£360/year** for an average UK home
**ROI Timeline:**
- Budget system (ENGO): **Payback in 7-12 months**
- Mid-range (Heatmiser, Wiser): **Payback in 12-18 months**
- Premium (Evohome): **Payback in 18-30 months**
These calculations assume an average UK heating bill of £1,000-£1,200 annually. Larger homes with higher bills will see faster payback periods, while smaller properties may take longer. The energy efficiency of your home's insulation also significantly impacts savings.
### Professional Installation: Worth the Cost?
While many thermostats claim "easy DIY installation," professional installation offers several advantages:
**When to DIY:**
- Replacing an existing thermostat (same location, compatible wiring)
- Single-zone electric UFH systems
- You're comfortable working with electrical systems
- Budget constraints are significant
**When to Use a Professional:**
- New multi-zone installations
- Wet UFH systems requiring wiring centre configuration
- Upgrading from basic to smart controls
- Any uncertainty about compatibility or safety
Professional installation costs (£100-£400) are often worthwhile for complex setups. An incorrectly installed thermostat can waste more in energy costs than the installation fee, and there's the risk of damage to your heating system or flooring if temperature limits aren't configured correctly.
Your underfloor heating system is a premium feature of your home. It deserves a control system that matches its quality. Moving beyond a basic thermostat to a smart, UFH-compatible model is a significant upgrade.
This is an investment in a more efficient and comfortable home. A smart control system optimises energy use through predictive algorithms, location-based automation, and data-driven insights, potentially saving 10-19% on heating costs while maintaining perfect comfort. Remote access means you never waste energy heating an empty house, and your floors are always warm exactly when you need them.
**Choosing the Right Brand in 2026:** With Google's exit from the UK market, it's more important than ever to choose a manufacturer committed to supporting UK customers long-term. UK-based brands like Heatmiser offer the advantage of local expertise and support, while established European manufacturers like Tado, Honeywell, and Drayton provide proven reliability. For budget-conscious installations, ENGO Controls offers modern features at accessible prices.
## Frequently Asked Questions
### General Smart Thermostat Questions
**Q: Will a smart thermostat work with my existing UFH system?**
A: Most likely, yes, but compatibility depends on your system type. Electric UFH systems are generally straightforward, requiring a thermostat rated for 16A at 240V. Wet (hydronic) systems need a thermostat compatible with your wiring centre or zone valves. Check your current thermostat's specifications and compare them with your chosen smart thermostat. When in doubt, contact the manufacturer or consult an installer.
**Q: Can I use Google Nest or Amazon Hive with underfloor heating?**
A: Google Nest has been discontinued in the UK and Europe as of 2026, so it's no longer available for new installations. Even when it was available, Nest lacked native support for multi-zone UFH systems. Amazon doesn't make a thermostat called "Hive", you may be thinking of the Hive Thermostat from British Gas, which works with wet UFH systems but not electric UFH due to the 16A requirement. For electric UFH, you need a thermostat specifically designed for high-load systems.
**Q: Do I need a separate thermostat for each room?**
A: For optimal comfort and energy efficiency, yes. Each UFH zone should have its own thermostat. This allows you to set different temperatures for different rooms (e.g., cooler bedrooms, warmer bathrooms) and create independent schedules. Some advanced systems can control multiple zones from a single interface, but each zone still needs its own sensor and control point.
**Q: What's the difference between WiFi and Zigbee thermostats?**
A: WiFi thermostats connect directly to your home WiFi network, making them easy to set up but potentially unreliable if your WiFi is crowded or unstable. Zigbee thermostats create a dedicated mesh network for smart home devices, which is often more reliable and doesn't congest your WiFi. However, Zigbee requires a hub. For UFH, reliability is crucial, so Zigbee can be advantageous in larger homes or those with many WiFi devices.
### Installation and Setup Questions
**Q: How difficult is it to install a smart thermostat myself?**
A: If you're replacing an existing thermostat in the same location, installation is usually straightforward, expect 30-60 minutes. You'll need to turn off power at the circuit breaker, disconnect the old thermostat, connect the new one following the wiring diagram, and configure it via the app. However, new installations, multi-zone setups, or wet UFH systems typically require professional help. Never work on electrical systems if you're uncomfortable with the process.
**Q: What happens if my WiFi goes down?**
A: Your thermostat will continue to operate based on its last programmed schedule. You simply won't have remote access or be able to make changes via the app until connectivity is restored. The heating system itself doesn't depend on internet connectivity. WiFi only enables remote control and smart features. Most thermostats also have manual controls on the unit itself for emergencies.
**Q: Do I need to replace my floor sensor?**
A: Usually not. If you have an existing floor sensor (the probe under your flooring), you can often reuse it with a new thermostat, as long as the resistance values match (typically 10kΩ or 12kΩ). Check your old thermostat's manual or use a multimeter to measure the sensor's resistance, then verify the new thermostat supports that value. If you're installing UFH for the first time, the floor sensor must be installed during floor construction.
**Q: Can I control multiple properties from one app?**
A: Yes, all the major smart thermostat brands (Evohome, Heatmiser, Tado, Wiser, ENGO) support controlling multiple locations from a single app account. This is useful if you have a holiday home or rental property. You can switch between properties in the app and manage each independently.
### Energy Savings and Efficiency Questions
**Q: How much money will a smart thermostat actually save me?**
A: Research suggests 10-19% energy savings are realistic, depending on your current setup and habits. For an average UK home spending £1,000-£1,200 annually on heating, this translates to £100-£240 per year. Savings are highest when upgrading from a basic manual thermostat and in homes where heating is often left on when no one's home. Multi-zone control with independent room temperatures typically delivers the best results.
**Q: Is the Tado subscription worth it?**
A: Tado's Auto-Assist subscription (£2.99/month or £24.99/year) adds convenience features like automatic temperature adjustments based on weather, air quality insights, and care & protect warnings. The core energy-saving features (geofencing, scheduling, remote control) work without a subscription, you just get manual notifications instead of automatic adjustments. Whether it's "worth it" depends on whether you want fully hands-off automation or are happy to make manual tweaks when prompted.
**Q: Will a smart thermostat reduce the warm-up time for my UFH?**
A: No, smart thermostats don't make your UFH heat up faster. The warm-up time is determined by your floor's thermal mass (the thickness and material of your screed or subfloor). However, smart thermostats use adaptive learning to *start* heating at the optimal time, so your floor reaches the desired temperature exactly when you want it. This creates the perception of faster heating because the room is warm when you need it, rather than making you wait.
**Q: Do smart thermostats work with heat pumps?**
A: Yes, but compatibility varies by brand. If you're using a heat pump with underfloor heating, look for thermostats with OpenTherm support or specific heat pump modes. Heatmiser Neo, Drayton Wiser, and Honeywell Evohome all offer good heat pump compatibility. Heat pumps work best with weather compensation and low-temperature operation, features that smart thermostats can help optimize. Check our [Underfloor Heating & Heat Pumps Guide](/underfloor-heating-heat-pumps-guide-2026/) for more details.
### Compatibility and Technical Questions
**Q: What's the difference between LOT 20 compliant and non-compliant thermostats?**
A: LOT 20 compliance means the thermostat includes mandatory energy-saving features like programmable schedules, adaptive start, and open window detection. Non-compliant thermostats (typically basic manual models) lack these features and are less energy-efficient. In the UK, electric heating installations should use LOT 20 compliant controls to meet building regulations and achieve meaningful energy savings. All smart thermostats are LOT 20 compliant by default.
**Q: Can I use smart TRVs (radiator valves) with my UFH thermostat?**
A: Yes, if you have a mixed heating system with both radiators and UFH. Brands like Drayton Wiser, Tado, and Evohome offer TRVs that integrate with their thermostat systems, allowing you to control all heating zones from a single app. This is ideal for homes where UFH is installed in some rooms (ground floor) and radiators in others (upper floors). Each system manages both heating types seamlessly.
**Q: What happens if I move house?**
A: Most smart thermostats can be uninstalled and taken with you. However, you'll need to leave the wiring centre (for wet systems) and floor sensors, as these are built into the heating infrastructure. Check whether your new home's heating system is compatible with your existing thermostats before moving. Some manufacturers offer trade-in or upgrade programs if you need to switch systems. The new homeowner will benefit from the smart heating infrastructure you leave behind.
**Q: Do smart thermostats need regular maintenance?**
A: Smart thermostats require virtually no maintenance beyond occasional software updates (which usually happen automatically via WiFi). Keep the thermostat screen clean and ensure nothing blocks the sensors. If temperature readings seem inaccurate, check that the thermostat isn't in direct sunlight or near heat sources. Battery-powered thermostats need battery replacement every 1-2 years, but most UFH thermostats are mains-powered.
**Q: What if my thermostat or UFH system isn't working correctly?**
A: If you're experiencing thermostat malfunctions, incorrect temperature readings, connectivity issues, or UFH system problems, see our [complete troubleshooting guide](/underfloor-heating-problems/). It covers thermostat-specific diagnostics including wiring issues, sensor problems, actuator failures, and communication errors between thermostats and heating systems.
---
**Still have questions?** Check the support pages for your specific thermostat brand, or consult with a qualified heating engineer for advice tailored to your installation.
Start with compatibility: is the system wet or electric, and how many zones do you need to control? Then look for floor-sensor support and learning algorithms that understand UFH's thermal mass. I'd also stick to an actively supported brand, because a smart thermostat is only useful while its app and services keep working.
For more guidance on UFH systems and heat pumps, see our [Underfloor Heating & Heat Pumps Guide](/underfloor-heating-heat-pumps-guide-2026/).
**Take the next step?** Compare free quotes from professional UFH installers via the [Underfloor Heating Directory](https://underfloorheating.directory/installers).
---
--- title: Underfloor Heating Costs UK 2026: Installation and Running Costs description: Underfloor heating costs £60 to £190 per m² in the UK. Compare electric and wet system installation, running costs and extras to budget with confidence. url: https://underfloorheating.info/underfloor-heating-costs/ published: 2025-10-01 updated: 2026-08-21 tags: ['underfloor heating costs', 'ufh costs uk', 'electric underfloor heating cost', 'wet underfloor heating cost', 'heating installation cost', 'home heating systems'] ---
# Underfloor Heating Costs UK 2026: Installation and Running Costs

> **Quick Answer:** Electric UFH costs £60–£120/m² to install; wet (water) systems cost £90–£190/m². A small bathroom (4 m²) runs from £240–£480; a 60 m² new build ground floor from £5,400–£7,800. Running costs favour wet systems for large areas, while electric suits single rooms and quick heat-ups. Read more practical UFH advice at [underfloorheating.info](https://underfloorheating.info/) or [compare UK installers](https://underfloorheating.directory/).
>
> 🧮 **[Use our free Underfloor Heating Cost Calculator for an instant personalised estimate →](https://underfloorheating.info/underfloor-heating-cost-calculator/)**
**Ready to get accurate quotes?** Compare prices from trusted underfloor heating installers via the [Underfloor Heating Directory](https://underfloorheating.directory/get-quotes).
## How this cost guide fits with the other UFH guides
This page is the **budgeting guide**. Use it when you need installed cost ranges, hidden extras, room examples and quote-checking guidance.
If you already know the system size and want day-to-day bills, use the [underfloor heating running costs guide](/underfloor-heating-running-costs-2026/). If you are still choosing between electric and wet UFH, use the [electric vs wet comparison](/electric-vs-water-underfloor-heating-2026/). If your main question is whether UFH beats radiators, use the [underfloor heating vs radiators guide](/underfloor-heating-vs-radiators/).
That distinction matters because upfront cost and running cost pull in different directions. A cheap electric mat can be the right answer for a bathroom, but the wrong answer for a 40m² kitchen-diner used all day. A wet system costs more to install, but it can make a heat pump or condensing boiler work much more efficiently.
## Is underfloor heating worth the cost?
Underfloor heating is worth considering when you are already replacing a floor, building an extension or planning a new home. It spreads heat across the floor instead of concentrating it around radiators, and it leaves the walls clear for furniture. Wet UFH also runs at lower water temperatures than traditional radiators, which suits modern boilers and heat pumps.
The snag is the upfront bill. Electric mats are affordable in one small room but expensive to run across a whole floor. Wet systems cost more to fit, especially in a retrofit, but make more sense for larger areas used every day.
This guide sets out what UK homeowners can expect to pay in 2026, from the kit and labour to floor preparation, controls and running costs. If you need the basics first, see [how underfloor heating works](/how-does-underfloor-heating-work/) and [whether underfloor heating is worth it](/is-underfloor-heating-worth-it/).
Related Reading: If you're new to underfloor heating, start with our [complete beginner's guide](/underfloor-heating-beginners-guide/) or explore our [electric vs water system comparison](/electric-vs-water-underfloor-heating-2026/). You can also browse our dedicated pages for [electric underfloor heating](/electric-underfloor-heating-systems/) and [wet underfloor heating](/wet-underfloor-heating-ultimate-guide/) systems.
## Understanding the two types of underfloor heating
Understanding the two main types of [underfloor heating](/underfloor-heating-beginners-guide/) is an important first step. The choice between an electric or water-based system directly impacts both initial installation fees and long-term running costs.
### Electric (Dry) Systems
[Electric UFH systems](/electric-underfloor-heating-systems/) work using a network of thin electric wires or pre-spaced heating mats. These elements are installed directly beneath your chosen floor covering. When switched on, electricity flows through the wires, generating radiant heat that warms the room from the ground up.
Best for:
- Single rooms and renovations. Their low profile makes them ideal for retrofitting into existing properties, including [bathrooms](/bathroom-underfloor-heating-guide/) and [kitchens](/kitchen-underfloor-heating/).
- Areas where raising floor height is an issue. The thin mats and wires add minimal height to the floor structure.
- Supplemental heating. They work well alongside an existing heating system to add comfort to specific areas.
Pros & Cons:
- Pros: Electric systems are generally cheaper and faster to install than their water-based counterparts. A typical electric UFH installation costs between £40 and £90 per square metre. They also heat up quickly, often reaching the desired temperature in 20-40 minutes, and require almost no maintenance once fitted.
- Cons: The primary drawback is higher running costs. As electricity is more expensive per unit than gas, these systems are less economical for heating large areas or an entire house.
### Water (Wet) Systems
Also known as hydronic systems, [water-based UFH](/wet-underfloor-heating-ultimate-guide/) works by circulating warm water through a series of pipes laid beneath the floor. This network of pipes is connected to a primary heat source, such as a central boiler or an energy-efficient [heat pump](/underfloor-heating-heat-pumps-guide-2026/).
Best for:
- New builds. The pipes can be easily integrated into the subfloor during the construction phase.
- Large-scale renovations and whole-house solutions. The lower running costs provide significant long-term savings across larger areas.
- Spaces requiring continuous, stable warmth.
Pros & Cons:
- Pros: Water systems have lower running costs and are considered more energy-efficient overall. When used with a modern boiler, they can reduce heating bills by up to 20% compared to [conventional radiators](/underfloor-heating-vs-radiators/). Once warm, the floor retains heat effectively, providing consistent comfort.
- Cons: The initial installation cost is higher, typically ranging from £100 to £190 per square metre. The [installation process](/underfloor-heating-installation-guide/) is more complex and disruptive, often raising the floor height, [sand/cement screed adds 65–75mm, liquid anhydrite 45–65mm](/underfloor-heating-screed/). These systems also have a much slower heat-up time, sometimes taking one to two hours to warm up.
[Check out our Underfloor Heating Manifold Guide](/underfloor-heating-manifold-guide/)
## Upfront installation costs: 2026 breakdown
The initial cost to install an underfloor heating system is a key factor for homeowners. Prices vary between electric and water-based systems, depending on project size and complexity. This section provides a detailed breakdown of the supply and installation costs per square metre (m²).
### Electric underfloor heating installation costs
Electric systems, often called 'dry' systems, are generally quicker and cheaper to install than their water-based counterparts. They are a popular choice for renovations and smaller, single-room projects.
- System Components: A typical installation includes heating mats or loose-lay wires, a thermostat for control, and essential insulation boards to maximise efficiency.
- Average Cost Per m²: In 2026, the average supply and installation cost for electric underfloor heating is £85 per m². However, prices typically range from £60 to £120 per m², influenced by the specific product and installer rates.
#### Example project scenarios
- Small Bathroom (4m²): The estimated total cost would range from £240 to £480 for supply and installation.
- Medium Kitchen (15m²): For a larger space, expect the total cost to be between £900 and £1,800.
Get Your Quote: For a personalised estimate based on your specific room dimensions and requirements, try our [Underfloor Heating Cost Calculator](https://underfloorheating.info/underfloor-heating-cost-calculator/).
### Water-based underfloor heating installation costs
Water-based systems, also known as 'wet' or hydronic systems, involve pumping warm water through pipes laid beneath the floor. While more expensive to install, they offer lower running costs.
- System Components: Key parts include the manifold to distribute water, pipes, a pump, system controls, and often a layer of screed. The system must also be connected to a primary heat source like a boiler or heat pump.
- Average Cost Per m²: The installation cost for a wet underfloor heating system generally ranges from £90 to £190 per m². Standard projects in new builds often fall within the £90 to £130 per m² bracket. More complex retrofit installations can push the price towards £190 per m².
#### Example project scenarios
- New Build Ground Floor (60m²): The total installation cost would likely be between £5,400 and £7,800, as new builds simplify the process.
- Large Open-Plan Extension (40m²): For a renovation project of this size, the estimated total cost would be between £3,600 and £7,600. See our [dedicated extensions guide](/underfloor-heating-extensions/) for heat loss calculation advice specific to extensions.
- Loft conversion or basement: costs vary more than a standard room due to floor-height or waterproofing constraints, see our guides to [loft conversions](/underfloor-heating-loft-conversion/) and [basements](/underfloor-heating-basement/) for realistic ranges.
### Underfloor heating cost by room
These totals apply the broad installed rates used throughout this guide: £60–£120/m² for electric and £90–£190/m² for wet UFH. They are useful first-pass budgets, not quotes. The heated floor area may be smaller than the room because installers normally exclude fixed kitchen units, baths and other permanent fittings.
| Typical project | Floor area | Electric UFH installed | Wet UFH installed |
| :--- | ---: | ---: | ---: |
| Bathroom | 4 m² | £240–£480 | £360–£760 |
| Kitchen | 12 m² | £720–£1,440 | £1,080–£2,280 |
| Living room | 20 m² | £1,200–£2,400 | £1,800–£3,800 |
| Extension | 30 m² | £1,800–£3,600 | £2,700–£5,700 |
| Full ground floor | 60 m² | £3,600–£7,200 | £5,400–£11,400 |
The 60 m² wet range is deliberately broad. A straightforward new build commonly lands in the existing £5,400–£7,800 bracket because it uses the lower £90–£130/m² new build rate. A difficult retrofit can move towards the £190/m² upper end.
### What pushes the cost up?
- **Floor preparation:** Uneven, damp or damaged subfloors need repair or levelling before any pipes or mats go down.
- **Screed and floor build-up:** Wet systems may need a new screed, while low-profile retrofit boards cost more than a simple new build installation.
- **Smart controls and zoning:** More thermostats, wiring centres and independently controlled rooms add hardware and electrician time.
- **Insulation:** Proper boards beneath the system cost extra upfront, but skipping them sends more heat into the structure below.
- **Poor access and site issues:** Awkward room shapes, fixed units, floor-height limits, door trimming, waste removal and difficult boiler or manifold routes all add labour.
### At a glance: electric vs wet system cost comparison
This table provides a simple summary of the key differences in upfront costs and suitability between the two system types.
| Feature | Electric (Dry) System | Water (Wet) System |
| :--- | :--- | :--- |
| Avg. Installation Cost (per m²) | £60 - £120 | £90 - £190 |
| Best Use Case | Single Rooms, Renovations | New Builds, Whole House |
| Installation Complexity | Low - Medium | High |
| Running Costs | Higher | Lower |
## Key factors that influence your final underfloor heating bill
There is no "one-size-fits-all" price for an underfloor heating (UFH) system. The final cost depends on a combination of project-specific factors. Understanding these variables will help you budget accurately and see where costs can be managed.
### New build vs retrofit project
The type of construction project is the most significant factor influencing the total cost.
- New Builds: Installing UFH in a new property is cheaper. The system is laid before floors and screed are in place. This simplifies the process, reduces labour time, and avoids disruptive work.
- Retrofitting: Adding UFH to an existing home is more complex and costly. It involves removing the current flooring, which adds to labour and disposal expenses. Other challenges include raising floor levels to accommodate the system, connecting to an existing heating network, and potentially requiring structural work. The cost to retrofit underfloor heating in an older home can range widely from £3,000 to £13,000 depending on the scope. Our [detailed retrofitting guide](/retrofitting-underfloor-heating/) covers all aspects of adding UFH to existing properties, while our [design and planning guide](/underfloor-heating-design-planning/) covers retrofit considerations in detail.
### System type and quality
The specific UFH system you choose directly impacts the price.
- Electric Systems: These systems vary in price. Simple electric mats offer a straightforward installation, while more flexible loose-wire systems allow for better coverage in irregularly shaped rooms but take longer to fit.
- Wet Systems: Traditional screed-based systems are common in new builds. For renovations, low-profile "overfloor" boards are often used as they can be laid on top of existing subfloors, minimising disruption. See our [Wunda underfloor heating review](/wunda-underfloor-heating-review/) for a worked example of overfloor retrofit pricing.
- Brand & Warranty: Premium brands often have a higher upfront cost. However, they typically provide greater reliability, better performance, and longer warranties, which can offer peace of mind and long-term value. For detailed comparisons of leading UFH manufacturers, see our [Best Underfloor Heating Brands UK Guide](/underfloor-heating-brands/).
### Project scope and labour
The size and complexity of the installation area are key cost drivers.
- Area Size: Larger areas generally have a lower cost per square metre. This is due to economies of scale, as materials can be bought in bulk and labour becomes more efficient over a larger space.
- Room Complexity: Square or rectangular rooms are the simplest and cheapest to fit. Irregularly shaped rooms with multiple corners or fixed obstacles require more time for planning and installation, increasing labour costs.
- Labour Costs: Prices for skilled labour vary by region across the UK. A qualified electrician is required for electric systems, while a plumber or heating engineer is needed for wet systems. Always ensure your installer is certified for the work. Check our [installation guide](/underfloor-heating-installation-guide/) for tips on choosing qualified installers.
### Essential ancillary costs
Several additional components and services are necessary for a complete and efficient system.
- Insulation: High-quality insulation boards are critical. They are placed beneath the heating system to prevent heat from escaping downwards, directing it up into the room. This greatly improves efficiency and reduces running costs.
- Thermostats: The choice of thermostat affects both cost and control. Basic dial thermostats are the cheapest option. [Smart, programmable thermostats](/smart-thermostats-underfloor-heating/) cost more but provide precise control over heating schedules, learning algorithms, and remote access, improving comfort and energy efficiency by up to 19%.
- Floor Preparation: The subfloor must be completely flat before UFH can be installed. In many cases, a self-levelling screed is required to create a smooth, suitable surface, adding to the overall cost.
- Final Floor Finish: Your choice of floor covering matters for efficiency. Tiles deliver 71 W/m² heat output compared to just 48 W/m² for carpet, a 48% difference that directly impacts running costs. For complete guidance on choosing the most efficient flooring, including thermal conductivity comparisons and tog ratings, see our [best flooring for underfloor heating guide](/best-flooring-underfloor-heating/).
## Long‑term running costs and potential savings
The initial installation price is only one part of the equation. To understand the true value of an underfloor heating system, you must consider the total cost of ownership. This includes the ongoing running costs, which are a key factor in your long-term household budget.
For up-to-date 2026 unit rates, room-by-room worked examples, and a reusable calculation method, bookmark our dedicated [underfloor heating running costs guide](/underfloor-heating-running-costs-2026/). If you want a quick myth-busting answer first, read [Is underfloor heating expensive to run?](/is-underfloor-heating-expensive-to-run/).
### Calculating running costs
How much underfloor heating costs to run depends entirely on the system type and your energy tariff. Accurate calculation requires knowing your system's output and your home's insulation levels.
- Electric UFH: The running cost is directly tied to your electricity tariff, measured in pounds per kilowatt-hour (£/kWh). As of winter 2026, [Ofgem's energy price cap](https://www.ofgem.gov.uk/information-consumers/energy-advice-households/energy-price-cap-and-standing-charges-explained) sets electricity at approximately 27p per kWh. A system's power output (e.g., 150W/m²) multiplied by the hours of use and your electricity rate determines the daily cost. These systems are most economical for short, targeted heating periods in well-insulated rooms like [bathrooms](/bathroom-underfloor-heating-guide/).
- Wet UFH: The cost depends on the fuel used by your primary heat source. This could be gas from a boiler (currently [6.9p per kWh under Ofgem's price cap](https://www.ofgem.gov.uk/information-consumers/energy-advice-households/energy-price-cap-and-standing-charges-explained)), oil, or electricity for a heat pump. The system's efficiency is determined by the efficiency of this heat source.
### The cost bridge: installation price vs operating performance
The cheapest quote is not always the cheapest system to own. Ask installers to show three things on the quote:
- **Design heat load:** The watts needed per room, not just the floor area.
- **Flow temperature or mat wattage:** Wet UFH should be designed for low flow temperatures where possible; electric UFH should not be oversized for the floor covering.
- **Insulation and floor build-up:** Poor insulation can turn a good system into an expensive one.
This is the bridge between installation cost and running cost. A wet UFH quote that includes better insulation, proper manifold balancing and low-temperature design may cost more upfront, but it protects heat pump COP, boiler efficiency and comfort. A cheaper quote that skips those details can create higher bills for years.
#### Heat pump fit
Wet UFH is an ideal partner for air source or ground source heat pumps. Heat pumps achieve maximum efficiency when producing water at lower temperatures, typically between 35-45°C. This is the exact temperature range where wet UFH systems operate, creating a highly efficient pairing that minimises electricity consumption and lowers running costs. This combination helps homeowners meet the stricter efficiency targets set out in [Building Regulations Part L](https://www.thefloorheatingwarehouse.co.uk/uk-underfloor-heating-in-2025-trends-costs-new-regulations-explained/) and the Future Homes Standard.
### UFH vs traditional radiators: the efficiency verdict
When comparing running costs, UFH consistently demonstrates higher efficiency than conventional radiators. This efficiency translates directly into lower energy bills over the system's lifetime.
- Lower Operating Temperatures: UFH systems run at a much lower flow temperature of 35-45°C. Radiators, by contrast, need to be heated to 60-75°C to effectively warm a room. Under current [UK Building Regulations Part L](https://www.buildingregsdrawings.co.uk/2025/03/22/building-regulations-for-underfloor-heating-installations/), the maximum flow temperature for heating systems must now be 55°C to reduce carbon emissions. This lower temperature demand reduces the energy required from your boiler or heat pump.
- Even Heat Distribution: Underfloor heating uses radiant heat, which warms objects and people in the room directly. This creates a uniform temperature from floor to ceiling, eliminating the cold spots common with radiators. This superior comfort is achieved at a lower overall air temperature, reducing heat loss.
- Proven Energy Savings: The operational efficiency of hydronic systems leads to significant reductions in heating expenses. Lower flow temperatures can reduce energy use compared to radiator systems; water-based UFH can cut bills versus radiators in well‑insulated homes.
## Is underfloor heating a good investment? ROI analysis
Deciding whether underfloor heating (UFH) is a worthwhile investment depends on your budget, priorities, and long-term goals. It involves balancing significant upfront costs against long-term savings and lifestyle benefits.
### Weighing the pros and cons
A clear evaluation of the advantages and disadvantages is essential before making a decision.
Pros of underfloor heating:
- Comfort: UFH provides radiant heat from the ground up. This creates a consistent and even temperature throughout the room, eliminating the cold spots and draughts common with traditional radiators.
- Aesthetic Freedom: With no bulky radiators on the walls, you gain complete freedom for furniture placement and interior design. This opens up wall space and creates a cleaner, more minimalist aesthetic.
- Better energy efficiency: Water-based systems operate at lower temperatures than radiators. This efficiency can reduce heating bills by around 20% compared to conventional radiators. When paired with a modern heat pump, this saving can increase further.
- Increased Property Value: Underfloor heating is widely seen as a premium feature in modern homes. Learn more about the benefits in our [detailed guide](/underfloor-heating-beginners-guide/). Its inclusion can make the property more appealing to buyers; [European underfloor heating market overview](/european-ufh-market-growth-analysis/).
Cons of underfloor heating:
- Higher Upfront Installation Cost: This is the most significant drawback. Wet systems, in particular, require a substantial initial investment. In 2026, installation costs for wet systems typically range from £100 to £190 per square metre, while electric systems are cheaper at £40 to £90 per square metre.
- Potential Disruption During Retrofitting: Installing UFH in an existing property is more complex and disruptive than in a new build. The process often involves raising floor levels, which can affect doors and fixtures. The total cost for retrofitting can range from £3,000 to £13,000 depending on the project's scale.
### Calculating your return on investment (ROI)
The return on your investment comes from two key areas: direct financial savings and indirect lifestyle improvements.
To calculate the financial payback period, you must weigh the total installation cost against your annual energy savings.
- Example: If your annual heating bill is £1,500, a 20% saving from a new wet UFH system equates to £300 per year. If the system cost £6,000 to install, the simple payback period would be 20 years (£6,000 ÷ £300).
However, the true value of UFH extends beyond pure finances. You must also factor in the long-term lifestyle and comfort benefits. The daily pleasure of a warm floor, improved air quality, and the freedom to design your living space without compromise are valuable assets that contribute to the overall investment case.
Quick estimate: **[Use our free Underfloor Heating Cost Calculator](https://underfloorheating.info/underfloor-heating-cost-calculator/)** to get a personalised quote for your specific project, enter your room size and get an instant breakdown of installation and running costs.
## Frequently asked questions
### How long does underfloor heating last?
A well-installed underfloor heating system typically lasts 25-30 years for water systems and 20-25 years for electric systems. This longevity makes UFH a sound long-term investment, especially when compared to radiators which may need replacement every 15-20 years.
### Can I install underfloor heating myself?
Electric mat systems can be DIY-friendly for competent homeowners, but water systems require professional installation by qualified heating engineers. Even with electric systems, electrical connections must be completed by a certified electrician to comply with Part P building regulations.
### Does underfloor heating work with carpet?
Yes, but carpet choice matters. Maximum combined tog rating (carpet + underlay) should be 2.5 for optimal heat transfer. Thin carpets with low-tog underlay work best. Thick carpets reduce efficiency, delivering only 48 W/m² compared to 71 W/m² for tiles. For detailed carpet specifications and visual comparisons, see our [flooring compatibility guide](/best-flooring-underfloor-heating/).
### What maintenance does underfloor heating require?
Electric systems require virtually no [maintenance](/underfloor-heating-maintenance-guide/) once installed. Water systems need annual pressure checks and occasional balancing. Professional servicing every 3-5 years is recommended for wet systems to maintain optimal performance.
If you experience system issues that affect heating efficiency or cause higher running costs, our [complete troubleshooting guide](/underfloor-heating-problems/) provides step-by-step diagnostics for common problems including cold zones, high energy consumption, and system failures.
### Can underfloor heating be zoned?
Yes, both electric and water systems can be divided into zones with separate thermostats. This allows different areas to be heated independently, improving comfort and energy efficiency. Zoning is particularly beneficial in larger properties. For detailed guidance on planning and implementing zones, see our [complete zoning guide](/underfloor-heating-zoning-complete-guide/).
## Planning your underfloor heating project
Your choice between electric and wet underfloor heating depends on your project's scale and budget. Electric systems offer a lower-cost entry point, making them ideal for smaller renovations or single rooms. Wet systems, while requiring a larger initial investment, provide superior long-term value and efficiency, especially for new builds and large-scale projects.
### Final recommendations
To ensure a successful and cost-effective installation, follow these key steps.
1. Assess your project
First, clearly define the scope of your work. Is it a new build where the system can be integrated into the screed floor? Or is it a renovation of a single room, like a bathroom? The nature of your project is the single biggest factor in determining the most suitable system. Retrofitting an older home, for instance, has unique challenges and can cost between £3,000 and £13,000.
2. Choose the right system
Match your system choice with your property and budget. For a small bathroom upgrade, an electric mat system is often the most practical and affordable option. For a whole-house installation or a new extension, a wet system connected to a boiler or heat pump will deliver lower running costs and can reduce heating bills by up to 20% compared to traditional radiators.
3. Always get multiple quotes
Do not settle on the first price you receive. Contact at least three qualified and experienced installers. Ask each for a detailed, itemised quote that breaks down the costs for materials, labour, the manifold, thermostats, and any necessary floor preparation. This allows you to make a true like-for-like comparison and ensure you are getting fair value. For a complete checklist of what to ask installers and how to compare quotes effectively, see our [underfloor heating quotation guide](/underfloor-heating-quotation/).
Before approaching installers, use our [cost calculator](https://underfloorheating.info/underfloor-heating-cost-calculator/) to understand the expected price range for your project.
4. Don't skimp on insulation
High-quality insulation is not an optional extra; it is essential. Proper insulation boards installed directly beneath the underfloor heating system prevent heat from escaping downwards. This ensures the warmth radiates up into your room, maximising the system's efficiency and minimising running costs. Investing in good insulation protects your overall investment in the heating system itself.
---
Ready to explore underfloor heating for your home? Check out our [detailed beginner's guide](/underfloor-heating-beginners-guide/), learn about [design and planning considerations](/underfloor-heating-design-planning/) for your project, or use our [system comparison tool](/electric-vs-water-underfloor-heating-2026/) to find the right solution.
**Ready to get accurate quotes?** Compare prices from trusted underfloor heating installers via the [Underfloor Heating Directory](https://underfloorheating.directory/get-quotes). Already have a quote? [Check if it's competitive →](https://underfloorheating.directory/analyse-quote)
---
--- title: Underfloor Heating vs Radiators: Costs, Efficiency and Comfort description: Compare underfloor heating vs radiators for costs, efficiency, comfort, heat pumps and retrofits in UK homes. Find the best choice for your UK project. url: https://underfloorheating.info/underfloor-heating-vs-radiators/ published: 2025-09-28 updated: 2026-08-21 tags: ['underfloor heating', 'radiators', 'heating systems', 'comparison', 'energy efficiency', 'home heating', 'cost analysis', 'uk heating'] ---
# Underfloor Heating vs Radiators: Costs, Efficiency and Comfort
## Underfloor Heating vs Radiators: The Complete Guide to Efficiency, Comfort, and Cost Savings
For most UK homes, underfloor heating wins on comfort, wall space and low-temperature efficiency. Radiators win on upfront cost, speed of installation and fast heat-up. The best choice depends on the property, not just the heating technology. Explore more advice at [underfloorheating.info](https://underfloorheating.info/) and compare installers through the [Underfloor Heating Directory](https://underfloorheating.directory/).
If you’re building new, renovating a ground floor or planning a heat pump, wet underfloor heating usually makes more sense long term. Upgrading an older home without lifting the floors? Modern radiators may be the better choice. Electric UFH sits in the middle: excellent for small bathrooms and kitchens, but expensive for whole-house heating.
So which should you choose? I’ll compare the things that actually matter: installed cost, running cost, heat-up time, comfort, floor build-up, maintenance, air movement, heat pump compatibility and retrofit practicality.
🧮 **[Use our free cost calculator](/underfloor-heating-cost-calculator/)** to compare installation and running costs for your specific room before deciding.
The short version: UFH is better when you can design it properly into the floor. Radiators are better when disruption, budget or response speed matter more.
**Need detailed pricing?** For comprehensive cost breakdowns, installation estimates, and ROI calculations, see our [Complete Underfloor Heating Costs Guide](/underfloor-heating-costs/).
**Deciding between UFH and radiators?** Compare quotes from trusted installers via the [Underfloor Heating Directory](https://underfloorheating.directory/get-quotes).
## Quick Verdict
| Priority | Better Choice | Why |
|----------|---------------|-----|
| Lowest upfront cost | Radiators | Less floor work and simpler installation |
| Best comfort | Underfloor heating | Even radiant heat from the whole floor |
| Fastest warm-up | Radiators | Smaller heat emitter, lower thermal mass |
| Heat pump efficiency | Wet underfloor heating | Works well at lower flow temperatures |
| Bathroom retrofit | Electric UFH | Thin, quick and ideal under tiles |
| Whole-house retrofit without lifting floors | Radiators | Far less disruption |
| Open-plan new build | Wet underfloor heating | Frees wall space and suits low-temperature design |
| Older or listed property | Usually radiators | Less risk to floors, joists and historic finishes |
## Understanding the Basics
### How Radiators Work
Radiators heat a room through convection and radiation. Hot water or steam flows through the metal radiator and heats its surface. The heat then moves into the room in two ways:
- **Convection:** The heated surface warms the adjacent air, causing it to rise and circulate. Cooler air moves in to replace it, creating a convection current. This gradually distributes warmth throughout the room.
- **Radiation:** The radiator also emits infrared energy directly to objects and people nearby. While convection is the dominant mechanism, radiation still contributes significantly, especially with larger surface areas or optimised designs.
**Typical operational temperatures** for radiator systems sit between 60°C and 80°C. They need those high input temperatures to move enough heat into the room through air movement and direct radiation. Radiators warm up quickly when you switch them on, especially low-thermal-mass aluminium models.
**Placement matters.** Installers often put radiators under windows or beside outside walls to offset incoming cold air and mix warm and cool air more evenly. Put one behind furniture or on an internal wall and you can restrict heat distribution, use more energy and create cold spots.
### How Underfloor Heating Works
Underfloor heating turns the whole floor into a heat emitter. You’ve got two main system types:
- **Electric Underfloor Heating:** Uses electric wires, mats, or cables laid under the floor to generate heat. It's best suited for small areas, bathrooms, or renovations. Installation is generally less invasive, but [running costs can be higher than other forms](/is-underfloor-heating-expensive-to-run/).
Electric systems heat up quickly and respond fast to controls, so they work well when you only need heat for short periods.
- **Wet (Hydronic) Underfloor Heating:** Circulates warm water through a network of pipes embedded in the floor. It's better for larger spaces and new builds, as installation is more complex but running costs are reduced over time.
Hydronic systems run at lower water temperatures (30-45°C). That improves efficiency and makes them a good match for renewable heat sources.
**Heat distribution** is the big advantage. UFH gives you even, consistent warmth from the ground up and removes the cold spots you often get with radiators. The whole floor acts as one giant low-temperature radiator, which improves comfort and cuts draughts.
That larger surface area lets UFH run at lower temperatures while feeling just as comfortable as conventional radiators. It’s one of the main reasons people choose it.
**Your floor finish matters.** Stone, ceramic, porcelain and engineered wood work best because they conduct and release heat efficiently. Thick carpets and wooden floors slow the response and reduce efficiency by trapping heat.
## Heat Distribution and Comfort
### Uniformity of Warmth: Underfloor Heating's Key Advantage
Underfloor heating spreads heat evenly across the whole floor. Warmth rises steadily from every part of the surface, keeping the room temperature balanced and consistent.
Radiators concentrate warmth around the unit. That can leave hot spots beside the radiator and cold zones in distant corners or near windows.
UFH minimises those temperature differences. You feel the same steady warmth wherever you sit, while radiators can leave one part of the room chilly and another uncomfortably warm.
That even distribution changes how the room feels. Heat starts at foot level and rises gently, so you don't overheat the air at ceiling height. The room can feel comfortable with the thermostat set 2-3°C lower than in a radiator-heated room.
You get better comfort and can save money over time because the system needs less energy.
### Air Quality and Noise Levels
UFH can also make a room quieter and reduce airborne dust. Radiators rely on convection: they warm the air, which rises, cools and falls in a cycle. That constant movement stirs up dust and allergens and can aggravate allergies or respiratory issues.
Underfloor heating radiates gently from below with minimal air movement, so less dust circulates. That’s useful in bedrooms and in homes where someone has asthma or allergies.
Then there’s noise. Radiators and their pipework can click, pop and creak as the metal expands and contracts. You may also hear water moving as the system ages or traps air. UFH is virtually silent.
## Energy Efficiency and Environmental Impact
### Operating Temperatures and Energy Savings
Underfloor heating systems typically operate at much lower temperatures-around [35-45°C (often cited as 40°C)](https://salford-repository.worktribe.com/output/3397480/energy-house-20-study-on-future-homes-standard-heating-systems%C2%A0)-compared to traditional radiators, which require water temperatures of 60-80°C, with 70°C being the norm.
Those lower operating temperatures give UFH its efficiency advantage. The system uses less energy while keeping the whole room comfortable.
The research shows what that means for bills. Homes with underfloor heating systems can see [utility bill reductions of 15-40% relative to those relying on conventional radiators](https://salford-repository.worktribe.com/output/3397480/energy-house-20-study-on-future-homes-standard-heating-systems%C2%A0). Multiple industry reports also find that underfloor heating can be up to 25% more efficient than standard radiator-based systems, especially with modern condensing boilers or heat pumps.
### Carbon Footprint and Sustainability
Because UFH runs at lower temperatures, it needs less energy. That means less fossil fuel use and a smaller carbon footprint. Heating makes up a significant share of domestic carbon emissions, so better efficiency matters.
UFH also works well with renewable energy. Modern heat pumps, solar thermal collectors and biomass boilers all suit its low-temperature demand, giving you more scope for carbon-neutral operation.
The strongest pairing is UFH with a ground-source or air-source heat pump because heat pumps work most efficiently at the lower flow temperatures UFH needs. There’s a summer benefit too: pair wet UFH with a reversible heat pump and it can cool your home, which radiators can't do. Learn more about [underfloor cooling](/heat-pump-underfloor-cooling/).
Recent lifecycle studies say underfloor heating can [reduce the embedded carbon footprint of a home by more than 90% versus traditional radiator systems](https://salford-repository.worktribe.com/output/3397480/energy-house-20-study-on-future-homes-standard-heating-systems%C2%A0). UFH also often lasts more than 50 years, which improves the sustainability case further.
### The Role of Floor Insulation and Construction
Insulation can make or break an underfloor heating system. Proper floor insulation cuts downward heat loss and sends as much warmth as possible into the room above.
Without enough insulation, you lose a significant amount of heat into the subfloor. Your running costs rise and the system performs badly. Choose insulation for the actual floor structure because concrete slabs, suspended timber and intermediate floors each need a different solution.
## Installation, Costs & Longevity
### Upfront Installation: Complexity and Investment
**Retrofitting vs New Builds**
UFH is much easier and more cost-effective to install in a new build than in a retrofit. You can plan it from the start and design the subfloor and layout around the heating elements, cutting labour and complexity.
Retrofitting UFH can be invasive. You may need to lift floors, raise the finished floor level and alter doors and thresholds. Some older homes also need extra reinforcement for the weight, adding more cost and disruption.
Radiators are quicker and less disruptive. Most homes already have the pipework and wall space, so an upgrade rarely needs major structural changes.
**Cost and Disruption Comparison**
- **Installation Costs (UK, 2026 estimates):**
- **Electric UFH**: £50-£75/m2 (new builds toward lower end)
- **Wet (hydronic) UFH**: £120-£150/m2 (lower range in new builds, higher in retrofits)
- **Radiators**: Lower overall cost, generally quicker to install, often under £50/m2 for standard replacements
Retrofit costs rise because you need more labour and may need structural changes. Lifting and replacing floors can be highly disruptive, and you may have to move out during the work. In a new build, UFH goes in during construction, which keeps disruption and extra costs down.
**Considerations: Flooring Types, Insulation, and System Design**
**Flooring Types:**
- **Ceramic tiles**: Offer high thermal conductivity, ideal for UFH due to effective heat transfer.
- **Stone flooring**: Excellent thermal mass but requires robust insulation beneath to prevent downward heat loss.
- **Wooden floors**: Moderate heat transfer; select lower temperature UFH designs to avoid damage. Rapid temperature shifts can stress wood, so engineered boards are preferable over solid hardwood.
- **Rubber/synthetic floors**: Insulate well against sound but may impede heat flow, reducing UFH efficiency.
**Insulation Needs:**
Efficient UFH needs high-quality floor insulation. Without it, heat escapes downwards, system efficiency drops sharply and bills rise. Insulating historic or solid floors can add cost and complexity, but the heating won't work properly without it.
### Operating and Maintenance Costs Over Time
**Maintenance Requirements**
Once installed, underfloor heating needs very little maintenance. Hydronic UFH pipework can last over 50 years with minimal leak risk when installed correctly. Manifolds and pumps only need occasional checks, while electric systems have no moving parts and rarely need attention. [Smart thermostats for underfloor heating](/smart-thermostats-underfloor-heating/) can monitor performance and flag issues early.
Radiators, however, demand ongoing care:
- **Regular bleeding** to remove trapped air, ensuring efficiency
- **Periodic flushing** to clear sludge build-up
- **Valve and component replacements** as wear and corrosion occur
Radiators are easier to reach when something goes wrong, but they need more regular upkeep over their 10-15 year lifespan.
**Lifespan Comparison**
- **UFH (hydronic or electric)**: 40-50 years or longer if properly installed
- **Radiators**: 10-15 years, with radiators, valves, or thermostats likely to need replacement over time
That longer life cuts both the maintenance burden and total replacement cost of UFH.
### Financial Payback and Value Over Time
**Return on Investment: Utility Savings, Durability, Comfort**
UFH often delivers noticeable savings on energy bills. Hydronic underfloor heating can achieve energy efficiency gains of 15-40% over radiators because it runs at lower water temperatures and spreads heat more evenly.
Its radiant heat avoids overheated pockets of air, reduces overall heat loss and lets you use a lower thermostat setting without losing comfort.
- **Example**: A wet UFH system in a well-insulated 3-bedroom house may recoup its higher upfront cost within 7-12 years due to reduced heating bills. The longer you stay in the property, the greater the cumulative savings.
UFH also offers comfort advantages: no cold spots, no hot-air convection currents, and more consistent room temperatures across each zone. For bathrooms and kitchens, underfloor heating adds luxury and can increase property appeal and value.
**Budgeting for Ongoing Costs**
- **UFH**: Low routine maintenance costs and fewer repairs over time. Energy savings help offset initial investment.
- **Radiators**: Lower upfront cost, but higher long-term maintenance and component replacement needed. Running costs can be higher, especially with outdated or poorly maintained radiator networks.
So don't look at installation cost on its own. Weigh it against long-term savings, low maintenance and better comfort.
## Health, Safety & Lifestyle Factors
### Allergy & Asthma Considerations
Underfloor heating reduces the circulation of airborne dust, pollen and mould compared with radiator or forced-air heating. Radiator convection creates air currents that stir up allergens. UFH radiates heat evenly from the floor, keeping air movement, dust and suspended particles to a minimum.
That can help in homes where someone has allergies or asthma. You don't get the same dust traps around radiators, so cleaning works better. The consistent floor temperature also helps maintain optimal humidity levels, reducing dust mites and slowing mould growth, two common allergy and asthma triggers.
For children, older adults and people with chronic respiratory conditions, those indoor air quality improvements can bring measurable health gains and make the home more comfortable.
UFH also removes hot surfaces and exposed pipes. Typical floor temperatures range from 29-35°C (84-95°F), far below the burn risk from standard radiators. Nothing sticks out from the walls, so you essentially remove the risk of accidental burns or impact injuries, especially for small children and older people with reduced mobility.
### Interior Design Freedom and Space Utilization
Because UFH sits inside the floor, you don't need bulky radiators or baseboard heaters. You get whole walls back and far more freedom with the room layout.
- **Room Layouts:** With no radiators, furniture placement is unrestricted. Large items like sofas, desks, or shelving can be positioned freely, optimizing the use of available space and supporting diverse layouts-from open-plan living to highly segmented rooms.
- **Aesthetics:** The absence of visible heating appliances aligns with minimalist and modern design trends. It enables streamlined wall and floor treatments free from visual clutter.
- **Property Value:** Homes with underfloor heating enjoy a bump in market value. According to [recent UK market analysis](https://salford-repository.worktribe.com/output/3397480/energy-house-20-study-on-future-homes-standard-heating-systems%C2%A0), properties equipped with underfloor systems see an average sale price increase of around 1.23% (≈£3,985 in 2026 figures) when listed in winter months; [Find out about current European Underfloor Heating Market](/european-ufh-market-growth-analysis/).
That extra freedom matters in compact homes and urban flats. It also makes staging and interior design easier in residential and commercial properties.
### Temperature Control and Zoning Options
Modern UFH gives you precise temperature control and zoning. Each room, open-plan area or section of a large space can have its own thermostat.
- **Zoning:** Enables targeted heating for occupied rooms and energy savings in unused spaces. This is a clear advantage over radiator-based systems, where single thermostats typically control large, mixed-use areas or even the whole home.
- **Smart Thermostat Integration:** Underfloor systems support most leading smart thermostats, including Google Nest, Honeywell Evohome, Drayton Wiser, and Hive. These devices allow for remote scheduling, adaptive learning (they "learn" household routines), open-window detection, and even voice assistant commands.
- **Future-Proofing:** The compatibility with home automation ecosystems and ongoing advances in smart heating technology ensure these systems remain flexible.
Match the schedule closely to how you use each room and the seasons, and you get better comfort as well as measurable energy savings.
## Limitations, Drawbacks & When to Choose Each System
### When Radiators Make Sense
Radiators win when you need a quick response. They heat rooms fast, which suits guest bedrooms, home offices and other spaces you use intermittently. They’re also the usual retrofit choice because they don't need major structural work.
On a tight budget, radiators are the practical choice. Both the materials and installation cost significantly less than UFH. Replacing old radiators or adding new ones usually needs basic plumbing, while UFH needs more parts, labour and often remedial flooring work.
Radiators are also easy to maintain and zone. Thermostatic radiator valves or smart controls let you adjust rooms separately without the complexity of multi-zone UFH.
Electric radiators work particularly well for rapid, localised heat where separate control matters, such as rental units or auxiliary spaces.
### Underfloor Heating Challenges
#### Upfront Costs and Installation Disruption
UFH costs much more upfront than radiators. You have to put a hydronic or electric network inside the floor, which can mean removing the existing finish, repairing the subfloor and sometimes reinforcing the structure.
Expect dust, noise and possibly a period out of the house. UFH elements often raise the floor, affecting thresholds, doors and fixtures. This "floor build-up" matters when room height is already limited.
#### Special Considerations for Older Properties and Listed Buildings
Older and heritage properties need more care. Lifting floors can damage historic features, and you may face restrictions on altering original subfloors or joists. Poor insulation can also undermine UFH’s low-temperature efficiency unless you make substantial upgrades.
Floor coverings like thick carpets or certain engineered woods may also restrict heat flow, lessening system efficiency and comfort.
#### Labour and Expertise
UFH needs a skilled installer. If experienced trades are scarce in your area, the project may take longer or suffer quality problems. Proper commissioning matters because poor balancing or incorrect manifold settings cause cold zones and inefficient operation.
### Combining Both Systems: Hybrid Solutions
A hybrid system gives you the best parts of UFH and radiators. A common setup uses UFH in busy open-plan or ground-floor living spaces, then keeps radiators upstairs, in bedrooms and anywhere that needs a fast warm-up.
#### Where Hybrid Systems Work Best
- **Large open-plan ground floors:** UFH provides consistent warmth and uncluttered aesthetics.
- **Bedrooms and bathrooms:** Radiators offer rapid temperature changes, which is useful where intermittent use or quick comfort is desired.
- **Retrofit situations:** Retain radiators where floor build-up is impractical (upstairs), install UFH as part of ground-floor renovations.
- **Bathrooms:** Towel radiators paired with UFH assure warm towels and floors, balancing comfort and responsiveness.
#### Benefits and Considerations
- **Efficiency:** Hybrid systems maximize energy efficiency by operating UFH at low temperatures with renewable technology (e.g., heat pumps) and supplementing with high-output radiators. [Studies suggest whole-home hybrids can achieve up to 25-40% better efficiency](https://www.port.ac.uk/news-events-and-blogs/blogs/developing-enhanced-technologies/how-a-hybrid-heating-system-could-lower-your-bills-and-shrink-your-carbon-footprint#:~:text=A%20hybrid%20heat%20pump%20requires,in%20the%20Faculty%20of%20Technology.) compared to radiator-only systems.
- **Flexible controls:** Zone-specific management enables occupants to tailor comfort and running costs.
- **Installation complexity:** Integrating both systems requires expert hydraulic and control design: manifolds, thermostats, and balancing valves must be coordinated.
## Decision Framework: Choosing the Right Heating System for Your Home
### Assessment Checklist: Key Factors in Heating System Selection
Still unsure? Run through these property and lifestyle questions:
- **Property Type & Age**: Is it a new build, retrofit, apartment, family home, or heritage property?
- **Budget**: What are your constraints for initial installation and acceptable ongoing energy costs?
- **Insulation Quality**: Is your home well-insulated or prone to heat loss?
- **Heating Preferences**: Do you prioritize consistent warmth (even heat), fast response times, or zoned control?
- **Long-Term Plans**: Do you expect to remain in the property for many years, or might you move soon?
- **Flooring Type & Room Layout**: Concrete, tile, and open-plan areas favour UFH; wood or carpeted floors may require special consideration.
- **Aesthetic Preferences**: Do you want visible heating emitters or a minimalist design?
- **Eco-Friendliness**: Is reducing your carbon footprint or integrating renewables (e.g., heat pumps) a priority?
### Match the System to the Property
#### 1. **New Builds**
**Best Heating System:** Underfloor heating, often combined with a heat pump.
- UFH is easiest and most cost-effective to install at build stage.
- Delivers even, draught-free comfort, maximised by modern insulation.
- Supports open-plan layouts and optimizes wall/floor space for furniture.
- Ideal for integrating with renewable energy systems, enhancing eco-credentials and long-term savings.
**Example:** A new eco-home pairs water-based UFH with a ground source heat pump, achieving superior comfort and up to 40% energy savings compared to radiators.
#### 2. **Retrofits (Existing Homes)**
**Best Heating System:** Radiators-unless major renovations are planned.
- Radiators are less disruptive, with lower installation cost and minimal changes to floors or room layouts.
- UFH can be retrofitted but may require raising floors and altering plumbing/electrics, increasing cost and inconvenience.
- Consider hybrid systems (radiators upstairs, UFH downstairs) when budgets or building structure permit partial conversions.
**Example:** A family upgrades an older suburban house with new high-efficiency radiators, greatly improving heating performance without major structural work.
#### 3. **Family Homes**
**Best Heating System:** Underfloor heating, especially for larger or open-plan spaces.
- UFH provides safe, even warmth, removing hot surfaces and freeing up room for active children.
- Reduces risk of dust circulation, allergy triggers, or burns.
- Long-term energy savings offset initial investment, supporting whole-house comfort.
**Example:** In a modern family home, UFH installed throughout the ground floor delivers draught-free comfort and allows children to play freely without worrying about hot radiators.
#### 4. **Apartments and Small Spaces**
**Best Heating System:** Electric underfloor heating (bathrooms, kitchens) or compact radiators.
- Electric UFH is suitable for single rooms; it's thin, quick to install, and often used in tiled bathrooms.
- For main living spaces, panel radiators offer high efficiency at a low cost and easy retrofit.
**Example:** An urban apartment uses electric UFH in the master bathroom for quick warmth, while a designer radiator provides main room heating without floor disruption.
#### 5. **Heritage or Period Properties**
**Best Heating System:** Modern radiators (often paired with heat pumps).
- Preservation of original features is critical; radiators are less invasive and easier to upgrade.
- UFH may require altering historic floors or substructures, risking damage.
- Hybrid solutions (modern radiators with advanced controls, or paired with a heat pump for efficiency) increase comfort and lower bills while preserving building integrity.
**Example:** A listed Victorian manor uses contemporary column radiators compatible with existing piping, maintaining aesthetics while upgrading energy efficiency.
### Custom Recommendations Based on Priorities
#### **If Comfort and Even Heat Are Paramount:**
- Water-based underfloor heating offers consistent, gentle warmth underfoot, reducing temperature gradients in open-plan, well-insulated spaces.
- Best for new builds, major renovations, and long-term family homes.
#### **If Budget and Speed Matter Most:**
- Choose modern, high-efficiency radiators for quick installation and repair, especially in older buildings or when full flooring replacement is not feasible.
#### **If Energy Efficiency and Eco-Friendliness Lead:**
- UFH paired with a heat pump system delivers maximum savings and minimal carbon emissions in a well-insulated property.
- Hybrid systems (UFH + radiators or heat pumps + radiators) work well in mixed-age or complex homes.
#### **If Maintenance Simplicity and Flexibility Are Key:**
- Radiators are easy to access, service, and upgrade. They can be zoned with smart thermostats for improved control.
#### **In Specialist Cases:**
- Electric UFH is best for small rooms (like bathrooms) or retrofits where space is tight.
- Hydronic UFH is better for full-home, low-carbon installations, especially with renewables integration.
**Summary Table: Evaluating Underfloor Heating vs Radiators by Need**
| Priority | Recommended System | Details |
|----------------------|---------------------------|-------------------------------------------------------------|
| Comfort | Underfloor Heating | Even warmth, ideal for open-plan homes |
| Fast Install | Radiators | Quick retrofit, budget-friendly projects |
| Eco-friendliness | UFH + Heat Pump/Hybrid | Best with insulation and renewables |
| Heritage preservation| Radiators (Hybrid option) | Less disruptive, maintains period features |
| Bathroom Upgrade | Electric UFH | Simple, quick heating for tiled areas |
| Flexibility | Combined (zoned systems) | UFH for key zones, radiators elsewhere |
Every property is different. Match the decision to your budget, lifestyle and the technical reality of the building.
## Frequently Asked Questions (FAQs)
### How does underfloor heating compare with radiators in terms of comfort and efficiency?
Underfloor heating spreads warmth evenly across the floor, removing the cold spots and draughts you often get with radiators. Because it runs at lower temperatures, it can reduce energy consumption by 15-40% compared with radiators. Hydronic (water-based) systems suit larger spaces, while electric systems work best in small areas or where you need fast heat-up.
### What are the main types of underfloor heating systems?
There are two main types:
- **Electric (dry) underfloor heating:** Uses cables or heating mats installed directly below the final floor covering. Best for retrofits or single rooms like bathrooms.
- **Water-based (wet or hydronic) underfloor heating:** Pumps warm water through pipes laid under the floor. Suited for larger spaces, new builds, or whole-house heating.
### What does installation involve for electric and water-based systems?
**Electric systems:**
- Typically installed above the subfloor or insulation, under tiles, vinyl, laminate, or engineered wood.
- Quicker and less invasive to install-often in a single day.
- Requires appropriate thermostat and may need a dedicated electrical circuit.
**Water-based systems:**
- Pipes are set in screed or panels beneath the floor. May raise floor height.
- Often involves more preparation and longer installation time.
- Best installed during renovations or new builds for minimal disruption.
Use an experienced professional for either type so the system meets safety codes and runs reliably.
### Can underfloor heating be added to existing homes without major renovations?
Yes. **Low-profile electric mats** and **ultra-thin hydronic panel systems** let you retrofit with little change to floor height. Electric UFH is popular because it’s thin and needs minimal alteration. Low-profile water systems can cover larger areas. Whichever you choose, make sure the existing floor has good insulation.
### How do you control underfloor heating, and what is zoning?
Modern UFH uses digital thermostats, often with smart controls. You can split the system into 'zones', giving each room or area its own thermostat and temperature. That improves comfort and stops you wasting energy in rarely used rooms. Some advanced systems add fuzzy logic or home automation for demand-driven, adaptive heating.
### What is the typical lifespan and maintenance for underfloor heating?
A properly installed system can last 25-50 years. Electric systems need little maintenance, and most faults involve the thermostat or accidental floor damage. Water-based systems may need occasional leak checks, pump and manifold servicing, or controller updates. Make sure either system has accessible maintenance points.
### Which floor coverings work best with underfloor heating?
The most effective floor coverings for heat transfer are:
- **Porcelain and ceramic tiles**
- **Natural stone**
- **Luxury vinyl tile (LVT), such as Karndean**
- **Engineered wood designed for underfloor heating**
Low-pile carpet and suitable underlay (TOG rating ≤ 2.5) can be used, but very thick or dense materials reduce performance. Always check compatibility with the floor heating system and the manufacturer's thermal limits.
### How quickly does underfloor heating warm the room, and how does this compare to radiators?
- **Electric systems**: Heat up most floors in 30-60 minutes, providing fast comfort.
- **Water-based systems**: Full concrete slabs may take hours or longer due to higher thermal mass, but thinner or panel-based systems can heat in 1-3 hours.
Radiators typically heat the air more quickly but with less even warmth.
### What does underfloor heating cost to install?
- **Electric systems**: Lower upfront installation costs, especially for single rooms or retrofits. Running costs may be higher depending on electricity prices.
- **Hydronic systems**: Higher installation costs due to pipework and mechanical systems, but more economical for larger areas or whole-home heating in the long run.
Installation costs can vary based on floor size, insulation, and existing building condition.
### Is underfloor heating compatible with renewable energy systems?
Yes. Hydronic underfloor heating works especially well with renewable heat sources such as heat pumps and solar thermal panels due to its low flow temperature requirement. This improves efficiency and lowers running costs further.
### What are common problems or troubleshooting tips for underfloor heating?
- **Cold spots**: May result from poor pipe/cable layout or airlocks (in hydronic systems). Professional diagnostics can pinpoint issues.
- **System not heating**: Check thermostats and power supply. For hydronic systems, check pressure, pump, and manifold operation. [Check out our Underfloor Heating Manifold Guide](/underfloor-heating-manifold-guide/)
- **Uneven heating or delayed response**: Verify correct zoning, check insulation, and floor covering compatibility.
### Does underfloor heating work in bathrooms and kitchens?
Yes. Both electric and water-based systems suit wet rooms when the installer uses proper waterproofing and IP-rated components. Fast-warming electric systems are particularly popular in bathrooms because they keep tiled floors comfortable.
### How does underfloor heating impact air quality and space usage?
Underfloor heating moves less air and dust than radiators or forced-air systems, which can help allergy sufferers and improve indoor air quality. Removing radiators also frees wall space for furniture and décor.
### Can underfloor heating be integrated with smart home systems?
Yes. Many underfloor heating thermostats are compatible with smart controls, allowing remote scheduling, voice commands, and energy monitoring for increased convenience and efficiency.
So what’s the answer? UFH delivers even radiant warmth, fewer cold spots and better thermal comfort. The research and industry data support those benefits, but they don't make UFH right for every property.
Radiators heat up fast and cost less to install, but they create less even temperatures and need hotter water, which affects efficiency and energy use.
The energy efficiency research is clear: UFH, especially water-based systems, can lower energy consumption by 25-35% compared with radiators, particularly when paired with renewable energy. That can save a meaningful amount over time, but installation usually costs more upfront, especially in a retrofit.
Radiators still win on project speed and cost in most retrofits. If disruption or budget is your main concern, they’re the practical option.
If comfort, lower energy use and minimal maintenance matter most, UFH is generally better. It needs no regular bleeding, has no exposed surfaces and lasts a long time.
### What I’d Do Next
**1. Speak to a qualified professional**
- Ask a heating engineer or HVAC consultant to assess the property’s insulation, floor structure and heating demand.
- Get advice based on the building, how you use it and the comfort you want.
- Ask them to compare electric underfloor heating vs water underfloor heating, plus any hybrid or zoned options.
**2. Check whether the property suits it**
- For a new build or major renovation, plan the UFH as part of the whole-house energy design.
- In an existing home, get a feasibility study to compare retrofit costs and benefits, especially in busy rooms such as bathrooms.
- Include any insulation upgrades you’ll need for good performance and savings.
**3. Compare cost and long-term value**
- Request quotes for UFH and radiators, including running-cost estimates over 10-20 years.
- Check available grants, incentives or energy-efficient finance when you compare the initial cost.
**4. Check the evidence**
- Read independent guides and authoritative industry resources on troubleshooting, drawbacks and new technology.
- Look at recent field data, peer-reviewed studies and standards to understand real-world performance.
**5. Consider a hybrid or zoned setup**
- Ask about combining UFH with radiators or using heat pumps across several zones.
- Match the system to room size, usage and available floor height, especially in a difficult retrofit.
If you've decided UFH is right but aren't sure which type, see our [Electric vs Wet UFH Comparison](/electric-vs-water-underfloor-heating-2026/).
My takeaway is simple: use wet UFH when you can design it properly into a well-insulated floor. Keep or upgrade radiators when budget, disruption or fast response matters more. If your home sits between those cases, a hybrid system is often the sensible answer.
**Ready to choose?** Get free quotes from professional underfloor heating installers via the [Underfloor Heating Directory](https://underfloorheating.directory/get-quotes).
---
--- title: Bathroom Underfloor Heating: Complete Installation & Cost Guide 2026 description: Discover bathroom underfloor heating costs, system choices and installation advice for warm, efficient floors. Plan your bathroom upgrade with confidence. url: https://underfloorheating.info/bathroom-underfloor-heating-guide/ published: 2025-09-17 updated: 2026-08-21 tags: ['bathroom underfloor heating', 'bathroom UFH', 'electric underfloor heating', 'wet underfloor heating', 'bathroom renovation'] ---
# Bathroom Underfloor Heating: Complete Installation & Cost Guide 2026
## Bathroom Underfloor Heating: Complete Installation & Cost Guide 2026
Bathroom underfloor heating gets rid of cold tiles and heats the room without taking up wall space. Plan your project with the practical guidance on [underfloorheating.info](https://underfloorheating.info/), then compare professionals through the [Underfloor Heating Directory](https://underfloorheating.directory/).
You’ll notice the difference as soon as you step onto the floor on a cold morning. It’s a simple upgrade, but one you’ll appreciate every day.
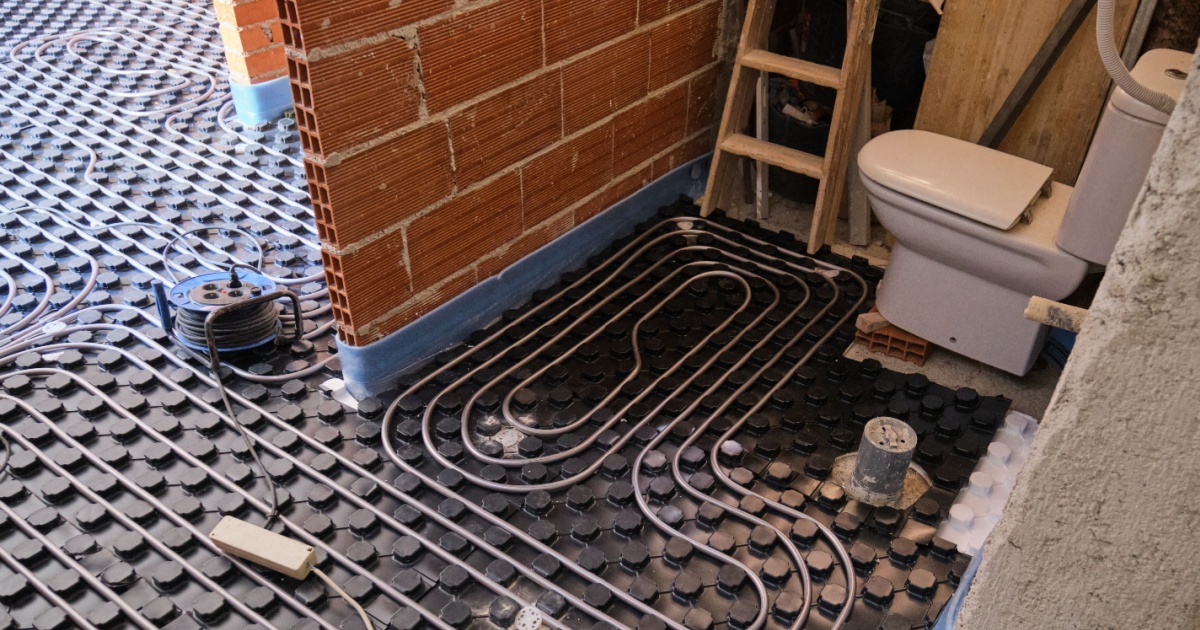
It’s not only about warm feet. Underfloor heating can improve energy efficiency, reduce heating bills and remove the need for a radiator that uses valuable wall space.
So which system should you choose, what does installation involve and how much will it cost? I’ll take you through the practical details.
🧮 **[Use our free cost calculator](/underfloor-heating-cost-calculator/)** for an instant estimate based on your bathroom's size and chosen system.
**Ready to install your bathroom underfloor heating?** Compare free quotes from trusted installers via the [Underfloor Heating Directory](https://underfloorheating.directory/get-quotes) to get started.
## Why Underfloor Heating is Perfect for Bathrooms
- **Warm tiles:** UFH gives you consistent, gentle warmth across the whole floor.
- **More space:** Remove the radiator and you free up useful wall space, which can make a small bathroom feel larger.
- **Lower temperatures:** UFH runs at lower temperatures than radiators, [saving you money on energy bills](/is-underfloor-heating-expensive-to-run/).
- **Less moisture:** The [radiant heat](/how-does-underfloor-heating-work/) helps dry the floor and reduce moisture, which can help prevent mould. It also doesn't circulate dust like forced-air systems.
- **A cleaner look:** You can't see the heating, so it won't get in the way of a simple bathroom design.

## Electric vs. Wet Systems for Bathrooms
For a bathroom, I’d almost always choose **[electric underfloor heating](/electric-underfloor-heating-systems/)**. Here’s why.
### Electric Underfloor Heating (Recommended for Bathrooms)
Electric systems use thin heating mats or cables directly under the tiles. They’re usually the most sensible option for a bathroom renovation. You can find more detail in my [complete electric UFH guide](/electric-underfloor-heating-systems/).

**Key Benefits for Bathrooms:**
- **Easy to retrofit:** The thin mats add minimal floor height and fit neatly into a standard bathroom renovation.
- **Quick heat-up time:** The floor will warm up in 30-60 minutes, which works well for a morning routine.
- **Lower installation cost:** You’ll spend significantly less and cause less disruption than you would with a wet system.
- **Independent control:** You can heat the bathroom separately from the rest of your home. For better control and energy savings, consider a [smart thermostat](/smart-thermostats-underfloor-heating/) with scheduling and remote access.
### Wet Underfloor Heating for Bathrooms
A wet system uses hot water pipes, and for one bathroom it’s usually overkill. I’d only consider it if you’re installing UFH throughout the house as part of a [new build](/underfloor-heating-new-builds/) or major renovation. For most bathroom-only projects, the installation cost and extra floor build-up don’t make sense.
## Installation Process: What to Expect
A competent DIYer can install electric UFH in a bathroom, but a qualified electrician **must** make the final electrical connections to comply with [Part P of the UK Building Regulations](https://www.gov.uk/government/publications/electrical-safety-approved-document-p).
**Before you start:** Calculate your bathroom's heat loss to determine the correct heating mat size and power output. Our [Heat Loss Calculator](/heat-loss-calculator/) will assess your room's insulation, windows, and heating requirements in minutes.
1. **Prepare the subfloor:** Make sure the floor is clean, level and stable.
2. **Lay insulation:** Fit high-quality insulation boards so the heat travels up into the room, not down into the subfloor.
3. **Roll out the mat:** Roll the electric heating mat out and fix it to the insulation. You can cut the mesh to fit the room, but don't cut the wire.
4. **Install the sensor:** Put the floor temperature sensor in a conduit midway between two runs of heating wire.
5. **Test the system:** Before you tile, ask an electrician to test the mat's resistance and check for damage.
6. **Tile over it:** Cover the mat with flexible tile adhesive, then lay the tiles on top.

## Cost of Bathroom Underfloor Heating (2026 UK Prices)
For a typical UK bathroom of around **5-8m²**, budget the following for an electric system:
- **Materials:** £250 - £500 (This includes the heating mat, a smart thermostat, and insulation boards).
- **Professional Installation:** £400 - £700 (Includes labour for laying the mat and the crucial electrical certification).
- **Total Estimated Cost:** **£650 - £1,200**
**Running Costs:**
- Expect to pay around **£120 - £180 per year** to run the system for 3-4 hours a day during the colder months.
## Best Flooring for Bathroom UFH
**Tiles and stone** work best with underfloor heating. Their excellent thermal conductivity (71 W/m² heat output) transfers heat quickly and efficiently, and both materials suit a wet bathroom. For a detailed comparison of flooring types, including tog ratings and temperature limits, see my [comprehensive flooring guide](/best-flooring-underfloor-heating/).
Luxury Vinyl Tile (LVT) also gives you a good waterproof option.
Electric underfloor heating can make a big difference to a bathroom without a huge installation cost. You get a warmer, more comfortable room, and it can even add value to your home.
If you’re already renovating the bathroom, this is one of the most cost-effective upgrades you can make. If you’re considering UFH for other rooms or the whole house, read my [complete guide to retrofitting underfloor heating](/retrofitting-underfloor-heating/) in an existing property.
Already have bathroom UFH but it’s not working properly? My [complete troubleshooting guide](/underfloor-heating-problems/) covers cold spots, circuit failures, sensor problems and inadequate heating in electric and wet systems.
For detailed prices across all room sizes and system types, including running costs and ROI analysis, see my [Underfloor Heating Costs Guide](/underfloor-heating-costs/).
**Ready to transform your bathroom?** Get free quotes from professional installers today through the [Underfloor Heating Directory](https://underfloorheating.directory/get-quotes). Already have a quote? [Check if it's competitive →](https://underfloorheating.directory/analyse-quote)
---
--- title: Best Water Underfloor Heating System UK 2026: Buyer's Guide description: Looking for the best water underfloor heating system in the UK? We compare screed vs overfloor, boiler vs heat pump compatibility, and manifold quality. url: https://underfloorheating.info/wet-underfloor-heating-ultimate-guide/ published: 2025-09-17 updated: 2026-08-21 tags: ['best water underfloor heating system', 'best water underfloor heating system uk', 'wet underfloor heating', 'hydronic underfloor heating'] ---
# Best Water Underfloor Heating System UK 2026: Buyer's Guide
> **Quick Answer:** The "best" water underfloor heating system depends entirely on your floor construction. For **new builds**, standard screed systems offer the best efficiency and thermal mass. For **retrofits**, low-profile overfloor boards (adding just 15-20mm height) are the superior choice. Expect to pay **£90–£190/m²** fully installed. Regardless of the brand, a quality system *must* have **75mm–100mm of rigid insulation** beneath it and use an A-rated circulation pump (like Grundfos) on the manifold. Explore more UK system advice at [underfloorheating.info](https://underfloorheating.info/) and find installers through the [Underfloor Heating Directory](https://underfloorheating.directory/).
If you are planning a renovation or building a new home in 2026, you are likely looking for the **best water underfloor heating system** to replace traditional radiators.
Water (or "wet") underfloor heating frees up wall space, provides even radiant heat, and costs less to run than electric underfloor heating mats.
The UK market offers many options. From traditional in-screed pipes to modern low-profile overlay boards, choosing the wrong system type for your specific floor can result in sluggish warm-up times, cold spots, and unnecessarily high heating bills.
This guide explains what makes a high-performance water underfloor heating system. It compares the different formats, core components, and critical installation requirements so you can choose the right system for your property.

## 1. System types: screed vs. low-profile overfloor
The single most important decision you will make is the *format* of the system. You cannot simply buy a generic "water underfloor heating kit" and expect it to work in any room. The best system is the one designed for your specific floor structure.
### Traditional screeded systems (best for new builds & extensions)
In a screeded system, installers clip the heating pipes into thick insulation boards and pour a layer of liquid screed (usually 50mm–65mm thick) over them. Our [UFH Screed Guide](/underfloor-heating-screed/) covers types, depths, drying times, and the essential commissioning protocol in full.
Once the screed cures, it acts as a thermal battery, absorbing heat from the pipes and radiating it slowly and evenly into the room.
**Pros:**
* **Highest Efficiency:** The thermal mass of the screed provides incredibly stable, even heat.
* **Cheapest Materials:** Because you are just buying pipe, clips, and standard insulation, the per-metre material cost is the lowest of any system.
* **Best for Heat Pumps:** Excellent at maintaining the low, steady temperatures that heat pumps prefer.
**Cons:**
* **Massive Height Addition:** Requires 100mm–150mm of total floor build-up (insulation + pipes + screed). This is usually impossible in older homes without digging up the existing concrete slab.
* **Slow Response Time:** Because the system has to heat a thick slab of concrete, it can take 2–3 hours to warm up from cold. It is designed to be left on at a low, steady temperature all winter.
* **Drying Times:** Liquid screed can take weeks to dry fully before you can lay your final floor finish.
### Low-profile overfloor systems (best for retrofits)
If you are renovating an existing house and cannot afford to lose 100mm of ceiling height, a low-profile overfloor system is the best water underfloor heating system for you.
These systems use dense, pre-routed insulation boards (typically 15mm–20mm thick) covered in an aluminium foil layer. They sit directly on top of your existing solid or timber floor. Installers press the heating pipe directly into the grooves and lay your final floor finish closely on top.
**Pros:**
* **Minimal Disruption:** Adds as little as 15mm to your floor height, meaning you rarely have to trim doors or raise skirting boards.
* **Rapid Response:** Because the pipes are sitting millimetres below your feet (with no thick screed to heat up first), the floor gets warm in **30–45 minutes**.
* **DIY Friendly:** The boards are glued down, and the pipe is simply walked into the pre-cut grooves.
**Cons:**
* **Higher Material Cost:** The engineered foil-faced boards are significantly more expensive than plain pipe and clips.
* **Lower Thermal Mass:** They cool down just as quickly as they heat up, requiring your boiler or heat pump to cycle more frequently.
For a deeper dive into the specific brands offering these systems, start with our [Wunda underfloor heating review](/wunda-underfloor-heating-review/) or compare Wunda, ProWarm, Nu-Heat and others in our guide to the [Best Underfloor Heating Brands UK](/underfloor-heating-brands/).

## 2. Heat source compatibility: boilers vs. heat pumps
A common misconception is that you need a specific type of water underfloor heating system depending on whether you have a gas boiler or an Air Source Heat Pump (ASHP).
In reality, the pipes under the floor are identical. The difference lies in the **manifold controls** and the **pipe spacing**.
### Running on a Gas or Oil Boiler
Standard boilers heat water to very high temperatures (typically 65°C–80°C) to serve wall radiators. If you pump 80°C water into a floor, you will damage the screed, warp your floorboards, and create an uncomfortably hot room.
To make a water underfloor heating system the "best" fit for a boiler, the manifold *must* be equipped with a **thermostatic blending valve**. This valve mixes the scalding hot water from the boiler with cooler water returning from the floor, reducing the flow temperature to a safe **35°C–45°C** before it enters the underfloor pipes.
**Efficiency bonus:** Because the floor requires such low temperatures, a modern condensing gas boiler can run in full condensing mode much more frequently, saving you up to 15% on your gas bill compared to running radiators.
### Running on a Heat Pump
Heat pumps pair well with water underfloor heating because they produce large volumes of low-temperature water (typically 35°C–45°C) efficiently.
Because the underfloor heating system requires this exact temperature range, **you completely bypass the need for a blending valve on the manifold**.
To ensure you get the best water underfloor heating system for a heat pump, you must pay attention to **pipe spacing**:
* **Standard Boiler Spacing:** Pipes are usually laid 200mm apart.
* **Heat Pump Spacing:** Because the water isn't as hot, the pipes must be laid closer together to deliver enough heat to the room. The gold standard for heat pump UFH design is **150mm or even 100mm pipe spacing**.
If you are transitioning to renewables, see our dedicated guide on [Heat Pumps and Underfloor Heating Integration](/underfloor-heating-heat-pumps-guide-2026/). Reversible heat pumps can also run wet underfloor systems for [reversible heat pump cooling](/heat-pump-underfloor-cooling/) in summer, making them a genuine alternative to air conditioning in well-insulated homes.
## 3. The engine room: manifold & pump quality
When comparing quotes from different suppliers, the pipe itself is rarely the differentiator. Modern multi-layer PEX or PE-RT pipe is highly standardised and almost universally comes with a 50-year guarantee.
The difference between a cheap kit and the best water underfloor heating system lies entirely in the **manifold and the circulation pump**.
### The Manifold
The manifold is the distribution hub. It splits the heated water into the various zones (circuits) around your house. A high-quality manifold should feature:
1. **Stainless Steel or High-Grade Brass Construction:** Cheap plastic or low-grade metal manifolds can corrode or crack over time.
2. **Individual Flow Meters:** Every single loop of pipe must have a clear, adjustable flow meter (the small glass vials on top). This allows your plumber to balance the system. Without balancing, a small bathroom loop might steal all the heat from a large living room.
3. **Isolation Valves:** The ability to shut off the water to a single loop without draining the entire house is critical for long-term maintenance.
[Check out our comprehensive Underfloor Heating Manifold Guide](/underfloor-heating-manifold-guide/) for a detailed breakdown of these components.
### The circulation pump
The pump sits on the manifold and pushes water through the hundreds of metres of pipe under your floor. Your boiler's internal pump is rarely strong enough to do this alone.
**This is the most critical quality check you can make:** The best water underfloor heating systems will always supply an A-rated, high-efficiency circulation pump from a premium brand, specifically **Grundfos** or **Wilo**.
If a quote includes a generic, unbranded pump, walk away. A cheap pump will burn out within 2–3 years, leaving you with a cold floor and a £200+ plumbing bill to replace it. An A-rated Grundfos pump will often run silently for 15+ years.
## 4. The golden rule: insulation requirements
Even an expensive water underfloor heating system will perform poorly if you skip the insulation.
Heat naturally travels to the coldest space. If you lay heating pipes directly onto an uninsulated concrete slab, you will spend your money heating the earth beneath your house, not the room above it. This is the number one cause of high running costs and complaints that "the floor never gets warm."
To get the best performance, you must meet the following insulation standards:
* **Ground Floors:** The UK building regulations standard for new floors is a minimum of **75mm to 100mm of rigid PIR insulation** (like Celotex or Kingspan) installed directly beneath the underfloor heating pipes.
* **Upper Floors:** Because heat rising to the floor above isn't totally wasted, you can usually get away with thinner insulation (or specialised foil-faced acoustic matting), but a thermal barrier is still highly recommended to ensure the heat goes up into the intended room, not down through the ceiling.
* **Edge Insulation:** A crucial, often-forgotten component. An 8mm–10mm foam expansion strip *must* be run around the entire perimeter of the room where the floor meets the wall. This stops the heat from bleeding horizontally into your external brickwork.
If a contractor tells you that you can skip the insulation to save floor height or money, they are setting you up for failure.

## 5. What Does it Actually Cost?
Water underfloor heating requires a larger upfront investment than electric mats or traditional radiators, but the 40–60% reduction in long-term running costs makes it highly economical over a 5 to 10-year period.
Based on 2026 UK averages:
* **System-Only Materials:** Expect to pay **£25–£45/m²** for the pipe, manifold, pump, and standard clips. (Low-profile overlay boards push this closer to £50–£70/m²).
* **Fully Installed (Retrofit):** Hiring a professional to prepare the floor, lay the system, plumb the manifold, and commission the controls typically costs **£90–£190/m²**.
* **New Build Installation:** Because the floors are open and access is easy, new build installations are cheaper, often landing around **£80–£120/m²**.
For a highly accurate estimate tailored to your exact room sizes and system choice, use our free [Underfloor Heating Cost Calculator](/underfloor-heating-cost-calculator/). Or, review our full breakdown of [Underfloor Heating Costs](/underfloor-heating-costs/).
## 6. How to choose the best system for you (checklist)
Before you purchase a kit or accept a plumber's quote, ensure your chosen system ticks these boxes:
1. **Format matches the floor:** Screed for new builds; low-profile overfloor for renovations.
2. **Pipe spacing is correct:** 200mm for boilers; 100mm–150mm for heat pumps. Use our [pipe spacing calculator](/underfloor-heating-pipe-spacing-calculator/) if you aren't sure.
3. **Pump is branded:** Confirm the manifold includes an A-rated Grundfos or Wilo pump.
4. **Manifold has flow meters:** Ensure every port has an adjustable flow meter for balancing.
5. **Insulation is planned:** Verify that 75mm–100mm of rigid insulation is factored into the floor build-up.
6. **Controls are zoned:** Ensure you have a smart thermostat for every distinct room/zone, not just one for the whole floor.
## Summary
The "best" water underfloor heating system in the UK isn't defined by a single brand name. It comes from choosing the correct physical format for your property (screed vs. overlay), reliable manifold and pump components, and adequate sub-floor insulation.
Whether you want to run efficiently on a gas condensing boiler today or prepare your home for an Air Source Heat Pump tomorrow, a correctly specified wet underfloor heating system can provide decades of silent, invisible and economical comfort.
### Related Guides
* [Electric vs Water Underfloor Heating 2026](/electric-vs-water-underfloor-heating-2026/)
* [Underfloor Heating Running Costs 2026](/underfloor-heating-running-costs-2026/)
* [Smart Thermostats for Underfloor Heating](/smart-thermostats-underfloor-heating/)
* [Complete Installation Guide](/underfloor-heating-installation-guide/)
* [Underfloor Heating Screed Guide](/underfloor-heating-screed/)
---
--- title: Electric Underfloor Heating Systems UK: Types and Costs description: Electric UFH guide for UK homes: mats, loose cable, foil systems, installed costs, running costs, floor suitability and Part P installation rules. url: https://underfloorheating.info/electric-underfloor-heating-systems/ published: 2025-09-16 updated: 2026-08-21 tags: ['electric underfloor heating', 'heating systems', 'electric UFH', 'underfloor heating installation', 'heating mats'] ---
# Electric Underfloor Heating Systems UK: Types and Costs
> **Quick answer:** Electric underfloor heating costs **£40-£90/m² installed** for many UK bathroom and kitchen projects. I’d use mats in regular tiled rooms, loose cable in awkward layouts and foil systems under floating laminate or engineered wood floors. Running costs depend on usage, but a 4m² bathroom with a 150W/m² mat costs about **32p per day** for two hours at 27p/kWh. You’ll find more practical advice at [underfloorheating.info](https://underfloorheating.info/) and suitable installers through the [Underfloor Heating Directory](https://underfloorheating.directory/).
## Electric underfloor heating: what you need to know
Electric underfloor heating (UFH) is best for rooms where you want warm floors without installing a wet pipe system: bathrooms, ensuites, kitchens, small extensions and retrofit projects with limited floor height.
The decision isn't only "electric or wet". You need to work out **which electric format suits the room, floor covering and expected running cost**. I’ll compare mats, loose cable and foil systems, including costs, installation checks, floor compatibility and Part P electrical rules. For prices across all system types, see my [Underfloor Heating Costs Guide](/underfloor-heating-costs/).
Planning a project now? You can [compare trusted underfloor heating installers](https://underfloorheating.directory/get-quotes) if you want quotes for supply, fitting and certified electrical connection.

## What is Electric Underfloor Heating?
Electric underfloor heating sends electricity through resistance wires beneath the floor. You can buy the wires as loose cables or embedded in a mesh mat. They generate the warmth directly, so this is a form of direct heating.
Key components include:
- **Heating Mats or Cables:** The heating element itself, available in various wattages (typically 150-200W/m²).
- **Thermostat:** A dedicated controller (basic, programmable, or smart) for precise temperature management.
- **Floor Temperature Sensor:** Monitors actual floor temperature to prevent overheating (typically limits to 28-29°C).
- **Insulation Boards:** Essential for ensuring heat travels up into the room, not down into the subfloor, improving efficiency by 30-50%.

## Types of Electric UFH Systems
You have three main types to choose from. The right one depends on the room and floor finish.
| Room or Floor Situation | Best Electric UFH Type | Why |
|-------------------------|------------------------|-----|
| Rectangular tiled bathroom | Heating mat | Fast layout, even cable spacing and simple wattage calculation |
| Awkward ensuite with fixtures | Loose cable | Easier to route around toilets, shower trays and vanity units |
| Laminate bedroom retrofit | Foil system | Dry installation with minimal floor height increase |
| Large kitchen used for long periods | Consider wet UFH first | Electric can work, but running costs rise quickly over larger areas |
| Poorly insulated floor | Add insulation before choosing system | Without insulation, electric UFH wastes heat downwards |
I’ve seen plenty of projects go wrong at this point. A cheap mat in the wrong room can cost more to run than a properly specified system with good insulation and controls.
### 1. Heating Mats (Most Popular)
**What they are:** Pre-spaced heating cables fixed to a fibreglass mesh mat, typically 50cm wide and available in various lengths to suit different room sizes.
**Pros:**
- Quick and easy to install - simply roll out like carpet
- Consistent cable spacing ensures even heat distribution
- Best for rectangular or square rooms
- Professional-looking results even for DIYers
- Fixed wattage (usually 150W/m² or 200W/m²) makes heat output calculations simple
**Cons:**
- Less flexible for awkward room shapes
- Cutting the mat (not the cable) is possible but requires care
- Slightly more expensive than loose cables (£5-10/m² more)
**Best for:** Bathrooms, kitchens, most standard room shapes.
**Cost:** £35-£60/m² for materials, £40-£90/m² installed.
For a dedicated guide covering all mat formats, floor-type compatibility, brand comparisons, and wiring, see our [Underfloor Heating Mats Guide](/underfloor-heating-mats-guide/).
### 2. Loose Wire/Cables
**What they are:** A single continuous heating cable on a reel that you space and fix yourself using cable clips or fixation tape.
**Pros:**
- Maximum flexibility for L-shaped, circular, or irregular rooms
- Can heat awkward corners and spaces around fixtures
- Typically 10-15% cheaper than heating mats
- Adjustable spacing for different heat requirements
**Cons:**
- More time-consuming to install
- Requires careful planning to maintain even spacing
- Easy to make mistakes that create cold or hot spots
- Not ideal for first-time DIYers
**Best for:** Awkwardly shaped rooms, small areas around toilets or under vanity units, experienced installers.
**Cost:** £30-£50/m² for materials, £50-£85/m² installed.
### 3. Foil Heating Systems
**What they are:** Ultra-thin heating elements (as thin as 0.5mm) sandwiched between aluminium foil layers, designed specifically for dry installations.
**Pros:**
- Ideal for floating floors (laminate, engineered wood)
- No need for screed or adhesive
- Zero floor height increase in some installations
- Fast and clean installation
- Can be installed over existing floors in some cases
**Cons:**
- Not suitable for wet rooms or areas with tile/stone
- Less effective heat distribution than embedded systems
- Limited product availability
- Typically more expensive per m²
**Best for:** Bedroom retrofits, living rooms with wooden floors, quick renovations.
**Cost:** £45-£70/m² for materials, £60-£100/m² installed.
## Is Electric Underfloor Heating Expensive to Run?
Electric UFH is more expensive per kWh than gas or heat-pump-fed wet UFH, but it can still make sense in small rooms used for short periods.
Use this simple calculation:
`heated area x system wattage x hours used ÷ 1,000 x electricity price`
For a 4m² bathroom:
- 4m² heated area
- 150W/m² mat
- 2 hours per day
- 27p/kWh electricity price
That gives: `4 x 150 x 2 ÷ 1,000 x £0.27 = £0.32 per day`.
For a 15m² kitchen running four hours per day, the same logic gives about **£2.43 per day**, which is why electric UFH works best as targeted comfort heating rather than whole-house primary heating.
For a deeper seasonal comparison, see [Is Underfloor Heating Expensive to Run?](/is-underfloor-heating-expensive-to-run/) and our [Underfloor Heating Running Costs 2026 Guide](/underfloor-heating-running-costs-2026/).
## Cost Breakdown: Supply vs Labour
Understanding the full cost picture helps you budget accurately and decide whether to [DIY or hire professionals](/diy-underfloor-heating/).
### Material Costs (Supply Only)
| Component | Cost Range |
|-----------|-----------|
| Heating mat (150W/m²) | £35-£60/m² |
| Loose cable system | £30-£50/m² |
| Foil heating system | £45-£70/m² |
| Insulation boards (6-10mm) | £8-£15/m² |
| Thermostat (basic) | £40-£80 |
| Thermostat (programmable) | £80-£150 |
| Thermostat (smart WiFi) | £120-£250 |
| Self-levelling compound | £12-£20/m² (if needed) |
| Tile adhesive (if tiling) | £5-£10/m² |
### Labour Costs
- **Mat installation:** £15-£30/m² for laying the system
- **Electrical connection (Part P):** £150-£300 for certified electrician
- **Floor preparation and screeding:** £15-£25/m² if required
- **Full professional installation:** £40-£90/m² all-in
### Example Room Costs
**Small Bathroom (4m²):**
- Heating mat: £180 (£45/m²)
- Insulation: £50
- Smart thermostat: £150
- Installation labour: £100
- Electrical certification: £200
- **Total: £680 (£170/m²)**
**Medium Kitchen (15m²):**
- Heating mat: £750 (£50/m²)
- Insulation: £180
- Smart thermostat: £180
- Installation labour: £400
- Electrical certification: £250
- Screed/levelling: £300
- **Total: £2,060 (£137/m²)**
For detailed cost comparisons and a breakdown of wet system pricing, see our [Underfloor Heating Cost Calculator](/underfloor-heating-cost-calculator/).
## Installation Process: Step-by-Step
Electric UFH installation follows a systematic process. While much of it is DIY-friendly, electrical connections must be completed by a Part P certified electrician.
### Step 1: Floor Preparation
1. **Remove existing flooring** down to the structural subfloor (concrete or timber joists with boards)
2. **Clean thoroughly** - sweep and vacuum all dust and debris
3. **Check level** using a spirit level or laser level; the floor should be flat to within 3mm per metre
4. **Repair any damage** - fill cracks, replace damaged boards, ensure structural soundness
### Step 2: Insulation Installation
Insulation is **critical** for electric UFH efficiency. Without it, 30-50% of heat escapes downwards.
1. **Choose appropriate insulation boards:**
- 6mm thermal boards for solid concrete floors
- 10mm boards for suspended timber floors
- XPS or high-density foam boards (look for thermal resistance R-value of 0.25+ m²K/W)
2. **Lay boards** tightly together with taped or interlocking joints
3. **Tape all seams** to prevent screed or adhesive seeping through
4. **Prime the surface** if required by manufacturer (usually only for flexible mats)
### Step 3: Laying the Heating Elements
**For Heating Mats:**
1. Plan your layout on paper first, measuring heated areas and avoiding permanent fixtures
2. Roll out the mat, cutting the mesh (never the cable) to turn corners
3. Use double-sided tape or specific mat adhesive to hold in place
4. Leave 10-15cm gaps around toilets, vanity units, and other permanent fixtures
**For Loose Cables:**
1. Fix cable guides or spacing rails to the insulation
2. Start from the thermostat location and work outward
3. Maintain even spacing (typically 100-150mm between cable runs)
4. Use cable clips every 30-50cm to secure
5. Never cross cables or allow them to touch
### Step 4: Thermostat and Sensor Installation
1. **Choose location:** 1.5m from floor, away from direct sunlight, draughts, and other heat sources
2. **Run sensor probe:** Thread into conduit and place between two cable runs in the middle of the heated area
3. **Bring cable tails** back to thermostat location through walls or skirting
4. **Test system resistance** with multimeter and record reading (should match manufacturer spec ±10%)
### Step 5: Electrical Connections (Part P Certified Electrician Required)
UK Building Regulations **Part P** requires electrical work to be completed by a qualified, certified electrician. They will:
- Connect heating cables to thermostat terminals
- Wire thermostat to dedicated circuit with RCD protection
- Test system resistance and insulation
- Issue Minor Electrical Installation Works Certificate or Building Regulations Compliance Certificate
**Never attempt final electrical connections yourself** - this violates Building Regulations and may void warranties.
For more on electrical requirements, see our [UK Building Regulations for Underfloor Heating Guide](/uk-building-regulations-underfloor-heating/).
### Step 6: Covering the System
**For tiled or stone floors:**
1. Apply thin layer of flexible tile adhesive directly over cables (3-5mm)
2. Alternatively, use self-levelling screed (10-15mm minimum)
3. Wait 24 hours before walking on it
4. Test system resistance again before tiling
5. Apply tiles with flexible adhesive and use flexible grout
**For vinyl or carpet:**
1. Apply 10mm minimum self-levelling compound
2. Allow to cure fully (usually 48 hours)
3. Test system resistance again
4. Install underlay suitable for UFH (max 1.5 tog for vinyl, 2.5 tog for carpet)
5. Lay final floor covering
### Step 7: First Heating Cycle
- **Wait full cure time** for screed or adhesive (usually 7-21 days for screed, 48 hours for adhesive)
- Start at low temperature (15-18°C) for 2-3 days
- Gradually increase by 2-3°C per day until reaching target temperature
- This prevents thermal shock and ensures even curing
For comprehensive installation guidance covering both electric and wet systems, see our [Underfloor Heating Installation Guide](/underfloor-heating-installation-guide/).
## Thermostat Types: Costs and Recommendations
Your thermostat choice significantly impacts both running costs and comfort.
### Basic Thermostats (£40-£80)
**Features:**
- Manual temperature control
- Simple on/off operation
- Floor or air temperature sensing
**Best for:** Budget installations, rarely-used spaces (guest bathrooms), rental properties.
**Drawback:** No scheduling = system may run when not needed = higher bills.
### Programmable Thermostats (£80-£150)
**Features:**
- 7-day scheduling
- Multiple set points per day
- Holiday mode
- Adaptive start (learns heat-up time)
**Best for:** Most installations - the sweet spot of cost vs functionality.
**Savings potential:** 20-30% reduction in running costs compared to basic thermostats through scheduling.
### Smart WiFi Thermostats (£120-£250)
**Features:**
- Control via smartphone app from anywhere
- Integration with Alexa, Google Home, Apple HomeKit
- Energy usage tracking and reporting
- Geo-fencing (automatic on/off based on phone location)
- Weather compensation
- Multi-zone control
**Best for:** Tech-savvy users, whole-house installations, maximising efficiency.
**Savings potential:** 25-35% reduction through intelligent automation and usage insights.
For detailed smart thermostat reviews and recommendations, see our [Smart Thermostats for Underfloor Heating Guide](/smart-thermostats-underfloor-heating/).
## Running Costs: Detailed Calculations
Electric UFH running costs depend on floor area, usage hours, insulation quality, and electricity prices. Here's how to calculate your costs accurately.
### Power Consumption
Typical electric UFH systems use:
- **150W/m²** for well-insulated rooms with good floor coverings
- **200W/m²** for poorly insulated rooms or quick heat-up requirements
### Current UK Electricity Prices (2025)
- **Standard variable tariff:** 24-27p/kWh
- **Fixed tariff:** 22-26p/kWh
- **Economy 7 night rate:** 12-18p/kWh
We'll use **27p/kWh** for conservative calculations.
### Worked Example: Small Bathroom (4m²)
**Assumptions:**
- Heating mat: 150W/m²
- Usage: 2 hours per day (morning warm-up before shower)
- Electricity price: 27p/kWh
- Days used: 180 days/year (October to March)
**Calculation:**
1. Total power: 4m² × 150W/m² = 600W = 0.6kW
2. Daily energy: 0.6kW × 2 hours = 1.2kWh
3. Daily cost: 1.2kWh × £0.27 = **£0.32/day**
4. Annual cost: £0.32 × 180 days = **£58/year**
### Worked Example: Medium Kitchen (15m²)
**Assumptions:**
- Heating mat: 150W/m²
- Usage: 4 hours per day (morning and evening)
- Electricity price: 27p/kWh
- Days used: 240 days/year (September to April)
**Calculation:**
1. Total power: 15m² × 150W/m² = 2,250W = 2.25kW
2. Daily energy: 2.25kW × 4 hours = 9kWh
3. Daily cost: 9kWh × £0.27 = **£2.43/day**
4. Annual cost: £2.43 × 240 days = **£583/year**
### Cost Reduction Strategies
1. **Use programmable thermostats** - save 20-30% through scheduling
2. **Improve insulation** - insulation boards reduce downward heat loss by 30-50%
3. **Choose appropriate floor coverings** - tile/stone conduct heat best; thick carpet reduces efficiency
4. **Zone heating** - only heat rooms when occupied
5. **Lower temperature setting by 1-2°C** - saves approximately 10% per degree
For year-round running cost analysis and comparisons with radiators and wet systems, see our [Underfloor Heating Running Costs 2026 Guide](/underfloor-heating-running-costs-2026/).
## Best Floor Types for Electric UFH
Floor covering significantly impacts heat transfer efficiency and overall performance.
### Excellent (Highest Efficiency)
**Porcelain/Ceramic Tile:**
- Thermal conductivity: Excellent
- Max floor temperature: 28-29°C comfortable
- Heat-up time: 30-45 minutes
- Efficiency rating: ★★★★★
**Natural Stone (Limestone, Slate, Marble):**
- Thermal conductivity: Excellent
- Retains heat well after system turns off
- Heat-up time: 45-60 minutes
- Efficiency rating: ★★★★★
### Good
**Engineered Wood:**
- Thermal conductivity: Good (if <18mm thick and suitable for UFH)
- Max floor temperature: 27°C to prevent warping
- Must be explicitly rated for UFH use
- Efficiency rating: ★★★★☆
**Luxury Vinyl Tile (LVT):**
- Thermal conductivity: Good
- Must be UFH-compatible
- Quick heat-up time
- Efficiency rating: ★★★★☆
### Acceptable (With Limitations)
**Laminate:**
- Must be specifically rated for UFH
- Max 27°C floor temperature
- Requires foil systems or very thin screed
- Efficiency rating: ★★★☆☆
**Carpet:**
- Maximum combined tog value: **2.5 tog** (carpet + underlay combined)
- Significantly reduces heat output (30-50% less than tile)
- Longer heat-up times (60-90 minutes)
- Higher running costs
- Efficiency rating: ★★☆☆☆
### Not Recommended
- Solid wood flooring (prone to warping and gaps)
- Thick carpets or underlays exceeding 2.5 tog
- Cork flooring (poor heat conductor)
For comprehensive flooring guidance including tog ratings and manufacturer recommendations, see our [Best Flooring for Underfloor Heating Guide](/best-flooring-underfloor-heating/).
## When to Choose Electric Over Wet Systems
Electric UFH works best in specific situations. So when should you choose it?
### Choose Electric If:
✅ **Single room or small area** (bathroom, ensuite, small kitchen)
✅ **Renovation or retrofit** where raising floor height is problematic
✅ **Budget under £2,000** for the project
✅ **Quick installation needed** (complete in 1-2 days)
✅ **DIY installation preferred** (with certified electrician for connections)
✅ **Existing heating system adequate** and you just want warm floors
✅ **No access to gas boiler or heat pump** for wet system
### Choose Wet System If:
❌ **Whole house heating** (3+ rooms or entire floor)
❌ **Primary heat source** required
❌ **Long-term running cost efficiency** is priority
❌ **[New build](/underfloor-heating-new-builds/) or major renovation** where floor build-up isn't an issue
❌ **Heat pump installation** planned (wet UFH achieves best COP)
❌ **Budget over £5,000** available
For a detailed side-by-side comparison with exact cost examples and decision framework, see our [Electric vs Wet Underfloor Heating Guide](/electric-vs-water-underfloor-heating-2026/).
## Building Regulations and Safety
### Part P: Electrical Safety
A **Part P certified electrician** must complete all electrical connections. They’ll:
- Ensure correct circuit sizing and RCD protection
- Test system resistance and insulation values
- Provide certification for Building Control compliance
- Guarantee safe installation meeting BS 7671 wiring regulations
### Floor Temperature Limits
- **Maximum floor surface temperature:** 28-29°C for occupied spaces
- **27°C limit** for wooden floors to prevent damage
- Floor temperature sensor and compatible thermostat required to enforce limits
- Prevents discomfort, floor damage, and excessive energy waste
### Heat Output Compliance
Building Regulations Part L requires consideration of energy efficiency. While electric UFH is permitted, design must:
- Include adequate insulation below heating elements
- Use programmable controls for heat management
- Not be specified as primary heating in new builds without justification
For full regulatory requirements including SAP calculations and compliance certification, see our [UK Building Regulations Underfloor Heating Guide](/uk-building-regulations-underfloor-heating/).
## Why choose electric UFH?
- **Easy to Install:** You can roll heating mats out quickly, which makes the physical installation a realistic DIY project (with a professional handling the final electrical work).
- **Low Upfront Cost:** Materials and installation are significantly cheaper than water-based systems - typically 40-60% less.
- **Minimal Floor Height Increase:** The mats are very thin (2-4mm plus screed), making them perfect for renovations where you can't raise the floor significantly.
- **Fast Heat-Up Time:** You'll feel the floor getting warm in 30-60 minutes compared to 2-4 hours for wet systems.
- **Ideal for Single Rooms:** Perfect for adding comfort to a bathroom, kitchen, or ensuite without altering your main heating system.
- **No Maintenance:** Unlike wet systems with potential leaks or boiler issues, electric UFH requires virtually zero maintenance once installed.
- **Long Lifespan:** Quality systems have warranties of 10-25 years and can last 30+ years with no servicing required.

## Common Mistakes to Avoid
1. **Skipping insulation** - reduces efficiency by 30-50% and increases running costs significantly
2. **Not testing resistance** before, during, and after covering - voids warranty if damage occurs
3. **Attempting electrical connections yourself** - illegal under Part P and dangerous
4. **Installing under permanent fixtures** (toilets, kitchen units) - wastes energy and risks overheating
5. **Using incompatible floor coverings** - thick carpet or solid wood severely impacts performance
6. **Setting temperature too high** - 27-29°C floor temperature is optimal; higher wastes energy
7. **Insufficient screed depth** - minimum 10mm for self-levelling compound to protect cables
## Frequently Asked Questions
### 1. Can I install electric underfloor heating myself?
You can install the heating mats or cables yourself, but **electrical connections must be completed by a Part P certified electrician** to comply with UK Building Regulations. The physical laying of mats is DIY-friendly and similar to rolling out underlay, but testing, wiring, and certification require professional qualification. Budget £150-300 for electrical work.
### 2. How long does electric underfloor heating last?
Quality electric UFH systems typically last **25-30+ years** with proper installation. Most manufacturers offer warranties of 10-25 years, with some lifetime warranties available. There are no moving parts to fail and no maintenance requirements, making electric systems extremely reliable. The thermostat may need replacing after 10-15 years.
### 3. Does electric UFH use a lot of electricity?
Electric UFH uses **150-200W/m²** when actively heating. A 4m² bathroom running 2 hours daily costs approximately **£58/year** to run. While more expensive than gas central heating per kWh, strategic use for short periods in small rooms keeps costs manageable. Whole-house electric UFH is expensive to run and generally not recommended in the UK.
### 4. Can electric underfloor heating be used as the sole heat source?
In well-insulated small rooms (bathrooms, small bedrooms), electric UFH can theoretically serve as the only heat source. However, for most UK homes, it's **not recommended for whole-house heating** due to high electricity costs. It works best as **supplementary heating** for comfort, with radiators or wet UFH handling primary heating duties. Heat loss calculations determine suitability.
### 5. What floor coverings work best with electric UFH?
**Tile and stone** provide the best performance (highest thermal conductivity, fastest heat-up). Engineered wood and LVT work well if UFH-rated. Carpet is acceptable but must not exceed **2.5 tog combined** (carpet + underlay) and will reduce heat output by 30-50%. Avoid solid wood flooring, which can warp and gap. Always verify manufacturer UFH compatibility before purchasing flooring.
### 6. How much does it cost to run electric underfloor heating?
Running costs depend on floor area, usage time, and electricity price. At **27p/kWh** (2025 UK average):
- **4m² bathroom** (2hrs/day): £0.32/day = £58/year
- **10m² kitchen** (3hrs/day): £0.81/day = £146/year (6-month heating season)
- **15m² living room** (6hrs/day): £2.43/day = £438/year
Programmable thermostats reduce costs by 20-30% through scheduling.
### 7. Can electric underfloor heating go wrong or break?
Electric UFH is very reliable, but issues can occur:
- **Cable damage during installation** - prevented by careful installation and resistance testing
- **Thermostat failure** - easily replaced (£40-250)
- **Poor heat distribution** - usually due to insufficient insulation or incorrect spacing
- **Circuit breaker tripping** - indicates electrical fault requiring professional diagnosis
Most problems are installation-related rather than product failures. Quality brands and proper installation minimise issues.
### 8. How thick does screed need to be over electric underfloor heating?
**Minimum 10mm** of self-levelling screed or flexible tile adhesive is required to adequately protect cables and ensure even heat distribution. For tile adhesive application, 3-5mm is acceptable if tiles are being applied directly. Thicker screed (15-20mm) provides better heat retention but increases heat-up time. Never exceed 30mm or the system becomes inefficient.
## Is electric UFH right for you?
I’d choose electric underfloor heating if you want a **low upfront cost** (£40-90/m² installed) and **fast, easy installation** in one room or a small area. It gives a bathroom or kitchen a warm floor without a major heating overhaul, and installation typically takes 1-2 days.
**Key advantages:**
- Installation costs 40-60% less than wet systems
- Minimal floor height increase (ideal for retrofits)
- Fast heat-up (30-60 minutes)
- DIY-friendly with professional electrical finish
- Zero maintenance requirements
**Key limitations:**
- Higher running costs than wet systems (150-200W/m² at 27p/kWh)
- Not recommended for whole-house primary heating
- Less efficient than wet UFH with heat pumps for large areas
For whole-house heating, or if your priority is the lowest possible long-term running cost, I’d choose wet underfloor heating with a heat pump. It offers 15-40% lower running costs despite the higher installation expense.
For detailed cost breakdowns, ROI calculations and help choosing between electric and wet systems, use my [Complete Costs Guide](/underfloor-heating-costs/) or [Electric vs Wet UFH Comparison](/electric-vs-water-underfloor-heating-2026/).
If you're planning a larger installation across multiple rooms, understanding zoning strategies is crucial - see our [Underfloor Heating Zoning Complete Guide](/underfloor-heating-zoning-complete-guide/) for system design principles.
To compare the leading UK electric UFH brands, warranties, and system kits, see our [Best Underfloor Heating Brands UK Guide](/underfloor-heating-brands/). For a detailed look at one of the UK's fastest-growing electric UFH suppliers, see our [Fastwarm underfloor heating review](/fastwarm-underfloor-heating-review/).
For bathroom-specific installation guidance with waterproofing requirements and layout planning, see our [Bathroom Underfloor Heating Guide](/bathroom-underfloor-heating-guide/).
If you encounter any issues with your electric system, from circuit failures to thermostat problems, see our [Complete Troubleshooting Guide](/underfloor-heating-problems/) for step-by-step diagnostics and solutions.
---
--- title: Underfloor Heating with Heat Pumps: UK Costs and Design Guide description: Underfloor heating with heat pumps explained, including flow temperatures, COP, grants, design and running costs. Plan an efficient UK system confidently. url: https://underfloorheating.info/underfloor-heating-heat-pumps-guide-2026/ published: 2025-09-14 updated: 2026-08-21 tags: ['underfloor heating heat pump', 'heat pump ufh', 'air source heat pump', 'ufh efficiency', 'renewable heating'] ---
# Underfloor Heating with Heat Pumps: UK Costs and Design Guide
> **Quick Answer:** Heat pumps with UFH typically run at **35–45°C flow** and deliver **COP ~3.0–3.8** (SCOP ~3.0–3.5), versus **COP ~2.0–2.5** with radiators at 60°C. ASHPs cost **£7,000–£13,000** and GSHPs **£15,000–£25,000**; the **BUS grant is £7,500** for both in England & Wales. A combined heat‑pump + UFH install is often **£15,000–£30,000**. Running costs can be competitive with gas in well‑insulated homes and are usually lower than oil. Read more system guidance at [underfloorheating.info](https://underfloorheating.info/) and find heat pump and UFH specialists through the [Underfloor Heating Directory](https://underfloorheating.directory/).
>
> 🧮 **[Use our free cost calculator for a personalised UFH cost estimate →](/underfloor-heating-cost-calculator/)**
## Underfloor heating with a heat pump (2026 guide)
A heat pump and wet underfloor heating work well together because both favour low water temperatures. Get the design right and you'll achieve a higher COP than the same heat pump running traditional radiators.
I'll explain why the pairing works, what COP and SCOP actually mean, how to design the system, what it costs and where UK grants stand in 2026.

## Why heat pumps and UFH are a good match
The match comes down to one thing: flow temperature. Lower flow temperature means higher COP.
### The flow temperature connection
- Heat pumps operate at maximum efficiency when producing water at low temperatures (35-45°C)
- Underfloor heating is specifically designed to work perfectly with low-temperature water, using the large surface area of the floor to gently and evenly heat the room
- Radiators require much higher water temperatures (60-80°C) to be effective, forcing heat pumps to work harder and consume significantly more electricity
The efficiency impact is clear:
| System Combination | Flow Temp | Heat Pump COP | Efficiency |
|-------------------|-----------|---------------|------------|
| Heat pump + UFH (ideal design) | 35°C | 3.5-4.0 | Excellent |
| Heat pump + UFH (standard design) | 40-45°C | 3.0-3.5 | Very good |
| Heat pump + low-temp radiators | 50-55°C | 2.5-3.0 | Good |
| Heat pump + traditional radiators | 60-65°C | 2.0-2.5 | Acceptable |
| Heat pump + old radiators | 70°C+ | 1.5-2.0 | Poor |
What this means in practice:
- At 35°C (ideal UFH): 1kWh electricity → 3.5kWh heat = **effective cost 7.7p/kWh** (£0.27÷3.5)
- At 65°C (radiators): 1kWh electricity → 2.0kWh heat = **effective cost 13.5p/kWh** (£0.27÷2.0)
Result: UFH with heat pumps can be markedly cheaper to run than radiators because COP stays higher at lower flow temperatures.
## Understanding COP (coefficient of performance)
COP tells you how efficiently the heat pump turns electricity into heat, so it has a direct effect on running costs.
### What is COP?
**COP (Coefficient of Performance)** is the ratio of heat output to electrical energy input:
**COP = Heat Output ÷ Electrical Input**
Examples:
- COP 3.0 = 1kW electricity input → 3kW heat output (300% efficiency)
- COP 3.5 = 1kW electricity input → 3.5kW heat output (350% efficiency)
- COP 4.0 = 1kW electricity input → 4kW heat output (400% efficiency)
### How COP changes with flow temperature
COP is not fixed, it decreases as flow temperature increases:
**Typical ASHP COP by flow temperature (outdoor temp 7°C):**
| Flow Temperature | COP | Heat per 1kWh Electric | Effective Cost (at 27p/kWh) |
|------------------|-----|------------------------|------------------------------|
| 35°C (ideal UFH) | 3.8 | 3.8kWh | 7.1p per kWh heat |
| 40°C (standard UFH) | 3.4 | 3.4kWh | 7.9p per kWh heat |
| 45°C (higher UFH) | 3.0 | 3.0kWh | 9.0p per kWh heat |
| 50°C (low-temp rads) | 2.6 | 2.6kWh | 10.4p per kWh heat |
| 55°C (standard rads) | 2.3 | 2.3kWh | 11.7p per kWh heat |
| 60°C (old radiators) | 2.0 | 2.0kWh | 13.5p per kWh heat |
Conclusion: Every 5°C reduction in flow temperature improves COP by approximately 0.3-0.4, reducing running costs by 10-15%.
### Seasonal performance factor (SPF)
While COP measures instantaneous efficiency, SPF (Seasonal Performance Factor) measures real-world annual efficiency accounting for:
- Varying outdoor temperatures
- Defrost cycles
- Part-load operation
- Distribution losses
Typical SPF for ASHP systems:
- ASHP + UFH (35-40°C): SPF 3.0-3.3
- ASHP + radiators (60-65°C): SPF 2.2-2.5
- GSHP + UFH (35-40°C): SPF 3.5-3.8
SPF is what determines actual annual running costs.
## Benefits of a heat pump + UFH system
So what do you gain by combining the two?
### 1. Higher energy efficiency
This combination achieves the highest efficiency of any heating system:
- **COP 3.0-4.0** depending on design and outdoor temperature
- [Capable of achieving 300-400% efficiency](https://www.sciencedirect.com/science/article/pii/S2542435123003513#:~:text=Heat%20pump%20efficiency%20is%20measured,temperatures%20above%20%E2%88%9210%C2%B0C.)
- 15-25% more efficient than heat pump + radiators
- often more efficient than gas boilers
- often more efficient than oil boilers
### 2. Lower running costs (when designed well)
High efficiency translates directly into low energy bills:
- often lower than gas in well‑insulated homes
- typically lower than oil heating
- usually lower than direct electric heating
- Savings vary by tariff and insulation; often modest vs gas
### 3. Environmental benefits
- Zero direct carbon emissions at point of use
- UK electricity grid increasingly renewable (currently ~40% renewable, target 100% by 2035)
- **60-70% lower carbon footprint** than gas heating today
- Carbon savings will increase as grid decarbonises
- Contributes to UK net-zero targets
### 4. Comfort
- Silent operation (no boiler noise)
- Consistent, gentle warmth throughout room
- Even heat distribution (no cold spots)
- No visible radiators (maximises usable wall space)
- Comfortable floor temperature year-round
- Summer cooling: reversible heat pump models can run your underfloor loops in [cooling mode during summer](/heat-pump-underfloor-cooling/), reducing indoor temperatures by 3–5°C with no additional hardware.
### 5. Future‑proofing
- Complies with Building Regulations Part L (2021+)
- Future Homes Standard phase‑out for gas boilers in new builds (mid‑late 2020s)
- Likely gas boiler replacement ban (from 2035)
- Property value improvement
- 25-50 year system lifespan

## Types of heat pumps for underfloor heating
### Air source heat pumps (ASHP)
How they work: Extract heat from outdoor air (even at -20°C) and transfer it to water circulating through UFH pipes.
Advantages:
- Lower installation cost (£7,000-13,000 vs £15,000-25,000 for GSHP)
- Simpler installation (outdoor unit + internal components)
- No need for ground works or large garden
- £7,500 Boiler Upgrade Scheme grant available
- Suitable for 95%+ of UK properties
Disadvantages:
- Slightly lower efficiency than GSHP (COP 3.0-3.5 vs 3.5-4.0)
- Performance reduces slightly in very cold weather
- Visible outdoor unit required
- Requires planning permission in some cases
Best for: Most UK homes, standard installations, budget-conscious projects
Costs:
- Equipment + installation: £7,000-13,000
- Less £7,500 BUS grant = **£0-5,500 net cost**
### Ground source heat pumps (GSHP)
How they work: Extract heat from ground via buried pipes (trenches 1.5-2m deep or vertical boreholes 50-150m deep).
Advantages:
- Higher efficiency (COP 3.5-4.0+)
- More consistent performance year-round
- Longer lifespan (25+ years for ground loop)
- No visible outdoor unit
- Quieter operation
Disadvantages:
- Much higher installation cost (£15,000-25,000+)
- Requires significant garden space (150-250m² for horizontal, or boreholes)
- Disruptive installation (ground excavation)
- Not suitable for small gardens or urban properties
- £7,500 BUS grant
Best for: New builds with significant garden space, rural properties, high-end installations where budget allows
Costs:
- Equipment + installation: £15,000-25,000
- Less £7,500 BUS grant = **£7,500-17,500 net cost**
### Which to Choose?
For most UK homes, an air source heat pump is the practical and cost-effective choice:
- 90% lower upfront cost after grants
- Suitable for properties with limited outdoor space
- Performance is excellent with UFH (COP 3.0-3.5 sufficient)
- Easier installation and commissioning
GSHP makes sense only if:
- Budget allows (willing to pay £10,000+ extra)
- Significant garden space available (200m²+ clear ground)
- New build where ground works can be coordinated with other construction
- Targeting absolute maximum efficiency
## Key design and installation considerations
Heat pump and UFH systems don't forgive poor design. You need to get the heat loss, pipe spacing, insulation and flow temperature right from the start.
### 1. Heat loss calculation (critical)
An accurate, room-by-room heat loss calculation is even more critical with a heat pump than with a gas boiler.
Why it matters:
- Under-sized heat pump: Struggles to maintain temperature on coldest days, runs constantly, poor comfort
- Over-sized heat pump: Excessive short-cycling, reduced efficiency, higher upfront cost, shortened lifespan
What's required:
- Room-by-room calculation (not whole-house estimate)
- Accounts for insulation, glazing, air tightness, thermal bridging
- Performed by MCS-certified installer (required for BUS grant)
- Typically costs £200-500 but essential for grant application
Calculate Your Heat Loss
Heat pumps require precise heat loss calculations for optimal efficiency. Our free calculator assesses your room's insulation, windows, and heating requirements to determine if your property is suitable for a heat pump + UFH system.
For design principles, see our [Underfloor Heating Design & Planning Guide](/underfloor-heating-design-planning/).
### 2. Pipe spacing and sizing
Heat pumps operate at lower flow temperatures, requiring careful pipe spacing design:
Standard spacing for heat pump + UFH:
- **150-200mm centres** for well-insulated modern homes (heat loss 60-80 W/m²)
- **100-150mm centres** for older properties or poorly insulated rooms (heat loss 80-120 W/m²)
- Closer spacing preferred to maintain low flow temperature (better COP)
Why closer spacing matters:
- Allows 35-40°C flow instead of 45-50°C
- Improves COP from 3.0 to 3.5+ (15% efficiency gain)
- Lower flow = lower running costs despite higher pipe material cost
Pipe sizing:
- **16mm PEX pipe:** Standard for most installations (max loop 80-100m)
- **20mm PEX pipe:** For larger rooms or longer loops (max 100-120m)
Use our [pipe spacing calculator](/underfloor-heating-pipe-spacing-calculator/) to get instant recommendations for heat pump systems - simply select "heat pump" as your heat source to get the correct spacing for optimal efficiency.
The same "shallower pipe, lower achievable flow temperature" logic that favours closer spacing for heat pumps is also the reasoning behind [milled screed retrofits](/milled-screed-underfloor-heating/), where pipe sits essentially at the floor surface rather than buried in screed, though no provider publishes COP figures measured specifically for milled installs, so treat this as a plausible principle rather than a proven number.
### Heat output per m² (what UFH can deliver at low flow temps)
Real‑world heat output depends on pipe spacing, floor build‑up and floor finish, see our [UFH screed guide](/underfloor-heating-screed/) for how screed type and depth affect thermal performance. As a rough guide for well‑insulated rooms with 150mm spacing and a screeded floor:
| Flow Temp | Typical Output | Notes |
|---|---|---|
| **35°C** | **50–70 W/m²** | Efficient, but may feel soft in colder rooms |
| **40°C** | **70–90 W/m²** | Sweet spot for many UK homes |
| **45°C** | **90–110 W/m²** | Higher output, lower COP |
If your heat loss is higher than the output at your target flow temperature, you’ll need closer spacing, better insulation, or a higher flow temperature (which reduces COP).
### 3. Insulation requirements (non‑negotiable)
Heat pumps work efficiently only in well-insulated properties. Poor insulation = high heat loss = high flow temperature required = poor COP = expensive running costs.
Minimum insulation standards for heat pump viability:
Walls:
- Cavity wall insulation (minimum 100mm)
- Solid walls: internal or external insulation (minimum 50-100mm equivalent)
- Target U-value: 0.30 W/m²K or better
Roof/loft:
- Minimum 270mm mineral wool or equivalent
- Target U-value: 0.16 W/m²K or better
Floor (ground floor UFH):
- Minimum 100mm rigid insulation below UFH pipes
- Edge insulation (10-20mm perimeter strip)
- Target U-value: 0.25 W/m²K or better
Windows:
- Double glazing minimum (triple glazing preferred)
- Target U-value: 1.4 W/m²K or better
If insulation is poor:
- Improve insulation first before installing heat pump
- Costs £3,000-8,000 but essential for heat pump efficiency
- Better long-term ROI than oversizing heat pump to compensate
### 4. Flow temperature strategy
Design target flow temperature determines system efficiency and running costs:
Recommended flow temperatures:
- **35-40°C:** Ideal target for new builds and well-insulated homes (COP 3.5-4.0)
- **40-45°C:** Standard for retrofits in average UK homes (COP 3.0-3.5)
- **45-50°C:** Maximum for heat pumps; only if absolutely necessary (COP 2.5-3.0)
- **Above 50°C:** Avoid if possible; consider improving insulation or larger emitters instead
Design priority: Always prefer closer pipe spacing or larger floor coverage over higher flow temperature.
### 5. Smart controls and weather compensation
Installing advanced controls dramatically improves heat pump efficiency:
Essential features:
- Weather compensation: Adjusts flow temperature based on outdoor temperature (10-15% efficiency gain)
- Smart scheduling: Learns usage patterns and optimises heating cycles
- Zone control: Independent temperature control for different areas (20-30% energy savings)
- Remote access: Monitor and adjust via smartphone app
Installing a [smart thermostat designed for underfloor heating](/smart-thermostats-underfloor-heating/) is essential for optimising heat pump efficiency. Advanced thermostats with weather compensation and learning algorithms can improve system performance by up to 19%.

### 6. MCS certification (required for grants)
MCS (Microgeneration Certification Scheme) certification is:
- Mandatory for Boiler Upgrade Scheme grant (£7,500 for ASHP and GSHP)
- Quality assurance that installer meets industry standards
- Ensures proper design, installation, and commissioning
- Provides consumer protection and warranties
What MCS installers must provide:
- Heat loss calculation
- System design documentation
- Commissioning certificate
- Handover pack with operating instructions
- 12-month workmanship warranty minimum
How to find MCS installers:
- Search MCS database: https://mcscertified.com/find-an-installer/
- Get 3+ quotes for comparison
- Check reviews and previous installations
- Verify MCS number is current
Ready to find a qualified installer? Our [quotation guide](/underfloor-heating-quotation/) explains what to look for when getting quotes and how to compare different installers.
## Costs: investment and returns
### Installation costs breakdown
**Air Source Heat Pump + Wet UFH (100m² house):**
| Component | Cost Range |
|-----------|-----------|
| Air source heat pump unit | £6,000–£9,000 |
| Heat pump installation & commissioning | £1,500–£3,000 |
| Wet UFH materials (100m²) | £5,000–£9,000 |
| UFH installation labour | £4,000–£8,000 |
| Controls & weather compensation | £500–£1,200 |
| Electrical work | £500–£1,000 |
| Total before grants | **£17,500–£31,200** |
| Less BUS grant (ASHP) | **-£7,500** |
| Net cost | **£10,000–£23,700** |
**Ground Source Heat Pump + Wet UFH (100m² house):**
| Component | Cost Range |
|-----------|-----------|
| Ground source heat pump unit | £8,000–£12,000 |
| Ground loop installation (horizontal) | £5,000–£10,000 |
| Ground loop installation (vertical borehole) | £8,000–£15,000 |
| Heat pump installation & commissioning | £2,000–£4,000 |
| Wet UFH materials (100m²) | £5,000–£9,000 |
| UFH installation labour | £4,000–£8,000 |
| Controls & weather compensation | £500–£1,200 |
| Total before grants | **£24,500–£49,200** |
| Less BUS grant (GSHP) | **-£7,500** |
| Net cost | **£18,500–£43,200** |
For detailed cost breakdowns, ROI calculations, and comparisons with other heating systems, see our [Underfloor Heating Costs Guide](/underfloor-heating-costs/).
### Boiler Upgrade Scheme (BUS) grant
The UK government's Boiler Upgrade Scheme provides grants for heat pump installations:
**Grant amounts (2025):**
- Air source heat pump: £7,500
- Ground source heat pump: £7,500
- Biomass boilers: £5,000 (less relevant for UFH)
Eligibility criteria:
- Property in England or Wales (Scotland has separate scheme)
- Replacing fossil fuel heating (gas, oil, LPG) or electric heating
- EPC recommendations followed (if applicable)
- Installation by MCS-certified installer
- Heat pump must be new (not replacing existing heat pump)
How to apply:
- Installer applies on your behalf (not homeowner application)
- Grant paid directly to installer, reducing your invoice
- Application process takes 2-4 weeks
More information: https://www.find-government-grants.service.gov.uk/grants/boiler-upgrade-scheme-1
### Running costs: real‑world examples
**3-bed semi-detached house (120m², heat loss 9kW):**
Current heating (gas combi boiler + radiators):
- Annual gas consumption: 12,000 kWh
- Gas price: 6.9p/kWh
- **Annual cost: £828**
**New system (ASHP + UFH, SPF 3.2):**
- Annual heat requirement: 12,000 kWh
- Electricity consumption: 12,000 ÷ 3.2 = 3,750 kWh
- Electricity price: 27p/kWh
- **Annual cost: £1,013**
Comparison: typically similar to gas or slightly higher on standard tariffs; can be lower on heat‑pump‑friendly tariffs
BUT:
- Gas prices volatile; electricity prices can improve with smart tariffs
- Grid decarbonising (cheaper renewable electricity future)
- Zero carbon emissions
- Future-proof (gas boiler ban approaching)
**4-bed detached house (180m², heat loss 14kW, replacing oil heating):**
Current heating (oil boiler + radiators):
- Annual oil consumption: 2,200 litres
- Oil price: 85p/litre
- **Annual cost: £1,870**
**New system (ASHP + UFH, SPF 3.2):**
- Annual heat requirement: 18,000 kWh
- Electricity consumption: 18,000 ÷ 3.2 = 5,625 kWh
- Electricity price: 27p/kWh
- **Annual cost: £1,519**
**Savings: £351/year (19% cheaper)**, payback on £15,000 net investment in 43 years (system lifespan 25+ years, so marginal long-term savings)
Key insight: Heat pumps are currently most cost-effective replacing oil heating, roughly cost-neutral vs gas, and excellent for environmental reasons and future-proofing.
### Return on investment timeline
**ASHP + UFH (£10,000-15,000 net after grant) vs gas boiler:**
- Annual savings: £0-350 depending on property and usage
- **Payback: 30-50+ years** (not financially motivated; environmentally motivated)
- Property value increase: £5,000-15,000 (especially for future buyers)
**ASHP + UFH (£10,000-15,000 net after grant) vs oil heating:**
- Annual savings: £200-500
- **Payback: 20-30 years**
Future trajectory: As electricity prices fall (more renewables) and gas prices rise (carbon pricing), heat pump economics will improve significantly by 2030s.
## Maintenance requirements
Heat pump + UFH systems require minimal but important maintenance:
### Annual heat pump service (£150-250/year)
Professional service includes:
- Refrigerant pressure check
- Electrical connections inspection
- Filter cleaning/replacement
- Condensate drain check
- Performance verification
### 3-5 year system pressurisation
Wet UFH systems slowly lose pressure over time:
- Check pressure gauge annually
- Top up when pressure drops below 1.0 bar
- DIY task (similar to topping up radiator system)
- Professional help if frequent pressure loss (potential leak)
### Smart thermostat updates
- Firmware updates (usually automatic)
- Occasionally reset/recalibrate if behaviour changes
Total annual maintenance cost: £150-300 (similar to gas boiler servicing)
## Common mistakes to avoid
### Mistake 1: Over‑specifying flow temperature
Problem: Designing for 50-55°C flow "just in case" instead of optimising for 35-40°C
Impact: COP drops from 3.5 to 2.5 = 40% higher running costs
Solution: Design properly with accurate heat loss, closer pipe spacing, adequate insulation
### Mistake 2: Poor insulation
Problem: Installing heat pump in poorly insulated property without upgrading insulation first
Impact: High heat loss requires high flow temperature = poor COP = expensive running
Solution: Improve insulation first; costs £3,000-8,000 but essential
### Mistake 3: Inadequate pipe spacing
Problem: Using 200-250mm pipe spacing throughout to save on materials
Impact: Insufficient heat output at low flow temperatures; forces higher flow temperature = poor COP
Solution: Use 150-200mm spacing (or closer for poorly insulated rooms) to maintain low flow temperatures
### Mistake 4: Skipping weather compensation
Problem: Using basic on/off thermostat instead of weather compensation controls
Impact: Heat pump runs at fixed flow temperature regardless of outdoor conditions = 15-20% efficiency loss
Solution: Install weather compensation and smart controls (£500-1,200), pays for itself through savings
## Frequently asked questions
### 1. What is the best flow temperature for underfloor heating with a heat pump?
**35-40°C is ideal** for maximum efficiency (COP 3.5-4.0). This requires well-insulated property and appropriate pipe spacing (150-200mm centres). **40-45°C is acceptable** for average UK homes (COP 3.0-3.5). Avoid exceeding 45°C if possible, higher flow temperatures dramatically reduce COP and increase running costs. Every 5°C reduction in flow temperature improves COP by approximately 0.3-0.4.
### 2. Can I use underfloor heating with an existing heat pump?
Yes, if the heat pump is correctly sized. Key considerations: heat pump capacity must match heat loss (including UFH zones), manifold and mixing valves may need adding, controls must support multiple zones, and system should be re-commissioned by MCS engineer to optimise flow temperatures. Retrofitting UFH to existing heat pump is common and often improves overall system efficiency if designed properly.
### 3. How much does it cost to run underfloor heating with a heat pump?
Running costs depend on property size, insulation, and usage. Examples at 2025 UK prices (27p/kWh electricity):
- **100m² well-insulated house** (SPF 3.2): £900-1,100/year
- **150m² average insulation** (SPF 3.0): £1,300-1,600/year
- **200m² older property** (SPF 2.8): £1,800-2,200/year
Compare to gas heating (6.9p/kWh) at £650-1,500/year. Heat pumps currently cost similar to or slightly more than gas but offer environmental benefits and future-proofing.
### 4. Is a heat pump with underfloor heating better than radiators?
Yes, for three key reasons:
1. Higher efficiency: Heat pumps achieve COP 3.5-4.0 with UFH at 35-40°C vs COP 2.0-2.5 with radiators at 60-65°C = **40-50% lower running costs**
2. Better comfort: Even heat distribution, no cold spots, silent operation
3. More space: No radiators on walls = more usable floor area
The only advantage of radiators is faster heat-up time (1-2 hours vs 3-4 hours for UFH), but this is offset by UFH's thermal mass retaining heat longer.
### 5. What size heat pump do I need for underfloor heating?
Size must match heat loss calculation, not floor area. Professional MCS heat loss calculation is essential (required for BUS grant). As rough guide:
- **Well-insulated 100m² house:** 6-8kW heat pump
- **Average 150m² house:** 9-12kW heat pump
- **Older 200m² house:** 13-16kW heat pump
Never guess or use "rule of thumb" sizing, over-sized heat pumps short-cycle and lose efficiency; under-sized heat pumps struggle on cold days. Always use professional heat loss calculation.
### 6. Can I get a grant for a heat pump with underfloor heating?
Yes, the Boiler Upgrade Scheme (BUS) provides:
- **£7,500 for air source heat pumps** (ASHP)
- **£7,500 for ground source heat pumps** (GSHP)
Requirements: Installation by MCS-certified installer, replacing fossil fuel heating, property in England/Wales, following EPC recommendations. The grant applies to the heat pump installation; UFH is not separately funded but is compatible with the scheme. Installer applies on your behalf.
### 7. How long does a heat pump with underfloor heating last?
System lifespan:
- Heat pump unit: 15-20 years (compressor may need replacing once)
- UFH pipes: 25-50+ years (embedded in screed, rarely fail)
- Manifold and controls: 15-25 years
- Overall system: 20-30 years with proper maintenance
Compare to:
- Gas boiler: 10-15 years
- Oil boiler: 15-20 years
Heat pump + UFH provides longer service life than conventional heating, with lower maintenance requirements than boilers.
### 8. What maintenance does a heat pump with UFH require?
**Annual heat pump service (£150-250):**
- Refrigerant pressure check
- Filter cleaning
- Electrical connections inspection
- Performance verification
Periodic UFH maintenance:
- System pressure top-up (3-5 years, DIY)
- Manifold balancing check (5-10 years if performance changes)
**Total annual cost: £150-300**, similar to gas boiler servicing. No significant ongoing maintenance beyond professional annual heat pump service. UFH pipes require virtually no maintenance once installed.
If you're building a new home or carrying out a major renovation in the UK, an air source heat pump with wet UFH is one of the strongest options available. You get:
- Maximum efficiency: COP 3.0-3.5 (300-350% efficiency)
- Lowest carbon footprint: 60-70% lower than gas heating
- Future-proof: Complies with coming gas boiler bans
- Unmatched comfort: Silent, even, gentle warmth
- Property value: Highly desirable feature for buyers
- Long lifespan: 25-50 years with minimal maintenance
The investment is significant: £10,000-25,000 net after BUS grant for average home. Here's what you get for it:
- Government grants reduce upfront cost by £7,500
- Running costs competitive with gas (and improving as grid decarbonises)
- Environmental benefits substantial (60-70% carbon reduction)
- System lifespan 25-50 years (outlasts conventional heating)
- Property value increase £5,000-15,000+
Is it worth it financially? It's currently marginal vs gas and excellent vs oil. It also makes a strong case if cutting carbon and future-proofing matter to you. As electricity decarbonises and gas prices rise through carbon pricing, the economics will improve significantly through 2030s. If you're considering a reversible model, see our [heat pump underfloor cooling guide](/heat-pump-underfloor-cooling/), the marginal cost of adding cooling capability at installation time is small.
Who should install heat pump + UFH:
- New builds (design-in from start, maximise efficiency)
- Major renovations (floors already being replaced)
- Oil heating replacements (immediate running cost savings)
- Environmentally-motivated homeowners (carbon reduction priority)
- Future-proofing for gas boiler ban (2035 likely deadline)
If you experience integration issues, performance problems, or unexpected running costs with your heat pump and UFH combination, our [complete troubleshooting guide](/underfloor-heating-problems/) covers heat pump-specific diagnostics including flow temperature issues, system balancing, and efficiency optimisation.
For installation guidance once you've decided to proceed, see our [Underfloor Heating Installation Guide](/underfloor-heating-installation-guide/).
For comparisons with other heating systems and detailed cost analysis, see our [Electric vs Wet Underfloor Heating Guide](/electric-vs-water-underfloor-heating-2026/).
**Ready to make the switch?** Find trusted heat pump + UFH installers via the [Underfloor Heating Directory](https://underfloorheating.directory/get-quotes).
---
--- title: The Ultimate Guide to Underfloor Heating in the UK (2026) description: Compare electric and water underfloor heating systems in the UK, with detailed costs, installation guidance, and regulations to help you choose the right system url: https://underfloorheating.info/underfloor-heating-beginners-guide/ published: 2025-09-12 updated: 2026-08-21 tags: ['underfloor heating', 'underfloor heating guide', 'electric ufh', 'wet ufh', 'heating systems', 'uk heating', 'home renovation'] ---
# The Ultimate Guide to Underfloor Heating in the UK (2026)
## The Ultimate Guide to Underfloor Heating in the UK (2026)
Underfloor heating gives you even warmth, free wall space and lower operating temperatures, but it isn't the right answer for every project. Explore trusted guidance at [underfloorheating.info](https://underfloorheating.info/) and plan your next steps with the [Underfloor Heating Directory](https://underfloorheating.directory/). I'll help you work out whether it makes sense for your home.
We'll compare electric and water systems, break down 2026 costs and walk through the installation process. I'll also cover flooring compatibility and the UK building regulations you need to know about.

**Ready to start your UFH journey?** Find trusted installers through the [Underfloor Heating Directory](https://underfloorheating.directory/installers), or [use our free cost calculator](/underfloor-heating-cost-calculator/) to get an instant estimate for your room before you get quotes.
## 1. Quick Decision: Is Underfloor Heating Right for You?
Let's start with the decision that matters: electric or water?
**Choose Electric UFH if:**
- **Project:** You're retrofitting a single, small-to-medium-sized room (e.g., a bathroom, kitchen, or ensuite).
- **Budget:** Your priority is a lower upfront installation cost (typically under £2,000 for a bathroom).
- **Installation:** You're a confident [DIYer](/diy-underfloor-heating/) (for the [heating mat](/underfloor-heating-mats-guide/)) or want a quick, less disruptive installation.
- **Usage:** You need heat quickly for short, specific periods (e.g., warming the bathroom floor in the morning).
- **Constraints:** You cannot raise your floor level by more than a few millimetres.
**Choose Water (Hydronic) UFH if:**
- **Project:** You're undertaking a [new build](/underfloor-heating-new-builds/), an extension, or a major whole-house renovation.
- **Budget:** You have a larger budget for the higher upfront cost but want to prioritise long-term savings.
- **Installation:** You have the scope for a more involved professional installation and can accommodate a significant floor height increase (typically 50-100mm).
- **Usage:** You need a primary heat source for your entire home that will be running consistently.
- **Future-Proofing:** You have, or are planning to install, a heat pump or other renewable energy source.
Still undecided between the two? Use our [Electric vs Wet UFH Comparison](/electric-vs-water-underfloor-heating-2026/) for a full side-by-side breakdown.
## 2. What is Underfloor Heating and How Does it Work?
Underfloor heating turns the entire floor into a large, low-temperature radiant heater. Traditional radiators use convection to heat the air, which creates hot and cold spots. UFH uses **radiant heat** to warm people and objects directly, giving you a more consistent warmth from the ground up.
For a detailed explanation of the heating cycle, components, and physics behind UFH, see our comprehensive [How Does Underfloor Heating Work?](/how-does-underfloor-heating-work/) guide.
There are two main ways to achieve this:
1. **Electric (or 'Dry') Systems:** A network of electric heating wires, often pre-spaced on a mesh mat for easy installation, is laid beneath the floor covering.
2. **Hydronic (or 'Wet') Systems:** A series of flexible pipes are laid within the floor structure, and warm water is circulated through them from a central heat source (like a boiler or heat pump).
Both systems are governed by a dedicated thermostat that monitors the floor and/or air temperature, giving you precise control over your environment.
## 3. System Types Explored: Electric vs. Water
This is the big decision. For a direct comparison, see our [Electric vs Water Underfloor Heating guide](/electric-vs-water-underfloor-heating-2026/).
### Electric Underfloor Heating
Electric UFH is the easier option for retrofits and single rooms. If that's the route you're considering, our [complete electric UFH guide](/electric-underfloor-heating-systems/) covers it in detail.

- **Best for:** Bathrooms, [kitchens](/kitchen-underfloor-heating/), ensuites, and small extensions. For bathrooms specifically, see our [Complete Bathroom Underfloor Heating Guide](/bathroom-underfloor-heating-guide/).
- **Installation:** Quick and often DIY-friendly. The thin mats have a minimal impact on floor height.
- **Heat-up Time:** Very fast, typically 30-60 minutes.
- **Cost:** Lower upfront cost but higher running costs.
### Hydronic (Water-Based) Underfloor Heating
Hydronic systems cost more to install, but they're usually the better choice for new builds and whole-home heating.

- **Best for:** New builds, large extensions, and full-house renovations.
- **Installation:** A more complex process that requires a professional.
- **Heat-up Time:** Much slower, taking 2-4 hours to heat a room from cold, but it also retains heat for longer.
- **Cost:** A significantly higher upfront investment, but far cheaper to run.
For a deep dive, read [The Ultimate Guide to Wet Underfloor Heating Systems](/wet-underfloor-heating-ultimate-guide/).
## 4. Costs & Long-Term Value (2026 UK Prices)
So what will it cost? The system type, floor area and whether it's a new build or retrofit make the biggest difference.
- **Electric Systems:** Expect to pay **£60 - £85 per m²** for a retrofit. While cheaper to install, running costs are higher due to UK electricity prices. For a detailed monthly-bill breakdown, see [is underfloor heating expensive to run?](/is-underfloor-heating-expensive-to-run/).
- **Water Systems:** Installation is more expensive at **£95 - £110 per m²** for a retrofit. However, their high efficiency leads to significant long-term savings on your energy bills.
For a comprehensive breakdown of all costs, including ROI calculations and 2026 pricing, see our detailed [Underfloor Heating Costs Guide](/underfloor-heating-costs/).
## 5. Pros and Cons: A Balanced View
- **Pros:** Unmatched comfort, [high energy efficiency (up to 40% more than radiators)](https://salford-repository.worktribe.com/output/3397480/energy-house-20-study-on-future-homes-standard-heating-systems%C2%A0), design freedom, and improved air quality. See our full breakdown: [Is Underfloor Heating Worth It?](/is-underfloor-heating-worth-it/)
- **Cons:** High upfront cost, disruptive installation (especially for retrofits), and slower response times for water systems.
For a full comparison, read [Underfloor Heating vs Radiators: Complete Comparison](/underfloor-heating-vs-radiators/).
## 6. The Installation Process: A Step-by-Step Overview
A good UFH installation starts with preparation. Calculate the room's heat loss before choosing a system, otherwise you won't know whether it can deliver enough heat. Use our [Heat Loss Calculator](/heat-loss-calculator/) to check the requirement and UFH suitability.
1. **Subfloor Preparation:** The floor must be clean, level, and stable.
2. **Insulation:** High-performance insulation boards are laid down to ensure heat travels up into the room.
3. **Laying the System:** Electric mats are rolled out, or water pipes are laid in specific patterns.
4. **Screeding (Wet Systems):** A 65-75mm layer of [screed](/underfloor-heating-screed/) is poured over the pipes and must be left to dry completely.
5. **Connecting Controls:** A qualified professional connects the system to the thermostat and heat source.
6. **Flooring Installation:** The final floor covering is laid.
7. **Commissioning:** The system is carefully tested.
For existing properties, see our comprehensive [Retrofitting Underfloor Heating Guide](/retrofitting-underfloor-heating/). For DIY advice, see our [DIY Underfloor Heating Installation Guide](/underfloor-heating-installation-guide/).
## 7. Flooring Compatibility: What Works Best?
Your floor finish can make or break the system's performance. The key is **thermal conductivity**: how easily heat can pass through it.

- **Excellent:** **Tile, Stone, and Polished Concrete.** These are the perfect partners for UFH.
- **Good:** **Engineered Wood, LVT, and quality Laminate.** Always check the manufacturer's specifications.
- **Moderate:** **Carpet and Solid Wood.** Use with caution. Carpet and underlay must have a combined tog rating of less than 2.5.
For detailed guidance on choosing the right flooring, see our [complete flooring compatibility guide](/best-flooring-underfloor-heating/), including heat output comparisons and room-specific recommendations.
## 8. Controls, Thermostats, and Zoning
Good controls stop you heating rooms when you don't need to. Smart thermostats let you set schedules, control the heating remotely and run different zones at different temperatures.
- See our comprehensive [Ultimate Guide to Smart Thermostats for Underfloor Heating](/smart-thermostats-underfloor-heating/) to choose the perfect control system.
- Learn how to create an efficient system with our [Guide to zoning your underfloor heating system](/underfloor-heating-zoning-complete-guide/)
## 9. Maintenance and Troubleshooting
UFH doesn't need much maintenance. Most faults involve accessible parts such as thermostats or pumps, not the pipes or cables buried in the floor.
- Download our [Annual Maintenance Checklist](/annual-underfloor-heating-maintenance-checklist/) with seasonal schedules for both electric and wet systems.
- For problems, see our [Troubleshooting Guide: Common UFH Problems and Solutions](/underfloor-heating-problems/).
- For general upkeep, see our [Underfloor Heating Maintenance Guide](/underfloor-heating-maintenance-guide/).
## 10. UK Building Regulations & Compliance
All installations must comply with UK Building Regulations, particularly [**Part L (Conservation of Fuel and Power)**](https://www.gov.uk/government/publications/conservation-of-fuel-and-power-approved-document-l), which focuses on energy efficiency. This includes rules on insulation, flow temperatures, and controls. All electrical work falls under [**Part P**](https://www.gov.uk/government/publications/electrical-safety-approved-document-p) and must be done by a certified electrician.
## 11. Is Underfloor Heating Worth It in 2026?
For new builds and major renovations in the UK, I'd usually say **yes**. You get even comfort, lower operating temperatures and no radiators taking up wall space. But don't buy on those benefits alone. Check the heat loss, installation cost and floor build-up first.
Ready to take the next step? Our [guide to getting an underfloor heating quotation](/underfloor-heating-quotation/) will help you compare quotes and find the right installer for your project.
For more reading, see our comprehensive [Best Underfloor Heating Brands UK Guide](/underfloor-heating-brands/) comparing top manufacturers, warranties, and product quality.
**Ready to start your UFH project?** Find qualified installers through the [Underfloor Heating Directory](https://underfloorheating.directory/installers) and get expert help.
---
--- title: Electric vs Wet Underfloor Heating UK 2026: Costs and Efficiency description: Electric vs wet underfloor heating: compare UK installation prices, running costs and efficiency for single rooms or whole homes, then choose confidently. url: https://underfloorheating.info/electric-vs-water-underfloor-heating-2026/ published: 2025-09-08 updated: 2026-08-21 tags: ['electric vs wet ufh', 'underfloor heating comparison', 'heating systems', 'choose underfloor heating', 'ufh comparison'] ---
# Electric vs Wet Underfloor Heating UK 2026: Costs and Efficiency
> **Quick Answer:** Electric UFH costs £40–£90/m² installed and heats up in 30-60 minutes. I’d use it in a single room, though running costs are £0.55–£0.75/day for a 6m² bathroom. Wet UFH costs £90–£190/m² installed and takes 2-4 hours to heat, but it can reduce heating bills in larger spaces over the long term. Choose electric for bathrooms/kitchens and wet for whole-house heating or heat pumps. Read more guidance at [underfloorheating.info](https://underfloorheating.info/) and compare installers using the [Underfloor Heating Directory](https://underfloorheating.directory/).
>
> 🧮 **[Compare exact costs for your room with our free cost calculator →](/underfloor-heating-cost-calculator/)**
## Electric or wet underfloor heating?
Your biggest UFH decision is whether to install an electric (dry) or water-based (wet) system. Both get rid of cold floors, but they suit very different projects, budgets and priorities.
So which should you choose? I’ll compare installation costs, running costs, efficiency, disruption, heat-up times and the properties each system suits.
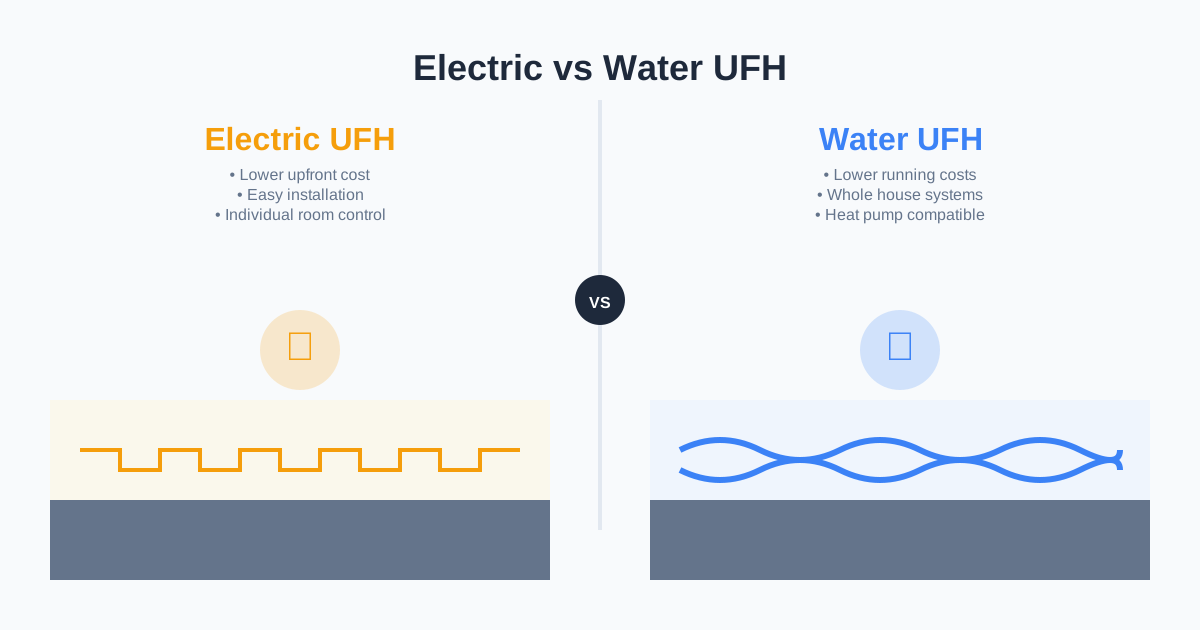
## How to use this comparison
This page is the **system choice guide**. It should help you decide whether electric or wet UFH suits the project.
Use the [underfloor heating costs guide](/underfloor-heating-costs/) when you need full installed prices and quote allowances. Use the [running costs guide](/underfloor-heating-running-costs-2026/) when you need day-to-day energy calculations. Use the [electric underfloor heating systems guide](/electric-underfloor-heating-systems/) if you have already chosen electric and need to compare mats, loose cable and foil systems.
The simple rule is this: **electric wins where access, speed and floor height matter; wet wins where long-term efficiency, heat pumps and larger heated areas matter.**
## At a glance: key differences
| Feature | Electric UFH | Wet (Water) UFH |
| :--- | :--- | :--- |
| Best For | Single rooms, bathrooms, renovations | Whole-house heating, new builds |
| Installation Cost | £40–£90/m² | £90–£190/m² |
| Running Cost | High (27p/kWh electric) | Low (15-40% less than radiators) |
| Installation Time | 1-2 days | 3-7 days |
| Floor Height Increase | 3-6mm (minimal) | 100-120mm (significant) |
| Heat-up Time | 30-60 minutes | 2-4 hours |
| Lifespan | 25-30+ years | 25-50+ years |
| Maintenance | None | Minimal (annual check) |
| Heat Source | Mains electricity | Boiler or heat pump |
| Disruption | Low | High (major works) |
| [DIY-Friendly](/diy-underfloor-heating/) | Yes (electrician for connections) | No (professional recommended) |
---
## Side-by-side detailed comparison
### Installation cost
Electric UFH:
- Materials: £35–£60/m² (heating mats, insulation, thermostat)
- Labour: £15–£30/m² (mat laying, electrical connection)
- Total installed: £40–£90/m²
- Example: 6m² bathroom = £240–£540 (total installed cost)
Wet UFH:
- Materials: £50–£90/m² (pipe, manifold, insulation, [screed](/underfloor-heating-screed/))
- Labour: £40–£100/m² (pipe laying, manifold setup, pressure testing, commissioning)
- Total installed: £90–£190/m²
- Example: 30m² living room = £2,700–£5,700 (total installed cost)
Winner for upfront cost: Electric UFH (40-60% cheaper to install)
For detailed cost breakdowns including materials, labour, and regional variations, see our [Underfloor Heating Costs Guide](/underfloor-heating-costs/).
### Running cost: the key difference
For a larger installation, wet UFH pulls ahead on running costs.
Electric UFH Running Costs:
Electric UFH uses direct electrical heating at 150-200W/m² when operating.
Example 1: Small Bathroom (6m²)
- Power consumption: 6m² × 150W/m² = 900W = 0.9kW
- Usage: 2 hours/day (morning warm-up)
- Daily energy: 0.9kW × 2 hours = 1.8kWh
- Daily cost: 1.8kWh × £0.27/kWh = £0.49/day
- Annual cost: £0.49 × 180 days = £88/year
Example 2: Medium Kitchen (15m²)
- Power consumption: 15m² × 150W/m² = 2,250W = 2.25kW
- Usage: 4 hours/day
- Daily energy: 2.25kW × 4 hours = 9kWh
- Daily cost: 9kWh × £0.27 = £2.43/day
- Annual cost: £2.43 × 240 days = £583/year
Wet UFH Running Costs:
Wet systems use gas (5-7p/kWh) or heat pumps (effectively 8-10p/kWh with COP 3.0), so they cost significantly less to run.
Example 3: Large Living Room (30m²) with Gas Boiler
- Heat requirement: 30m² × 80W/m² = 2,400W = 2.4kW
- Usage: 10 hours/day
- Daily energy: 2.4kW × 10 hours = 24kWh
- Daily cost (gas at 6.9p/kWh): 24kWh × £0.069 = £1.66/day
- Annual cost: £1.66 × 240 days = £397/year
Example 4: Same Living Room with Heat Pump
- Heat requirement: 2.4kW ÷ COP 3.2 = 0.75kW electrical input
- Daily energy: 0.75kW × 10 hours = 7.5kWh
- Daily cost: 7.5kWh × £0.27 = £2.03/day
- Annual cost: £2.03 × 240 days = £487/year
Cost Comparison Summary:
| Room Type | Electric UFH Annual Cost | Wet UFH Annual Cost (Gas) | Savings with Wet |
|-----------|-------------------------|---------------------------|------------------|
| 6m² bathroom (2hrs/day) | £88 | £61 | £27 (31%) |
| 15m² kitchen (4hrs/day) | £583 | £238 | £345 (59%) |
| 30m² living room (10hrs/day) | £1,166 | £397 | £769 (66%) |
Winner for running costs: Wet UFH (often cheaper for larger, frequently heated areas)
Want current 2026 tariffs and room-by-room running cost examples? Read our latest [underfloor heating running costs guide](/underfloor-heating-running-costs-2026/).
### Heat-up time
Electric UFH:
- 30-60 minutes to reach comfortable floor temperature
- Thin screed and low thermal mass = fast response
- Ideal for intermittent use (morning bathroom warm-up)
- Can be turned on 30 minutes before needed
Wet UFH:
- 2-4 hours initial heat-up from cold
- 1-2 hours for subsequent heating cycles
- High thermal mass (screed) retains heat longer
- Best run continuously or with programmable setback temperatures
- Not suitable for rapid on-demand heating
Winner for heat-up time: Electric UFH (4-8× faster response)
### Installation complexity and disruption
Electric UFH:
- Installation time: 1-2 days for typical room
- Process: Remove flooring → lay insulation → roll out mats → electrician connects → apply screed/adhesive → wait cure time → lay final floor
- Disruption: Moderate (room out of use for 3-7 days depending on screed cure)
- DIY-friendly: Yes (physical installation is straightforward; electrician required for final connections under Part P)
- Skills required: Basic DIY, measuring, careful following of instructions
Wet UFH:
- Installation time: 3-7 days for typical room
- Process: Remove flooring → lay insulation → fix pipe rails → lay pipes (200-300m for average room) → pressure test → screed → wait 7-21+ days cure → lay final floor
- Disruption: Significant (room out of use for 2-4+ weeks)
- DIY-friendly: Possible but challenging (pipe laying is laborious; pressure testing and commissioning require expertise)
- Skills required: Intermediate plumbing, manifold setup, pressure testing, system balancing
Winner for simplicity: Electric UFH (easier, faster, less disruptive)
### Floor height increase
Electric UFH:
- Heating mat: 2-4mm
- Screed/adhesive: 10-15mm
- Total: 12-19mm typical
- Minimal impact on door heights, stairs, floor transitions
- Ideal for retrofits in existing properties
Wet UFH:
- Insulation: 25-100mm
- Pipe: 16-20mm diameter
- Screed: 65-75mm minimum over pipes
- Total: 100-195mm typical
- Significant impact, requires door height adjustments, stair modifications, floor transitions
Low-profile wet options available: Overlay boards reduce to 20-30mm total but are more expensive (£30-50/m²).
Winner for floor height: Electric UFH (6-10× thinner)
For retrofit-specific solutions and low-profile systems, see our [Retrofitting Underfloor Heating Guide](/retrofitting-underfloor-heating/).
### Efficiency and environmental impact
Electric UFH:
- Direct conversion: 1kWh electricity → 1kWh heat (100% efficient at point of use)
- However, electricity generation is only ~40% efficient overall
- Carbon intensity: ~0.23 kg CO₂/kWh (UK grid 2025, decreasing yearly)
- Higher carbon footprint than gas or heat pump systems currently
Wet UFH:
- Gas boiler: 85-92% efficiency (condensing boiler)
- Heat pump: 300-350% efficiency (COP 3.0-3.5), outputs 3-3.5kWh heat per 1kWh electricity
- Lower flow temperatures (35-45°C) vs radiators (60-75°C) = higher boiler/heat pump efficiency
- 15-25% more efficient than radiator systems
- Heat pump + wet UFH = lowest carbon footprint option
Winner for efficiency: Wet UFH, especially with heat pumps (higher COP at low flow temps)
### The heat pump angle: why wet UFH wins
Heat pumps operate most efficiently at low flow temperatures. This is where wet UFH truly excels.
Heat Pump Efficiency (COP) by Flow Temperature:
| Flow Temperature | Heat Pump COP | Efficiency |
|------------------|---------------|------------|
| 35°C (wet UFH ideal) | 3.5-4.0 | Excellent |
| 45°C (wet UFH acceptable) | 3.0-3.5 | Good |
| 55°C (radiators in older homes) | 2.0-2.5 | Acceptable |
| 65°C (traditional radiator spec) | 1.5-2.0 | Poor |
At 35°C flow temperature:
- 1kWh of electricity → 3.5kWh of heat (COP 3.5)
- Running cost: £0.27/kWh ÷ 3.5 = 7.7p per kWh of heat
- Cheaper than gas (6-7p/kWh) once COP exceeds 4.0
Conclusion: If you're installing or considering a heat pump, wet UFH is the ideal partner. Electric UFH with a heat pump makes no sense, you'd bypass the heat pump's efficiency benefits.
For detailed heat pump and UFH system design, see our [Underfloor Heating with Heat Pumps Guide](/underfloor-heating-heat-pumps-guide-2026/).
---
## Electric underfloor heating: detailed look
Electric systems are basically a network of heating cables installed under your floor. They are simple, effective, and quick to install.

### How electric UFH works
Electrical resistance cables (similar principle to electric kettle elements) convert electricity directly into heat. The cables are either:
- Pre-spaced on mesh mats (most popular, easy installation)
- Loose cables on reels (flexible for awkward shapes)
- Foil systems (ultra-thin for floating floors)
A thermostat controls when the system operates, maintaining target floor or room temperature.
Typical wattage choices:
- Bathrooms: 150 W/m² is common
- Conservatories / high heat loss: up to 200 W/m²
- Low‑profile mats: often 100–150 W/m²
### Advantages of electric UFH
Lower Upfront Cost: 40-60% cheaper to install than wet systems
Easy Installation: DIY-friendly; mats roll out like carpet
Minimal Floor Build-up: Only 12-19mm total height increase
Fast Heat-Up Time: Warm in 30-60 minutes, ideal for short usage
No Maintenance: No moving parts, no servicing required
Long Lifespan: 25-30+ years with detailed warranties
Perfect for Single Rooms: Add luxury to bathroom without altering whole heating system
Works Anywhere: No need for boiler/manifold; any property with electricity
### Disadvantages of electric UFH
Higher Running Costs: Electricity at 27p/kWh vs gas at ~6.9p/kWh
Expensive for Large Areas: £500+ annual running cost for whole-house heating
Higher Carbon Footprint: Direct electric heating (currently) more carbon-intensive than gas or heat pumps
Not Heat Pump Compatible: Bypasses heat pump efficiency gains
### When to choose electric UFH
Ideal scenarios:
- Single bathroom renovation (4-8m²)
- Kitchen or ensuite (10-15m²)
- Small extension where wet system impractical
- Retrofit where floor height strictly limited (<20mm available)
- Budget under £1,500 for project
- Rented property (less invasive installation)
- Quick project timeline (complete in 1 week)
[Learn more about electric underfloor heating systems →](/electric-underfloor-heating-systems/)
---
## Wet underfloor heating: detailed look
Wet systems pump warm water from your central heating system (boiler or heat pump) through pipes laid in the floor. They are the pinnacle of efficiency for whole-home heating.

### How wet UFH works
A network of continuous plastic pipes (typically 16mm PEX) loops back and forth across the floor at 100-300mm spacing. Warm water (35-45°C) circulates through the pipes, heating the floor surface which radiates warmth into the room.
A manifold controls water flow to each zone (room or area), with individual thermostats providing room-by-room temperature control.
### Advantages of wet UFH
Lower Running Costs: 15-40% more efficient than radiators; 50-70% cheaper than electric UFH
Perfect for Whole-House Heating: Most cost-effective for 3+ rooms or entire floors
Works with Renewable Energy: Ideal partner for air source (ASHP) or ground source (GSHP) heat pumps
Maximum Efficiency: Low flow temperatures (35-45°C) maximise boiler/heat pump COP
Increases Property Value: Desirable feature for modern homes; appeals to buyers
Even Heat Distribution: No cold spots; uniform warmth across entire floor
Long Lifespan: 25-50+ years; pipes embedded in screed rarely fail
### Disadvantages of wet UFH
Higher Installation Costs: £90-190/m² vs £40-90/m² for electric
Complex Installation: Requires manifold, pump, pipework, professional commissioning
Significant Disruption: Room out of use for 2-4+ weeks during installation
Floor Build-up: 100-195mm typical (significant impact on door heights, stairs)
Slower Response Time: 2-4 hours heat-up; not suitable for rapid on-demand heating
Professional Installation Recommended: Not beginner DIY-friendly
### When to choose wet UFH
Ideal scenarios:
- New build (entire house, 80-150m²+)
- Major renovation where floors already being replaced
- Open-plan living areas (30-60m²)
- Whole-house heating project (3+ rooms)
- Installing or already have heat pump
- Budget over £5,000 for project
- Priority is long-term efficiency and low running costs
- Property has sufficient floor height clearance (100mm+)
[Learn more about wet underfloor heating systems →](/wet-underfloor-heating-ultimate-guide/)
---
## Property type guide: which system suits your home?
### [New Build](/underfloor-heating-new-builds/)
Recommendation: Wet UFH
Why:
- Floors already being installed (no disruption)
- Floor height can be designed-in from start
- Future Building Regulations will likely require heat pumps (wet UFH ideal partner)
- Lowest lifetime running costs
- Adds value and desirability
Cost for 100m² house: £9,000–£15,000 installed
### Retrofit: single room (bathroom/[kitchen](/kitchen-underfloor-heating/))
Recommendation: Electric UFH
Why:
- Minimal disruption (1-2 days vs 1-2 weeks)
- Low floor height increase (fits under existing door heights)
- Cost-effective for small area (£300-800 total)
- Fast installation (room back in use quickly)
- Running costs acceptable for intermittent use (bathrooms heated 2-4 hrs/day)
Cost for 6m² bathroom: £300–£700 installed
### Retrofit: multiple rooms or whole house
Recommendation: Wet UFH
Why:
- Running cost savings justify higher installation cost within 3-7 years
- Can be done room-by-room over time to spread cost
- Much cheaper to run for all-day heating
- Works with heat pump for future-proofing
Alternative: Low-profile wet UFH systems (like [Wunda](/wunda-underfloor-heating-review/)) if floor height restricted
Cost for 50m² ground floor: £4,500–£9,500 installed
### Period property / listed building
Recommendation: Electric UFH
Why:
- Minimal floor height increase preserves original floor levels
- Less invasive installation (important for conservation areas)
- Doesn't require manifold/pipework routing through period features
- Can be installed without structural alterations
Alternative: Suspended wet UFH systems if accessible void below
### Extension or [Conservatory](/conservatory-underfloor-heating/)
Recommendation: Wet UFH (if new build) or Electric UFH (if retrofit)
Why (wet for new build):
- Can connect to existing heating system
- High heat loss areas (lots of glass) benefit from wet system efficiency
Why (electric for retrofit):
- Isolated from main heating system
- Lower installation cost for single room
- Fast installation minimises disruption
---
## Decision flow: which system to choose?
Use this decision flow to pick the right system:
- Project scope: single small room (bathroom/ensuite/small kitchen 4–10m²) → electric. Multiple rooms or whole house (3+ rooms, 40m²+) → wet.
- Budget: under £2,000 → electric. Over £5,000 → wet. £2,000–£5,000 → depends on area.
- Floor situation: height limited (<50mm) → electric. New build or major renovation → wet. Retrofit with existing floors → check build‑up carefully.
- Usage pattern: intermittent (bathroom 1–2hrs, kitchen 2–4hrs/day) → electric. All‑day heating → wet.
- Heat pump plans: yes or planned → wet. No → either system, depending on area.
- Timeline: need it in a week → electric. Can allow 2–4+ weeks → wet.
## The grey area: when either system could work
Some projects genuinely sit in the middle. A 12-18m² kitchen, utility room or extension may be suitable for either electric or wet UFH depending on use.
Choose electric if the room is used for short comfort boosts, floor height is tight, and the existing heating already covers the main heat load. Choose wet if the room is occupied for long periods, the floor is already being rebuilt, or you may move to a heat pump later.
This is where insulation and controls decide the outcome. Good insulation and a smart thermostat can make electric UFH acceptable in a small kitchen. Poor insulation and high flow temperatures can make wet UFH underperform, even though it is theoretically the more efficient system.
---
## Cost of switching: electric to wet upgrade
If you've installed electric UFH and later wish you'd chosen wet, switching is possible but expensive:
What's involved:
1. Remove floor covering
2. Remove screed/adhesive to expose electric cables
3. Remove electric system (may be damaged in removal; usually discarded)
4. Install wet system (insulation, pipes, screed)
5. Replace floor covering
Cost: £90-190/m² for wet installation + £20-40/m² removal/disposal + new floor covering
Total: Similar to new wet installation (£110-230/m²), you basically pay twice
Conclusion: Choose carefully first time; switching systems is rarely cost-effective
---
## Common mistakes to avoid
### Mistake 1: choosing electric for whole-house primary heating
Why it's a mistake: Running costs of £1,500-3,000/year for average house (vs £600-1,200 for wet system with gas/heat pump)
Better approach: Use wet UFH for whole-house; electric for isolated rooms not worth connecting to wet system
### Mistake 2: installing wet UFH in a single small bathroom
Why it's a mistake: Installation cost £800-1,500 vs £300-700 for electric; running cost savings only £20-40/year = 15-30 year payback
Better approach: Electric UFH for bathrooms <10m² used intermittently
### Mistake 3: not considering heat pump future
Why it's a mistake: Installing electric UFH now means missing out on heat pump efficiency gains if/when you upgrade
Better approach: If considering heat pump within 5-10 years, install wet UFH now (even if using gas boiler initially)
### Mistake 4: skipping professional design for wet systems
Why it's a mistake: Incorrect pipe spacing, zoning, or manifold sizing leads to cold rooms, inefficiency, or system failure
Better approach: Pay £200-500 for professional heat loss calculation and system design; saves £1,000s in mistakes
For design guidance and avoiding common pitfalls, see our [Underfloor Heating Design & Planning Guide](/underfloor-heating-design-planning/).
---
## Frequently asked questions
### 1. Is electric or water underfloor heating cheaper to run?
Wet (water) UFH is usually cheaper to run than electric in larger spaces. A 30m² living room costs approximately £397/year with wet UFH (gas) vs £1,166/year with electric UFH. For small bathrooms used intermittently, the difference is smaller (£61 vs £88/year). Wet systems use gas at ~6.9p/kWh or heat pumps at effective 8-10p/kWh, compared to electricity at 27p/kWh for electric systems.
### 2. Which is better for a bathroom: electric or wet underfloor heating?
Electric UFH is better for most bathrooms due to lower installation cost (£300-700 vs £800-1,500), minimal floor height increase (12-19mm vs 100-120mm), faster installation (1-2 days vs 2-3 weeks), and acceptable running costs for intermittent use (£88/year for 2hrs daily). Wet UFH only makes sense for bathrooms if you're already installing it throughout the house.
### 3. Can you have both electric and wet underfloor heating in the same house?
Yes, mixing systems is common and sensible. Typical approach: wet UFH for main living areas (living room, open-plan kitchen-diner) connected to central heating; electric UFH for isolated rooms (upstairs bathroom, ensuite) not worth connecting to wet manifold. This combines efficiency where it matters most with convenience and lower installation cost for small isolated areas.
### 4. How much does it cost to run electric underfloor heating vs wet?
Running cost comparison at 2026 UK energy prices:
- 6m² bathroom (2hrs/day): Electric £88/year, Wet (gas) £61/year
- 15m² kitchen (4hrs/day): Electric £583/year, Wet (gas) £238/year
- 30m² living room (10hrs/day): Electric £1,166/year, Wet (gas) £397/year
Electric is 30-65% more expensive depending on usage. The larger the area and longer the usage, the bigger the savings with wet UFH.
### 5. Which heats up faster: electric or wet underfloor heating?
Electric UFH heats up much faster. 30-60 minutes to comfortable floor temperature vs 2-4 hours for wet systems. Electric systems have low thermal mass (thin screed), while wet systems have high thermal mass (thick screed retains heat longer but takes longer to warm up). For on-demand heating (bathroom warm-up before shower), electric is superior. For all-day heating, wet's thermal mass is actually beneficial (retains warmth after system turns off).
### 6. Is wet underfloor heating worth the extra cost?
Yes, if heating large areas (30m²+) or whole house. Initial installation costs £90-190/m² vs £40-90/m² for electric, but running cost savings of £300-800/year for typical home means payback can be in the mid‑term for larger areas (varies by tariff and usage). Over a 25-year system lifespan, wet UFH saves £7,500-20,000+ in energy costs. For single small rooms (<10m²), electric is more cost-effective.
### 7. Can electric underfloor heating be used as the main heating source?
Technically yes, but not recommended for UK homes due to high running costs. A 100m² house would cost £1,800-3,200/year to heat with electric UFH vs £600-900/year with wet UFH and gas boiler, or £800-1,200/year with wet UFH and heat pump. Electric UFH works best as supplementary heating for comfort in specific rooms (bathrooms, kitchens) while radiators or wet UFH handle primary heating.
### 8. Does underfloor heating work with heat pumps?
Wet UFH works brilliantly with heat pumps, it's the ideal pairing. UFH operates efficiently at 35-45°C flow temperature where heat pumps achieve COP 3.0-3.5 (300-350% efficiency). Radiators require 55-65°C, reducing heat pump COP to 2.0-2.5. Electric UFH with heat pumps makes no sense, you'd be using expensive direct electric heating and bypassing the heat pump entirely. If you have a heat pump, always choose wet UFH.
---
The electric vs wet decision depends on your specific project, budget, and priorities:
Choose Electric UFH if:
- Single room project (bathroom, kitchen, ensuite)
- Budget under £1,500
- Floor height severely limited (<20mm available)
- Quick installation needed (1-2 days)
- Intermittent usage (2-4 hours/day)
- DIY installation preferred
Choose Wet UFH if:
- Whole-house heating (3+ rooms)
- Budget over £5,000
- New build or major renovation
- Installing or have heat pump
- All-day heating required
- Priority is long-term efficiency and low running costs
Hybrid approach (often best):
Many homeowners benefit from combining both systems: wet UFH for main living areas where running cost savings justify installation expense, and electric UFH for isolated rooms (upstairs bathrooms) where connection to wet system would be impractical or expensive.
Return on investment:
- Electric UFH for bathroom: Pays for itself through comfort and property value boost
- Wet UFH for whole house: Pays for itself through energy savings in 3-7 years; can save money over the long term depending on tariffs and usage
The right choice delivers decades of comfort, efficiency, and value. The wrong choice leads to regret, high running costs, or expensive system replacement.
For detailed cost breakdowns, ROI calculations, and help choosing between electric and wet systems based on your specific situation, check our [Complete Costs Guide](/underfloor-heating-costs/).
For detailed installation guidance once you've made your decision, see our [Underfloor Heating Installation Guide](/underfloor-heating-installation-guide/).
## Flooring considerations for both systems
Your choice of flooring affects both electric and wet UFH performance. Tiles deliver the highest heat output (71 W/m²) but feel cold when the system is off. Engineered wood provides 56 W/m², with a warmer feel but requires careful temperature monitoring (27°C maximum). Your flooring choice can impact running costs by up to 48%. For detailed comparisons and room-specific recommendations, see our [best flooring for underfloor heating guide](/best-flooring-underfloor-heating/).
## Choosing a reputable brand
Whichever system you choose, buy from a reliable manufacturer. A good brand gives you better installation support, a clearer warranty and better customer service. I’ve compared the top UK UFH manufacturers, including Warmup, ProWarm and Uponor, in my [Best Underfloor Heating Brands Guide](/underfloor-heating-brands/).
## Your next step
Once you’ve chosen the right system, get accurate quotes from qualified installers. A professional installation protects the system’s performance and warranty. My [underfloor heating quotation guide](/underfloor-heating-quotation/) explains how to get competitive quotes and what to expect from the process.
Still undecided? Start with my [Ultimate Beginner's Guide to Underfloor Heating](/underfloor-heating-beginners-guide/) and work through the options before you request quotes.
---
--- title: DIY UFH Installation Guide: Electric & Water System Setup 2026 description: Learn how to install electric or water underfloor heating, including tools, preparation and common mistakes, for a safer, more successful DIY installation. url: https://underfloorheating.info/underfloor-heating-installation-guide/ published: 2025-09-07 updated: 2026-08-21 tags: ['diy underfloor heating', 'ufh installation', 'how to install underfloor heating', 'electric ufh installation', 'wet ufh installation'] ---
# DIY UFH Installation Guide: Electric & Water System Setup 2026
## DIY Underfloor Heating Installation: Step-by-Step Guide for 2026
You can install underfloor heating yourself, but electric systems make a much better DIY project than wet ones. If you're competent, prepared and honest about your limits, you'll add real comfort and value to your home. You'll find more practical advice at [underfloorheating.info](https://underfloorheating.info/) and local specialists through the [Underfloor Heating Directory](https://underfloorheating.directory/).
I'll walk you through both electric and water-based systems, step by step.
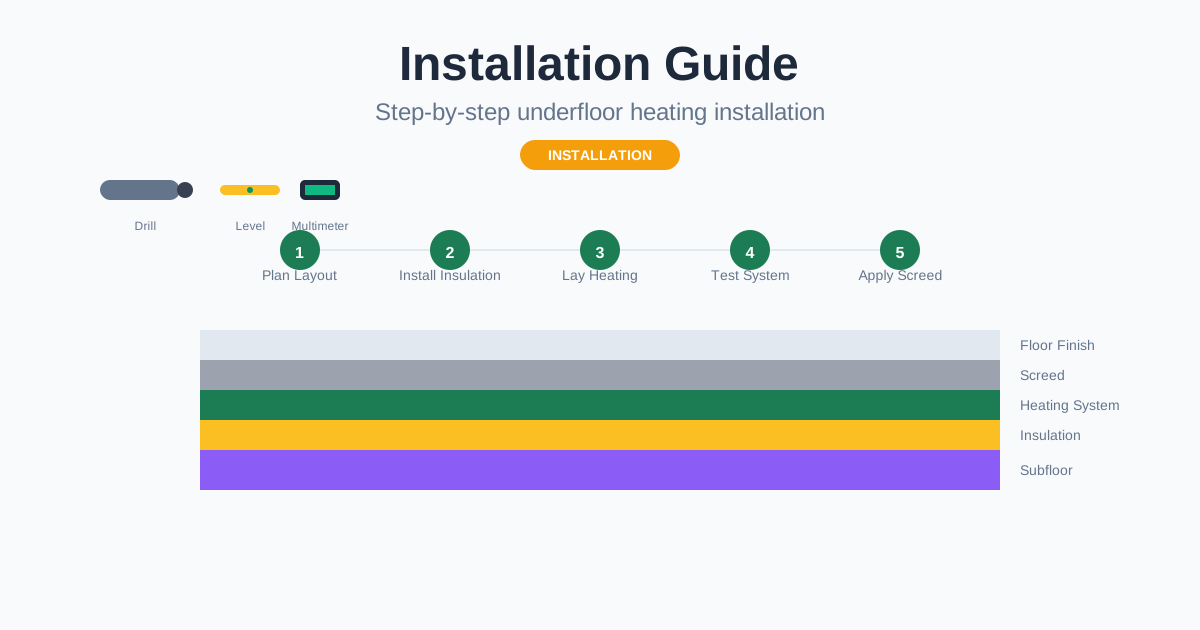
New to underfloor heating? [Start with our beginner's guide →](/underfloor-heating-beginners-guide/) to understand the basics first.
📄 **[Get this whole guide as a free PDF →](/underfloor-heating-installation-guide-pdf/)**, handy to keep on site or print out.
## Before You Start: DIY or Professional?
- **Consider DIY if:** You have flooring or plumbing experience, you're working on a small area (e.g., a single bathroom), and you're installing an electric system.
- **Use a Professional if:** It's a large or whole-house installation, a complex layout, a water-based system, or you're at all unsure. Electrical connections **must** be certified by a qualified electrician.
## Tools and Materials Needed
Get the right tools together before you start. It makes the whole job go more smoothly.
**For Electric UFH:**
- Multimeter & Insulation Resistance Tester
- Tiling tools (trowel, spacers)
- Sharp knife, measuring tape
- Heating mats/cables, thermostat, insulation boards
**For Wet UFH:**
- Pipe cutters & bending tool
- Manifold and mounting brackets
- Pressure testing equipment
- Pipe staples or clips
- UFH pipes, insulation boards, screed

## Electric UFH Installation: Step-by-Step
If you're doing the work yourself, electric is the obvious place to start.
### Step 1: Plan Your Layout
Measure the floor area accurately and leave out fixed furniture such as baths and kitchen cabinets. Plan the heating mat route and choose the thermostat location, typically 1.5m high near the door. Designing a wet system? Use our [pipe-per-m² guide](/how-much-underfloor-heating-pipe-per-m2/) to estimate loop lengths before you order anything.
### Step 2: Prepare the Subfloor & Insulate
Make sure the subfloor is clean, level and free of debris. On concrete floors, insulation boards stop heat escaping downwards and keep the system efficient. Don't skimp here. It's the most important step for performance.

### Step 3: Install the Thermostat & Sensor
Fit the thermostat back box, then run the floor sensor probe from there onto the floor. Put it centrally between two runs of heating cable so it gets an accurate reading.

### Step 4: Lay the Heating Mat/Cables
Roll out the [heating mat](/underfloor-heating-mats-guide/) to match your plan. You can cut the mesh to turn corners, but never cut the wire. Don't let the cables cross or overlap, and fix the mat firmly with its self-adhesive backing or tape.

### Step 5: Test the System
**Don't skip this step.** Before you cover the system, use a multimeter to test the mat's resistance and continuity. The reading should match the manufacturer's specified value. Write it down because you'll need it for the warranty.
### Step 6: Cover with Screed & Install Flooring
Cover the heating mat with a thin layer of flexible self-levelling compound. It protects the wires and gives you a flat surface. Once it has cured, you can lay the final floor covering, such as tiles.
## Wet UFH Installation: Step-by-Step
Wet systems involve more work, and I'd usually leave them to a professional. Here's how the job fits together.
### Step 1: Design and Heat Loss Calculation
Start with a professional heat loss calculation. That tells you the pipe spacing and flow temperature each room needs.
**Want to calculate your pipe spacing yourself?** Our [free pipe spacing calculator](/underfloor-heating-pipe-spacing-calculator/) provides instant recommendations based on your room specs, insulation level, and heat source.
### Step 2: Install the Manifold
The manifold is the hub of the system, so put it somewhere you can get to it, such as a utility cupboard. It connects to the main heat source, either a boiler or heat pump.

[Check out our Underfloor Heating Manifold Guide](/underfloor-heating-manifold-guide/)
### Step 3: Lay Insulation and Pipes
Once the insulation boards are down, you can lay the pipes. Start at the manifold, uncoil the pipe and secure it to the boards with staples or clips in your planned pattern, such as snail or serpentine. Bring the other end back to the manifold to complete the loop.

**My tip:** Use our [pipe spacing calculator](/underfloor-heating-pipe-spacing-calculator/) to work out exactly how much pipe you'll need and which spacing suits the room's heat requirements.
### Step 4: Pressure Test the System
Once every pipe loop connects to the manifold, fill the system with water and pressure test it, typically to 6 bar for 24 hours. You need to confirm there are zero leaks before anything gets covered.
### Step 5: Pour the Screed
The pipes then need a layer of floor [screed](/underfloor-heating-screed/), typically 65-75mm deep. Our [UFH screed guide](/underfloor-heating-screed/) covers the types, drying times and commissioning protocol. Let it dry and cure completely, which can take several weeks.
## Common Mistakes to Avoid
- **Forgetting Insulation:** The #1 mistake. Without it, much of your heat escapes downwards.
- **Damaging Cables/Pipes:** Be extremely careful not to cut or pierce the heating elements during installation.
- **Incorrect Spacing:** Leads to hot and cold spots on the floor.
- **Skipping the Tests:** Failure to test before covering can mean catastrophic failure with no warranty.
## Wrapping Up
Can you install underfloor heating yourself? Yes, especially if you choose an electric system. Plan it properly, follow the instructions and test at every stage. Take your time and you'll end up with comfortable, efficient heating that lasts for years.
If you hit issues during installation or after commissioning, our [complete troubleshooting guide](/underfloor-heating-problems/) covers testing failures, incorrect wiring, sensor issues, and post-installation faults for both electric and wet systems.
Before buying materials, compare system kits and components from leading UK manufacturers in our [Best Underfloor Heating Brands UK Guide](/underfloor-heating-brands/).
---
--- title: Underfloor Heating Design: Heat Loss, Pipe Spacing and Zones description: Plan underfloor heating with accurate heat loss calculations, pipe spacing, zones and flow temperature. Design an efficient, comfortable UK heating system. url: https://underfloorheating.info/underfloor-heating-design-planning/ published: 2025-09-06 updated: 2026-08-21 tags: ['ufh design', 'underfloor heating planning', 'heat loss calculation', 'pipe spacing', 'ufh zoning'] ---
# Underfloor Heating Design: Heat Loss, Pipe Spacing and Zones
> **Quick Answer:** Proper UFH design requires a **heat loss calculation** (typically 60–120 W/m² for UK homes), appropriate **pipe spacing** (100–300mm depending on insulation quality), and strategic **zoning** (separate controls for living, sleeping, and bathroom areas). Flow temperatures should be **35–45°C** for efficiency. Poor design = cold rooms and wasted money; professional design services cost £200–500 but ensure optimal performance. Plan with the guidance at [underfloorheating.info](https://underfloorheating.info/) and find suitable professionals through the [Underfloor Heating Directory](https://underfloorheating.directory/).
## UFH Design & Planning: Heat Loss Calculations and System Layout
Good UFH starts with the design. Get the heat loss, pipe spacing and zoning wrong and you can end up with cold rooms, high bills or hot and cold patches that are difficult to fix once the floor goes down.
Get them right and the system will distribute heat evenly, work properly with your boiler or heat pump and cost less to run. I'll cover the essential design decisions for everything from a single-room electric installation to a whole-house wet system.
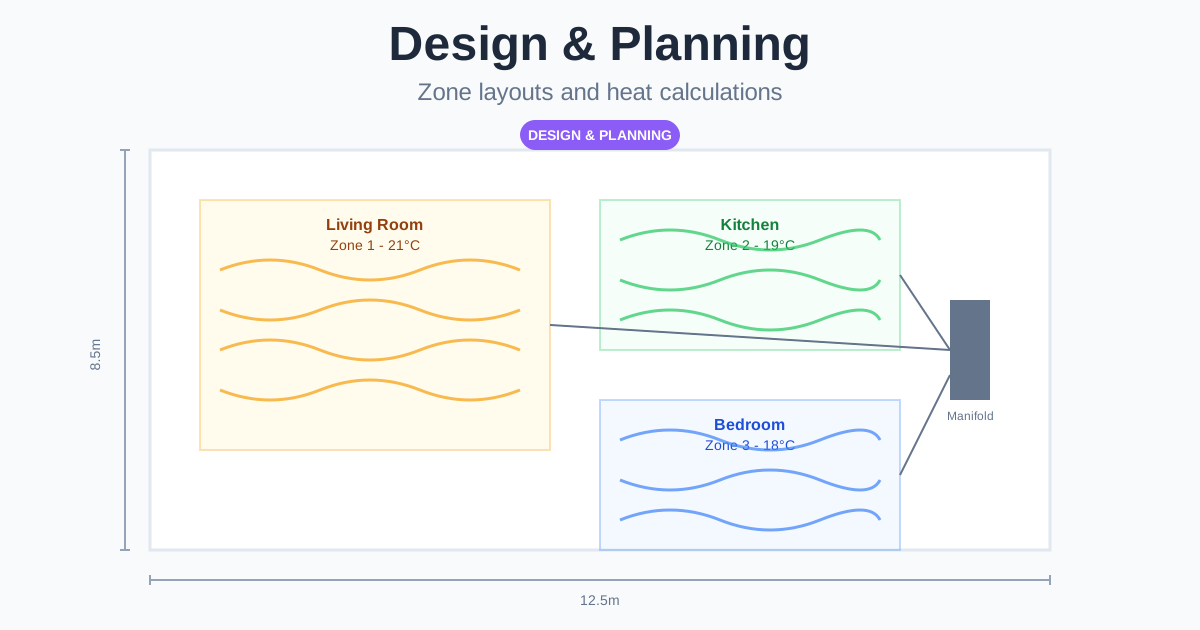
New to underfloor heating? [Start with our beginner's guide →](/underfloor-heating-beginners-guide/) to understand the basics first.
## Why Design Matters: The Cost of Getting It Wrong
Don't guess or rush the design. Once the system sits under the finished floor, mistakes become expensive. Here's what can go wrong:
### Under-Specification Results In:
- **Cold rooms** that never reach comfortable temperatures
- **Extended heat-up times** (6+ hours instead of 2-3 hours)
- **Heat pump inefficiency** if flow temperature must be raised to compensate
- **Comfort complaints** and dissatisfaction with the system
- **Expensive remedial work** to increase pipe density or replace components
### Over-Specification Results In:
- **Wasted money** on unnecessary materials and installation labour
- **Higher initial costs** (£500-2,000+ extra for whole-house systems)
- **Potential overheating** if controls aren't sophisticated enough
- **Reduced system lifespan** from thermal stress
### Correct Design Delivers:
✅ **Optimal comfort** with even heat distribution
✅ **Lowest running costs** through efficient operation
✅ **Maximum heat pump efficiency** (COP 3.0–3.5 at low flow temperatures)
✅ **Long system lifespan** (25-50+ years)
✅ **Compliance** with Building Regulations Part L
✅ **Predictable performance** matching design specifications
The design stage typically costs £200-500 for professional services but can save thousands in avoided mistakes and optimised running costs.
## Understanding Heat Loss Calculations
Before you design the system, you need to know how much heat each room loses. Nothing else matters until you have that figure.
### What is Heat Loss?
Heat loss is the rate at which heat escapes from a space, measured in **Watts (W)** or **Watts per square metre (W/m²)**. Heat escapes through:
- **Walls** (30-40% of total heat loss in typical UK homes)
- **Roof/ceiling** (20-30%)
- **Windows and doors** (15-25%)
- **Floor** (10-15% if uninsulated)
- **Ventilation and air leakage** (10-20%)
The heat loss calculation determines how much heat your UFH system must generate to maintain comfortable temperatures on the coldest days. This matters even more for rooms with an unusual heat loss profile, see our guides to [underfloor heating in extensions](/underfloor-heating-extensions/) and [basements](/underfloor-heating-basement/) for room-specific design considerations.
### Why Heat Loss Calculation Matters
A heat loss calculation determines:
- The **required heat output** (in Watts per square metre, W/m²)
- The **necessary pipe spacing** or cable density
- The **system's operating flow temperature**
- The **potential energy consumption** and running costs
- **Heat source sizing** (boiler or heat pump capacity)
Getting this wrong can lead to an undersized system that never gets warm enough, or an oversized system that is inefficient and expensive to run.
For detailed information on running costs and how design choices affect your energy bills, see our [Underfloor Heating Running Costs 2026 Guide](/underfloor-heating-running-costs-2026/).
### Typical UK Heat Loss Values
Heat loss varies dramatically based on property age, insulation levels, and construction quality:
| Property Type | Typical Heat Loss (W/m²) |
|---------------|--------------------------|
| Modern new build (post-2010, excellent insulation) | 60–80 W/m² |
| Well-insulated home (2000s, good double glazing) | 70–90 W/m² |
| Average 1980s-1990s home (basic insulation) | 80–100 W/m² |
| Older property (pre-1980, poor insulation) | 90–120 W/m² |
| Period property (single glazing, solid walls) | 120–150+ W/m² |
| [Conservatory](/conservatory-underfloor-heating/) or extension (large glazed area) | 150–200+ W/m² |
**Important:** These are rough guides only. A room-by-room professional heat loss calculation is always recommended for accuracy, accounting for:
- Window sizes and orientation
- External wall area
- Ceiling height
- Number of external walls
- Insulation quality and thickness
- Air change rate (ventilation and draughts)
### How to Get a Heat Loss Calculation
**Option 1: Professional Surveyor (£200–500)**
A qualified heating engineer or surveyor will:
- Visit your property and measure each room
- Record construction details (wall types, window sizes, insulation)
- Use industry-standard software to calculate room-by-room heat loss
- Provide a detailed report with recommendations
**Option 2: MCS-Accredited Heat Pump Installer (Often Free)**
If you're installing a heat pump, MCS-accredited installers must perform heat loss calculations as part of their design process. This is often included in their quotation.
**Option 3: DIY Using Online Calculators (Free, Less Accurate)**
Basic online calculators can provide rough estimates but lack the accuracy of professional assessments. Use only for initial planning, not final design.
### Heat Loss and UFH Suitability
UFH can comfortably provide **up to 100 W/m²** with 35-45°C flow temperatures. Beyond this:
- **100-120 W/m²**: Possible with closer pipe spacing (100-150mm) and higher flow temperatures (45-50°C)
- **120+ W/m²**: UFH alone may not suffice; supplementary radiators or heat loss reduction (insulation upgrades) recommended
For properties with very high heat loss, consider improving insulation before installing UFH, it's usually more cost-effective long-term.
## Pipe Spacing: The Key to Output Control
For wet UFH systems, [pipe spacing](/how-much-underfloor-heating-pipe-per-m2/) is the primary method of controlling heat output per square metre.
### How Pipe Spacing Works
The closer together pipes are laid, the more evenly heat is distributed and the higher the output. Standard spacing options:
| Pipe Spacing | Heat Output | Best For | Pipe Required per m² |
|--------------|-------------|----------|----------------------|
| **100mm centres** | 90-110 W/m² | High heat loss areas, conservatories, poorly insulated rooms | 10 linear metres |
| **150mm centres** | 70-90 W/m² | Average UK homes, moderate insulation | 6.7 linear metres |
| **200mm centres** | 60-80 W/m² | Well-insulated modern homes, new builds | 5 linear metres |
| **250mm centres** | 50-70 W/m² | Excellent insulation, passive house standards | 4 linear metres |
| **300mm centres** | 40-60 W/m² | Very low heat loss, supplementary heating | 3.3 linear metres |
**Standard spacing for most UK homes:** 200mm centres in living areas, 150mm in bathrooms and poorly insulated rooms, 100mm in conservatories.
### Why Pipe Spacing Matters
**Too close (over-specification):**
- Wastes money on unnecessary pipe (£1-2/m extra × floor area)
- Increases installation labour time and cost
- Creates denser pipe networks harder to install
**Too wide (under-specification):**
- Insufficient heat output on cold days
- Visible "striping" effect with warm and cool bands across the floor
- System never achieves target room temperature
- Higher flow temperatures required to compensate (reduces heat pump efficiency)
### Adjusting Spacing for Room Variations
Even within the same property, different rooms may require different pipe spacing:
- **Bathrooms**: Often use 150mm spacing for higher output (prefer 22-24°C room temperature)
- **Living rooms**: Standard 200mm spacing for 18-21°C
- **Bedrooms**: 200-250mm spacing for 16-18°C
- **Kitchens**: 200mm spacing accounting for heat from appliances
- **Conservatories**: 100-150mm spacing due to large glazed area and heat loss
- **North-facing rooms**: 150-200mm spacing (less solar gain, higher heat loss)
- **South-facing rooms**: 200-250mm spacing (benefit from solar gain)
**Need help calculating the right spacing for your project?** Use our [free pipe spacing calculator](/underfloor-heating-pipe-spacing-calculator/) to get instant recommendations based on your room specifications, heat loss, and heat source.
## Flow Temperature Selection
Flow temperature is the temperature of water circulating through your UFH pipes. It's critical for both comfort and efficiency.
### Standard Flow Temperatures
- **35-40°C**: Ideal for heat pumps (maximises COP 3.5+), very efficient
- **40-45°C**: Standard for well-insulated homes with gas boilers
- **45-50°C**: For older properties with higher heat loss
- **50-55°C**: Maximum for UFH; approaching radiator territory
**Important:** Building Regulations Part L (2021) encourages low-temperature heating systems. Flow temperatures above 55°C should be avoided for UFH as they reduce efficiency and can damage some floor coverings.
### Why Flow Temperature Matters
**Lower flow temperatures (35-40°C):**
✅ Maximum heat pump efficiency (COP 3.0-3.5)
✅ Lower energy consumption and running costs
✅ Gentle, even heat distribution
✅ Suitable for all floor types including timber
✅ Longer system lifespan (less thermal stress)
**Higher flow temperatures (45-55°C):**
❌ Reduced heat pump efficiency (COP drops to 2.0-2.5)
❌ Higher running costs (15-30% increase)
❌ Risk of overheating floor surfaces
❌ Not suitable for engineered wood or laminate
❌ Greater thermal expansion stress on components
### Balancing Flow Temperature and Pipe Spacing
If heat loss calculations suggest you need high output:
**Option A: Closer pipe spacing + low flow temperature**
- Better for heat pumps and efficiency
- Higher pipe material costs
- Superior long-term performance
**Option B: Standard pipe spacing + higher flow temperature**
- Lower initial material costs
- Higher running costs over system lifespan
- Reduces heat pump efficiency
**Recommendation:** Always prefer closer pipe spacing over higher flow temperatures for long-term efficiency and heat pump compatibility.
For heat pump-specific design considerations, see our [Underfloor Heating with Heat Pumps Guide](/underfloor-heating-heat-pumps-guide-2026/).
## Zoning Strategy: Room-by-Room Control
Zoning allows you to control the temperature of different areas independently, which is key to both comfort and efficiency.
### Why Zone Your UFH System?
**Comfort benefits:**
- Different rooms need different temperatures (bathroom 22-24°C vs bedroom 16-18°C)
- Occupancy patterns vary (bedrooms only heated evenings, living room during day)
- Personal preferences differ (some like it warmer/cooler)
**Efficiency benefits:**
- Heat only the rooms you're using (20-30% energy savings)
- Prevent overheating of rooms that don't need heating
- Tailor temperatures to usage patterns
- Reduce wasted energy in unoccupied spaces
### Typical Zoning Approach
Create separate zones for areas with different heating needs:
| Zone Type | Target Temperature | Operating Hours | Example Rooms |
|-----------|-------------------|-----------------|---------------|
| **Living areas** | 18-21°C | 7am-11pm | Living room, dining room, kitchen |
| **Bedrooms** | 16-18°C | 6pm-7am | All bedrooms |
| **Bathrooms** | 22-24°C | Morning 6-9am, evening 6-10pm | Ensuite, main bathroom |
| **Utility/hallways** | 15-17°C | As needed | Hallways, utility room |
| **Home office** | 19-21°C | 8am-6pm weekdays | Study, office |

### How Many Zones Do You Need?
**Minimum zoning (basic comfort):**
- 1 zone per floor (upstairs/downstairs)
- Suitable for very small properties or tight budgets
- Limited control and efficiency
**Standard zoning (recommended for most homes):**
- Living areas: 1 zone
- Bedrooms: 1-2 zones (master separate from other bedrooms)
- Bathrooms: 1 zone (or combined with bedrooms if timing aligns)
- Total: **3-5 zones** for typical 3-4 bedroom house
**Advanced zoning (maximum control):**
- 1 zone per room
- Ideal for large homes or varying occupancy
- Maximum efficiency and comfort
- Higher installation costs (more manifold ports, thermostats, wiring)
### Manifold Sizing and Multiple Manifolds
Each zone requires one manifold port (flow and return). Standard manifolds come in:
- 2-port
- 4-port
- 6-port
- 8-port
- 10-port
- 12-port
**When to use multiple manifolds:**
- Properties with more zones than manifold capacity
- Multi-storey buildings (1 manifold per floor)
- Very large floor areas (long pipe runs reduce efficiency)
- Extensions or annexes distant from main manifold
Multiple manifolds add cost (£200-400 per additional manifold plus installation) but improve system performance in large properties.
For comprehensive manifold selection and setup guidance, see our [Underfloor Heating Manifold Guide](/underfloor-heating-manifold-guide/).
For detailed zoning strategies and control options, see our [Underfloor Heating Zoning Complete Guide](/underfloor-heating-zoning-complete-guide/).
## Floor Build-Up Considerations
The floor construction significantly impacts UFH design, installation cost, and system performance.
### Screed Depth for Wet Systems
**Traditional sand/cement screed:**
- Minimum depth over pipes: **65-75mm**
- Provides thermal mass for even heat retention
- Adds significant floor height (pipes + screed = 85-95mm total)
- Long cure time (1mm per day = 65-75 days before final flooring)
**Liquid screed (anhydrite):**
- Minimum depth over pipes: **50-65mm**
- Self-levelling for easier application
- Better thermal conductivity than sand/cement
- Faster cure time (typically 28-35 days)
- 20-30% more expensive than traditional screed
**Floor height comparison:**
- Insulation: 25-100mm
- Pipe: 16-20mm
- Screed: 50-75mm
- **Total build-up: 100-195mm**
For a full breakdown of screed types, minimum depths, drying times, and the commissioning protocol, see our [Underfloor Heating Screed Guide](/underfloor-heating-screed/).
This is why wet UFH is challenging for retrofits in properties with fixed door heights, staircases, or floor transitions.
### Low-Profile Systems for Retrofit
When floor height is limited:
**Low-profile overlay boards (20-30mm total):**
- Grooved boards with channels for pipes
- Dry installation (no wet screed)
- Suitable where only 20-30mm height available
- More expensive (£30-50/m² for boards)
- Faster installation (no cure time)
**Suspended floor systems:**
- Pipes run between floor joists from below
- Zero floor height increase
- Requires accessible void below
- Insulation fitted between joists
- Ideal for ground floors with accessible underside
For retrofit-specific design considerations and low-profile solutions, see our [Retrofitting Underfloor Heating Guide](/retrofitting-underfloor-heating/).
### Insulation Requirements
Insulation is **not optional**, it's essential for efficiency and Building Regulations compliance.
**Ground floors (over earth or unheated void):**
- Minimum: **100mm** rigid foam insulation (PIR/XPS)
- Recommended: **150mm** for maximum efficiency
- Placed directly on structural base before pipes
**Upper floors (over heated rooms below):**
- Minimum: **25mm** acoustic/thermal insulation
- Purpose: Reduce heat loss downwards (still costs money even if heating room below)
- Improves sound insulation between floors
**Edge insulation:**
- **10-20mm** perimeter strip around all room edges
- Prevents heat escaping sideways into walls
- Allows thermal expansion of screed
- Essential but often forgotten in poor installations
**Without adequate insulation:**
- 30-50% heat loss downwards
- Significantly higher running costs
- Longer heat-up times
- Reduced system efficiency
- Potential Building Regulations non-compliance
## Thermostat Placement and Control Strategy
Where you place thermostats significantly impacts comfort and efficiency.
### Thermostat Location Guidelines
**Air temperature sensors:**
- 1.5m from floor level
- Interior wall (never exterior wall which is colder)
- Away from direct sunlight, draughts, radiators
- Away from heat-generating equipment (TVs, computers, lamps)
- Representative of average room temperature
**Floor temperature sensors:**
- Embedded in floor between two pipe runs (centre of heated area)
- Protected by conduit for future replacement
- Used as limit sensor (prevents floor overheating)
- Essential for timber floors (limit to 27°C)
### Air vs Floor Sensors vs Combined
| Sensor Type | Purpose | Advantages | Limitations |
|-------------|---------|------------|-------------|
| **Air sensor only** | Maintains room air temperature | Accurate comfort control | Doesn't protect floor from overheating |
| **Floor sensor only** | Maintains floor temperature | Prevents floor damage | Room temperature can vary |
| **Combined (air + floor limit)** | Air temp control, floor protection | Best of both worlds | Slightly more expensive (£20-40) |
**Recommendation:** Use combined air + floor sensors for all installations, especially with timber flooring.
For smart thermostat options with remote control and scheduling, see our [Smart Thermostats for Underfloor Heating Guide](/smart-thermostats-underfloor-heating/).
## Water System Design Details: Pipe Layout Patterns
There are two main patterns for laying pipes:
### 1. Spiral (or Snail) Pattern ⭐ Recommended
**How it works:**
- Flow and return pipes run alongside each other throughout
- Creates most even heat distribution
- Warmer flow pipe compensates for cooling return pipe
**Advantages:**
- Even temperature across entire floor (no hot/cold spots)
- Lower flow temperature required (better efficiency)
- Ideal for large open-plan areas
- Professional appearance
**Disadvantages:**
- Slightly more complex to plan
- Requires more skill to lay correctly
**Best for:** Living rooms, open-plan areas, high-specification installations.
### 2. Serpentine (or Zig-Zag) Pattern
**How it works:**
- Single continuous pipe runs back and forth across room
- Water gradually cools from start to end of loop
**Advantages:**
- Simple to plan and lay
- Easier for DIY installations
- Works well for narrow rooms (hallways)
**Disadvantages:**
- Temperature variation from hot to cool end
- May create warm/cool zones in large rooms
- Requires slightly higher flow temperature
**Best for:** Bathrooms, narrow hallways, small rooms, DIY projects.

### Loop Lengths
Maximum loop length depends on pipe diameter:
- **16mm pipe**: 80-100m maximum per loop
- **20mm pipe**: 100-120m maximum per loop
Exceeding maximum length increases pressure drop, reducing flow rate and system efficiency. Large rooms may require multiple loops.
### Manifold Planning
The manifold is the central hub for a wet system. It should be located in a central, accessible position (like a utility cupboard). You will need one port on the manifold for each pipe loop (zone).
**Manifold location criteria:**
- Central to all zones (minimises pipe run lengths)
- Easily accessible for maintenance and adjustment
- Protected from damage (cupboard or boxed enclosure)
- Well-ventilated (prevents condensation)
- Near heat source (boiler/heat pump) where possible

[Check out our Underfloor Heating Manifold Guide](/underfloor-heating-manifold-guide/) for setup, balancing, and troubleshooting.
## Electric System Design
Design for electric systems is simpler than wet systems but still requires careful planning.
### Power Output Selection
Electric UFH mats come in standard power outputs:
- **150W/m²**: Standard for well-insulated rooms (bathrooms, bedrooms)
- **200W/m²**: Higher output for poorly insulated rooms or quick heat-up
Match power output to room heat loss:
- Heat loss 60-80 W/m² → 150W/m² mat sufficient
- Heat loss 80-120 W/m² → 200W/m² mat recommended
### System Types
**Heating Mats:**
- Pre-spaced cables attached to mesh
- Easy to roll out (DIY-friendly)
- Fixed spacing ensures even heat
- Best for square/rectangular rooms
- £35-60/m² materials
**Loose Wire Systems:**
- Cable on reel, space yourself
- Flexible for awkward shapes
- L-shaped rooms, around fixtures
- Requires more installation skill
- £30-50/m² materials
**Foil Systems:**
- Ultra-thin (0.5mm) for floating floors
- Laminate, engineered wood
- No screed required
- Quick retrofit installation
- £45-70/m² materials

For comprehensive electric system design, costs, and installation guidance, see our [Electric Underfloor Heating Systems UK Guide](/electric-underfloor-heating-systems/).
## Working with Installers: What to Expect
If you're hiring a professional installer, a good design package should include:
### Essential Design Documentation
1. **Room-by-room heat loss calculations**
- W/m² for each space
- Total heat requirement
- Assumptions documented (insulation, window types, etc.)
2. **System specification**
- Pipe spacing for each room
- Loop lengths and quantities
- Manifold sizing and location
- Insulation specification
3. **Floor plan drawings**
- Pipe layout overlaid on floor plan
- Manifold location
- Thermostat locations
- Exclusion zones (permanent fixtures)
4. **Materials list**
- Pipe quantities
- Insulation requirements
- Manifold specification
- Control equipment
- Screed volume
5. **Cost breakdown**
- Materials costs
- Labour costs
- Total project cost
### Questions to Ask Installers
✅ "Can you provide a detailed heat loss calculation?"
✅ "What pipe spacing do you recommend and why?"
✅ "What flow temperature will the system operate at?"
✅ "How many zones do you recommend?"
✅ "What is the total floor build-up height?"
✅ "How long until the floor is ready for final covering?"
✅ "What warranty do you provide on installation?"
✅ "Are you registered for Building Control notification?"
### Red Flags to Watch For
❌ No heat loss calculation ("we'll just use 150mm spacing everywhere")
❌ Unwilling to provide detailed drawings
❌ Vague about flow temperatures
❌ No discussion of zoning strategy
❌ Pressure to choose single zone to save costs
❌ No mention of Building Regulations or certification
❌ Quote significantly cheaper than others (usually means shortcuts)
For cost expectations and what's included in professional installations, see our [Underfloor Heating Costs Guide](/underfloor-heating-costs/).
## Building Regulations Compliance
UFH design must comply with Building Regulations Part L (England & Wales) covering energy efficiency.
**Key requirements:**
- Adequate insulation below heating elements
- Programmable controls (minimum)
- Design documentation for Building Control
- MCS certification for heat pump systems (required for grants)
- Energy efficiency calculations (SAP or similar)
For full regulatory guidance, see our [UK Building Regulations Underfloor Heating Guide](/uk-building-regulations-underfloor-heating/).
## Frequently Asked Questions
### 1. Do I really need a professional heat loss calculation?
For single small rooms (bathroom, ensuite), rough estimates may suffice. For whole-house systems or rooms over 15m², **yes, a professional calculation is essential**. It costs £200-500 but prevents expensive mistakes. Under-specification means cold rooms; over-specification wastes £500-2,000+ on unnecessary materials. The calculation pays for itself through optimised design.
### 2. What pipe spacing should I use for a standard UK home?
**200mm centres** is standard for well-insulated modern homes (post-2000) with heat loss around 60-80 W/m². Use **150mm centres** for older properties (1980s-1990s) with heat loss 80-100 W/m², and **100mm centres** for very poorly insulated rooms or conservatories with heat loss over 100 W/m². Always base spacing on actual heat loss calculations, not guesswork.
### 3. How many zones do I need for underfloor heating?
**Minimum 3-5 zones** for a typical 3-4 bedroom house: living areas (1 zone), bedrooms (1-2 zones), bathrooms (1 zone). Each zone needs one manifold port and one thermostat. More zones = better control and efficiency but higher upfront cost. Single-zone systems save money initially but cost more to run (10-30% higher energy bills) and offer poor comfort control.
### 4. What flow temperature should I use for underfloor heating?
**35-40°C** is ideal for heat pumps (maximises COP 3.5+) and well-insulated homes. **40-45°C** is standard for gas boilers in average UK homes. Avoid exceeding **50°C**, higher temperatures reduce efficiency, increase running costs, and can damage wooden floors. If you need more than 50°C, improve insulation or use closer pipe spacing instead.
### 5. Can I design and install underfloor heating myself?
**Electric systems:** Yes, DIYers can lay mats/cables, but **Part P certified electrician required** for final connections (£150-300). Physical installation is straightforward.
**Wet systems:** Design requires professional heat loss calculations. Installation is physically demanding (pipe laying, screed work) but possible for competent DIYers. However, pressure testing, manifold setup, and commissioning benefit from professional expertise. Many DIYers do the groundwork and hire professionals for technical commissioning.
### 6. What's the minimum floor build-up for wet underfloor heating?
**Traditional screed:** 100-120mm total (insulation 25-50mm + pipe 16-20mm + screed 65-75mm).
**Low-profile systems:** 20-30mm using grooved overlay boards (suitable for retrofits with height restrictions).
Floor height is the biggest challenge for wet UFH retrofits. If you have less than 100mm available, consider low-profile systems or electric UFH instead.
### 7. How long does underfloor heating take to heat up?
Depends on floor construction:
- **Electric systems:** 30-60 minutes (thin screed, low thermal mass)
- **Wet systems with screed:** 2-4 hours first time, 1-2 hours for subsequent heating cycles
- **Wet systems with overlay boards:** 60-90 minutes (lower thermal mass)
Design impacts heat-up time: closer pipe spacing = faster response, but higher cost.
### 8. What's the difference between spiral and serpentine pipe layouts?
**Spiral pattern:** Flow and return pipes run alongside each other, creating the most even heat distribution. Recommended for living rooms and open-plan areas. More complex to lay.
**Serpentine pattern:** Single pipe snakes back and forth. Simpler to install but creates slight temperature variation from start to end. Suitable for bathrooms, hallways, and small rooms.
For large important rooms, always use spiral pattern for superior comfort.
The takeaway is simple: design the UFH around the building, not around a standard kit. Calculate the heat loss, then use it to choose the pipe spacing, insulation, flow temperature and zones.
**Key design priorities:**
1. **Accurate heat loss calculation**, the foundation of all other decisions
2. **Appropriate pipe spacing**. 100-300mm based on heat loss, not guesswork
3. **Strategic zoning**. 3-5 zones minimum for efficiency and comfort
4. **Low flow temperatures**. 35-45°C for efficiency and heat pump compatibility
5. **Adequate insulation**. 100mm+ ground floors, 25-50mm upper floors
6. **Professional design service**, £200-500 investment that saves thousands
**DIY or professional?**
- Small electric projects (single bathroom): DIY-friendly with electrician for connections
- Wet systems or multi-room: Professional design essential, installation can be DIY or professional
For anything larger than a single room, I'd use a professional design service. It's the safest way to get the calculations right and meet UK Building Regulations.
The design stage isn't where I'd try to save money. It determines whether the investment performs properly for 25-50 years. Poor design can cost far more in wasted energy, comfort problems and remedial work than the professional service ever would.
For detailed cost expectations including design fees and installation costs, see our [Underfloor Heating Costs Guide](/underfloor-heating-costs/).
For installation guidance once your design is complete, see our [Underfloor Heating Installation Guide](/underfloor-heating-installation-guide/).
If you're experiencing issues with an existing system, poor design may be the root cause, see our [Underfloor Heating Problems Guide](/underfloor-heating-problems/) for diagnostics and solutions.
---
--- title: Underfloor Heating Maintenance Guide: Checks, Costs and Repairs description: Keep underfloor heating efficient with annual servicing, pressure checks, electric UFH testing, troubleshooting and UK costs. Prevent faults and save. url: https://underfloorheating.info/underfloor-heating-maintenance-guide/ published: 2025-09-05 updated: 2026-08-21 tags: ['underfloor heating maintenance', 'ufh troubleshooting', 'underfloor heating problems', 'heating maintenance', 'ufh service'] ---
# Underfloor Heating Maintenance Guide: Checks, Costs and Repairs
## Underfloor Heating Maintenance: Annual Checks and Troubleshooting Guide
Underfloor heating doesn't need much maintenance, but you can't ignore it completely. Electric UFH mainly needs thermostat and electrical safety checks. Wet UFH needs pressure, pump, manifold, inhibitor and air checks, especially before winter. You'll find more maintenance guidance at [underfloorheating.info](https://underfloorheating.info/) or local specialists through the [Underfloor Heating Directory](https://underfloorheating.directory/).
For most UK homes, I'd budget **£120-£250 for an annual wet UFH service**, depending on the number of manifolds and zones. Electric UFH usually costs less to check because it has no pumps, valves or water quality tests. You still need a qualified electrician for any electrical testing.

New to underfloor heating? [Start with our beginner's guide](/underfloor-heating-beginners-guide/) to understand system basics first.
If your system is already losing pressure, showing cold zones, or refusing to heat, compare trusted local specialists through the [Underfloor Heating Directory](https://underfloorheating.directory/get-quotes) rather than guessing at hidden floor or manifold faults.
## Why Maintenance Matters
A few regular checks protect the system's efficiency, warranty and lifespan.
- **Prevents breakdowns:** Early pressure drops, air locks or thermostat faults are easier to fix before they become major failures.
- **Maintains efficiency:** A balanced, well-controlled system uses less energy and gives steadier room temperatures.
- **Extends lifespan:** Properly maintained wet UFH pipework can last 50 years or more.
- **Preserves warranties:** Many manufacturers expect proof of correct commissioning and servicing.
- **Saves money:** A £150 service is usually far cheaper than emergency pump, manifold or floor fault diagnosis.
For detailed information about long-term costs, including maintenance expenses and ROI calculations, see our [Underfloor Heating Costs Guide](/underfloor-heating-costs/).
## Quick Maintenance Schedule
| Task | Electric UFH | Wet UFH | Who Should Do It |
|------|--------------|---------|------------------|
| Check thermostat schedules | Monthly | Monthly | Homeowner |
| Confirm each zone heats | Monthly | Monthly | Homeowner |
| Check system pressure | Not applicable | Monthly | Homeowner |
| Inspect manifold for leaks | Not applicable | Monthly | Homeowner |
| Bleed air from circuits | Not applicable | Before heating season | Competent homeowner or engineer |
| RCD and resistance testing | Annually | Not applicable | Electrician |
| Water quality and inhibitor check | Not applicable | Annually | Heating engineer |
| Pump, actuator and valve inspection | Not applicable | Annually | Heating engineer |
## Electric System Maintenance
Electric UFH comes close to "fit and forget", but I'd still check the controls and keep every installation record.
### Monthly Checks
**Thermostat function:**
1. **Test response:** Turn the temperature up and confirm the floor starts to warm.
2. **Check the display:** Make sure the thermostat shows a believable room or floor temperature.
3. **Verify programming:** Check schedules after clock changes, holidays and seasonal routine changes.
4. **Watch floor sensor behaviour:** If the floor overheats, never reaches temperature, or cycles on and off quickly, the probe or thermostat settings may be wrong.
### Annual Maintenance
Ask a qualified electrician to carry out the safety checks once a year, especially in bathrooms, kitchens and rented properties.
**Electrical testing should include:**
- **RCD test:** Confirms the Residual Current Device trips correctly.
- **Insulation resistance:** Checks that the cable's protective sheath hasn't been damaged.
- **Continuity check:** Confirms the heating element is still a complete circuit.
- **Resistance reading check:** Confirms the cable still matches the manufacturer's expected ohms range.

In my experience, electric UFH usually fails because of a faulty thermostat or sensor, damaged cables or missing installation records. If the installer recorded resistance readings before, during and after fitting the floor covering, you'll have a much easier and less invasive fault-finding job.
## Wet System Maintenance
Wet systems have more moving parts. Give them more attention before the heating season starts.
### Monthly Checks
**System pressure:**
- **Check the gauge:** Locate the pressure gauge on your boiler or manifold. It's commonly around **1-2 bar** when cold, but follow your boiler and installer guidance.
- **Top up if needed:** If pressure is low, use the filling loop slowly and stop at the correct pressure.
- **Monitor repeated pressure loss:** One small top-up after bleeding is normal. Repeated pressure loss can point to a leak, failed expansion vessel, pressure relief valve problem, or air working its way out of the UFH circuits.

[Use our Underfloor Heating Manifold Guide](/underfloor-heating-manifold-guide/) if you need help identifying flow meters, actuators, isolation valves and blending valves.
### Seasonal Maintenance
Before winter arrives, work through these checks:
1. **System venting:** Bleed trapped air from the manifold air vents if you know how to do it safely.
2. **Valve operation:** Turn each zone on and off at the thermostat and check that actuators open and close.
3. **Pump operation:** When the system calls for heat, you should be able to hear or feel the circulation pump running.
4. **Flow meter movement:** Flow meters should respond when zones open. No movement can mean air, a closed valve, pump trouble or a stuck actuator.
### Annual Professional Service
A qualified heating engineer should check:
- **Water quality:** Inhibitor concentration, pH and signs of corrosion or contamination.
- **System cleanliness:** Dirty water, sludge or blocked strainers may mean flushing is needed.
- **Pump and valve condition:** Including the blending valve, actuators and expansion vessel.
- **Flow rate balancing:** Each loop should match the design closely enough that one room isn't stealing heat from another.
- **Controls:** Thermostats, wiring centre, time programmes and smart controls should work together.
Ask the engineer to write down the pressure, inhibitor level, pump condition and any manifold adjustments. You'll be glad you have that service history if a warranty, insurance or house-sale question comes up later.
## Common Problems and Solutions
Even a well-maintained system can go wrong. Here's how I'd narrow down the cause.
For step-by-step diagnostics for both wet and electric systems, see our [Underfloor Heating Problems and Troubleshooting Guide](/underfloor-heating-problems/). If you're unsure whether to attempt a fix or call a professional, use our [When to Call a Professional for UFH Repairs](/when-to-call-professional-underfloor-heating/) guide.
### Problem: One Zone Is Not Heating
- **Possible cause 1: Air lock.** Air is trapped in one pipe loop, preventing circulation.
- **Solution:** Isolate and bleed the affected circuit from the manifold.
- **Possible cause 2: Faulty actuator.** The electronic head on the manifold may have failed.
- **Solution:** A heating engineer can test and replace it.
- **Possible cause 3: Thermostat issue.** The thermostat may have lost power, connection or calibration.
- **Solution:** Check batteries, settings and wiring before assuming pipework failure.
### Problem: The Whole System Is Not Heating
- **Possible cause 1: Pump failure.** The UFH circulation pump isn't moving water through the loops.
- **Solution:** Ask a heating engineer to test the pump, power supply and pump speed settings.
- **Possible cause 2: Boiler or heat pump issue.** The heat source may not be supplying warm water.
- **Solution:** Check fault codes and confirm other heating or hot water circuits work.
- **Possible cause 3: System pressure is too low.** Some boilers stop operating below minimum pressure.
- **Solution:** Re-pressurise the system, then monitor whether pressure drops again.
### Problem: High Energy Bills
- **Possible cause 1: Incorrect programming.** The system is running too long or too hot.
- **Solution:** Optimise schedules and use sensible setback temperatures instead of aggressive on/off cycling.
- **Possible cause 2: Poor insulation.** The system is replacing heat as fast as the room loses it.
- **Solution:** Improve floor, wall, roof or draught insulation before blaming the UFH.
- **Possible cause 3: Unbalanced wet loops.** One zone may be over-supplied while another struggles.
- **Solution:** Ask an engineer to rebalance the manifold flow meters and check pump speed.
## When to Call a Professional
Call a heating engineer or electrician if:
- The system pressure keeps dropping after topping up.
- One zone stays cold after checking the thermostat and actuator.
- The RCD trips when electric UFH turns on.
- The floor overheats or the thermostat shows sensor faults.
- The manifold shows staining, corrosion, dripping or noisy pump operation.
- You're buying a home with existing UFH and want a pre-purchase system health check.
For wet UFH, a professional visit is usually worth it before the first proper cold spell. For electric UFH, call an electrician before lifting floors or assuming the cable has failed.
## Wrapping Up
Keep up with the basic maintenance and your underfloor heating should stay efficient, quiet and predictable. You can check thermostat response, pressure, leaks, unusual noises and room-by-room heat yourself. Leave the annual wet system service and electric UFH testing to the right specialist.
For a comprehensive seasonal maintenance schedule with printable checklists, see our [Annual Underfloor Heating Maintenance Checklist](/annual-underfloor-heating-maintenance-checklist/).
If your UFH needs diagnosis or servicing, [compare trusted underfloor heating installers](https://underfloorheating.directory/get-quotes) and ask for pressure readings, electrical test results and any manifold changes in writing.
---
--- title: UK Building Regulations for Underfloor Heating: Complete Guide description: Understand UK building regulations for underfloor heating, including Part L, Part P, BS EN 1264 and certification, so your installation stays compliant. url: https://underfloorheating.info/uk-building-regulations-underfloor-heating/ published: 2025-01-01 updated: 2026-08-21 tags: ['uk building regulations', 'part l', 'part p', 'bs en 1264', 'underfloor heating compliance', 'ufh certification'] ---
# UK Building Regulations for Underfloor Heating: Complete Guide
## Draft outline (scope, when it applies, and compliance checklists)
Use [underfloorheating.info](https://underfloorheating.info/) for practical UK guidance and the [Underfloor Heating Directory](https://underfloorheating.directory/) when you are ready to find an installer for a compliant project.
- **Scope:** What Part L and Part P cover, how BS EN 1264 fits in, and where MCS guidance applies (especially for heat pump-driven systems).
- **When it applies:** New builds, extensions, material changes, renovations, and any new electrical circuits or controls.
- **Compliance by system type:** Separate checklists for electric and wet (hydronic) underfloor heating.
- **Certification and handover:** What installers must certify, test results, and homeowner documentation.
- **Practical flowchart:** A plain-English route from design to sign-off.
## UK Building Regulations for Underfloor Heating: A practical compliance guide
If you are planning underfloor heating (UFH) in the UK, building regulations are not a box-ticking exercise. They determine how the system must be designed, installed, tested, and certified. They also influence what evidence you need for Building Control, mortgage providers, and warranties.
This guide summarises what the regulations cover, when they apply, and how compliance differs between electric and wet (hydronic) systems. It is written for homeowners, self-builders, and installers who want clarity rather than jargon.

## The three compliance pillars in plain English
### 1) Part L: Energy efficiency
Part L of the Building Regulations sets energy efficiency requirements for new builds and renovations. It is published as Approved Document L in England and Wales on the government site, and it focuses on fabric performance, heating controls, and system efficiency. For UFH, Part L affects insulation, heat loss calculations, heat source efficiency, and controls such as zoning and time/temperature programming.
Reference: [Approved Document L (Conservation of fuel and power)](https://www.gov.uk/government/publications/conservation-of-fuel-and-power-approved-document-l)
### 2) Part P: Electrical safety
Part P is the electrical safety section of the Building Regulations. It applies to any fixed electrical installation work, including electric UFH mats, cables, thermostats, and new circuits. Notifiable work must be carried out by a registered electrician or notified to Building Control.
Reference: [Approved Document P (Electrical safety)](https://www.gov.uk/government/publications/electrical-safety-approved-document-p)
Note: Building regulations are devolved. Scotland uses Building Standards (Section 6 for energy), and Northern Ireland uses Technical Booklets. Always confirm the local requirements with your Building Control body.
### 3) BS EN 1264: Design and performance standard for wet UFH
BS EN 1264 is the European standard that defines how water-based surface embedded heating and cooling systems are designed, tested, and commissioned. It is not law, but it is the recognised technical benchmark for wet UFH design, output calculations, and testing. Many manufacturers, designers, and warranty providers expect systems to follow BS EN 1264 principles.
Reference: [BS EN 1264 overview (BSI)](https://landingpage.bsigroup.com/LandingPage/Series?UPI=BS%20EN%201264)
### Where MCS guidance fits in
MCS (Microgeneration Certification Scheme) guidance is most relevant if the wet UFH system is paired with a heat pump or is part of a renewable heating installation. MCS standards and installation guidance govern the design, commissioning, and paperwork needed for eligibility under schemes such as the Boiler Upgrade Scheme.
Reference: [MCS standards and guidance](https://mcscertified.com/who-we-are/standards-governance/)
## When building regulations apply to UFH

In practice, building regulations apply in the following situations:
- **New builds and major renovations:** Full Part L compliance is required, including insulation, heat loss calculations, and high-efficiency controls.
- **Extensions and conversions:** The new area must meet current standards, and any new heating controls must comply with Part L.
- **Material alterations:** Replacing or upgrading heating systems, adding new zones, or changing the heat source can trigger Part L compliance checks.
- **Any new electrical circuit or fixed wiring:** Electric UFH and new thermostats fall under Part P rules for electrical safety.
If you are unsure whether work is notifiable, ask Building Control early. It is far easier to document compliance during design and installation than to fix it after the floor goes down.
## Compliance checklist: electric vs wet systems
This is the practical checklist you can use on site or during specification.
| Requirement | Electric UFH | Wet (hydronic) UFH |
| --- | --- | --- |
| Part L energy efficiency | Confirm insulation levels, design heat output, and programmable controls | Heat loss calculations, flow temperatures, zoning, and insulated pipework |
| Part P electrical safety | New circuits and thermostats must be installed and certified | Electrical elements (wiring centre, actuators, pumps) still need Part P compliance |
| BS EN 1264 alignment | Not typically applied | Design, output calculations, circuit lengths, and testing should follow BS EN 1264 |
| Controls and zoning | Programmable thermostat, floor sensor, suitable load rating | Room-by-room zoning, mixing controls, and temperature limits |
| Commissioning and tests | Electrical tests (continuity, insulation resistance) | Pressure test, flushing, balancing, and commissioning records |
| Handover documentation | Electrical Installation Certificate (EIC) and Part P notification | Commissioning sheet, as-built layout, pressure test results, and controls setup |
For installation best practice, see our [DIY UFH Installation Guide](/underfloor-heating-installation-guide/) and if you are gathering quotes, read our [Underfloor Heating Quotation Guide](/underfloor-heating-quotation/).
If you are comparing trades, use the [underfloor heating installer qualifications checklist](/underfloor-heating-installer-qualifications-uk/) to verify the right electrician, heating engineer, Gas Safe, or MCS credentials for the work involved.

## Compliance flowchart (from design to sign-off)
```
START
|
|-- 1) Does the work trigger Building Regs?
| |-- New build / extension / conversion -> Part L applies
| |-- Alteration or new circuit -> Part L or Part P may apply
|
|-- 2) Choose system type
| |-- Electric UFH -> Part P for fixed wiring + test certification
| |-- Wet UFH -> BS EN 1264 design principles
|
|-- 3) Design & specification
| |-- Heat loss calculation and room outputs
| |-- Floor insulation and build-up confirmed
| |-- Controls and zoning schedule defined
|
|-- 4) Install & test
| |-- Electric: mat/cable layout + resistance/insulation tests
| |-- Wet: pipe layout + pressure test + manifold setup
|
|-- 5) Commission
| |-- Balance circuits, set controls, verify temperatures
| |-- Record results and as-built drawings
|
|-- 6) Certify & hand over
| |-- Part P cert (if applicable) + Building Control sign-off
| |-- Handover pack: test results, warranties, controls guide
|
FINISH
```
## Exceptions to building regulation certificates: when a separate certificate may not be issued
Many homeowners search for *exceptions to building regulation certificate* rules. In UFH projects, the confusion usually comes from how work is notified rather than from a true exemption.
In plain terms, a separate Building Control certificate may not be issued when:
- **Work is non-notifiable:** Minor electrical alterations that are not notifiable under Part P may not generate a separate compliance certificate.
- **A registered installer self-certifies:** If the installer belongs to a competent person scheme, they submit compliance directly and you may receive scheme paperwork instead of a standalone local authority certificate.
- **UFH is part of broader approved works:** Evidence can appear in the wider project completion documents rather than as a UFH-only certificate.
What does *not* change: safety testing, commissioning records, and compliance evidence are still required. Keep all documents (electrical certificates, commissioning sheets, and warranties) because solicitors and surveyors often request them during sale or remortgage.
## What installers must certify and hand over
This is the documentation that should be provided at completion. If you are a homeowner, insist on this; if you are an installer, build it into your handover pack.
### For [electric underfloor heating](/electric-underfloor-heating-systems/)
- **Electrical Installation Certificate (EIC)** or Minor Electrical Installation Works Certificate, depending on the scope.
- **Part P compliance notification** or Building Control certificate if the work is notifiable.
- **Manufacturer warranty registration** with recorded test readings (resistance, insulation).
- **Controls setup** and user instructions.
### For wet (hydronic) underfloor heating
- **Pressure test record** (including test pressure and duration).
- **Commissioning sheet** with flow rates, manifold settings, and actuator checks.
- **As-built layout drawings** showing pipe runs, manifold location, and sensor position.
- **Heat loss calculation summary** (room-by-room output design).
- **Controls configuration** and user instructions.
### When heat pumps or renewables are involved
If the UFH is tied to a heat pump or a renewable installation, you may also need:
- **MCS certificate and handover pack** (required for grant eligibility).
- **System commissioning checklist** aligned with MCS guidance.
Reference: [MCS standards and guidance](https://mcscertified.com/who-we-are/standards-governance/)
## How Part L changes the design brief

Part L pushes UFH design in a few key directions:
- **Lower flow temperatures:** Wet UFH is naturally suited to low-temperature heating, which improves boiler efficiency and is essential for heat pump performance.
- **High levels of insulation:** Floor insulation and perimeter insulation are critical. Without them, heat loss increases and Part L compliance becomes harder to achieve.
- **Time and temperature controls:** Zoning and programmable controls are expected. A single on/off switch for the whole house is no longer sufficient.
- **Heat loss calculations:** Each room should be sized for output and pipe spacing, not guessed.
The practical result is that UFH becomes a system-wide design task, not just a flooring choice.
## How Part P affects electric UFH installations

Electric UFH is often installed in bathrooms and kitchens, which are classed as special locations for electrical work. Part P makes sure the wiring is safe and properly certified. Key points include:
- **New circuits are notifiable.** If you are adding a new circuit for UFH, it must be installed by a Part P registered electrician or signed off by Building Control.
- **Thermostats and sensors count as fixed wiring.** Even if the heating mat is DIY, the final connection and testing must be certified.
- **Documentation protects warranties.** Most manufacturers require certified electrical test results to keep the warranty valid.
If you are unsure what is notifiable, check the Approved Document P guidance or ask a registered electrician at quotation stage.
## BS EN 1264 in practice for wet UFH
BS EN 1264 is the backbone of wet UFH design. The standard covers:
- **Design heat output calculations** based on floor construction and room heat loss.
- **Maximum surface temperatures** to avoid discomfort and floor damage.
- **Circuit length limits and pipe spacing** to maintain even heat distribution.
- **Testing and commissioning** to prove the system is safe and performs as designed.
Even if you do not purchase the standard, a competent UFH designer should follow its principles. This is especially important where you need warranty support or third-party sign-off.
## Typical compliance risks (and how to avoid them)
- **Skipping insulation to save money:** This is the most common cause of Part L failures and high running costs. Use the correct insulation thickness for the floor type.
- **No heat loss calculation:** UFH output must match the room demand. Guessing leads to cold rooms and failed compliance checks.
- **Uncertified electrical connections:** This can invalidate warranties and create safety risks. It also creates delays with Building Control.
- **No commissioning records:** If the system is not balanced and documented, it is hard to prove compliance or diagnose issues later.
For a cost reality check, see our [Underfloor Heating Costs Guide](/underfloor-heating-costs/) and compare it with the savings from efficient design.
## FAQs
**Q: Do I need Building Control approval for underfloor heating?**
A: Often yes. New builds, extensions, and any notifiable electrical work must be signed off. If you use installers registered with a competent person scheme, they can usually self-certify and notify Building Control on your behalf.
**Q: Is electric UFH allowed under Part L?**
A: Yes, but it still needs proper insulation, controls, and energy efficiency measures. Electric UFH can meet Part L in smaller areas or well-insulated spaces, but running costs and heat source efficiency will be scrutinised in new builds.
**Q: Does BS EN 1264 apply to electric systems?**
A: No, it applies to water-based (hydronic) surface embedded systems. Electric UFH follows electrical safety rules and manufacturer guidance, plus Part L energy performance requirements.
**Q: Can I install UFH myself if I am competent?**
A: You can lay mats or pipes, but certification matters. Electric systems must be connected and tested by a qualified electrician. Wet systems should be pressure tested and commissioned by a competent installer, with documentation for Building Control.
**Q: What are exceptions to building regulation certificates for UFH?**
A: Most projects still need compliance evidence. The main "exceptions" are usually non-notifiable minor works or competent-person self-certification, where you may not receive a separate local authority certificate. Keep all alternative compliance documents.
**Q: What documentation should I keep as a homeowner?**
A: Keep your Part P certificate, commissioning sheets, test results, as-built drawings, and manufacturer warranties. These are important for resale, insurance, and future maintenance.
## Sources and further reading
- [Approved Document L: Conservation of fuel and power](https://www.gov.uk/government/publications/conservation-of-fuel-and-power-approved-document-l)
- [Approved Document P: Electrical safety](https://www.gov.uk/government/publications/electrical-safety-approved-document-p)
- [BS EN 1264 overview (BSI)](https://landingpage.bsigroup.com/LandingPage/Series?UPI=BS%20EN%201264)
- [MCS standards and guidance](https://mcscertified.com/who-we-are/standards-governance/)
If you are comparing installers, our [Underfloor Heating Quotation Guide](/underfloor-heating-quotation/) explains what to ask for in the compliance paperwork, and our [DIY UFH Installation Guide](/underfloor-heating-installation-guide/) shows the practical steps where compliance evidence is typically recorded.
---